How to Format a Hard Drive Without Losing Data
When your hard drive becomes corrupted, Windows immediately suggests formatting it to fix the damage. But, what are you supposed to do if you still have data on that hard drive? Surely you’re not expected to just let it all go, right?
Well, there are actually a few ways you can format a hard drive without losing data. In this article, we’re going to show you a few ways you can go about formatting your drive without sacrificing all of your important files.
Why Would You Want to Format a Hard Drive Without Losing Data?
There are many reasons why you’d want to format a disk without losing data. For example, your HDD may be corrupted and deny you access to your data. Or, perhaps you simply need to change the file system that your drive uses. The problem is that it’s not always easy to do so.
The ideal solution is to back up your data before formatting (yes, even from corrupted drives), as you can easily restore it afterward. The less safe option is to quick format the hard drive and then recover what data you can using data recovery software, but this method often results in some data becoming permanently lost (or all data becoming lost if you’re planning to do a full format).
Here is a useful table you can use to quickly jump to the ideal solution based on your situation:
Reason | Solution |
The file system on your hard drive got corrupted. | When your file system becomes corrupted, you should create a byte-to-byte backup of the hard drive first, then format it. Once formatted, you can restore the data from the backup. |
You need to reinstall your operating system. | You can create a backup first and then reinstall your operating system, or format it and attempt data recovery afterward. |
You need to change your file system from FAT to NTFS. | You can make use of the convert command to change your FAT partition to NTFS without data loss. |
How to Format a Hard Drive Without Losing Data
Using some of the methods listed below, you can format a hard drive without losing your precious data. The below methods will work on any brand of hard drive (Seagate, WD, Samsung, etc.), as long as it supports a compatible file system.
Method 1: Format a Hard Drive and Retrieve Data First
The surefire way of making sure your data isn’t lost is by creating a byte-to-byte copy of your hard drive first (particularly in cases where you need to fix a corrupted hard drive). A byte-to-byte copy is a full image copy of your hard drive’s current layout, including all of the data on it. By creating a byte-to-byte copy first, you can easily restore the data once you’re done formatting.
To do this, however, you must use a data recovery tool that also has the ability to create drive images, or use a dedicated backup recovery software tool. Not all hard drive data recovery tools include such a feature, and those that do aren’t always the perfect fit for the job.
Here at Pandora Recovery, we’re focused on pairing you with a data recovery solution that fits your needs. As part of our ongoing efforts, we’re continuously expanding our Windows and Mac data recovery review database. Each solution is put through an extensive testing process that allows us to fairly and objectively compare each tool. You can help us by voting on your favorite recovery tools and comparing data recovery software. And, if you’re ever in a unique recovery situation, check out our software picker.
When you need to format a hard drive without losing data, the ideal data recovery solution should be able to do the following:
- 💾 Create drive backups – The program should be able to create a byte-to-byte image of your hard drive and recover the data from it.
- ❗ Read unrecognized or corrupted drives – The software you use must be able to read the hard drive, even if it’s not appearing in File Explorer.
- 📖 Read-only scans – In instances where you need to recover data from the hard drive directly, the program should use read-only scanning modes so as not to corrupt the data.
With all this considered, we’ve chosen Disk Drill as the best tool for creating a backup of the drive and restoring data from it once the format has taken place. It uses multiple scanning methods to scan drives for recoverable data, even if they’re unrecognized or corrupted. It’s regularly updated and fully supported on the latest versions of Windows 10 and Windows 11. If you’d like to learn more about the program, check out our Disk Drill review.
Step 1: Create a Byte-to-byte Copy
We’ll start by making a byte-to-byte copy of the hard drive using Disk Drill’s free Drive Backup feature.
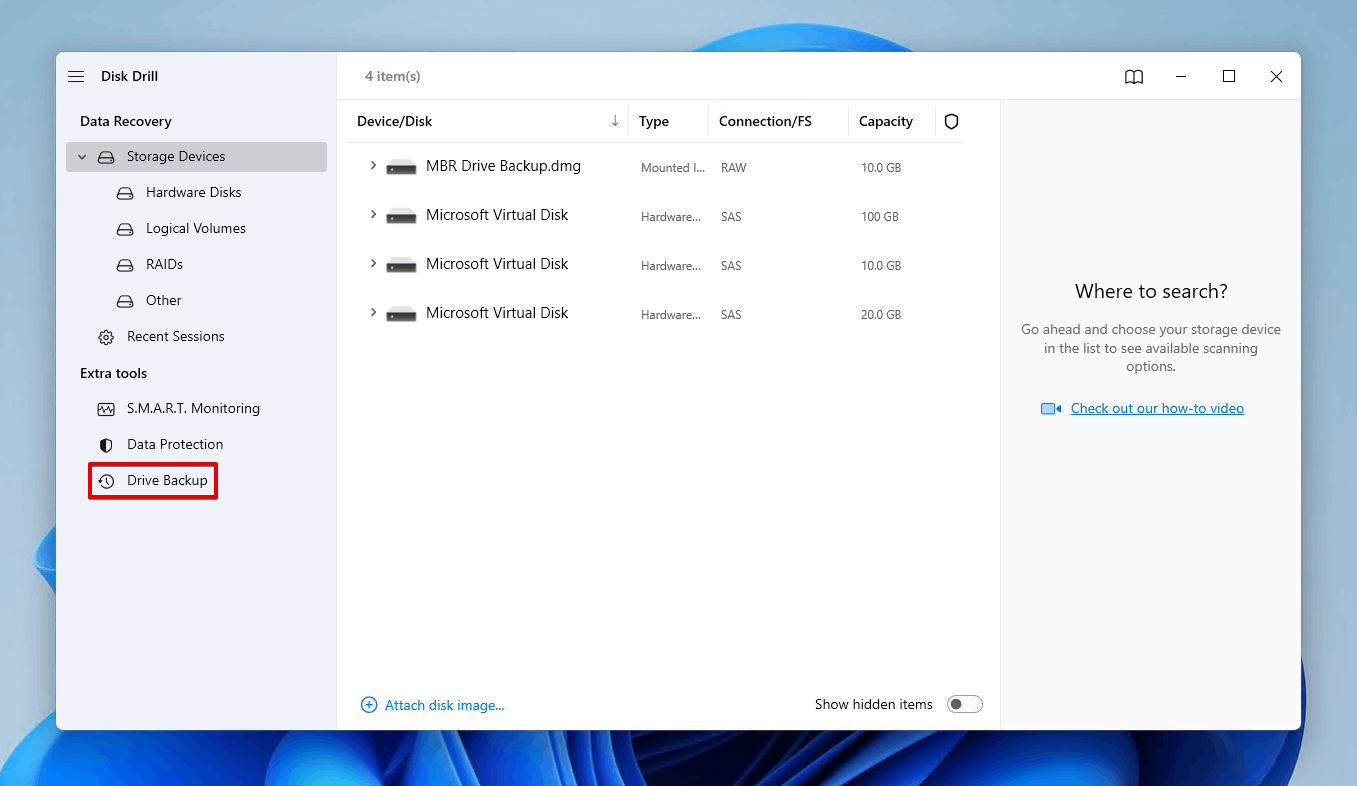
- Download and open Disk Drill.
- Click Drive Backup.
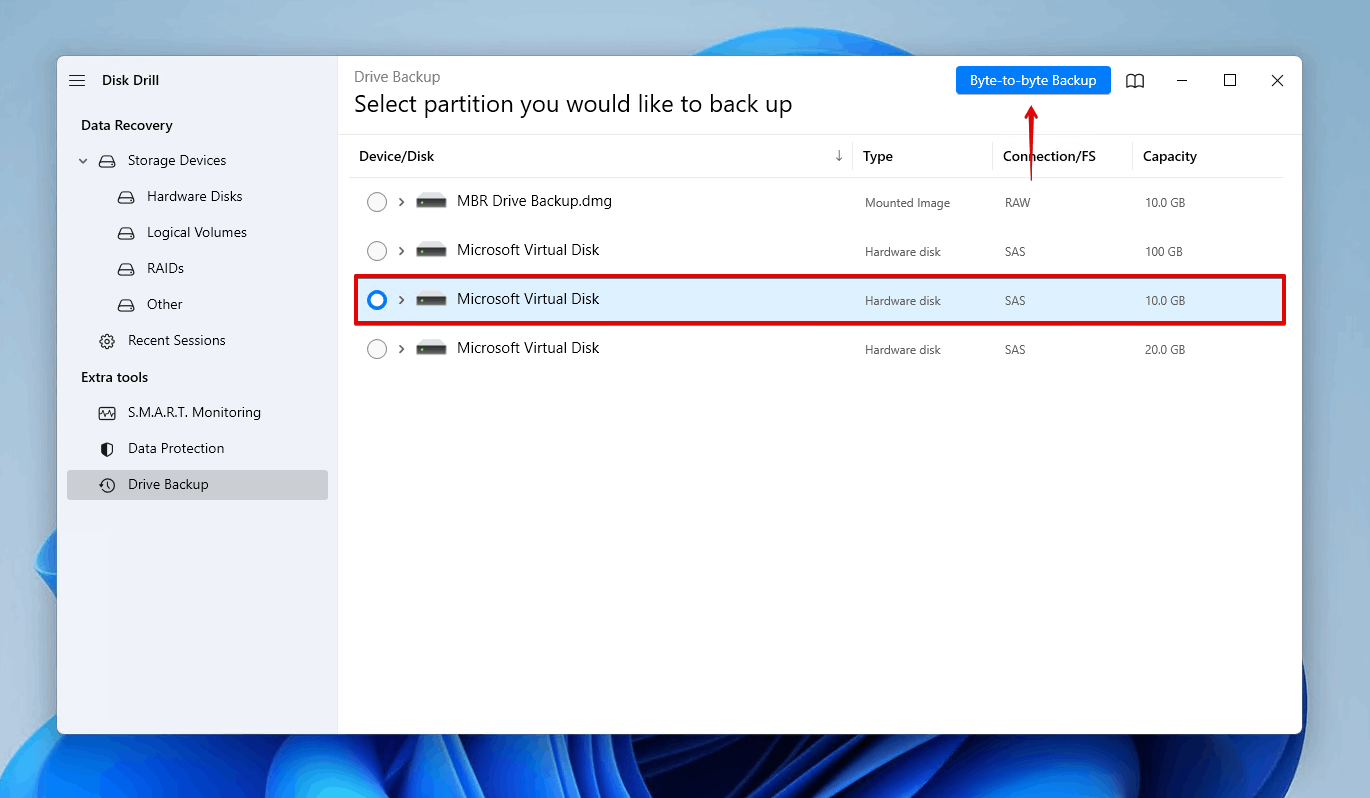
- Select the hard drive you’re planning to format and click Byte-to-byte Backup.
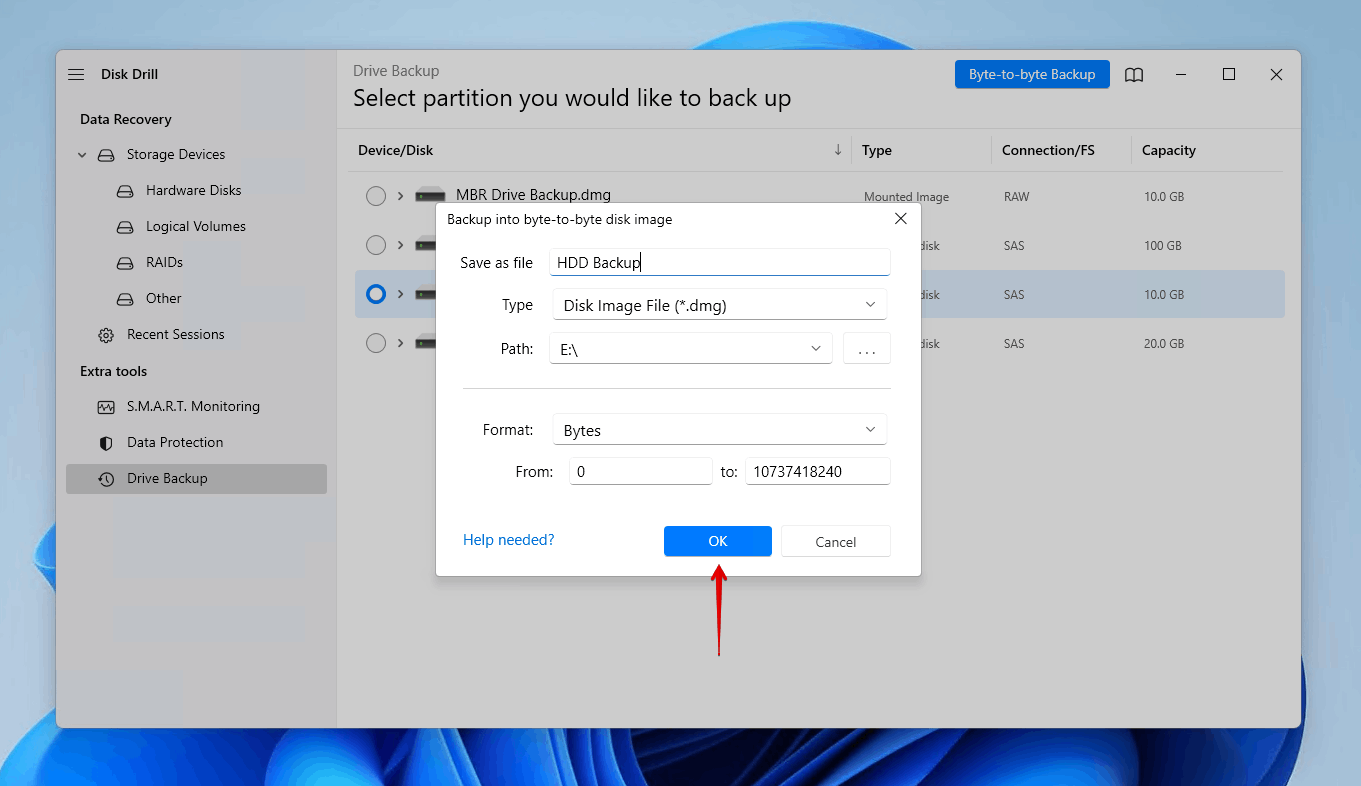
- Give the backup a name and specify where you want it to be stored. Be sure to store the copy on a separate storage device. When you’re ready, click OK.
Step 2: Format the Hard Drive
Now that the data is safely backed up, you can go ahead and reformat the hard drive without losing data using File Explorer:
- Open File Explorer.
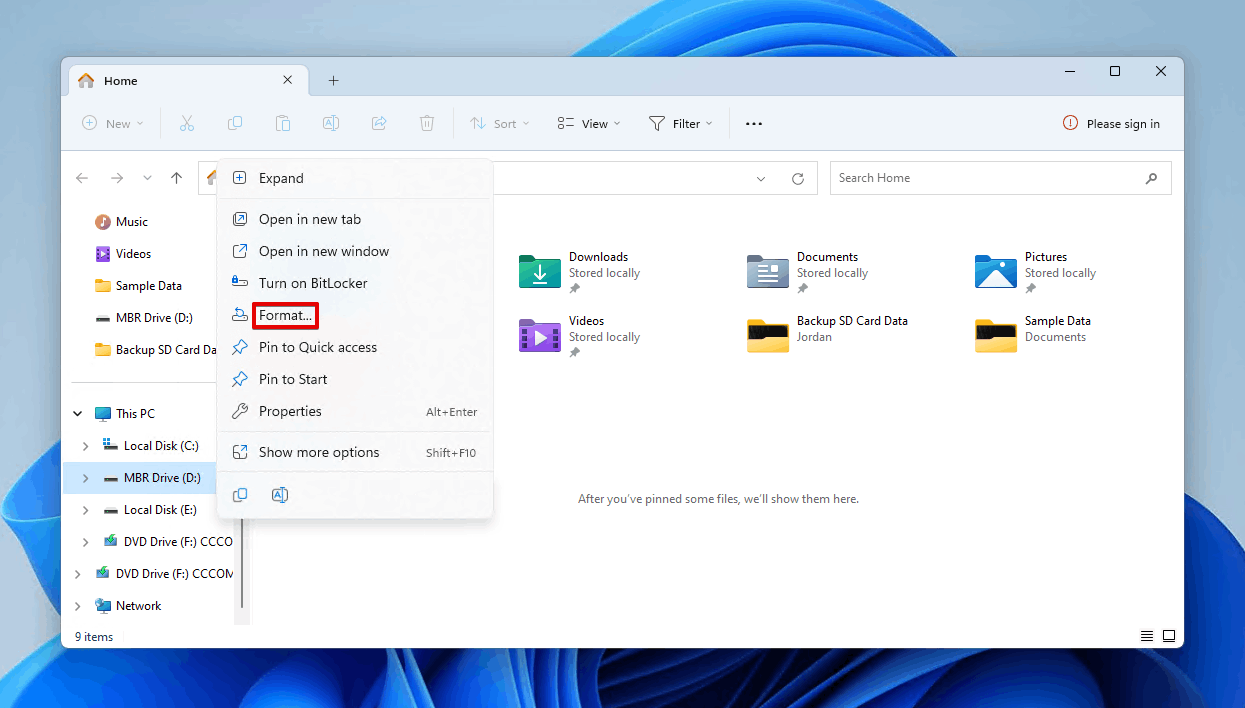
- Right-click your hard drive and click Format.
- Specify a volume label and choose a file system. Make sure Quick Format is ticked. Then, click Start.
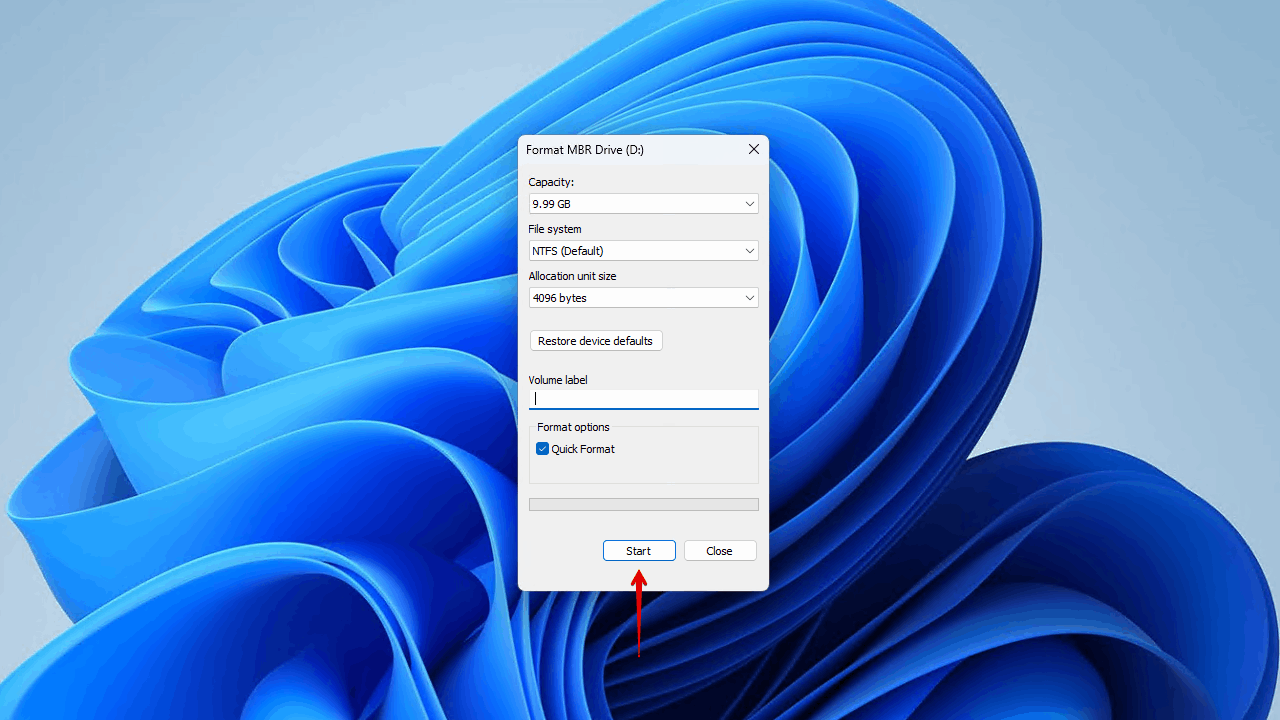
- Click OK to confirm.
Step 3: Retrieve Your Data
Once the drive is formatted, you can recover the data from the byte-to-byte backup you created earlier.
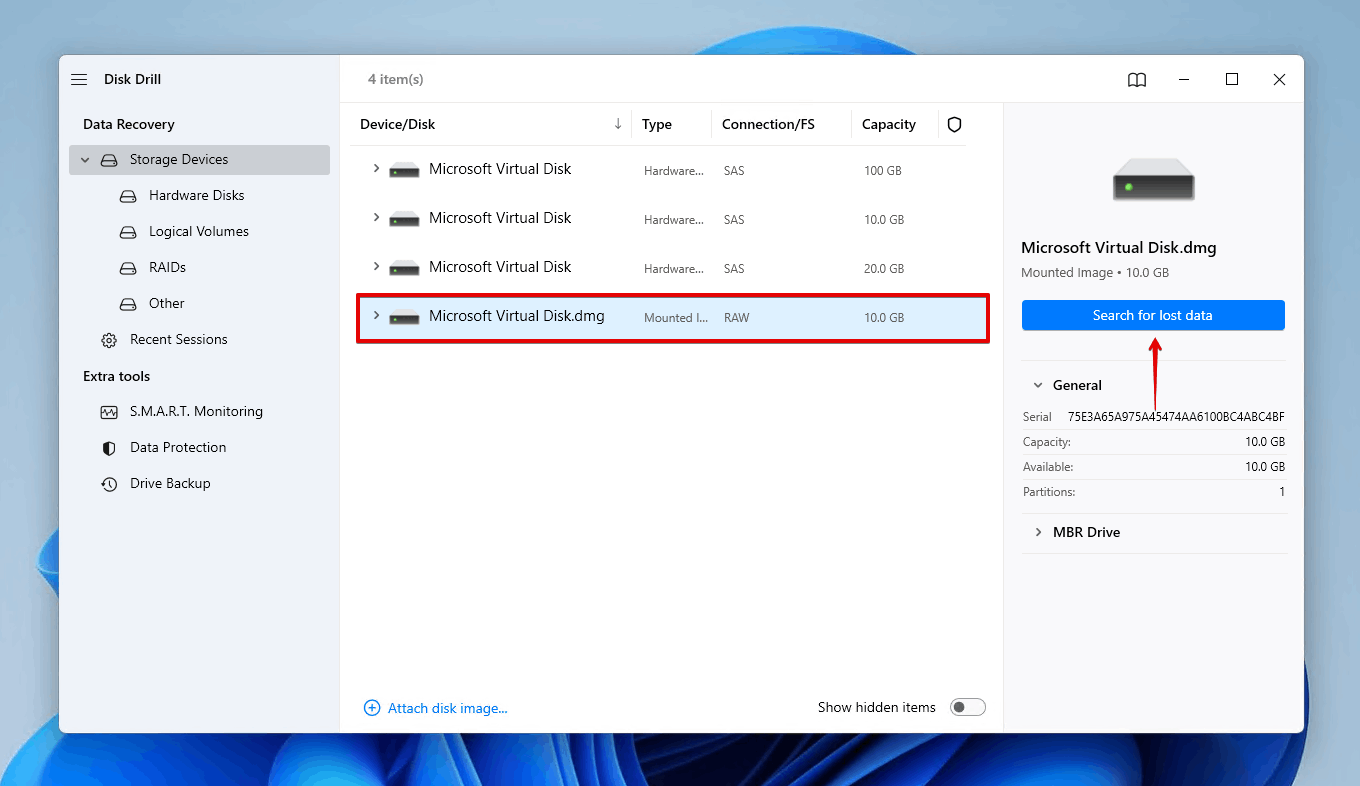
- Attach the disk image.
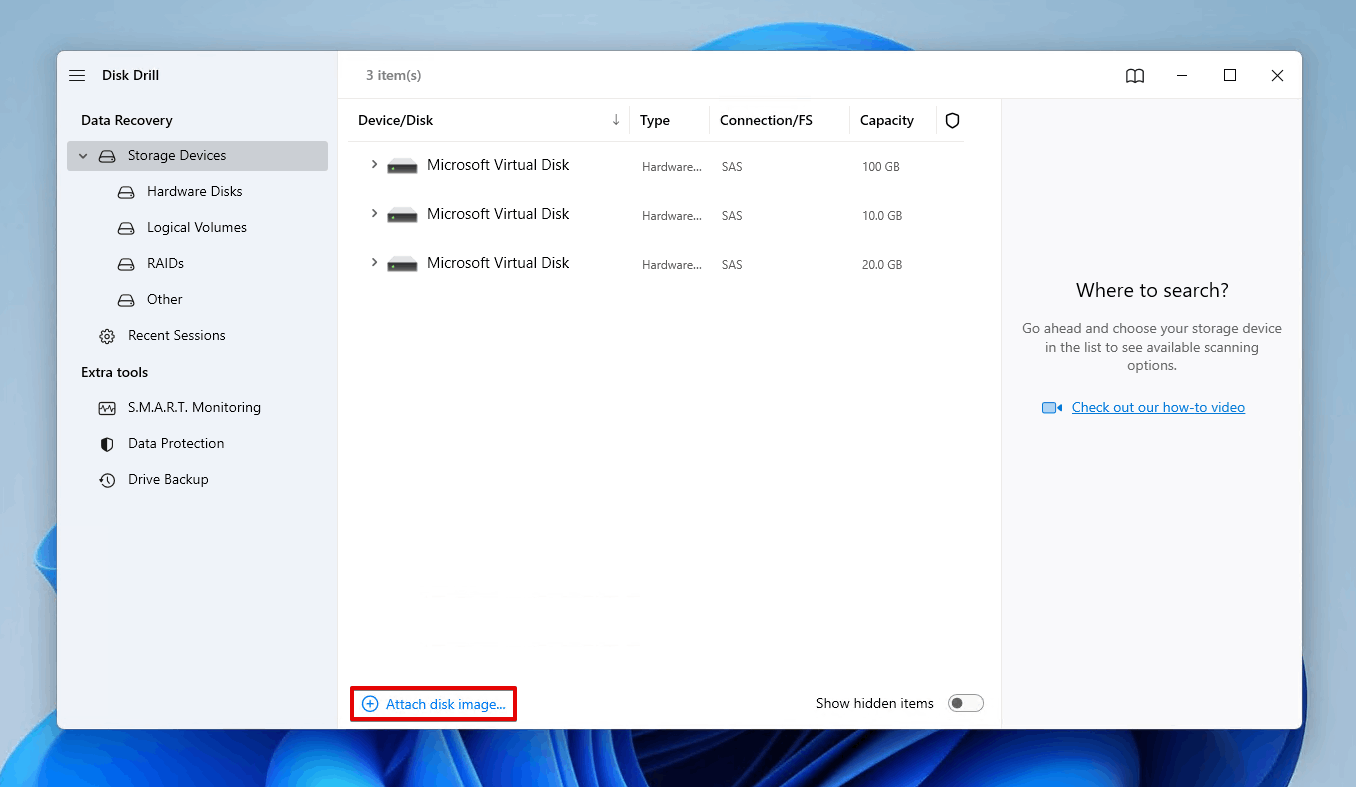
- Select the disk image and click Search for lost data.
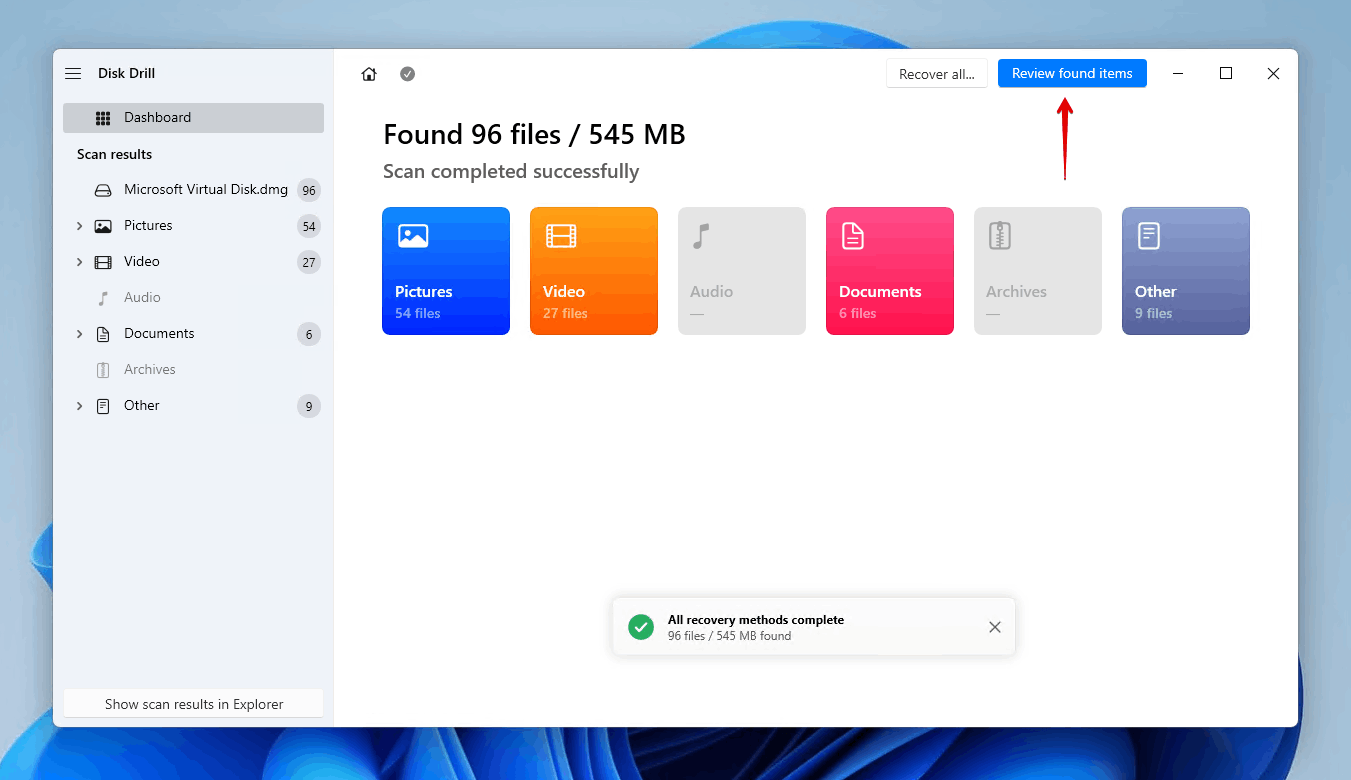
- Click Review found items.
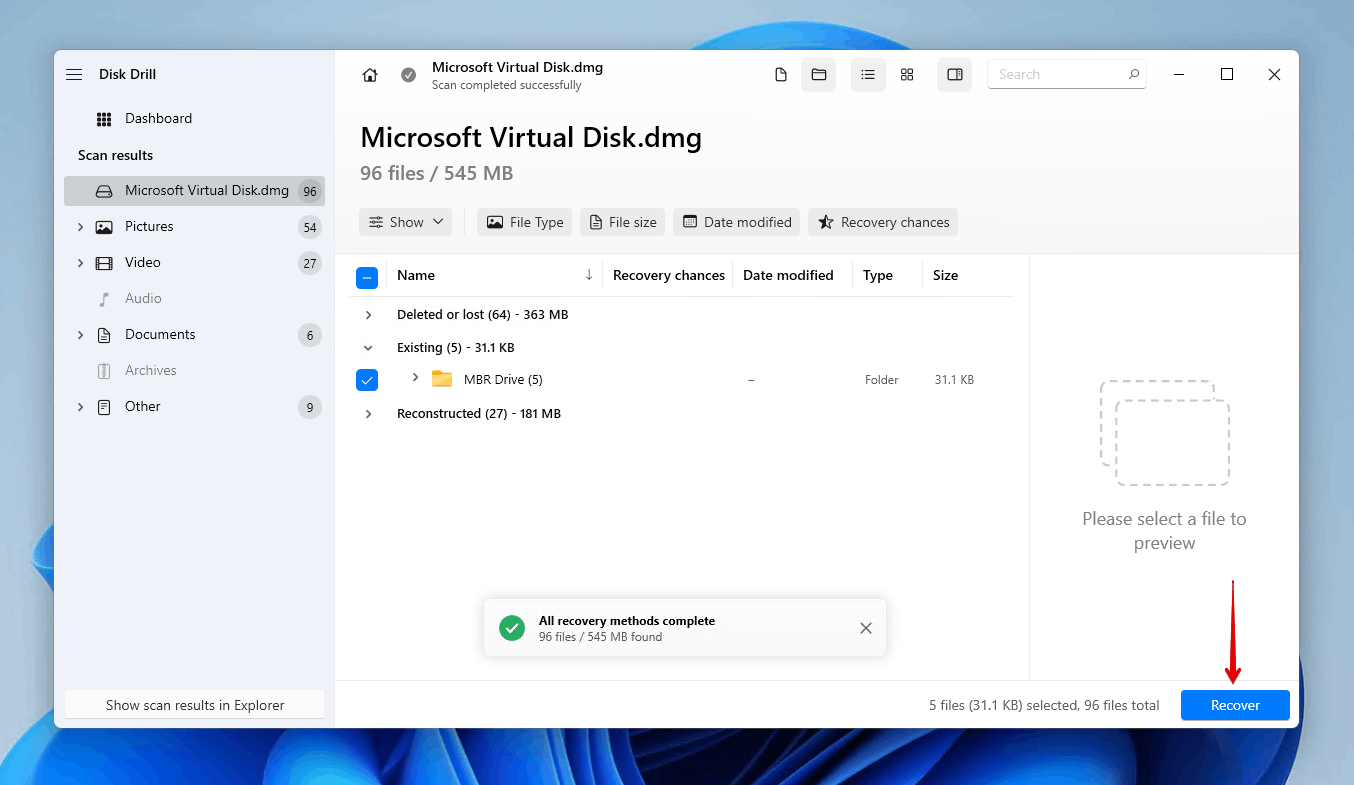
- Expand the Existing dropdown (as this is where all of your data would be) and click Recover.
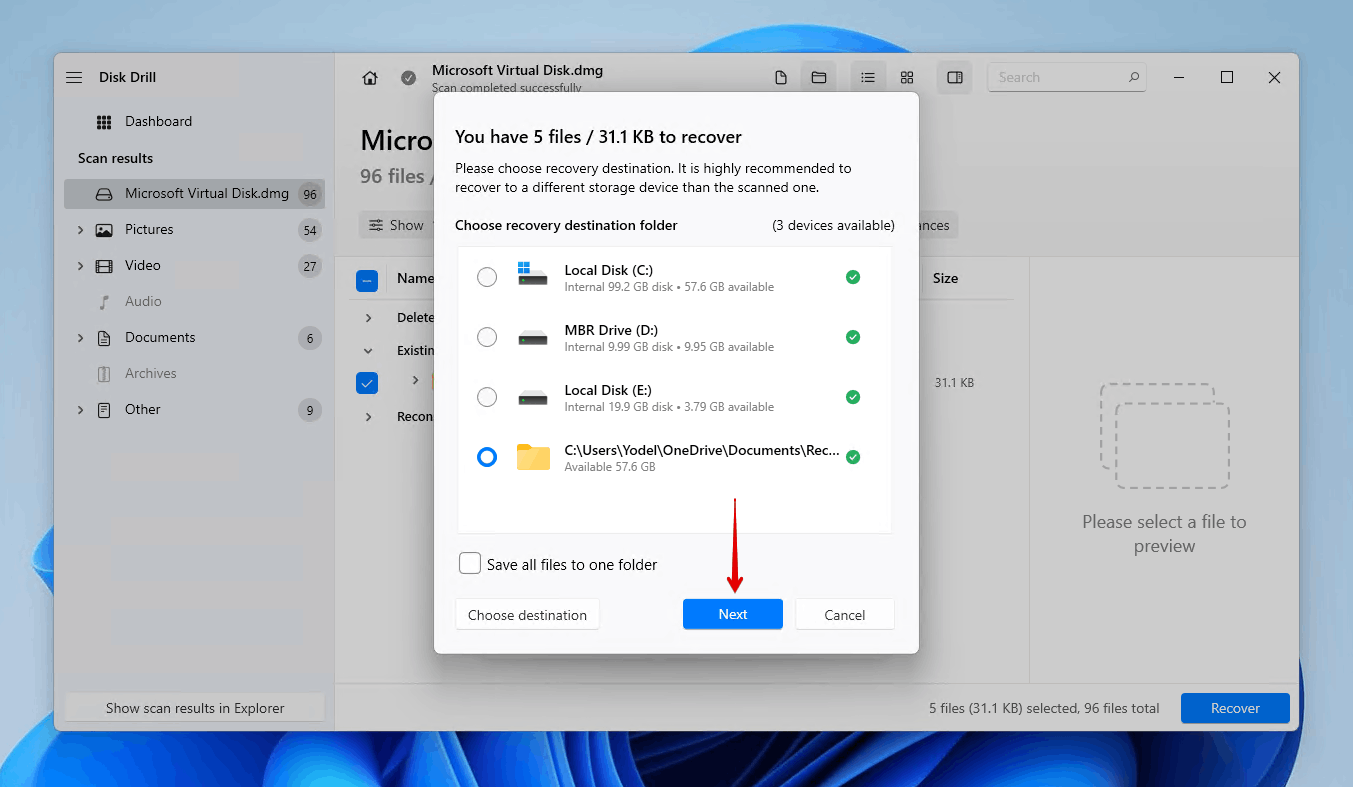
- Choose a safe location to restore the data. Click Next to complete recovery.
Method 2: Format a Hard Drive With Data On It
The other option you have is performing a quick format and then recovering the data afterward. This method is faster, but there’s a much higher chance that some of your data will become lost in the process.
Step 1: Format the Hard Drive
Let’s start by formatting the hard drive. If you’re planning to recover your data, you must be certain that you’re performing a quick format. Otherwise, if you perform a full format instead, your data will not be recoverable.
As we’ve already demonstrated how to format using File Explorer, we’ll show you how to do it using Disk Management this time:
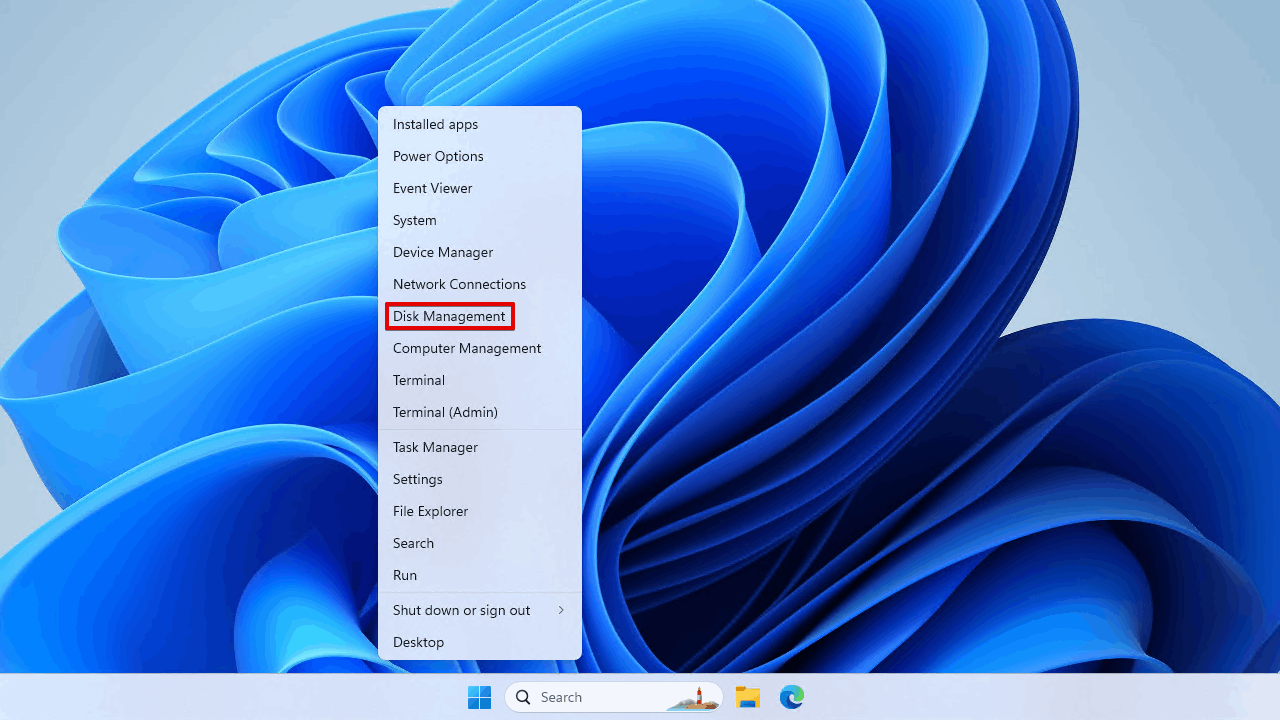
- Right-click Start and click Disk Management.
- Right-click the volume of your hard drive, then click Format.

- Give the volume a name and specify the file system you want to use. Make sure Perform a quick format is ticked. Then, click OK.

- Click OK to confirm.
Step 2: Use Data Recovery Software
Once the format is complete, it’s imperative that you recover the data as soon as possible. Every passing moment increases the chances of your data being overwritten, so the faster you are the better. We’re continuing to use Disk Drill here as it has a great chance of recovering files from a number of different file systems, including FAT32, exFAT, NTFS, HFS, HFS+, APFS, EXT2/3/4, and even RAW drives.
- If you’re recovering data from an external hard drive, connect it now.
- Select the hard drive and click Search for lost data.

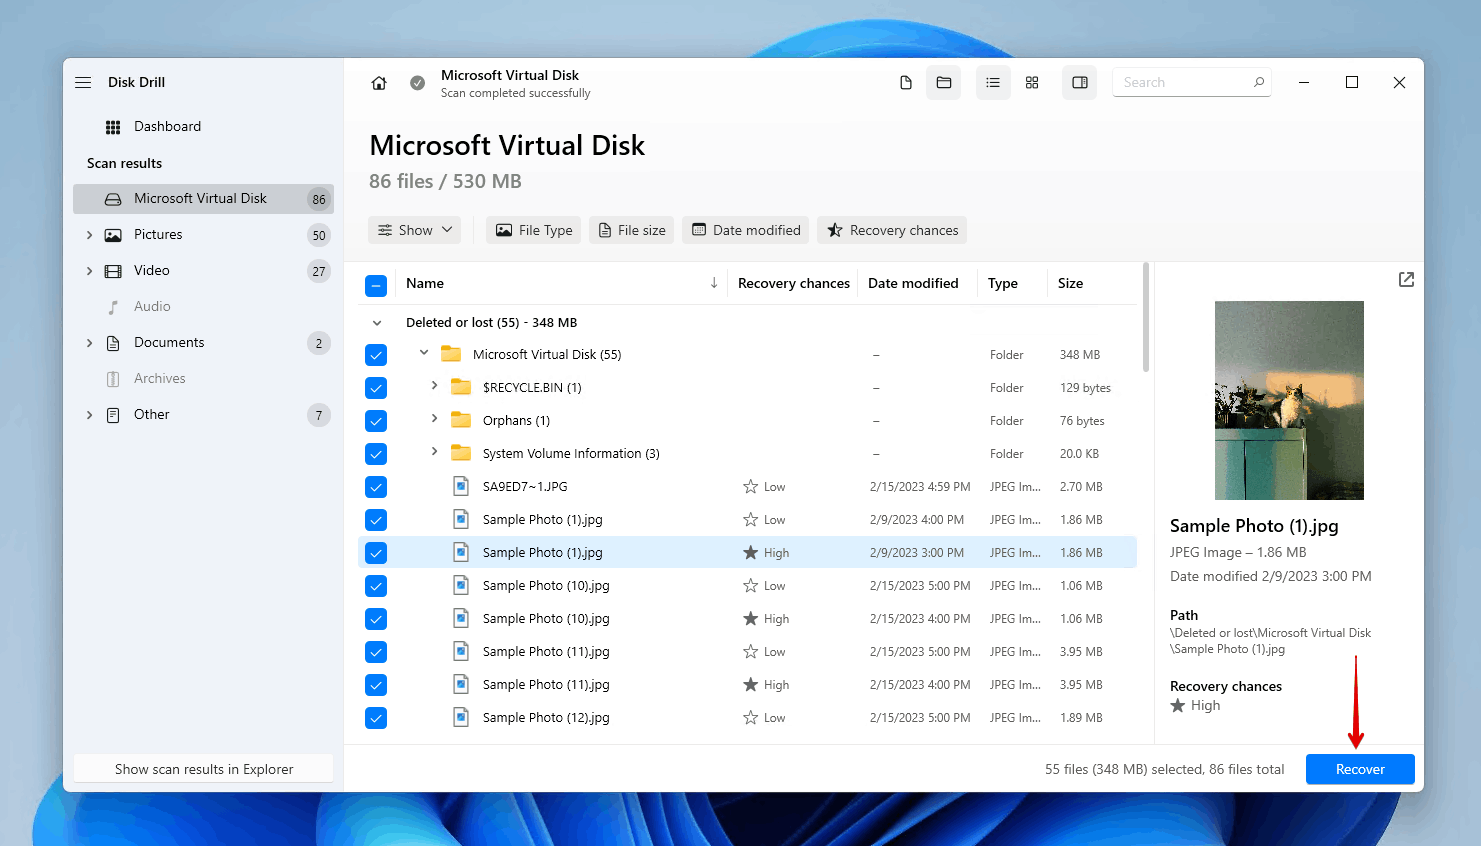
- Click Review found items. Alternatively, you can click one of the colored file type icons to filter the results or click Recover all to recover everything that Disk Drill found immediately.

- Select the data you wish to recover. Unlike the first method, much of your data will be found in the Deleted or lost dropdown section. Make note of the recovery chances column and preview panel, as they will tell you which data has the best chance to be recovered. When ready, click Recover.
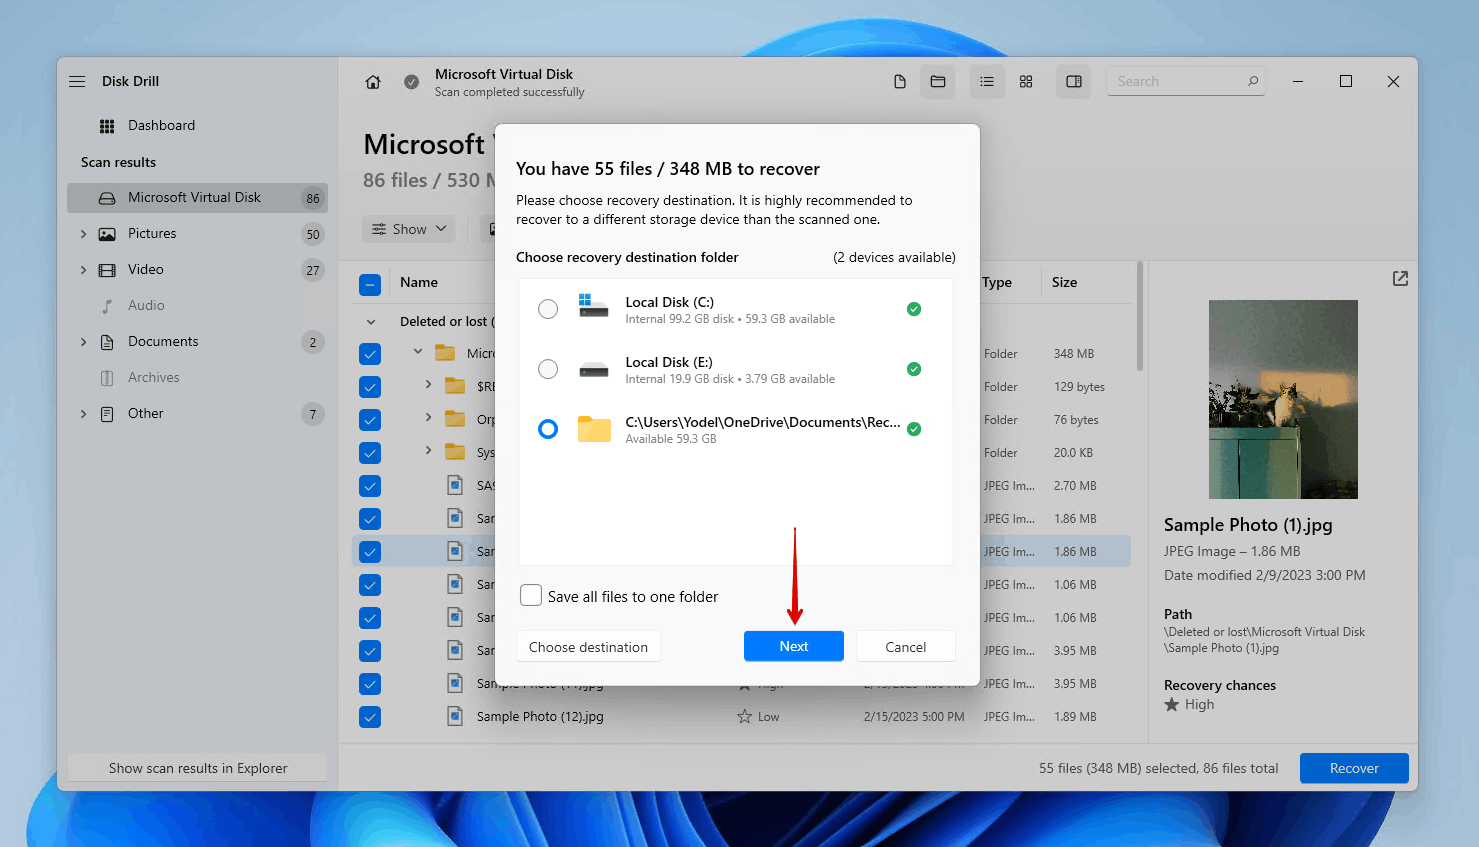
- Select a recovery location on a separate storage device, then click Next.
If you want to explore other data recovery software options, check out our list of the best data recovery software we’ve reviewed so far.
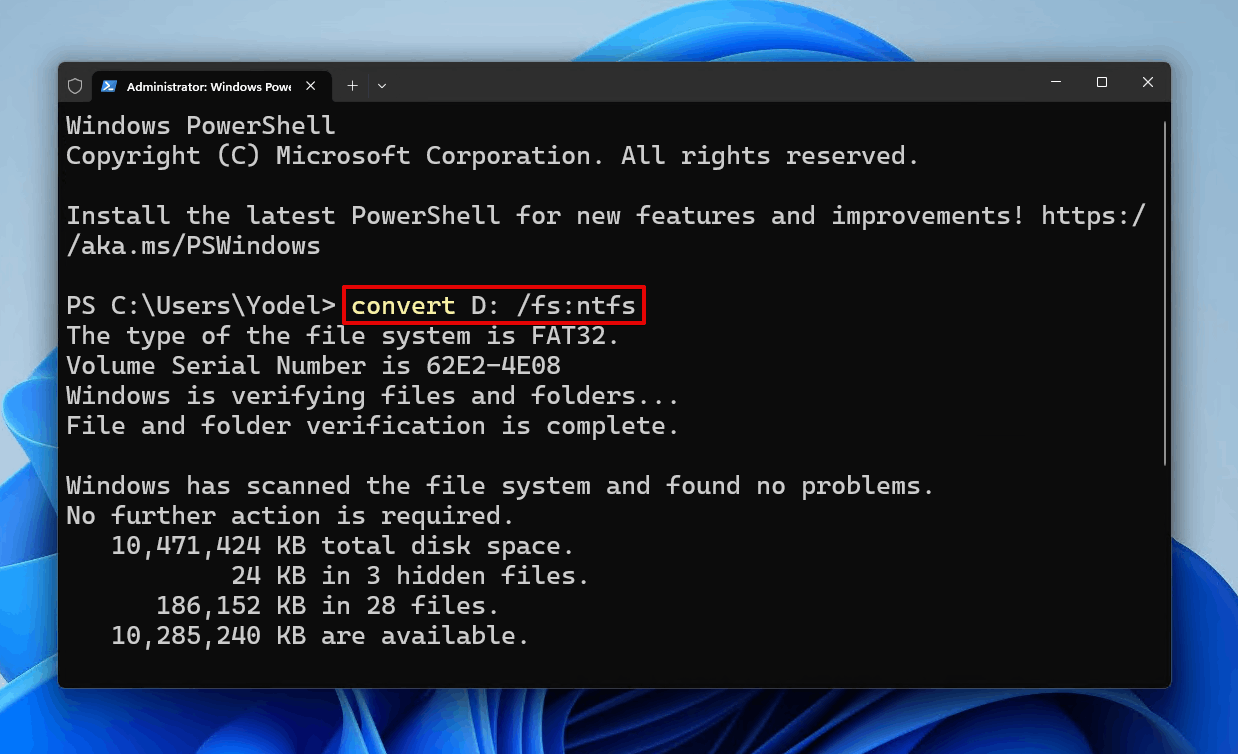
Method 3: Format a Hard Drive Using the Convert Command
The convert command allows you to perform a special type of format in the sense that your data will remain untouched. However, it’s not perfect for all situations, as the command can only be used to convert FAT32 drives to NTFS, not the other way around.
Follow these steps to change a hard drive format without losing data with the convert command:
- Right-click Start and click Terminal (Admin).
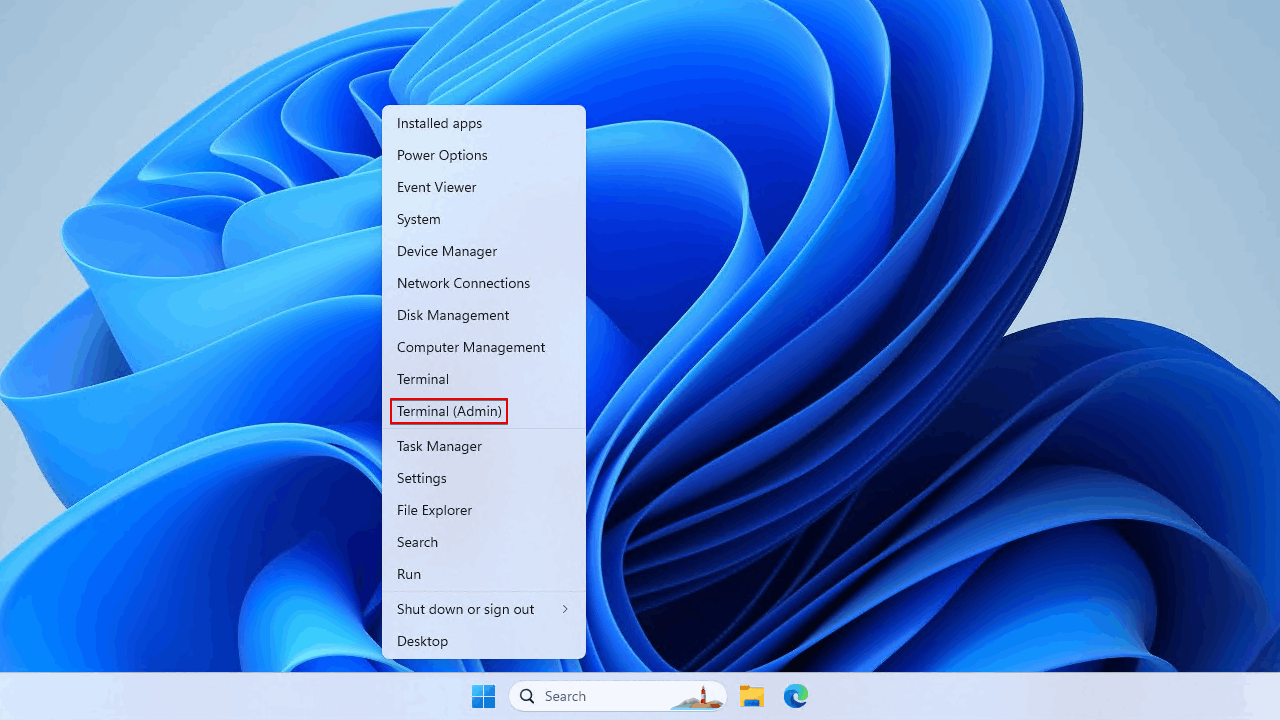
- Type convert *: /fs:ntfs. Replace * with the drive letter assigned to your volume. Press Enter.
Frequently Asked Questions
Will formatting a hard drive delete everything?
Yes, typically, a format will erase everything stored on your hard drive. However, if you’re moving from FAT32 to NTFS, you can use the command convert to format your hard drive without data loss. In other cases, you should back up the data beforehand, then restore it once the drive has been formatted. In cases where your hard drive has already been erased, see our guide on how to recover data from a wiped hard drive.
How to format a hard drive without losing data on Mac?
You can format a hard drive without losing data on Mac by creating a backup first with Time Machine, then formatting the hard drive with Disk Utility. If you’ve already formatted your Mac’s hard drive, check out our guide on how to recover data from a formatted hard drive on Mac and Windows.
How to format SSD without losing data?
There are two safe and effective ways of formatting an SSD without data loss. The best way to reformat the drive without losing data is by making a full backup of the drive, formatting it, then restoring the data afterward. Or, if you’re moving from FAT32 to NTFS, you can use the convert command to convert the file system without losing data.
Conclusion
When you need to format your hard drive, you may not always be in a position where you can easily back that data up by copying and pasting it to another storage device. Instead of saying goodbye to all the data stored on the drive, there are some ways you can format the hard drive without data loss.
In an ideal situation, you can create a byte-to-byte backup of the drive, format it, then restore the data from the backup. The riskier option involves quick formatting the drive and then performing internal or external hard drive recovery using specialized data recovery software, like Disk Drill. If you’re moving from FAT32 to NTFS, you have the ability to do so without data loss using the convert command.
- 46 publishings
- Auckland, New Zealand
Jordan Jamieson-Mane is a content writer with a focus on technology-related content. He has spent much of his life studying and working with all types of technology. During his time as a writer, he has written countless articles in the field of data recovery, breaking down complex topics into articles that are easy to understand.
When he's not writing articles on data recovery, Jordan enjoys traveling the world, reading books, and building websites.
- LC Tech FILERECOVERY Professional Review – Can It Compete with Modern Recovery Tools?
- UFS Explorer Review – A Powerful Recovery Tool With Lots to Offer
- Cisdem Data Recovery for Windows Review – A Capable Copy
- AnyRecover Data Recovery Review – A Polished Solution for Basic Users
- iBoysoft Data Recovery Review: Not Much to Offer
- Frisco, Texas, United States
Yevgeniy Tolkunov is Hardware Engineer at ACE Data Recovery. Yevgeniy has a Master's Degree in Physics, Information Technology; 15+ years of experience.