How to Restore Hard Drive from a Time Machine Backup
Watching your Mac suddenly die can be a heart-sinking moment, especially if you were in the middle of something important and don’t have time to troubleshoot the issue. Fortunately, you can easily restore all backed up data, applications, and settings with Apple’s Time Machine.
Introduced in macOS 10.5, Time Machine is an easy-to-use backup and recovery software application, and you already have it installed on your Mac. Let’s take a look at two ways how you can restore from time machine.
How to Recover Data With Time Machine
Method #1: Recover Files from a Time Machine Backup
The first method to restore from time machine is useful when you lose valuable files but your operating system still works. Instead of restoring your entire Mac, it lets you selectively choose which files you want back, making it a true lifesaver when you find yourself in a high-pressure situation where full system recovery wouldn’t be possible.
To recover files from a Time Machine backup:
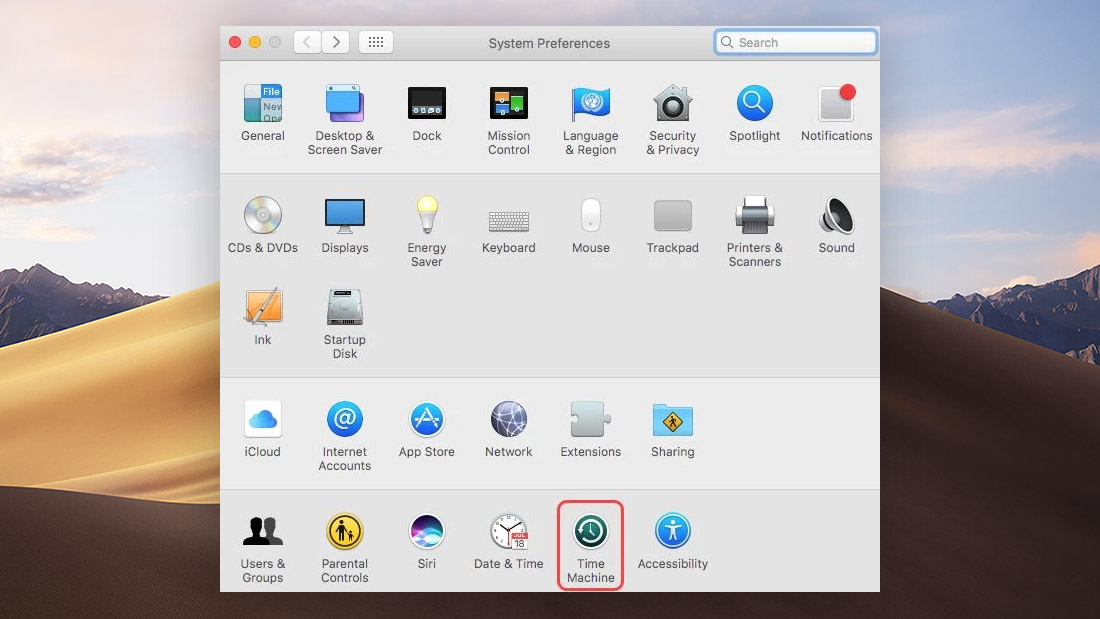
- Open the Apple menu and select System Preferences.
- Click the Time Machine icon on the bottom.
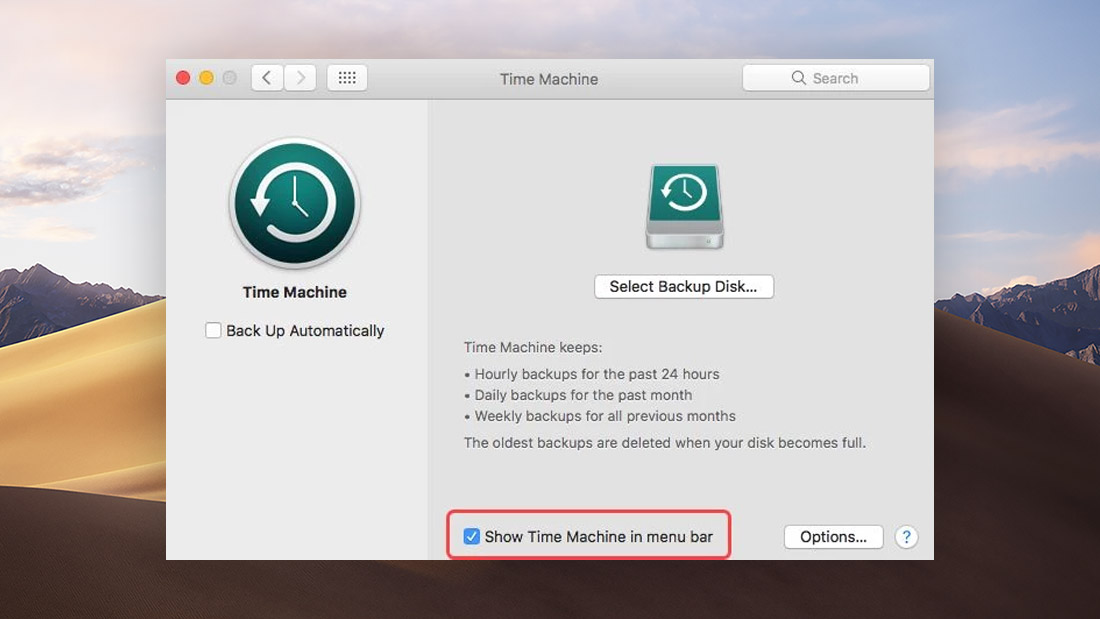
- Check the checkbox next to the Show Time Machine in menu bar option. A new icon should appear in the Menu bar.
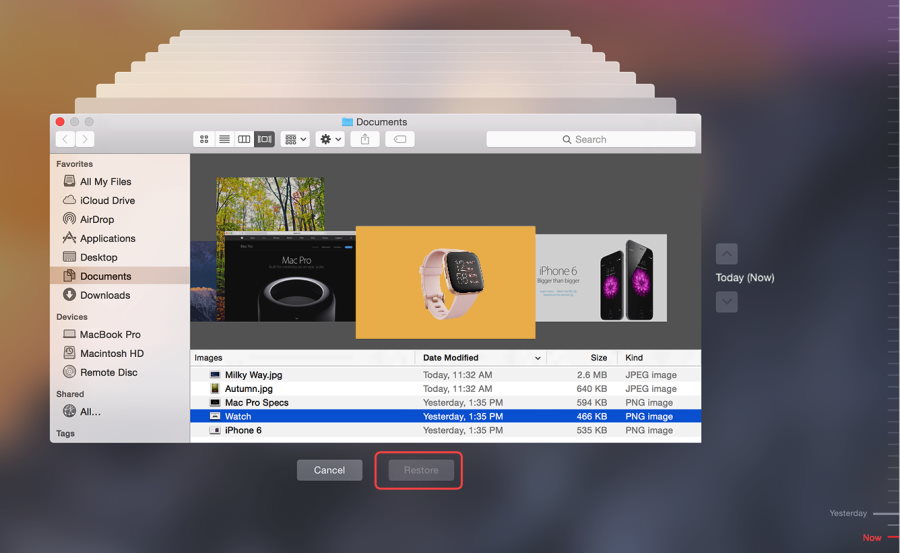
- Click on the newly created Time Machine icon in the menu bar and select Enter Time Machine.
- Navigate to the folder with the missing files and use the arrows on the right to select an older backup of the folder.
- Click the Restore button on the bottom to restore the missing files from your Time Machine backup.
Method #2: Restore Hard Drive from a Time Machine Backup
This method can save you if you can’t restore individual files because you’re experiencing major issues with your Mac that require the operating system to be reinstalled. By restoring hard drive from a Time Machine backup, you can go back to an earlier version of your Mac and recover everything from system files to applications to personal data.
To restore hard drive from a Time Machine backup:
- If your Mac is running turn it off.
- Hold Command + R and power it on to access the Recovery Partition. You will know that the boot is done when you see a window titled macOS Utilities.
- Select the Restore from Time Machine Backup option inside the macOS Utilities window and click Continue.
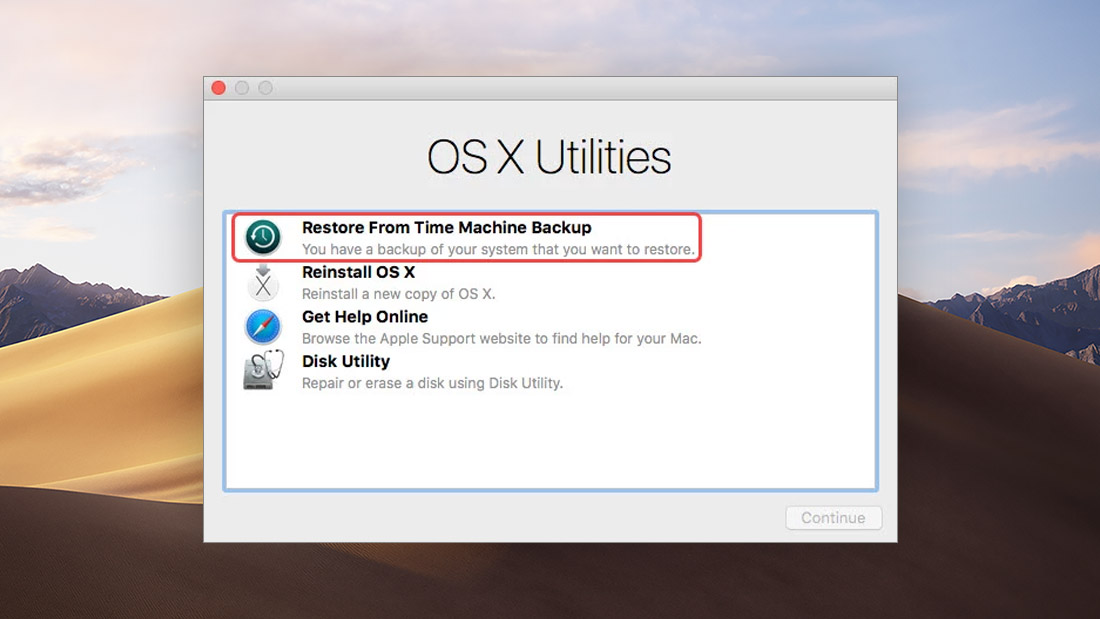
- Click Continue again to move to the next screen, select your restore source (your Time Machine backup drive), and click Continue to confirm your selection.
- Select the most recent functioning Time Machine backup and click Continue to begin the restore process.
How to Recover Hard Drive Without Time Machine
Method #3: Recover Files from Hard Drive Using Disk Drill for Mac
Time Machine is a fantastic backup and recovery software application that has saved countless Mac users from permanent loss of data, but there’s one huge problem with it: it doesn’t work unless you manually activate it, and most people never do.
The good news is that not all backup and recovery software applications work like Time Machine. Disk Drill for Mac is one such example, allowing you to recover deleted or lost files from your hard drive even if you don’t have a backup.
However, there’s one caveat you need to keep in mind: Disk Drill for Mac may not be able to recover your files if you wait too long before you use it. Some application or the operating system itself may overwrite them and make them impossible to recover. That said, if you act decisively and don’t wait too long, you should be able to recover most—if not all—files without any problem.
To recover hard drive without Time Machine:
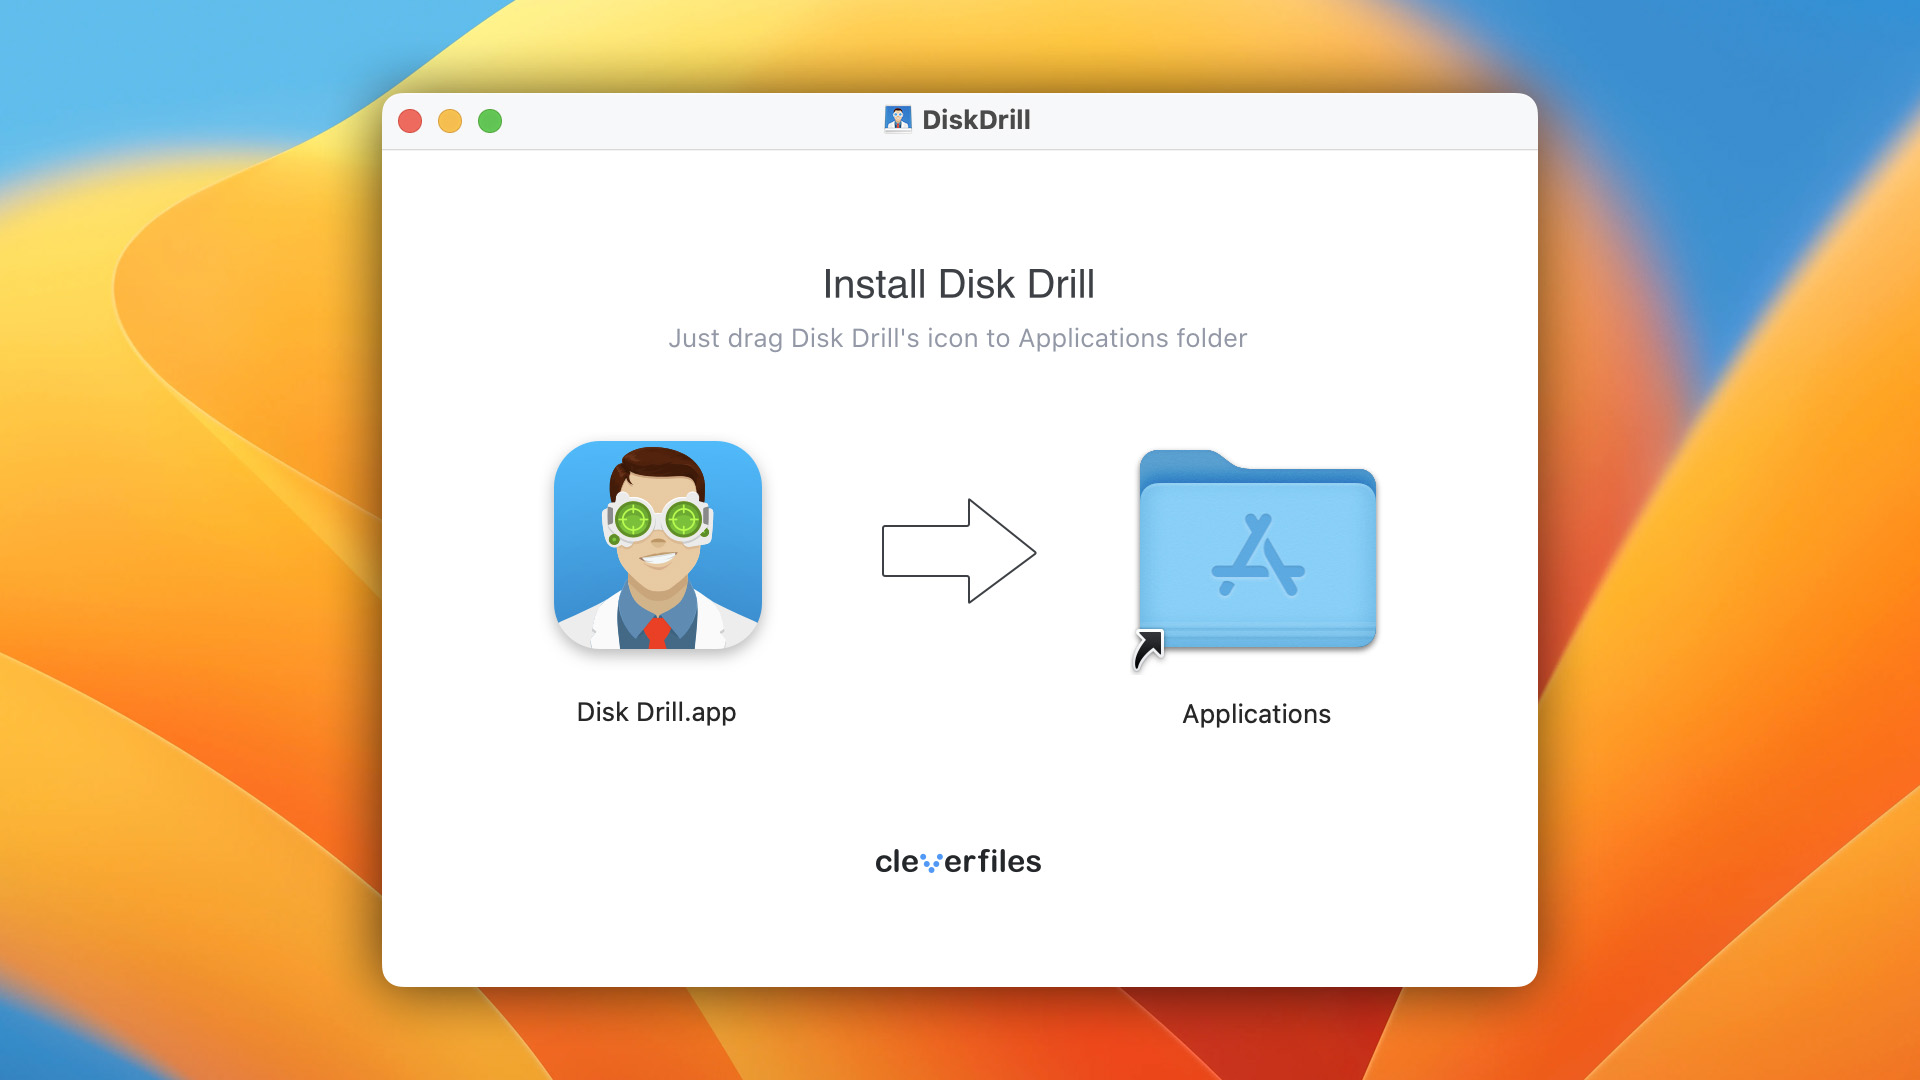
- Download the disk image, double-click it, drag the Disk Drill app to Applications folder, and launch it from there.
- Click the Search for lost data button next to the hard drive from which you want to recover your files.
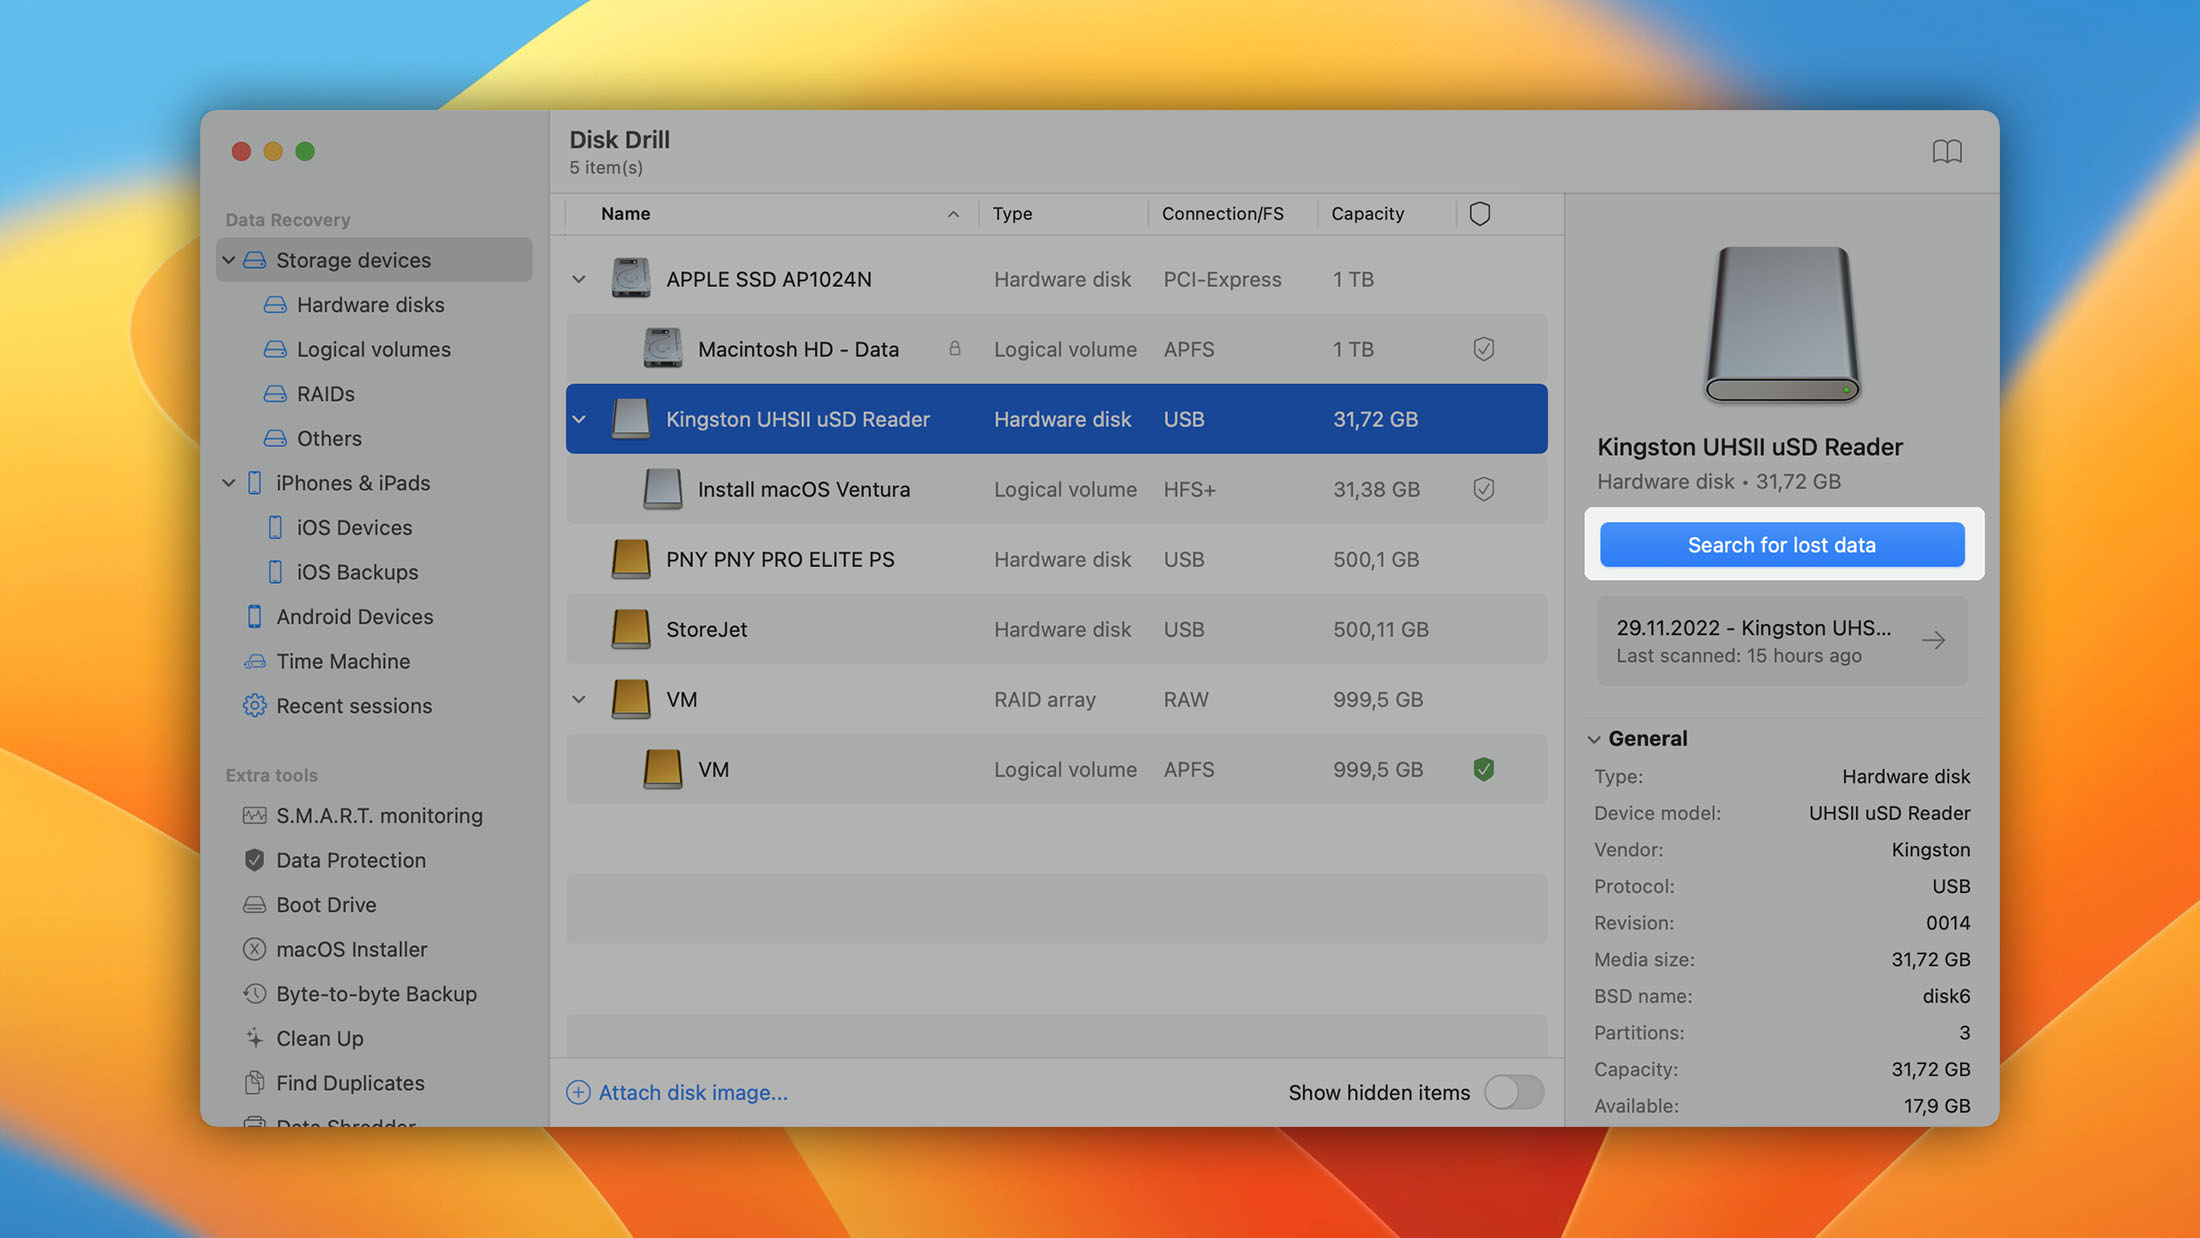
- Wait for Disk Drill to scan the hard drive.
- Preview the recovered files using the view icon next to them.
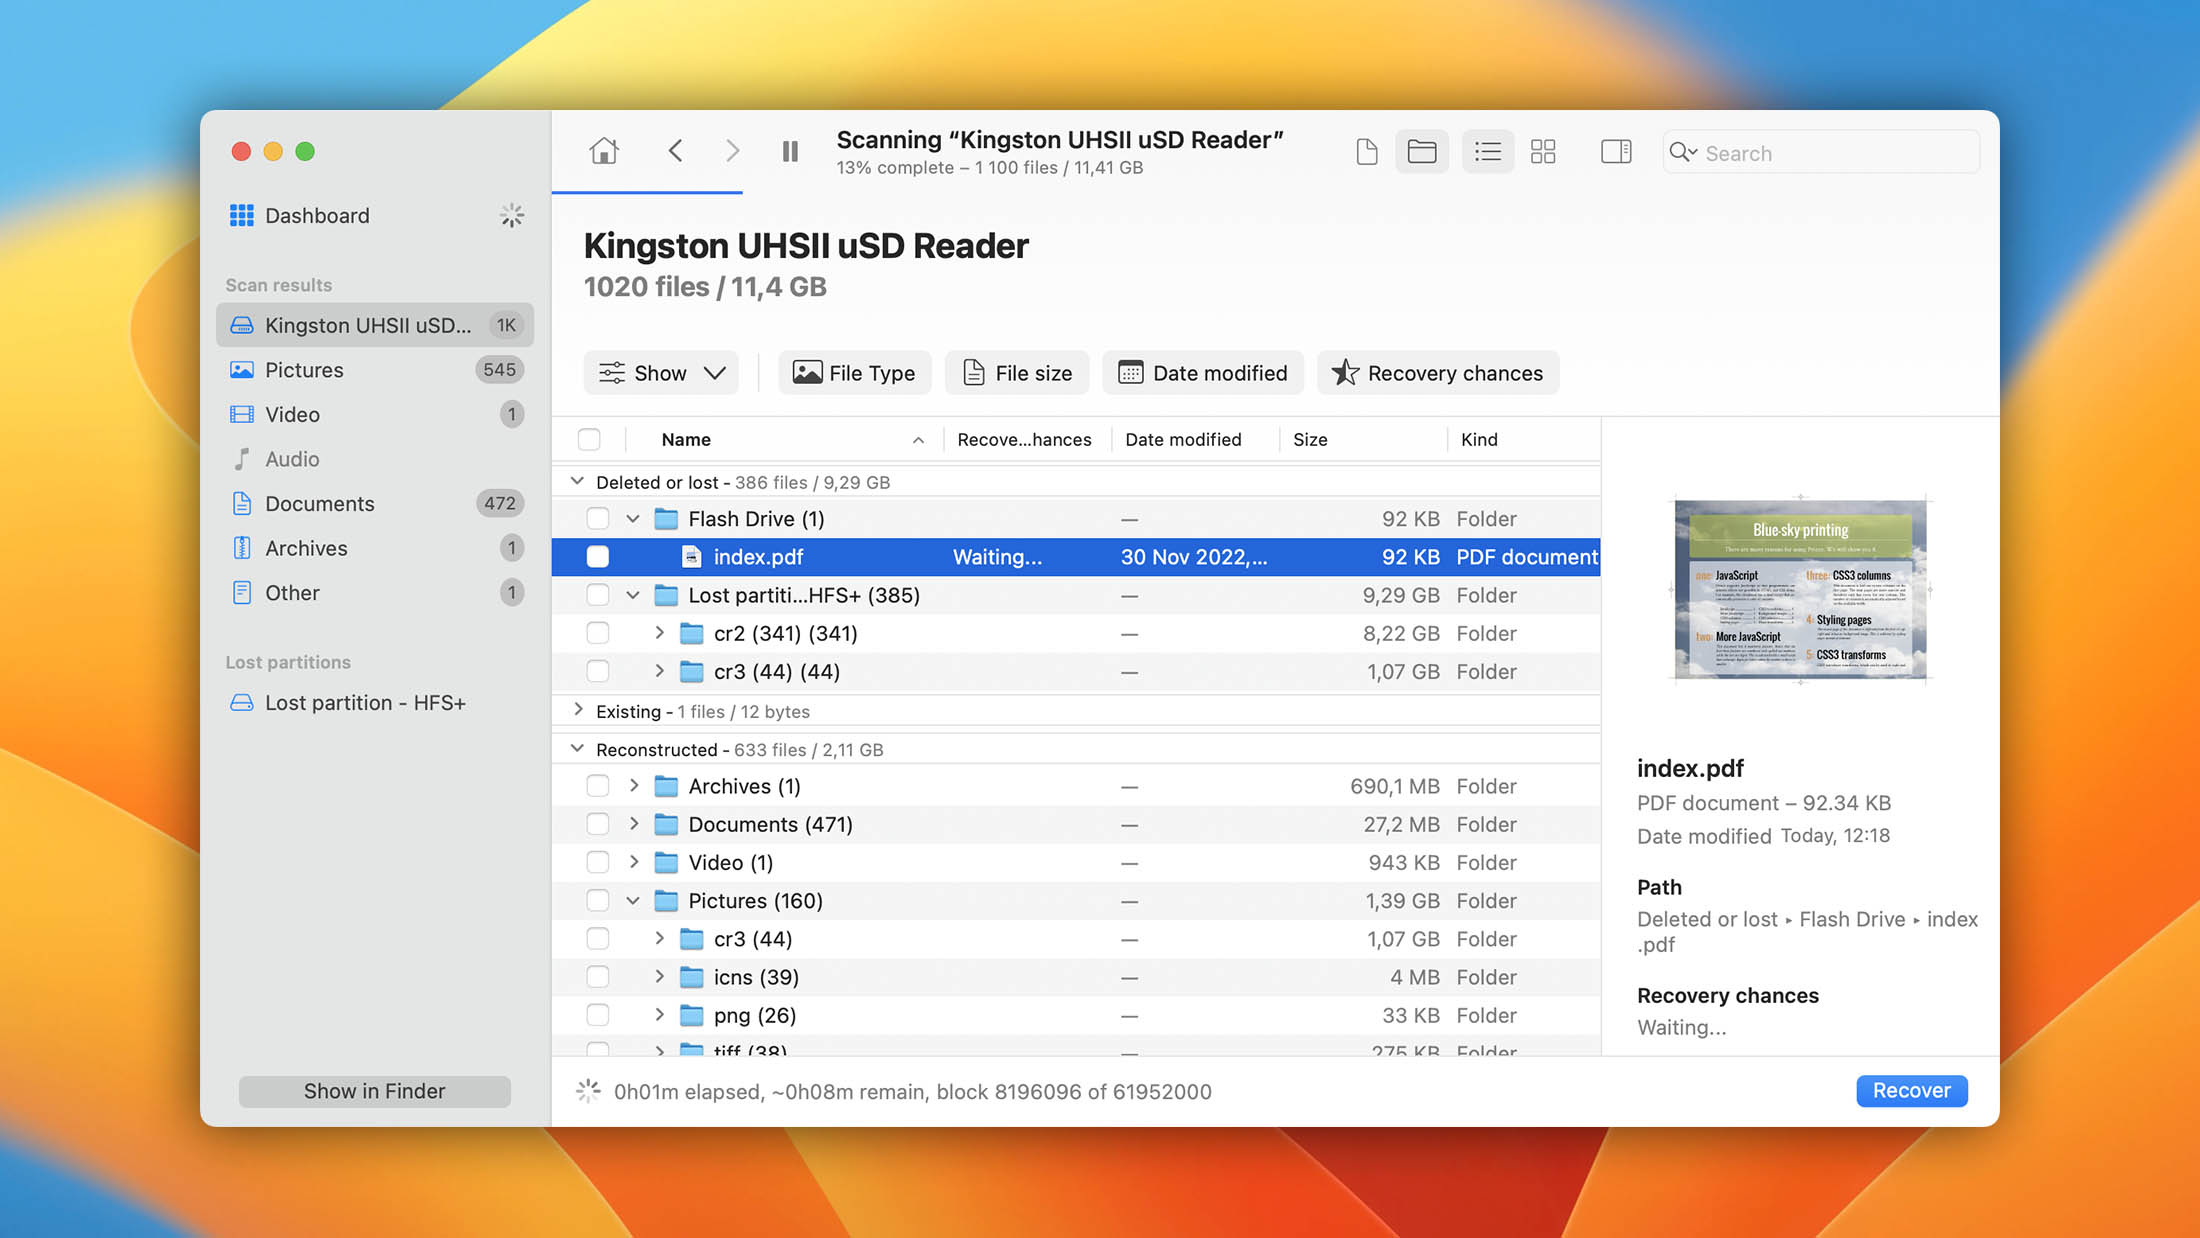
- Select the files you want to recover and click the Recover button located in the lower-right corner of the window.
Additional Mac Recovery Options
Method #4: Restore Your Mac from a Local Backup
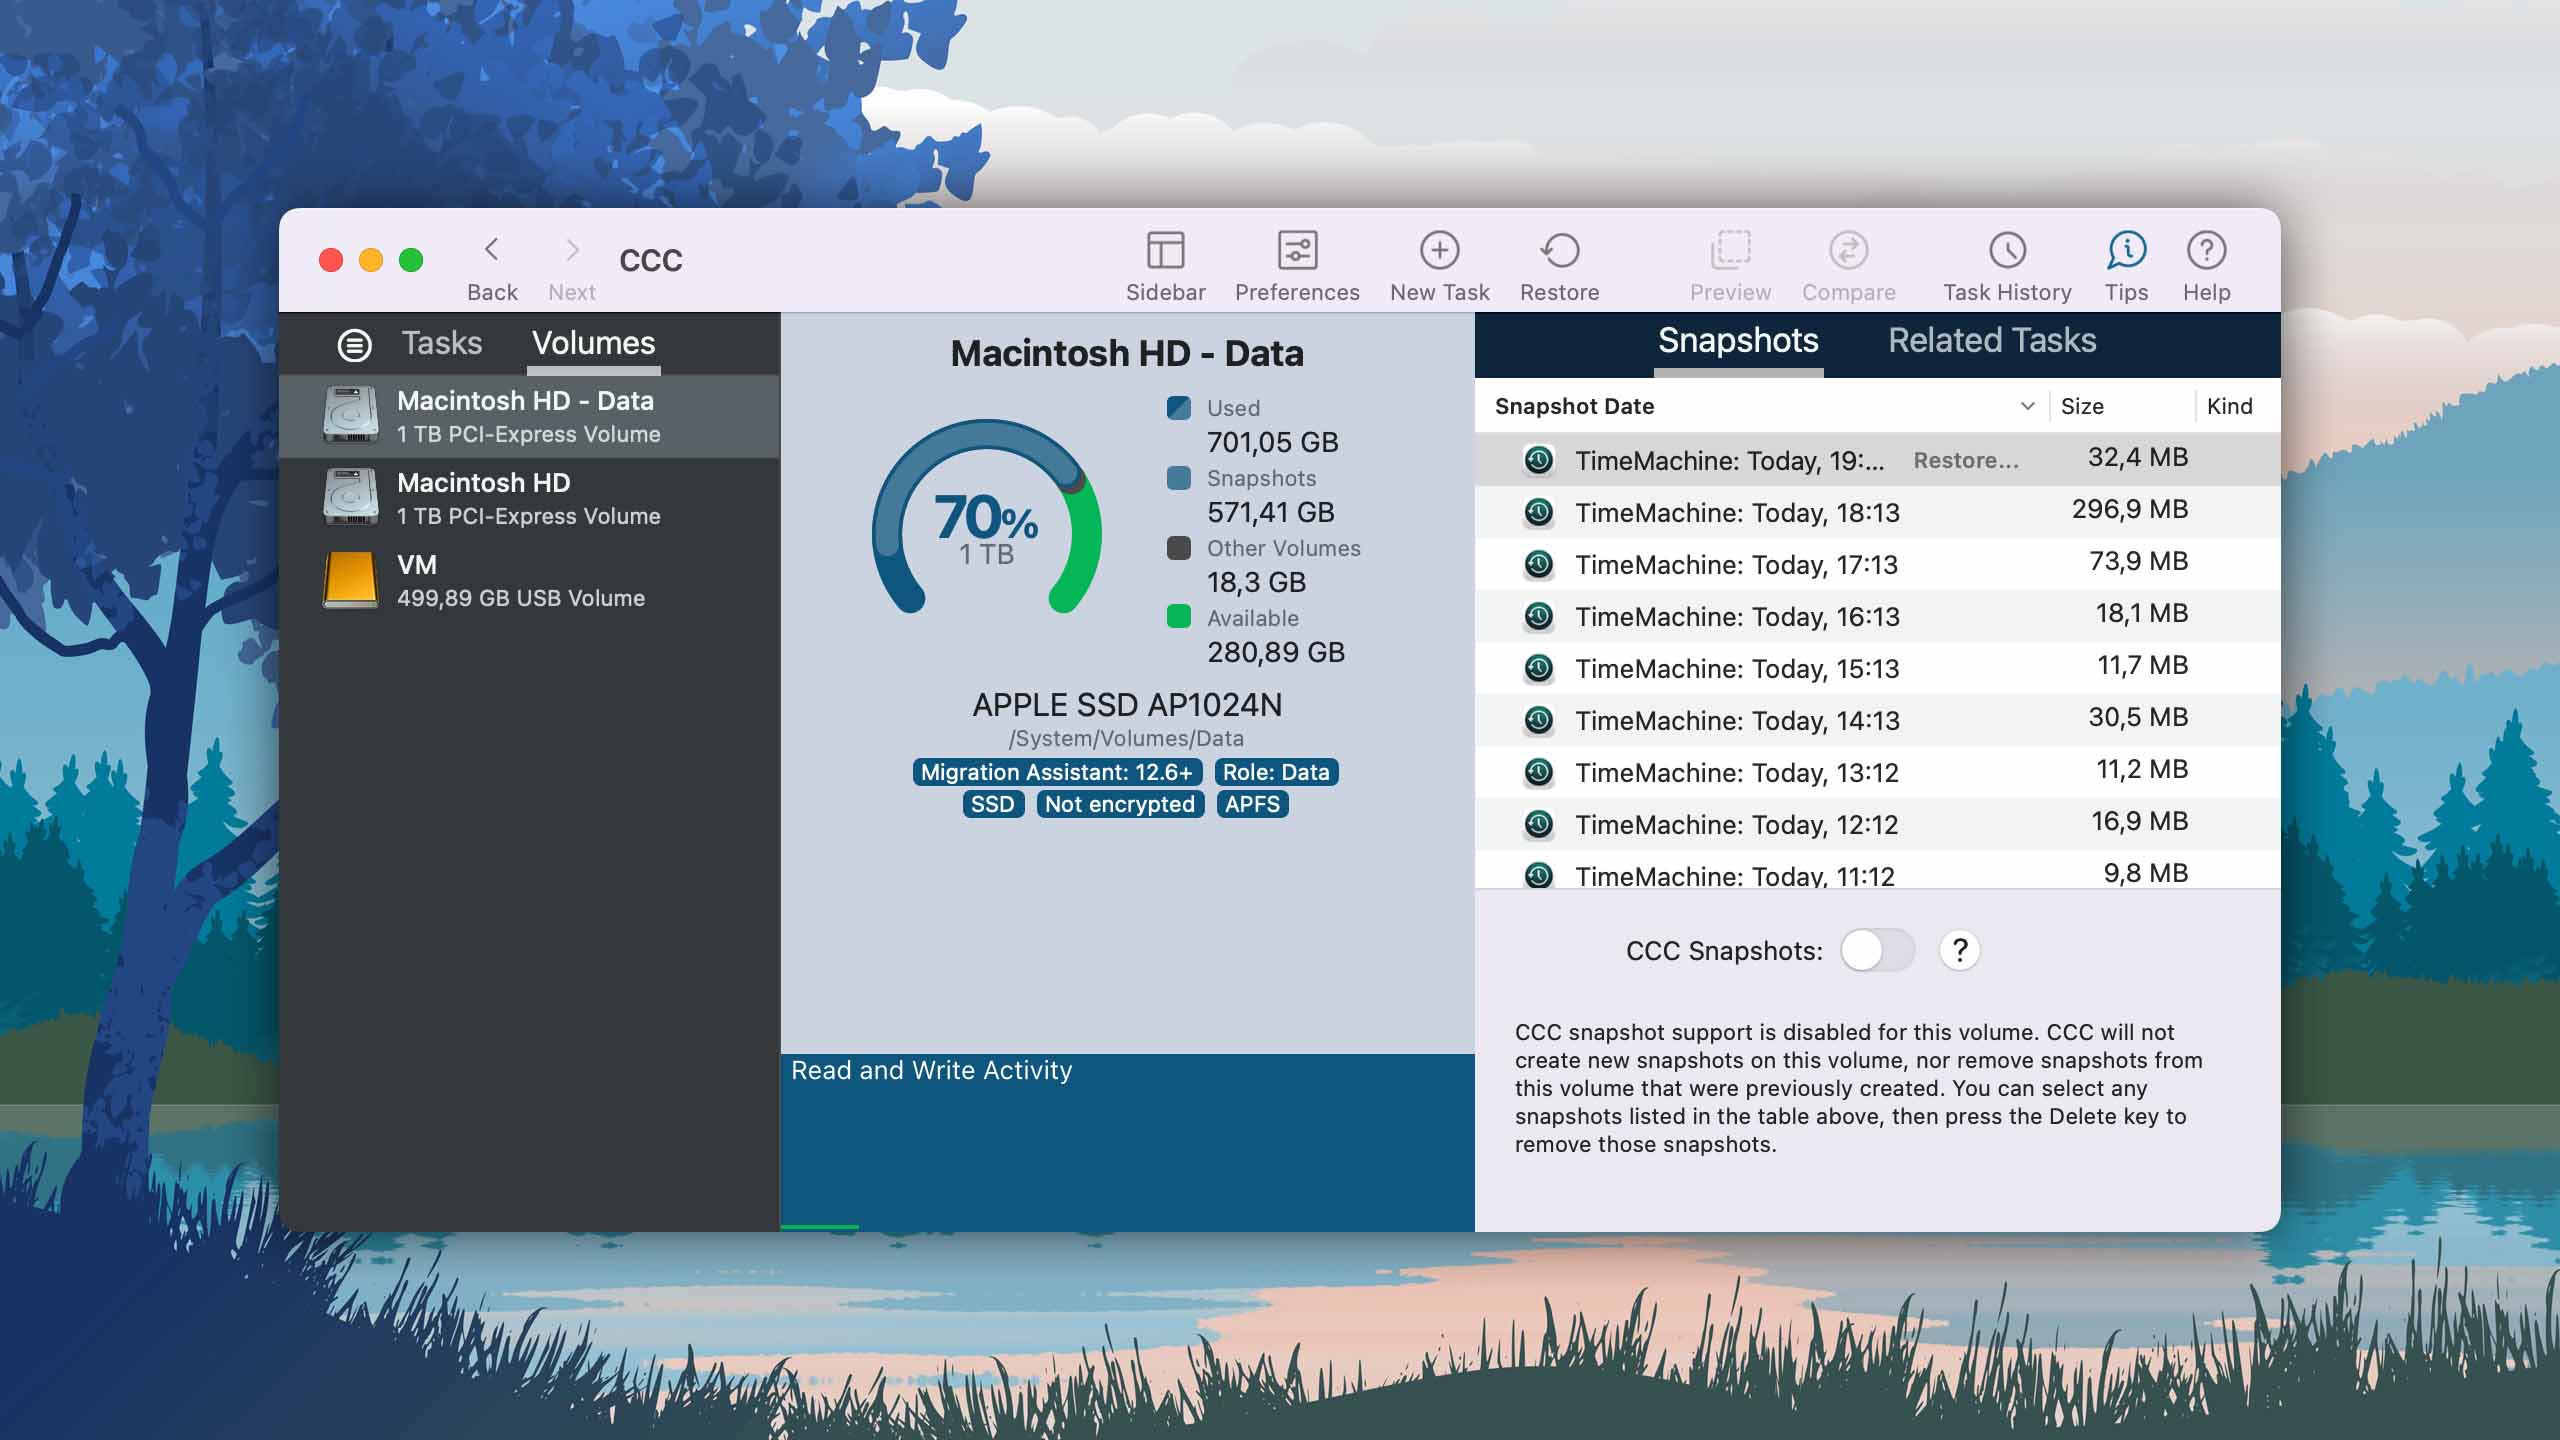
Local data backups have their place even in the day and age of easy-to-use data recovery software applications like Disk Drill for Mac. Arguably the biggest advantage of local backups is their simplicity. You simply fire up your backup software, select your local backup, and wait for it to finish restoring your Mac. For the sake of this article, we’re going to assume that you have a backup created using Carbon Copy Cloner.
To restore your Mac from a local backup:
- Launch Carbon Copy Cloner.
- Select the Restore from disk image option located in the Source menu. Pick your backup disk image.
- Go to the Destination menu and select the volume where you want Carbon Copy Cloner to restore the backup image.
- Deselect any files you don’t want Carbon Copy Cloner to restore.
- Click the Clone button to begin the data restore process.
Method #5: Restore Your Mac from a Cloud Backup
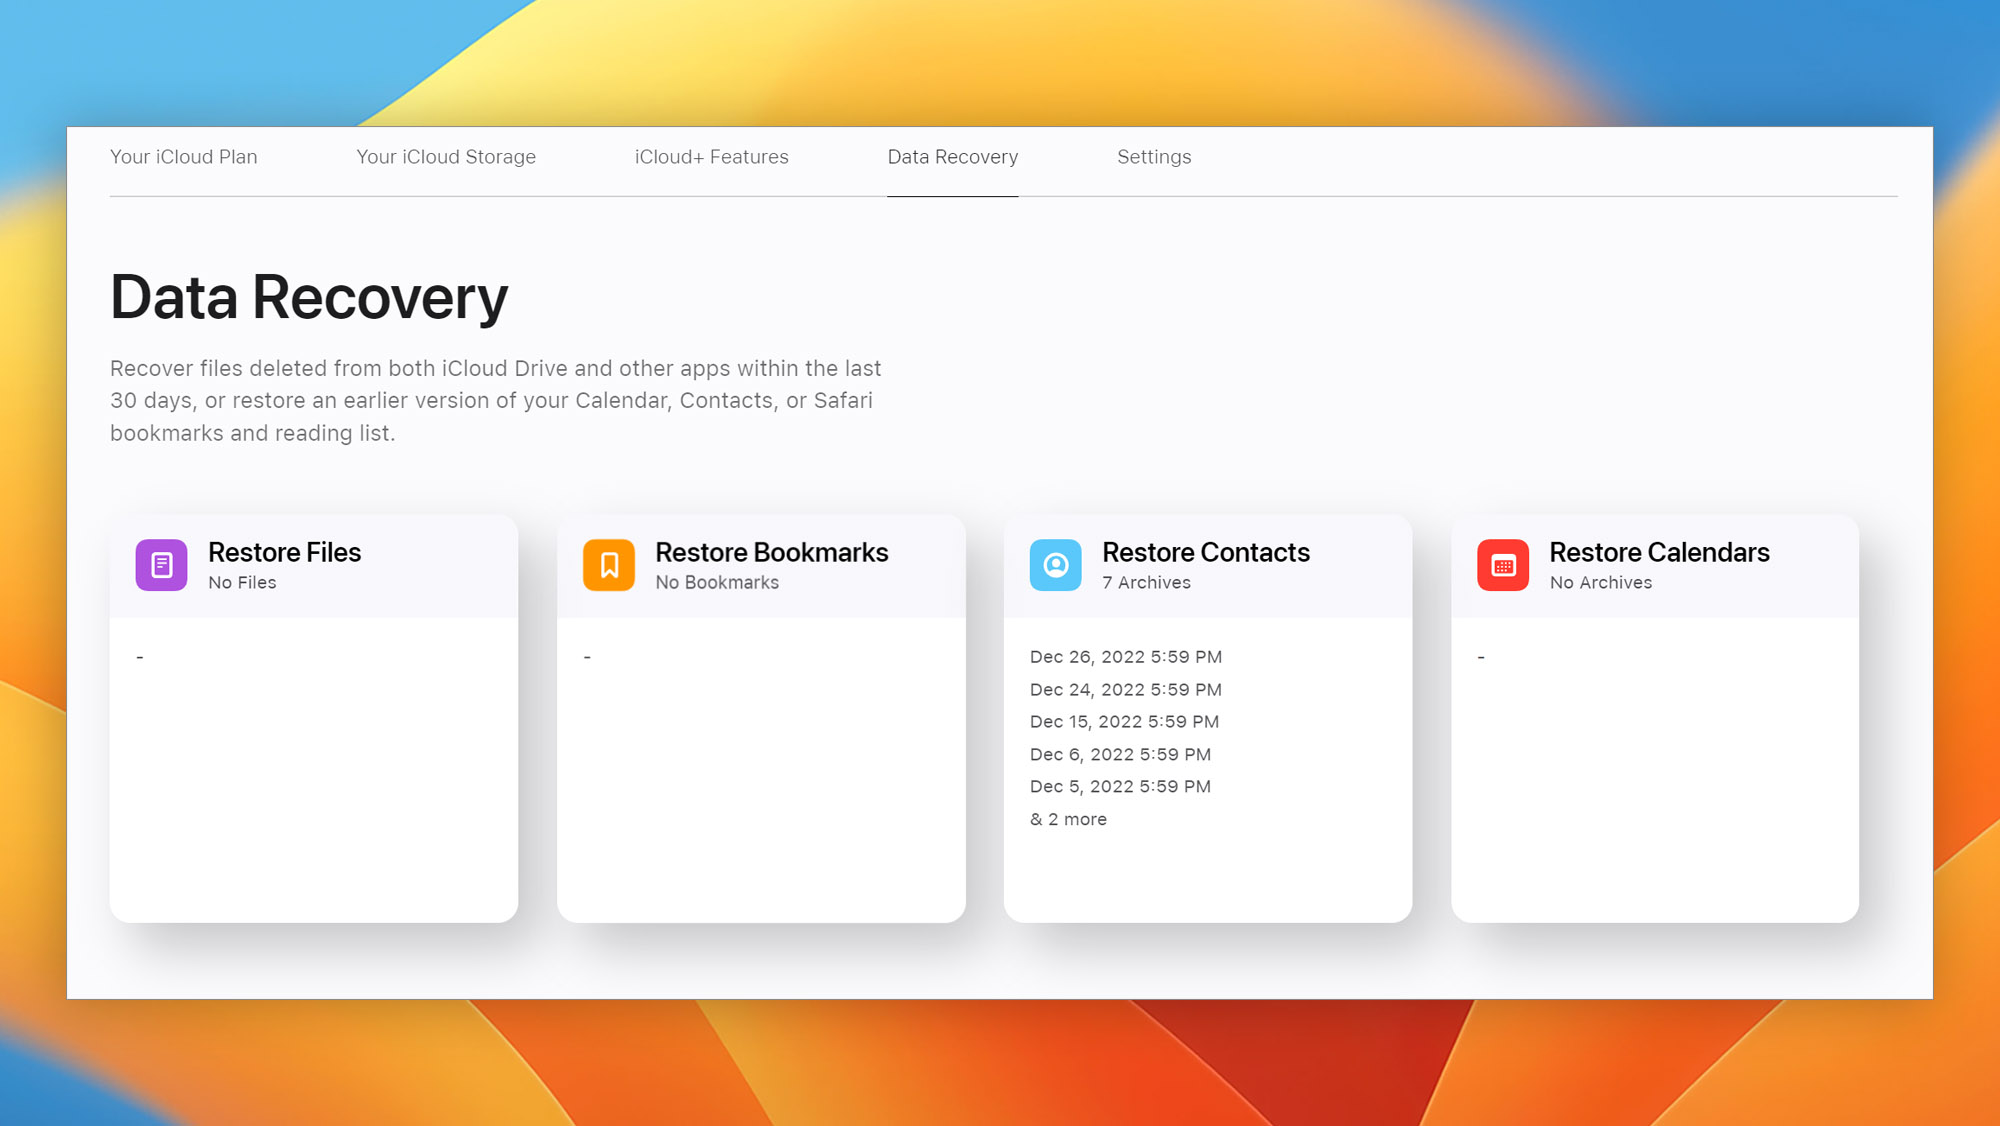
Storing files on someone else’s hard drive has been a viable backup option for some time now. Apple offers its own cloud backup service, called iCloud, giving all users 5 GB of cloud storage space for free. If you’ve taken Apple up on its offer and have your files backed up in the cloud, restoring them couldn’t be simpler.
To restore your Mac from a cloud backup:
- Go to iCloud.com and sign in.
- Go to Settings.
- Click Restore Files in the Advanced section, located on the bottom of the page.
- Select which files you want to restore.
- Click the Restore button.
| Disk Drill | Time Machine | 3rd Party Backup | |
| Recover files that were deleted from Trash | Yes | No | Yes |
| Preview files before recovery | Yes | Yes | Depends on the application |
| Recover files without a previous backup | Yes | No | No |
| Recover files from any internal or external storage | Yes | No | No |
How to Restore a Time Machine Backup to Another Mac?
Since Time Machine backups are stored on a dedicated backup drive, you can simply connect the drive to another Mac to restore files, apps, user accounts, and settings from your Time Machine backup. The entire process is fairly straightforward, and there’s not much that can go wrong if you follow our step-by-step instructions.
To restore a Time Machine backup to another Mac:
- Connect your Time Machine backup drive to the target Mac.
- Launch Finder and go to the Utilities folder of your Applications folder.
- Open Migration Assistant and click Continue. Enter your admin password if asked to.
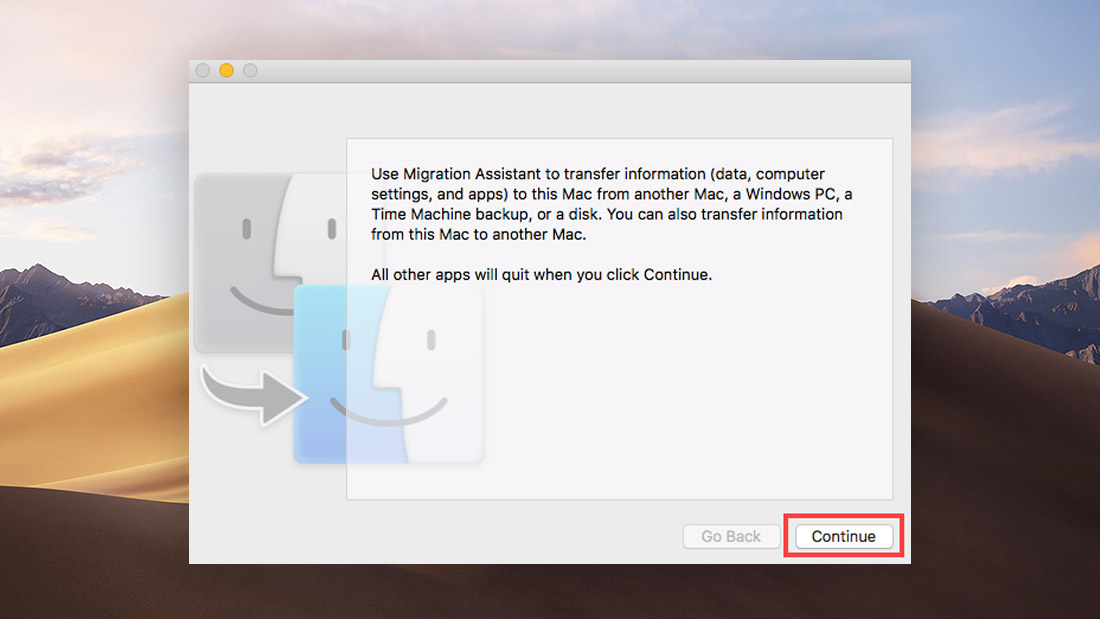
- Leave the option to transfer from a Mac, Time Machine backup, or startup disk selected and click Continue again.
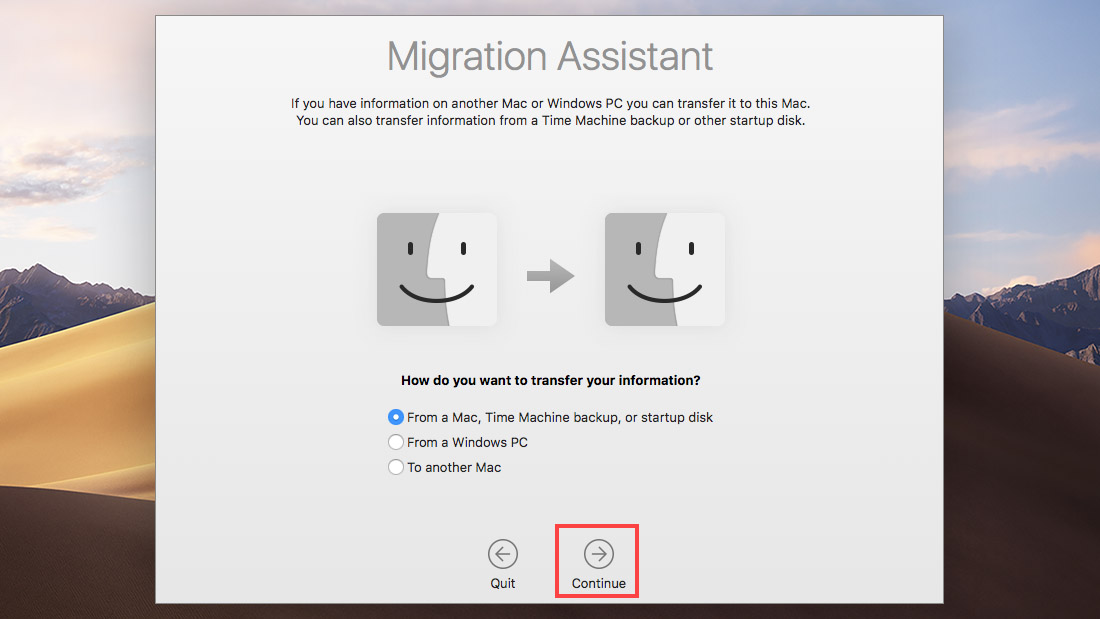
- Click the appropriate icon when asked to select a Time Machine backup disk and click Continue.
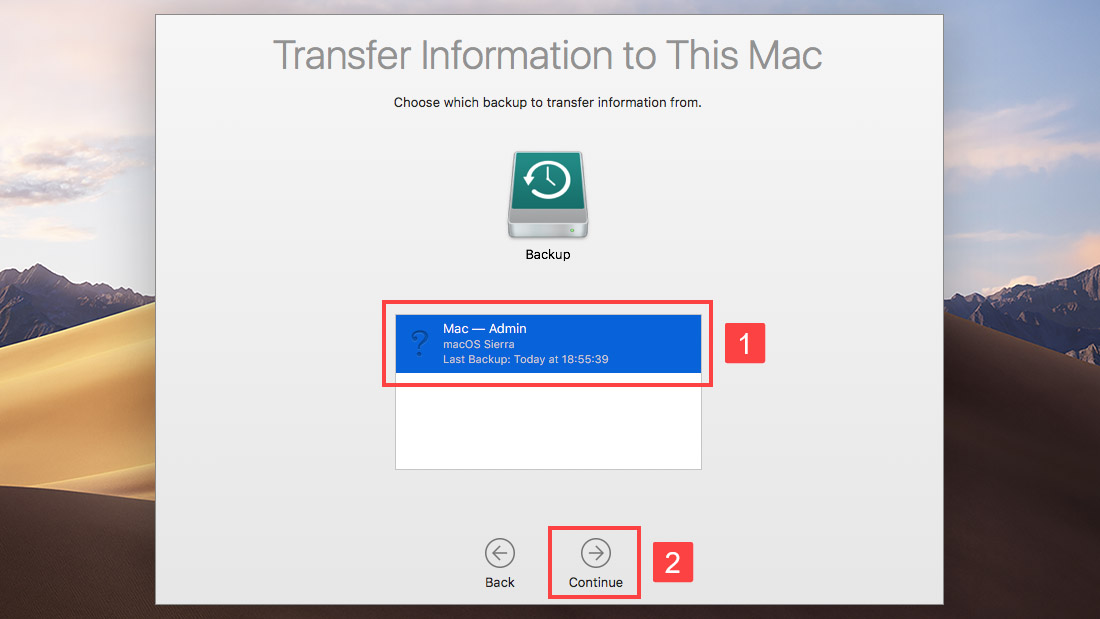
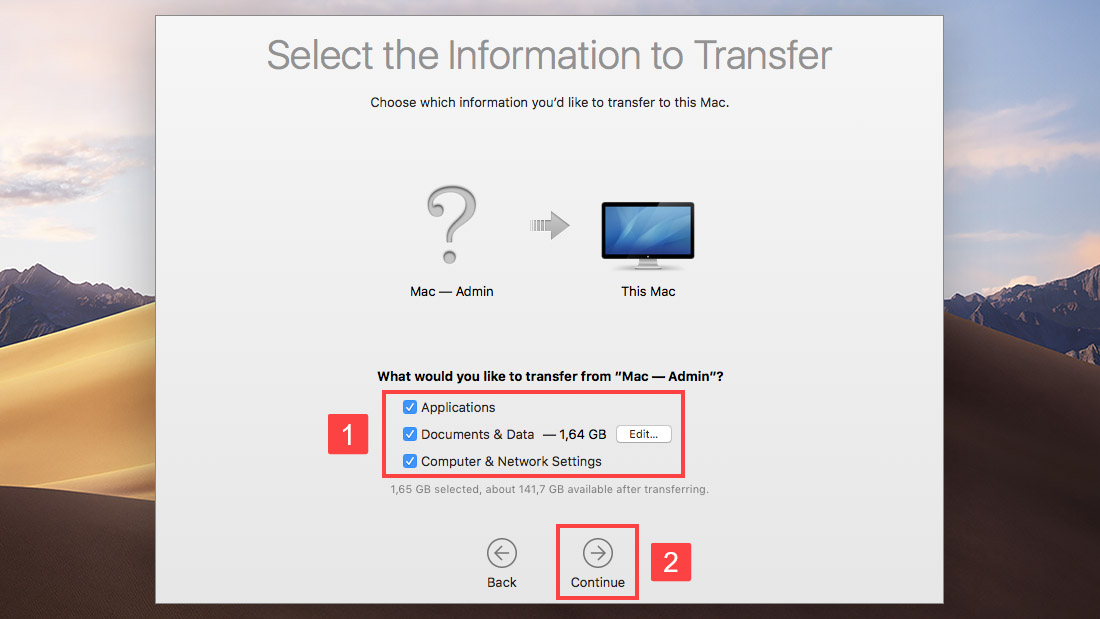
- Choose the information you which to restore from the Time Machine backup.
- Click Continue one last time to restore a Time Machine backup to another Mac.
Migration Assistant vs Time Machine
If you’ve recently purchased a new Mac, you’re probably wondering what’s the best way to move information from your old macOS Mojave-equipped Mac to your new machine, which most likely came with macOS Catalina. Mac users have been asking the same question for years, and the answer isn’t complicated at all since you have only two basic options:
- Migration Assistant – As its name suggests, the purpose of Migration Assistant is to help Mac users migrate their information from one Mac to another. It can transfer applications, documents, computer settings, printer setups, and user accounts without overwriting the operating system itself.
- Time Machine – This backup software application creates incremental backups that can be used to restore the whole system or specific files. Time Machine backups are supported by Migration Assistant, but only Time Machine itself can restore the whole operating system.
What to Do if Time Machine Couldn’t Complete the Backup?
Sometimes, the Time Machine backup process starts fine, only to fail suddenly and display the “Time Machine couldn’t complete the backup” error message. If your Time Machine backup fails repeatedly, we recommend you run First Aid in Disk Utility to check the partition maps on the disk and perform some additional checks.
To repair a Time Machine backup drive with Disk Utility:
- Launch Disk Utility from Applications and Utilities.
- Select your Time Machine backup drive.
- Click the First Aid button.
- Click Run and then click Continue.
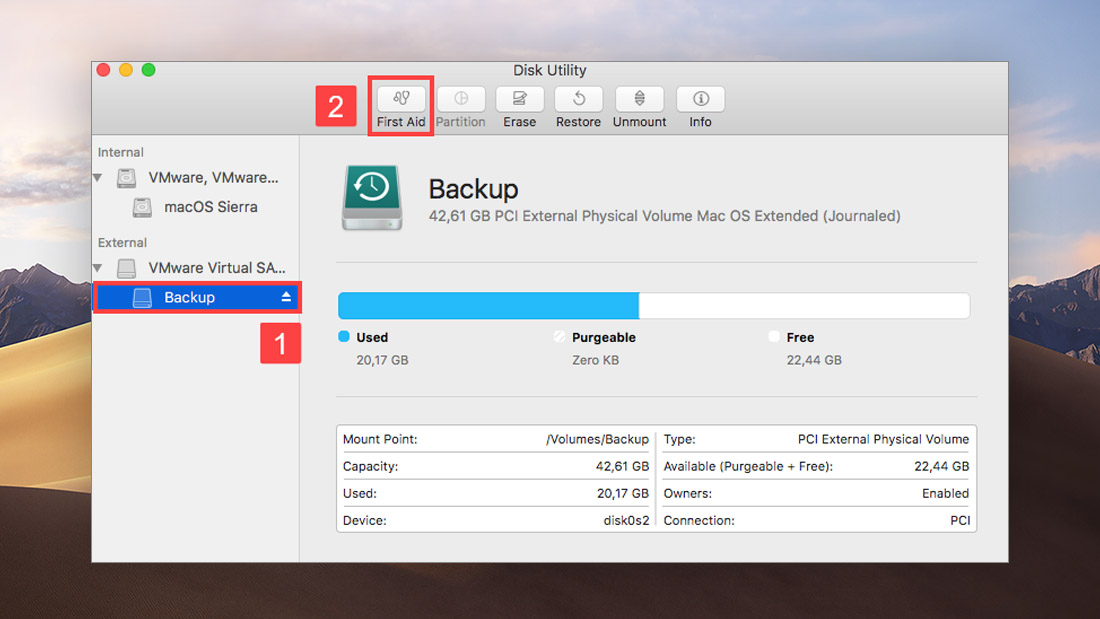
If Disk Utility reports that there’s nothing wrong with the Time Machine backup drive or that the problem has been fixed, you can consider your job to be finished.
Why Does My Time Machine Backup Keep Failing?
Your Time Machine backup could be failing for a number of different reasons:
- Faulty backup drive: The most common cause of failing Time Machine backups are faulty backup drives. If you often carry your backup drive with you to work or school, there’s a chance that it could have suffered physical damage that is now causing it to be unreliable. It’s also possible that the drive’s file system has become corrupted. In that case, you might be able to fix it with Disk Utility, but it’s also possible that formatting will be the only solution.
- Network issues: If your Time Machine restore failed while restoring from a server, AirPort Time Capsule, or drive connected to your AirPort Extreme Base Station, your network might be to blame. Restart your router, as well as your remote Time Machine backup device, and try again.
- Malware infection: Malicious processes can prevent Time Machine from backing up your files and finishing successfully. You can look for suspicious processes manually using Activity Monitor (found in /Applications/Utilities/), or you can use an antivirus solution to find them for you.
- Insufficient storage space: It should go without saying that you need enough free storage space on your Time Machine backup drive to successfully complete the backup process. Time Machine lets you exclude items from your backups, so take advantage of this option if buying a larger backup drive doesn’t sound appealing to you.
Common Time Machine Backup Errors and How to Fix Them
Let’s take a look at three common Time Machine backup errors and explain how to fix them:
No Time Machine backup found.
This error occurs when Time Machine is unable to establish a connection with your backup drive or locate your backup files. Often, reconnecting it to your Mac is all you need to do to fix the problem. If that doesn’t help, make sure the backup drive is visible in Finder and that the backup files are actually located on it. If you can access it and the files are where they should be, use First Aid in Disk Utility to fix logical errors.
The backup volume is read-only.
This worrisome Time Machine backup error is usually easy to solve because there’s rarely anything wrong with your Time Machine backup drive permissions. In most cases, ejecting the external backup drive and then reconnecting it is enough to fix the error. If you suspect that there really is a problem with permissions, you can fix them the First Aid option in Disk Utility, as described earlier in this article.
Time Machine couldn’t complete the backup to [backup drive name].
Also known as the Time Machine restore stuck error, this dreaded error message has the tendency to appear seemingly randomly, so fixing it may take some work. We recommend you review all running processes on your Mac and eliminate those that could potentially interfere with your Time Machine backups. For example, the WD Utilities app is known for preventing Time Machine from completing backups. You should also scan your Mac for malware using a reliable antivirus solution.
How to Set Up and Start Using Time Machine
If you haven’t yet set up Time Machine, you should do it right now so that you can easily restore your hard drive in the future.
To set up and start using Time Machine, you’ll need a suitable external backup drive (USB, FireWire, or Thunderbolt). Because storage space has become relatively cheap, we recommend you use a drive that’s at least two times the size of the drive you’re backing up.
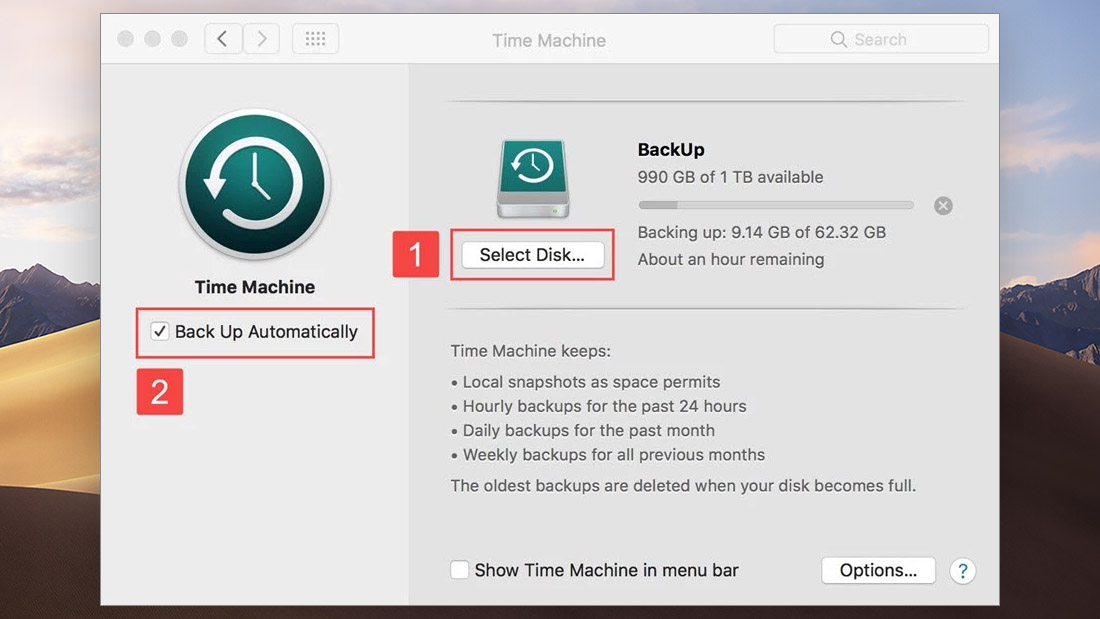
To set up Time Machine in macOS:
- Open the Apple menu and click System Preferences.
- Select Time Machine.
- Click the Select Backup Disk option and add a suitable disk.
- Click the Back Up Automatically box and close the Time Machine window.
Did You Know?
Apple’s Time Machine was first introduced on January 15, 2008, with the announcement of Mac OS X Leopard (version 10.5), the sixth major release of Mac OS X. Along with Time Machine, Mac OS X Leopard also introduced a redesigned Dock, Stacks, a semitransparent menu bar, and an updated Finder, giving Mac users an even more polished user experience.
Frequently Asked Questions
How to restore a MacBook with a new hard drive with Time Machine?
If you had to replace the hard drive inside your MacBook for a brand-new hard drive that doesn’t contain even the recovery partition, you can still use Time Machine to restore your MacBook:
- Hold the Option key and turn on your MacBook on to access the Recovery Partition located on your Time Machine backup drive.
- Select the Restore from Time Machine Backup
- Click Continue again to move to the next screen
- Select your restore source and click Continue to confirm your selection.
- Select the most recent functioning Time Machine backup and click Continue to begin the restore process.
How to format a hard drive for Time Machine
You can backup your files with Time Machine on any internal or external hard drive, as long as the hard drive is properly formatted. To format a hard drive for Time Machine:
- Launch the Disk Utility.
- Select the hard drive you want to format for Time Machine from the list of available storage devices in the sidebar.
- Click the Erase button and choose Mac OS Extended (Journaled) to format as a Mac volume.
- Click Erase again to format the hard drive.
How to remove Time Machine backups from external hard drive?
Time Machine backups can be quite large, and you may start to run out of available storage space on your external hard drive very soon. When that starts to happen, you can simply delete old Time Machine backups to free up some storage space:
- Click the Time Machine icon located in the Menu Bar and select Enter Time Machine.
- Find the Time Machine backup you want to delete.
- Click the Gear icon and select Delete Backup.
- Enter your password if asked to do so.
Why are my Time Machine backups not visible?
If your Time Machine backup are not visible, there could be something wrong with your backup drive. Reconnect it to your Mac and give it a few seconds to be recognized. Some external drives require a source of power, so make sure that your drive is working as it should. If you’re still having problems, we recommend you repair your Time Machine backup drive by running First Aid on it.
How to access Time Machine files from another Mac?
To access Time Machine files from another Mac:
- Connect your Time Machine backup drive to the Mac from which you want to access your Time Machine files.
- Launch Finder and open the backup drive.
- Select the folder called Backups.backupdb and open the folder with the name of the Mac on which the Time Machine backup files were created.
- Open any of the folders you see to access your Time Machine files.
Is it possible to restore my external hard drive from Time Machine?
Yes, if you’ve configured Time Machine to back up your external hard drive, you can now use it to restore it.
How do I restore a Time Machine backup after a clean install?
The best way to restore a Time Machine backup after a clean install is with Migration Assistant:
- Launch Finder and go to Application and Utilities.
- Open Migration Assistant and click Continue.
- Select the option to transfer from a Mac, Time Machine backup, or startup disk and click Continue.
- Select your Time Machine backup disk and click Continue.
- Choose which files you want to restore and click Continue.
Does Time Machine restore a previous operating system?
Yes, Time Machine does restore a previous operating system but only if you restore from a Time machine backup without installing an operating system first. If you restore after installing an operating system, Time Machine will restore only personal files. In either case, it’s not possible to boot from a Time Machine backup alone.
Is it possible to restore individual apps from Time Machine?
You can restore individual apps by copying their .app files from Time Machine backup files. However, this will not restore your settings and application data.
David Morelo is a professional content writer with a specialization in data recovery. He spends his days helping users from around the world recover from data loss and address the numerous issues associated with it.
When not writing about data recovery techniques and solutions, he enjoys tinkering with new technology, working on personal projects, exploring the world on his bike, and, above all else, spending time with his family.
- Klennet Recovery Review (Formerly Zero Assumption Recovery)
- iBeesoft Data Recovery Review – A Likable Clone With Limited Features
- DMDE Review – A Data Recovery Powerhouse or a Usability Nightmare?
- Cisdem Data Recovery for Mac Review – A Clone in Disguise
- Tenorshare 4DDiG Review – All That Glitters Is Not Gold
- Houston, Texas, United States
Nikolay Lankevich has over 15 years of strong experience in various fields and platform includes Disaster Recovery, Windows XP/7. System analysis, design, application (Inter/Intranet) development, and testing. Provided technical supports on desktop and laptops on Win-XP and Macintosh for about 2000 employees.