Photos Disappeared From SD Card? Here’s How to Get Them Back
Returning from a long day of picture-taking to find your SD card empty is enough to send anyone into full panic mode. The photos on your SD card can disappear for a number of reasons, including corruption, accidental deletion, or malware.
All hope is not yet lost. There are still ways for you to get your photos back. Read on to figure out how to recover photos that have disappeared from your SD card.
Quick Solutions for Getting Back Missing Photos From an SD Card
Before we look at the best SD card data recovery software to use for this situation, you should make sure your files aren’t just hidden. When the files on your memory card are hidden, they won’t show up like normal. This can happen on any brand of SD card, including SanDisk, Lexar, Samsung, and Kingston. But, it will depend on how the data is hidden.
Unhide Hidden Pictures on the SD Card
It’s possible for you to hide files on Windows using the ‘hidden’ attribute. Files with this attribute (like some system files) will make them appear invisible when you check them in programs like File Explorer.
If your files are not showing up because they’ve been marked with the ‘hidden’ attribute, you can actually make them visible in File Explorer and then unhide them, like so:
- Open File Explorer.
- Click View > Show > Hidden items.
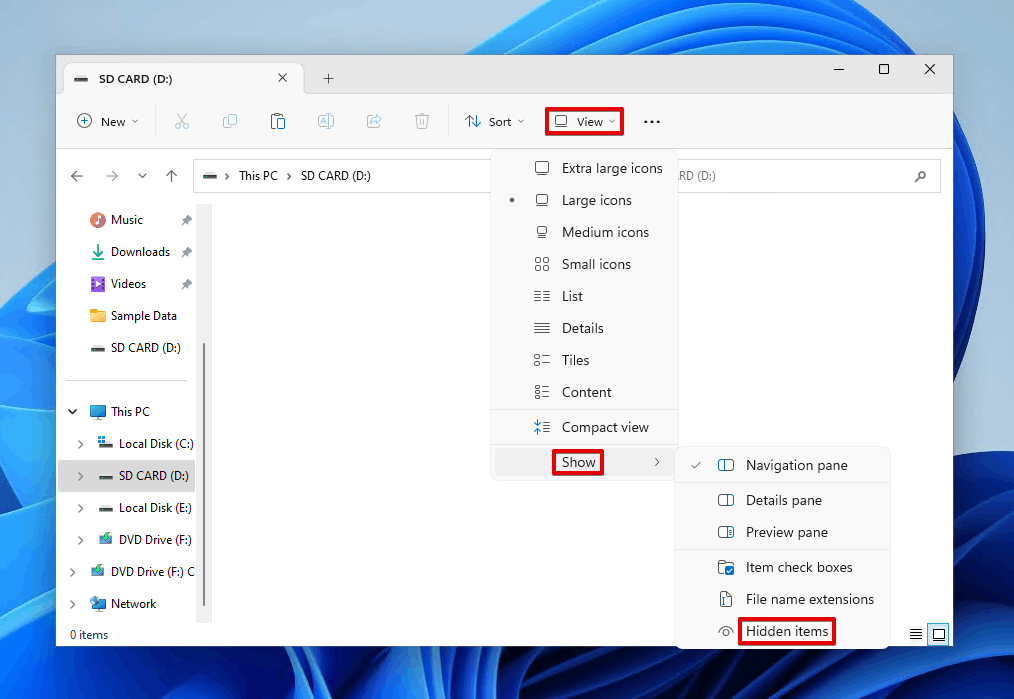
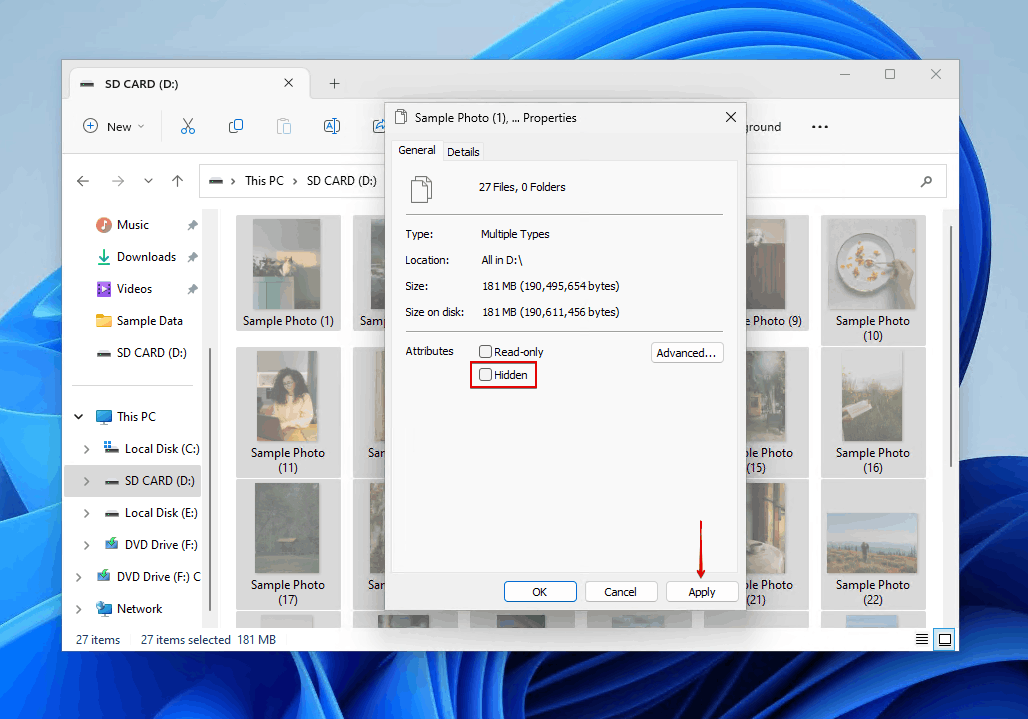
- Select the hidden items, then click See more > Properties.

- Untick Hidden, then click Apply.
Remove the Nomedia File From Your Smartphone
Files on your microSD card in your Android phone may be hidden because it shares the same directory as a .NOMEDIA file. When a file with the .NOMEDIA file extension is present, all other files in that folder won’t be visible in photo managers or video players. Deleting the file can make the files visible once again:
- Open a file manager app on your Android device (e.g. My Files).
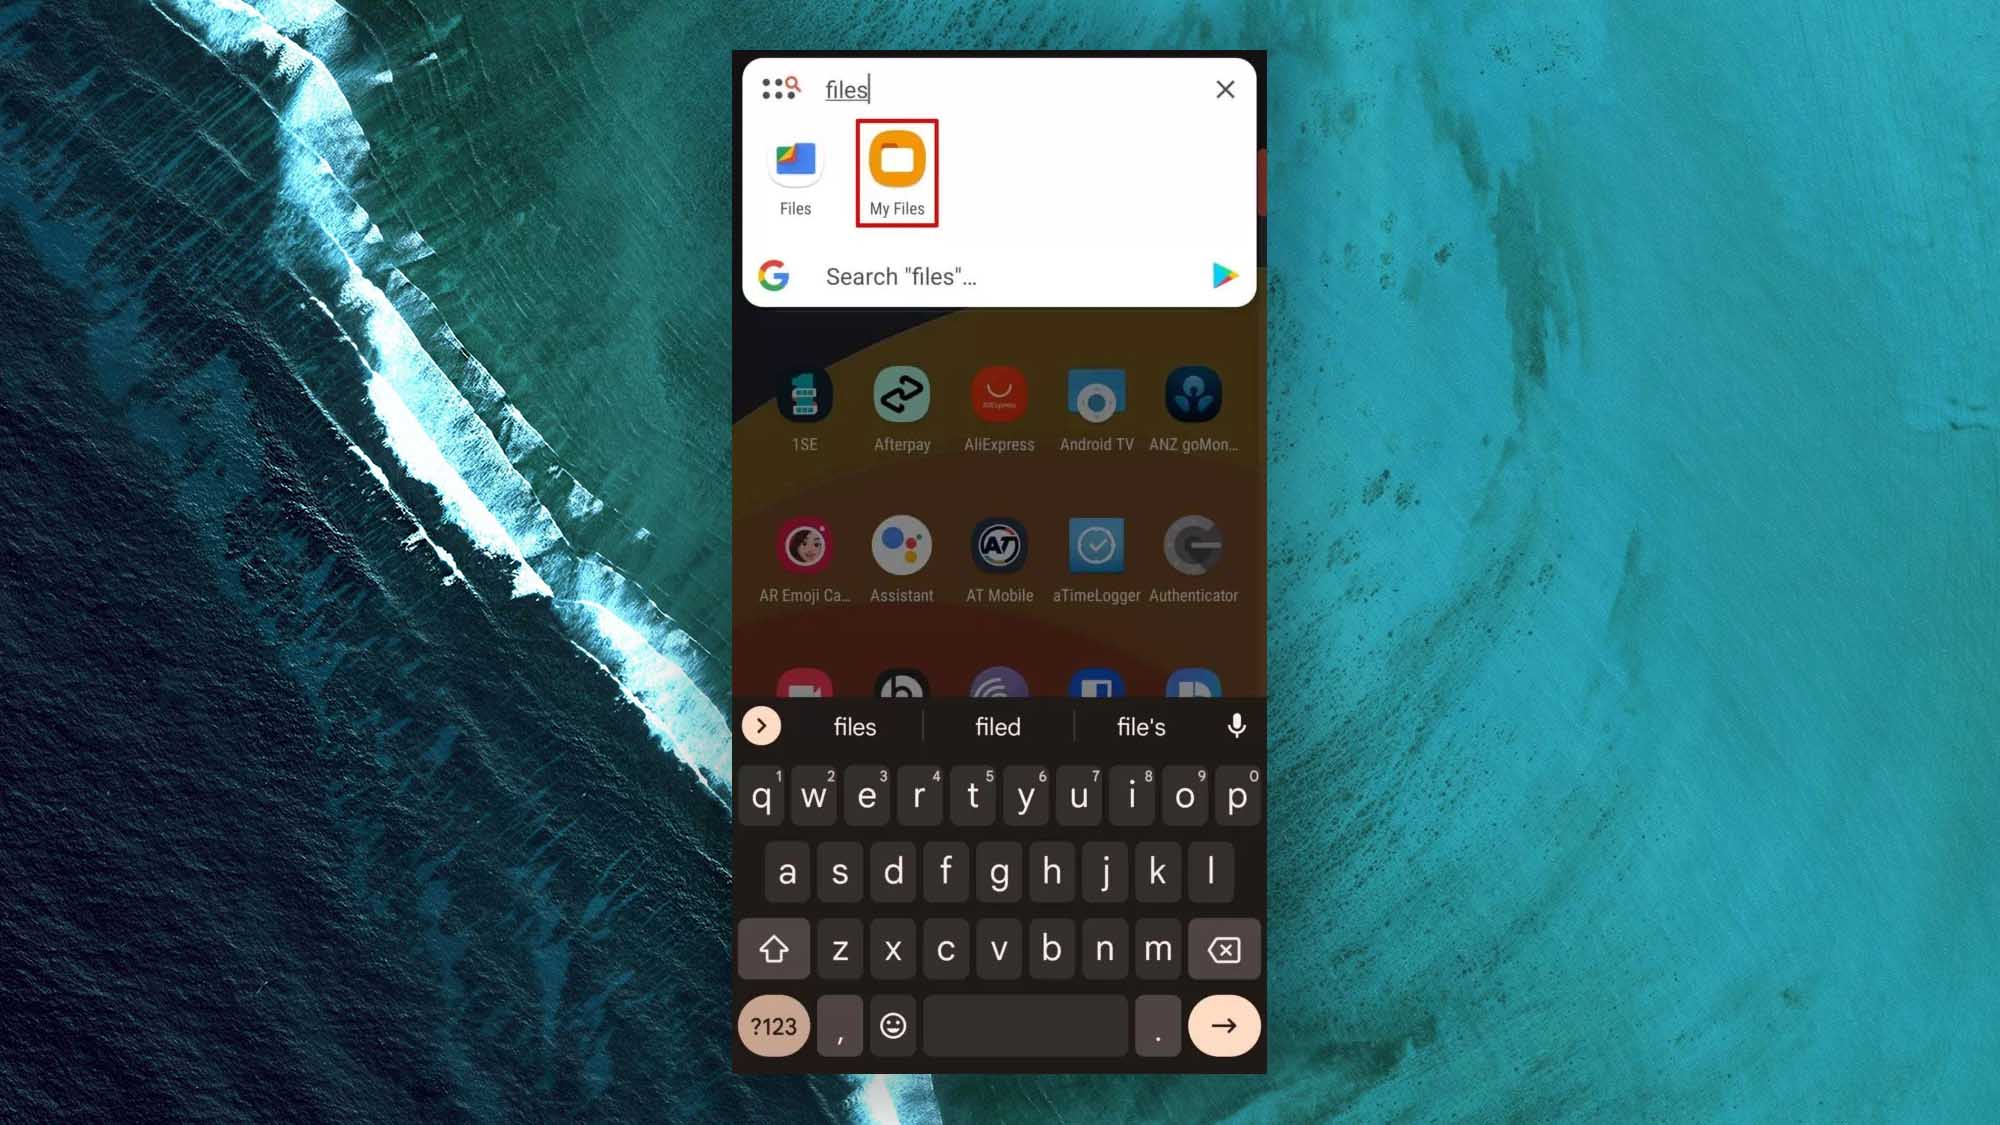
- Navigate to the folder that contains your photos that aren’t showing.
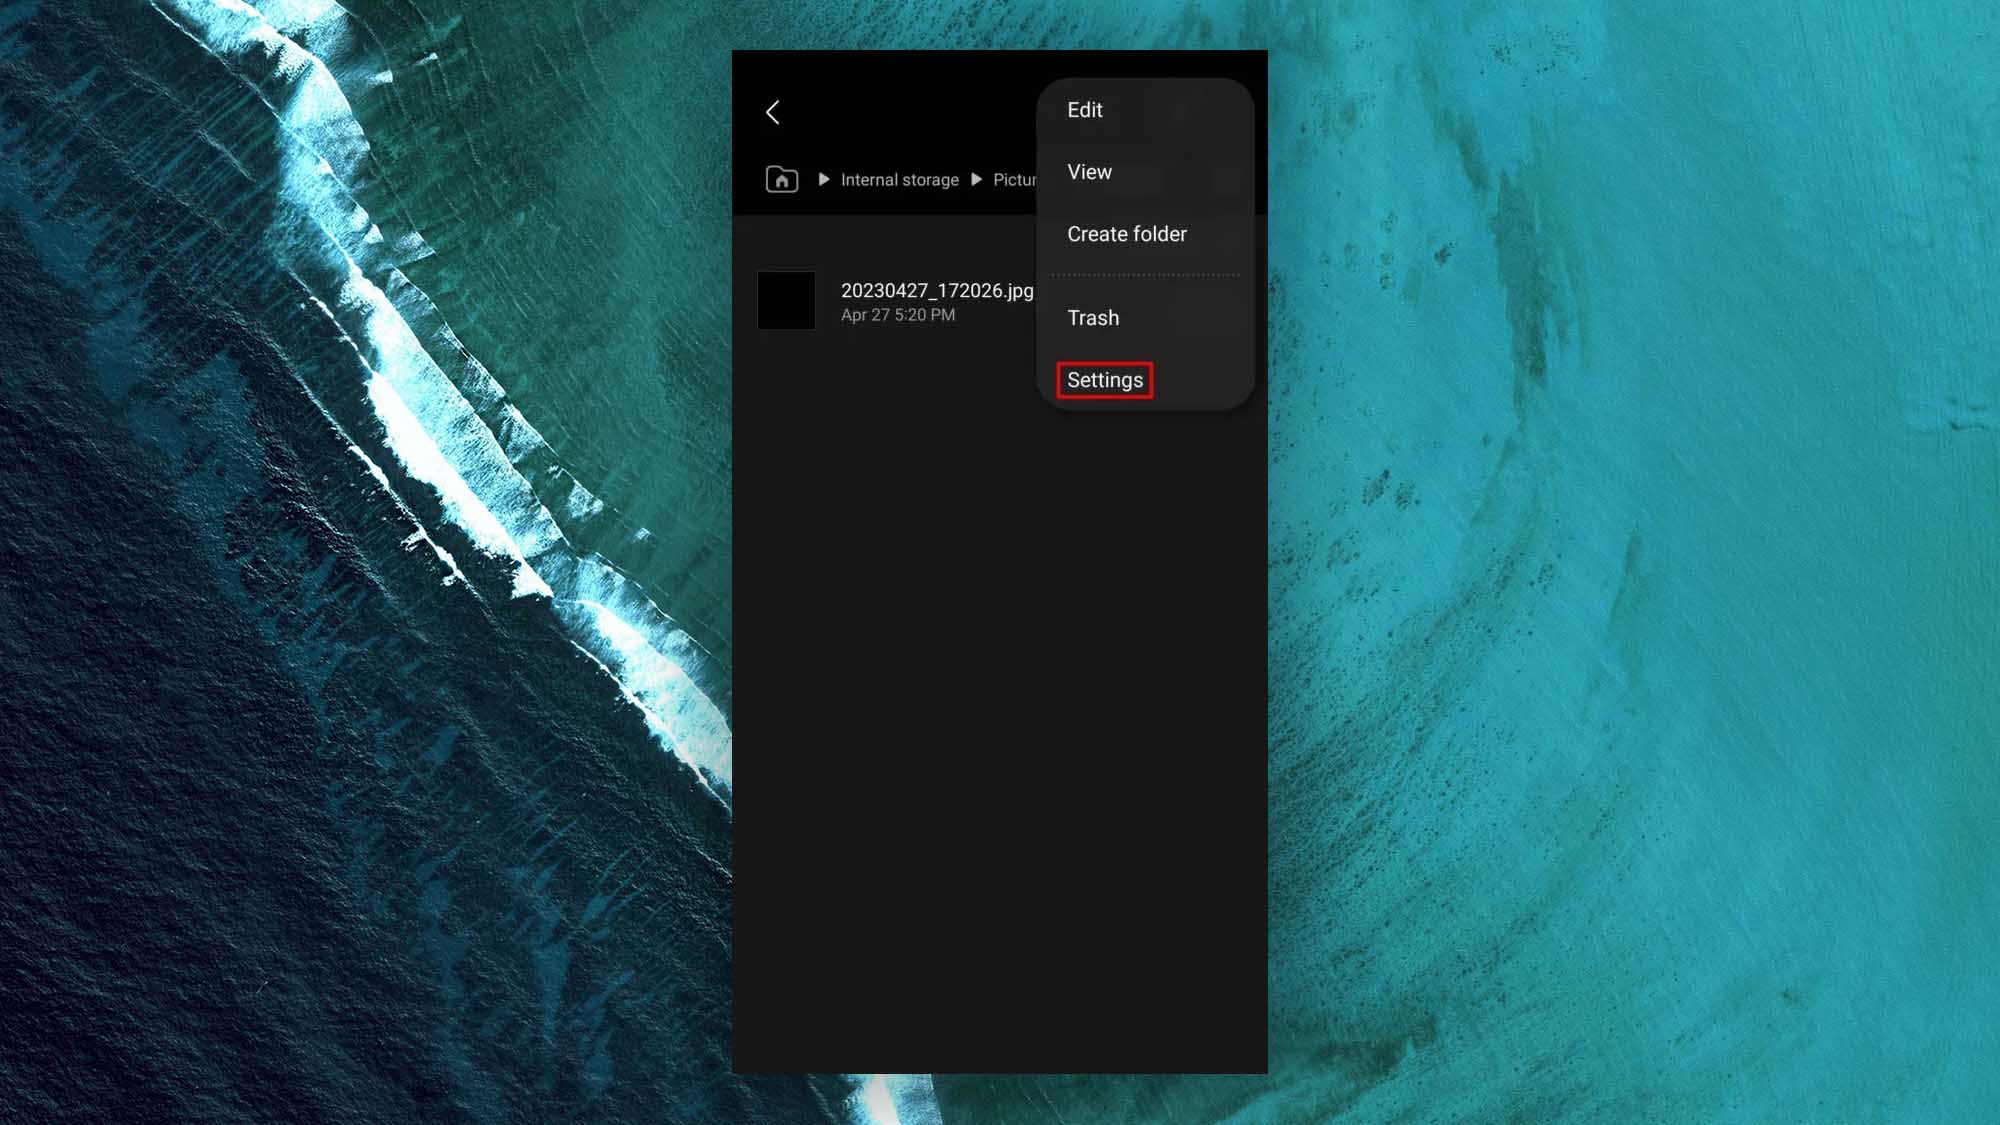
- Tap the vertical ellipsis at the top-right and click Settings.
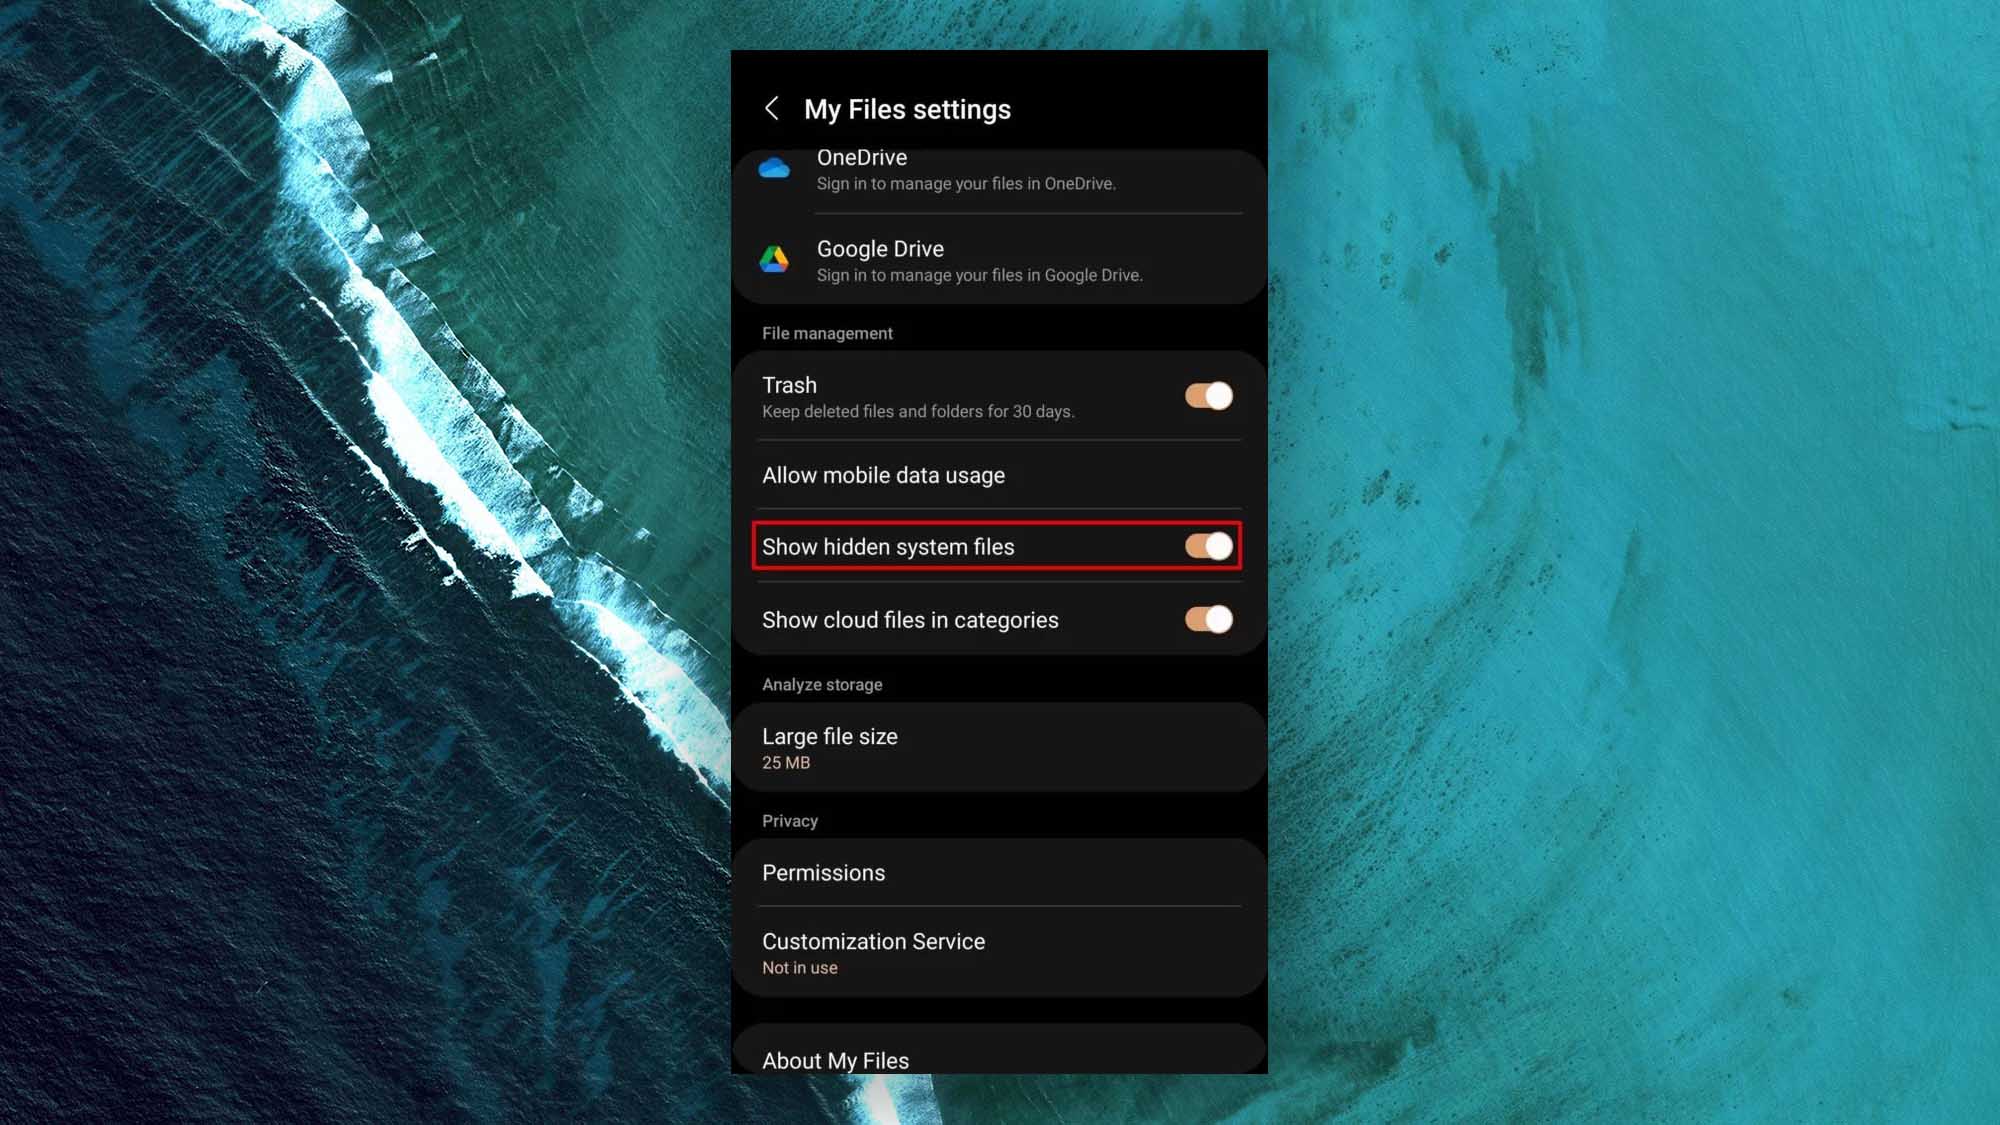
- Enable Show hidden system files.
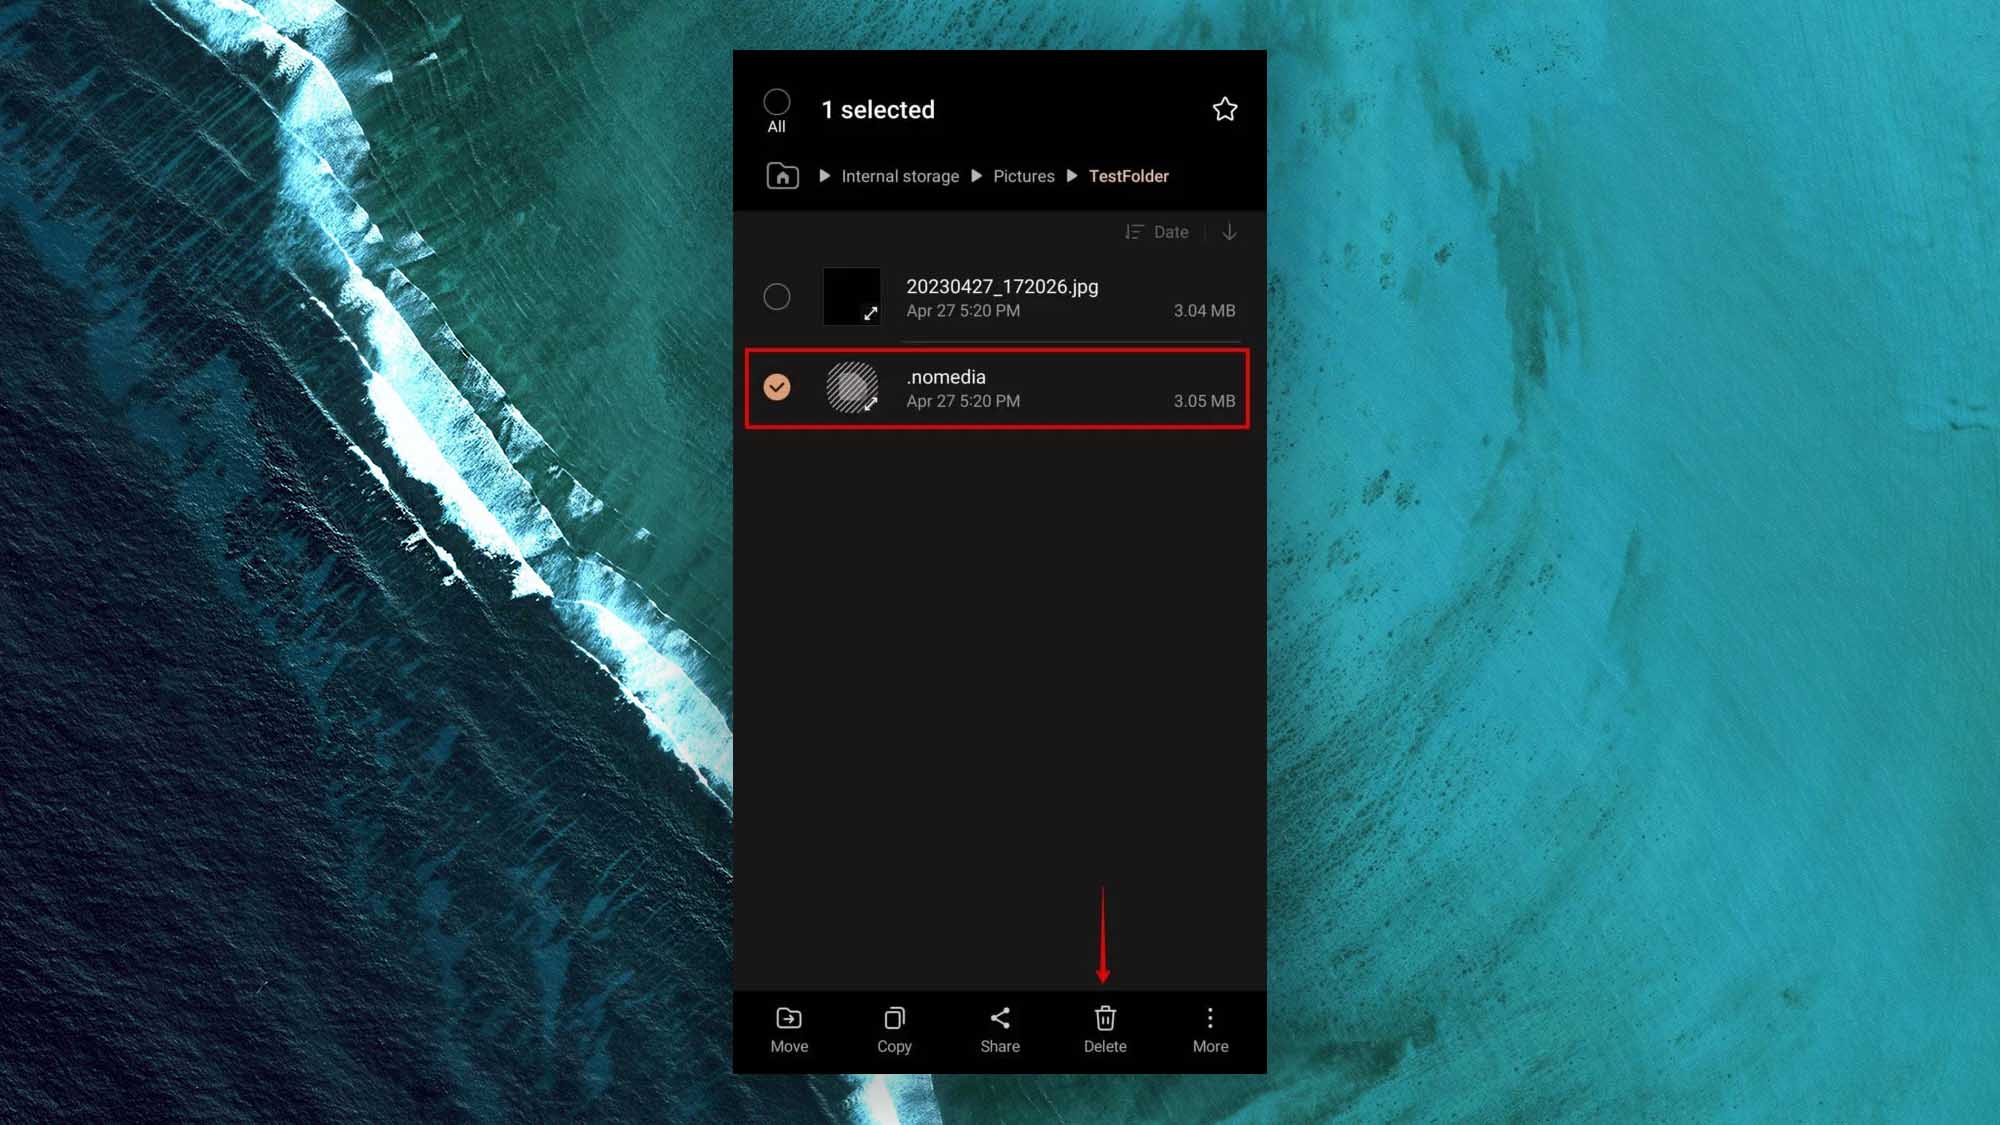
- Return to the folder and delete the .NOMEDIA file.
How to Recover Photos Disappeared From SD Card
When your photos or videos are definitely lost or deleted, you should recover them using a data recovery tool as soon as possible. The longer you wait, the lower your chances of recovery become.
In the case of disappeared photos, the ideal data recovery tool should be capable of:
- 📷 Raw photo recovery – Seeing as there is a huge number of different photo file types out there, the number that can be recovered by their file signature greatly increases your chances of recovering more.
- 🔍 Using multiple scanning algorithms – There are lots of ways to discover lost data. Some recovery tools merely rely on the file system, but a strong and capable data recovery tool will be able to find photos based on their file signature.
- 👀 Previewing and filtering data – Many users, especially photographers, will greatly benefit from being able to quickly preview any recoverable data to easily select what photos and videos to recover.
For this reason, we recommend Disk Drill. After a lengthy testing process, Disk Drill revealed that it was more than capable of recovering our lost photos and videos from our SD card using its all-in-one smart scan. The smart scan uses the file system to find recoverable files quickly, then follows up with a signature scan to find any files that were missed. During our review of Disk Drill, it received a score of 100% in raw photo recovery, making it the ideal choice even for photographers who shoot in more obscure file formats. All recoverable files were easy to locate and search through thanks to the preview function and handy filtering options.
Here’s what SD card photo recovery looks like with Disk Drill:
- Download and install Disk Drill.
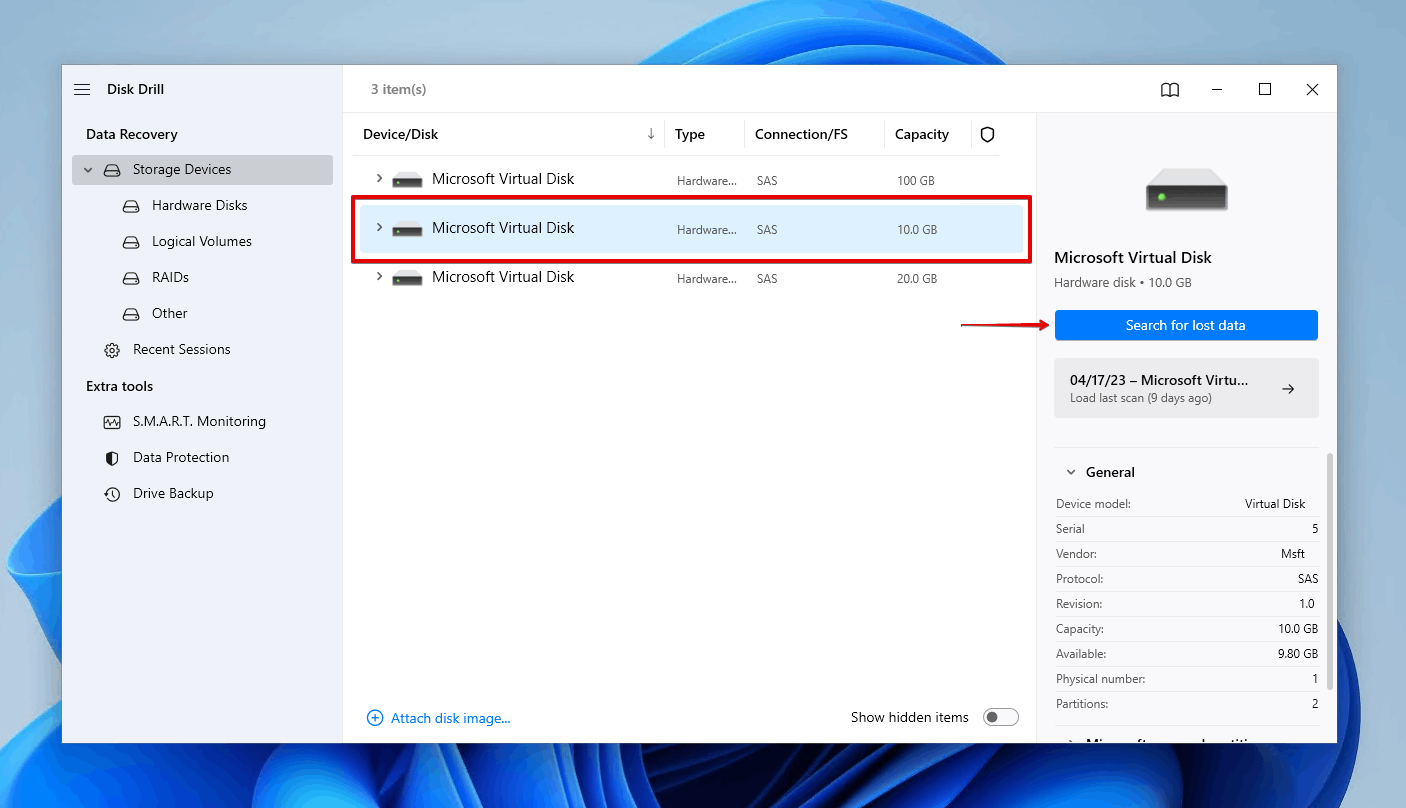
- Select the SD card from the device list, then click Search for lost data to begin the smart scan for any photos that have disappeared.
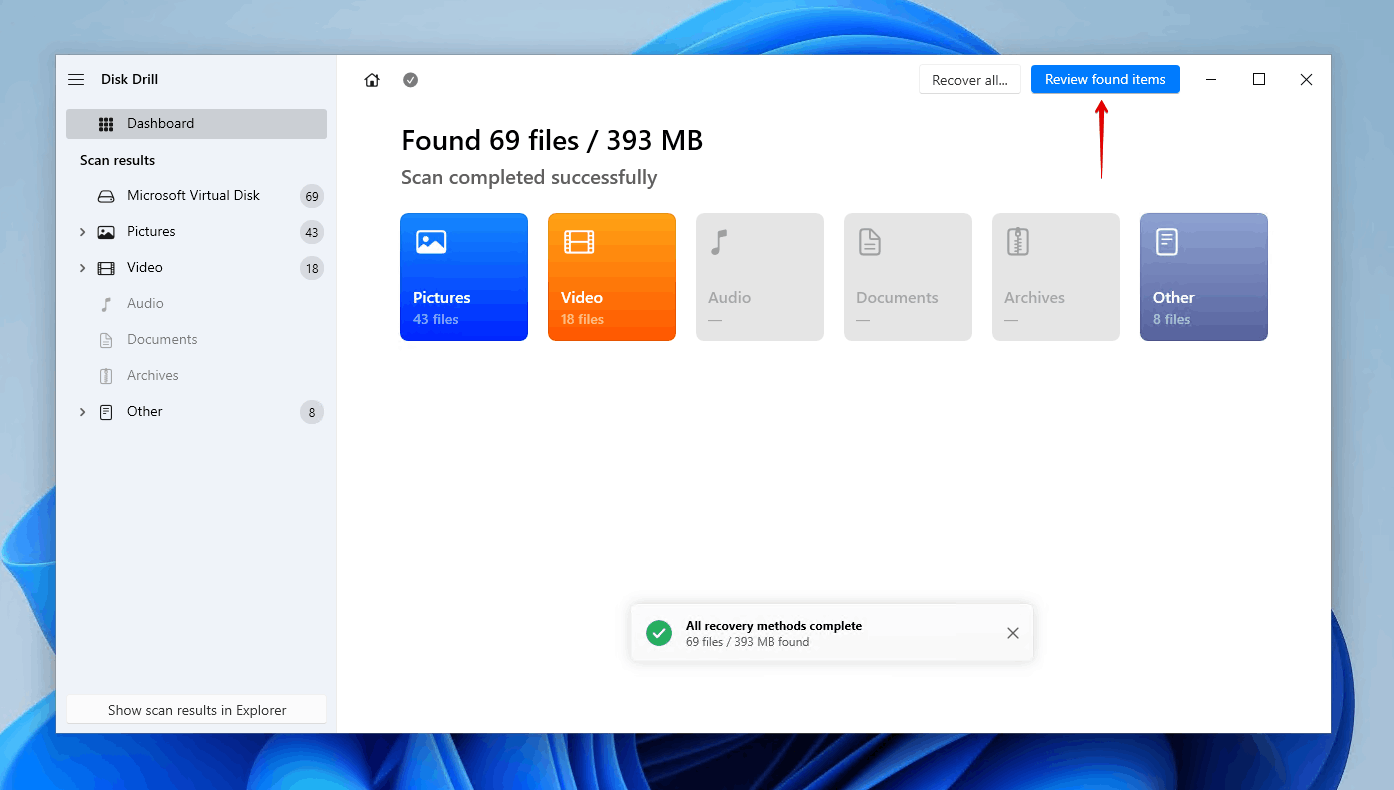
- Click Review found items, or click Pictures to see all of the image files that Disk Drill found. Alternatively, recover everything straight away by clicking Recover all.
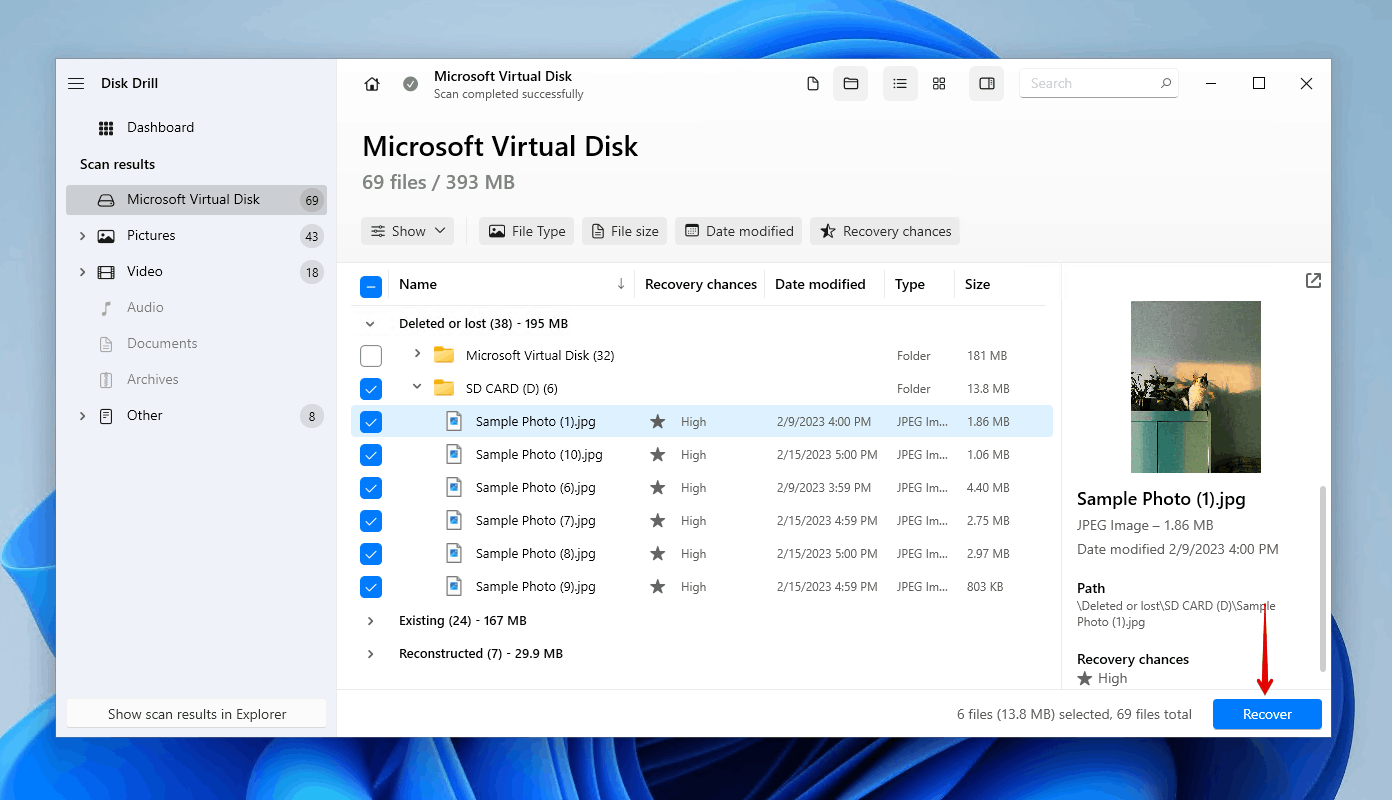
- Select the photos that disappeared. You can use the collapsible Existing, Deleted or lost, and Reconstructed sections to find data based on its state. Any hidden data will be visible in the Disk Drill scan results. When you’re ready, click Recover.
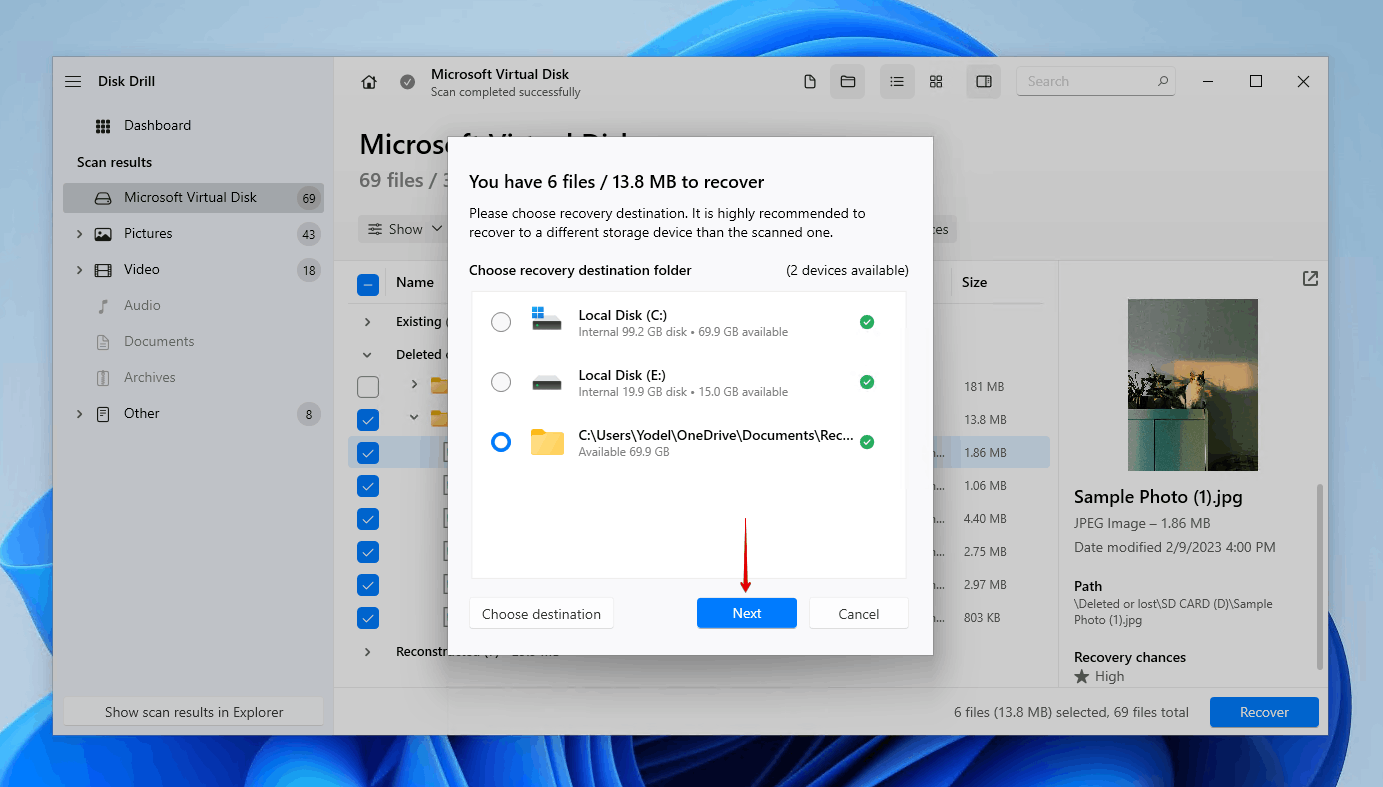
- Select an appropriate recovery location. Make sure you don’t recover the photos to the same SD card you’re recovering them from. When ready, click Next to complete recovery.
If you want to explore other data recovery solutions, check out our list of the best data recovery software for more options.
Other Solutions to Fix Photos That Disappeared From Your SD Card
After recovering your data, you can troubleshoot your SD card without the stress of losing it. Here’s a step-by-step troubleshooting guide to fix the issue of photos that have disappeared.
Step 1: Reinsert Your SD Card Into the Device
Your photos may not appear due to an unstable connection. If you’re using the SD card in a camera, try removing it from the SD card slot and then reinserting it. Check to make sure the port is free of any physical build-up or damage and make sure the contacts on the SD card are clean.
Step 2: Identify and Resolve Hardware Problems
Let’s eliminate other areas that could be faulty. Try connecting your SD card to your computer using a different external card reader. If you have a built-in SD card reader, make sure its drivers are up-to-date and it’s working by testing it with another SD card. This can also be done on any devices you use the SD card in. For example, if it’s used in a Canon camera, inspect its SD card port and do a test with another SD card if possible.
Step 3: Scan Your SD Card for Viruses
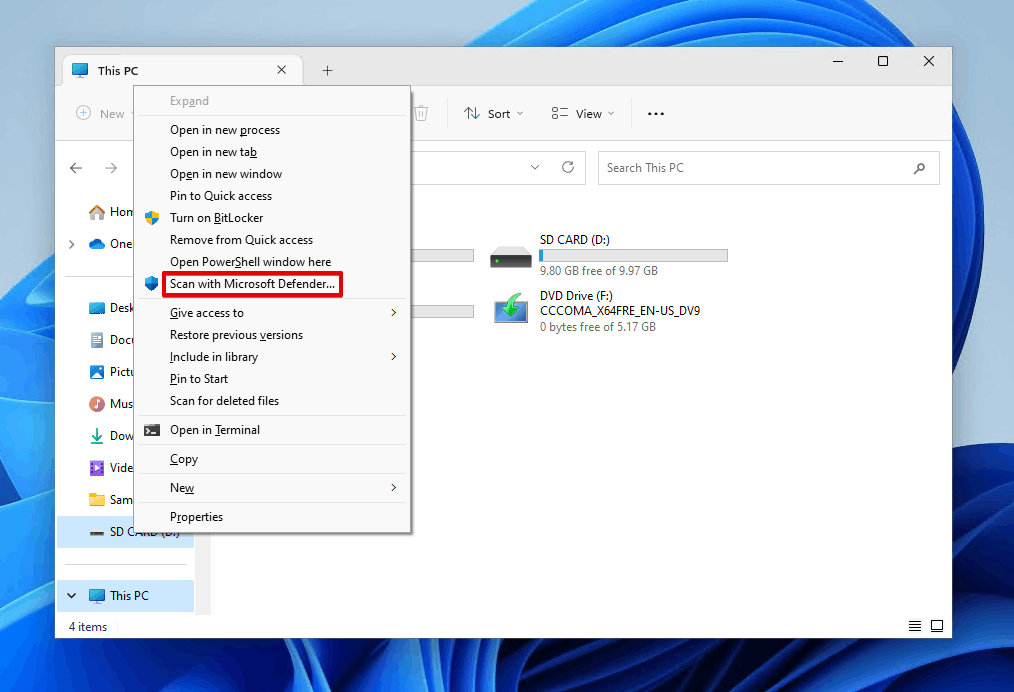
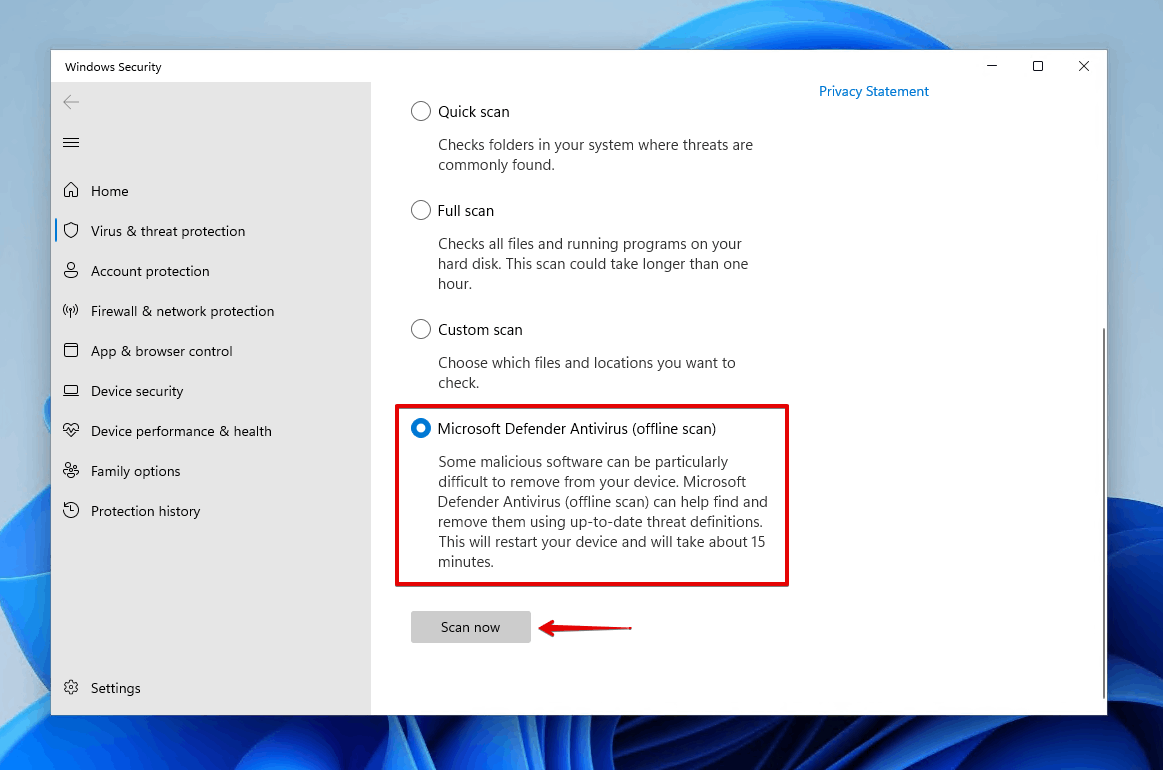
Disappearing files can be caused by a virus-infected SD card. Viruses can target your data and either mark it as hidden or delete it entirely. If your photos have disappeared from your SD card because of a virus, perform a virus scan using Microsoft Defender Antivirus which is included with Windows 10 and 11 by default.
- Open File Explorer.
- Shift right-click your SD card and click Scan with Microsoft Defender. This will immediately perform a quick scan of the SD card.
- To perform a more comprehensive scan, select Microsoft Defender Antivirus (offline scan) and click Scan now.
Step 4: Repair SD Card Errors Using Command Prompt
Corruption can be the culprit if your pictures have disappeared from your SD card. When the file system of your SD card becomes corrupted, data on affected partitions will become lost and inaccessible. Until the damage is repaired or the data is recovered, it will remain this way. You can repair SD card errors using CHKDSK.
Here’s how you run CHKDSK to repair damage on your SD card:
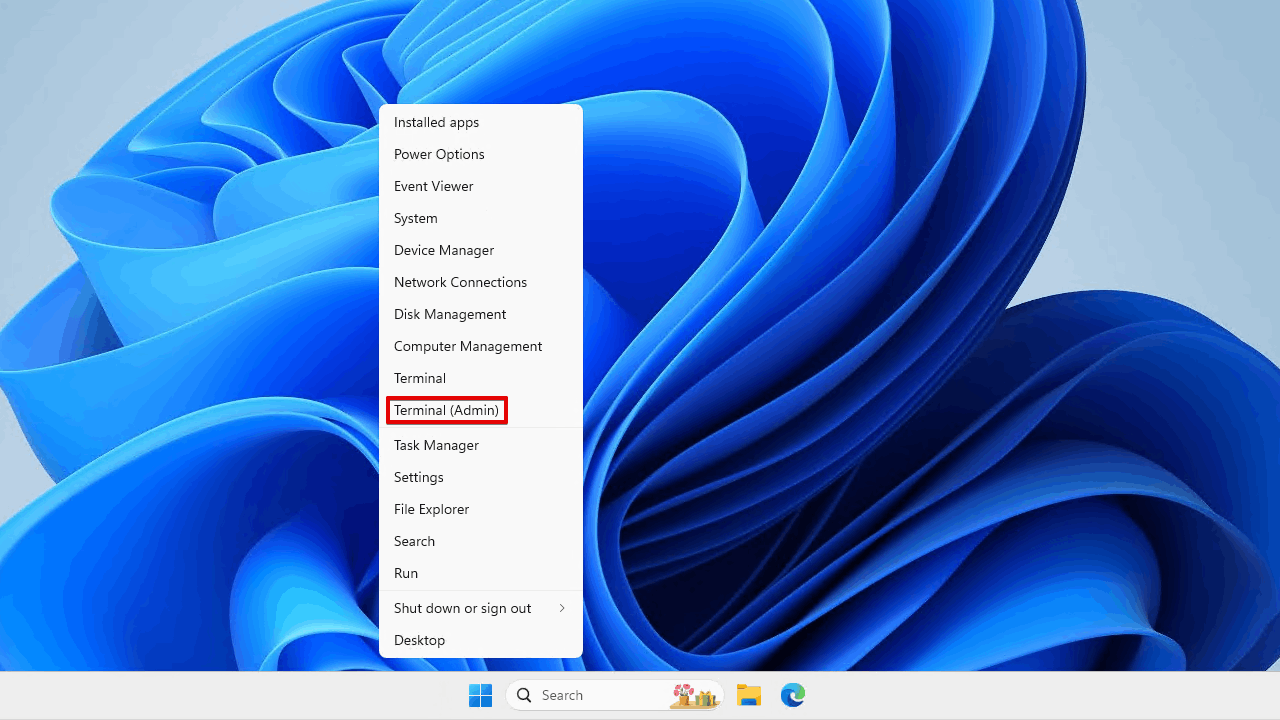
- Right-click Start and click Terminal (Admin). For Windows 10 users, click Windows PowerShell (Admin) instead.
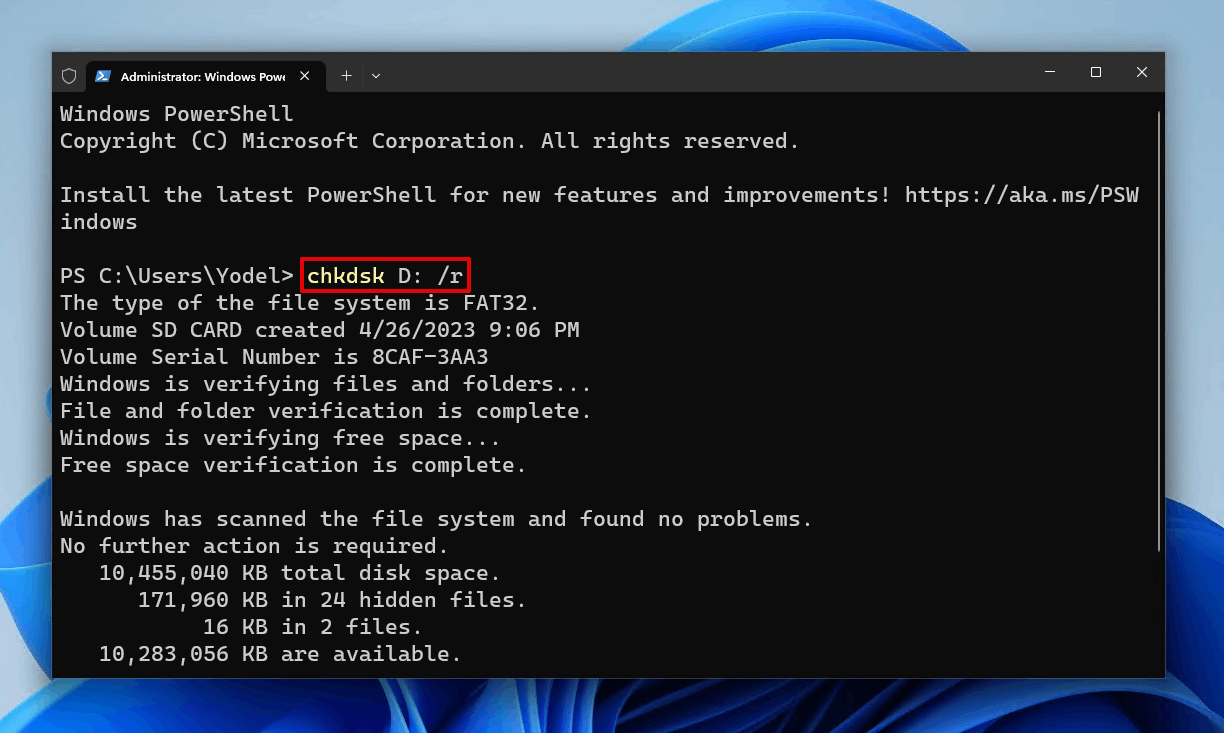
- Type chkdsk *: /r. Replace * with the drive letter assigned to your SD card. Press Enter.
Step 5: Erase and Reset Your SD Card
If none of the steps prior to this have worked, you can always fall back on a full format. Performing a full format is akin to factory resetting your SD card. It will overwrite all sectors, eliminating all corruption in the process. However, this will also delete your data and eliminate any chance of data recovery. Therefore, you should absolutely perform data recovery before this.
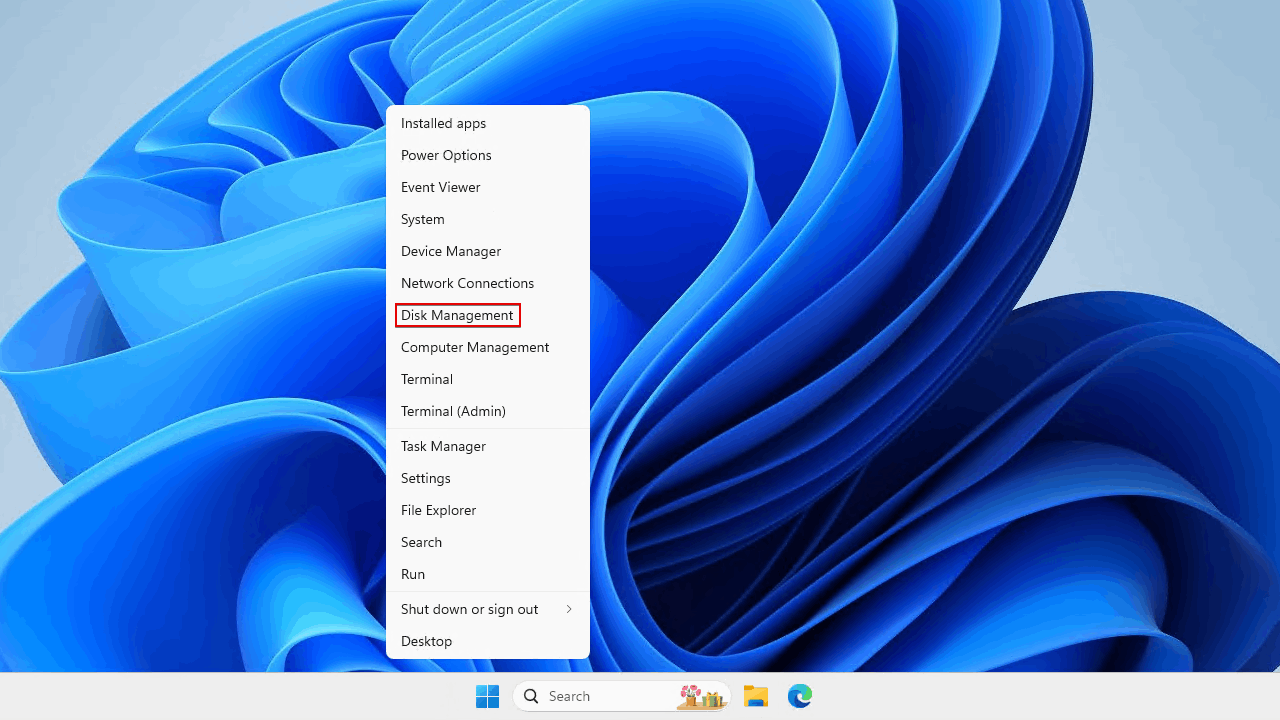
- Right-click Start and click Disk Management.
- Right-click the volume of your SD card, then click Format.
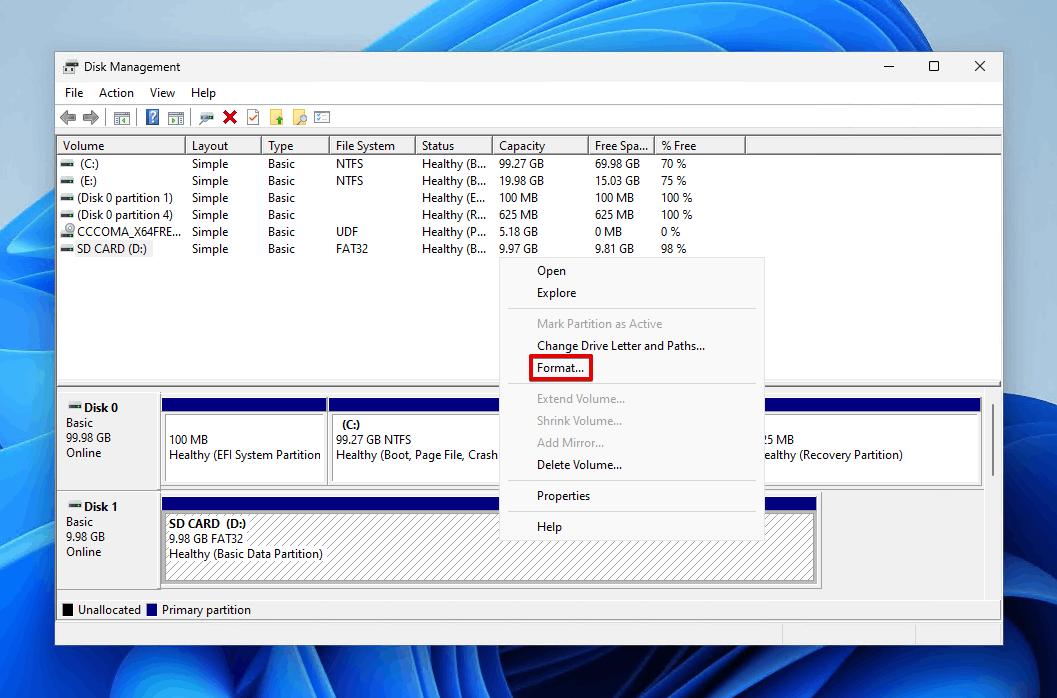
- Specify a volume label and select your file system. Make sure Perform a quick format is unticked, then click OK.

- Click OK to confirm the format.
Frequently Asked Questions
Why did my pictures disappear from my SD card?
There are many possible reasons why your SD card photos disappeared. In case they’ve disappeared due to some form of damage, you should start with data recovery using a data recovery tool to retrieve as much data from the SD card as possible. Then, you can try to fix the issue by reconnecting the SD card, inspecting it for damage, or repairing it with CHKDSK.
Why are pictures on the SD card not showing in Gallery?
When SD card photos don’t show in the Gallery app of your phone, it may be because it shares the same folder as a .NOMEDIA file. When a .NOMEDIA file is present, it prevents apps from indexing the photos inside, so they won’t appear like usual. To stop this, simply delete the .NOMEDIA file. If the files are still not there at all, you should recover the photos from your microSD card as soon as possible.
How to find photos on an SD card?
Plug your SD card into your computer. You can then open it using File Explorer and either manually search for your data or use the search function. On Android, use a file manager app like Files or My Files to browse for photos. To find your SD card’s lost photos, use a data recovery tool to scan the SD card and recover the photos.
How to recover SD card lost photos?
You can easily recover lost photos from your SD card using data recovery software like Disk Drill:
- Download and install Disk Drill on your PC.
- Connect the SD card to your computer.
- Select the SD card from the list of devices, then scan it.
- Review the scan results and mark the lost photos for recovery.
- Choose a suitable location to recover the lost photos.
How to recover photos that disappeared from an SD card on Android?
If your photos disappeared from your SD card on Android, it may be due to the presence of a .NOMEDIA file. If a file with the extension .NOMEDIA is in the same folder as your photos, media viewing apps will not show the photos in that folder. To fix this, simply delete the .NOMEDIA file and the photos will once again be visible.
Conclusion
Photos that have disappeared from your SD card could either be hidden or deleted. For hidden photos, you can connect your SD card to your computer and manually unhide them through File Explorer. On Android, you can delete the .NOMEDIA file contained in the folder where your photos reside.
If your photos are deleted, you should recover the deleted photos from your SD card as soon as possible. This can also be done for existing data on the SD card that’s hidden, and it’s a much safer option if you’re unsure whether your SD card is damaged or not.
- 46 publishings
- Auckland, New Zealand
Jordan Jamieson-Mane is a content writer with a focus on technology-related content. He has spent much of his life studying and working with all types of technology. During his time as a writer, he has written countless articles in the field of data recovery, breaking down complex topics into articles that are easy to understand.
When he's not writing articles on data recovery, Jordan enjoys traveling the world, reading books, and building websites.
- LC Tech FILERECOVERY Professional Review – Can It Compete with Modern Recovery Tools?
- UFS Explorer Review – A Powerful Recovery Tool With Lots to Offer
- Cisdem Data Recovery for Windows Review – A Capable Copy
- AnyRecover Data Recovery Review – A Polished Solution for Basic Users
- iBoysoft Data Recovery Review: Not Much to Offer
- Frisco, Texas, United States
Yevgeniy Tolkunov is Hardware Engineer at ACE Data Recovery. Yevgeniy has a Master's Degree in Physics, Information Technology; 15+ years of experience.