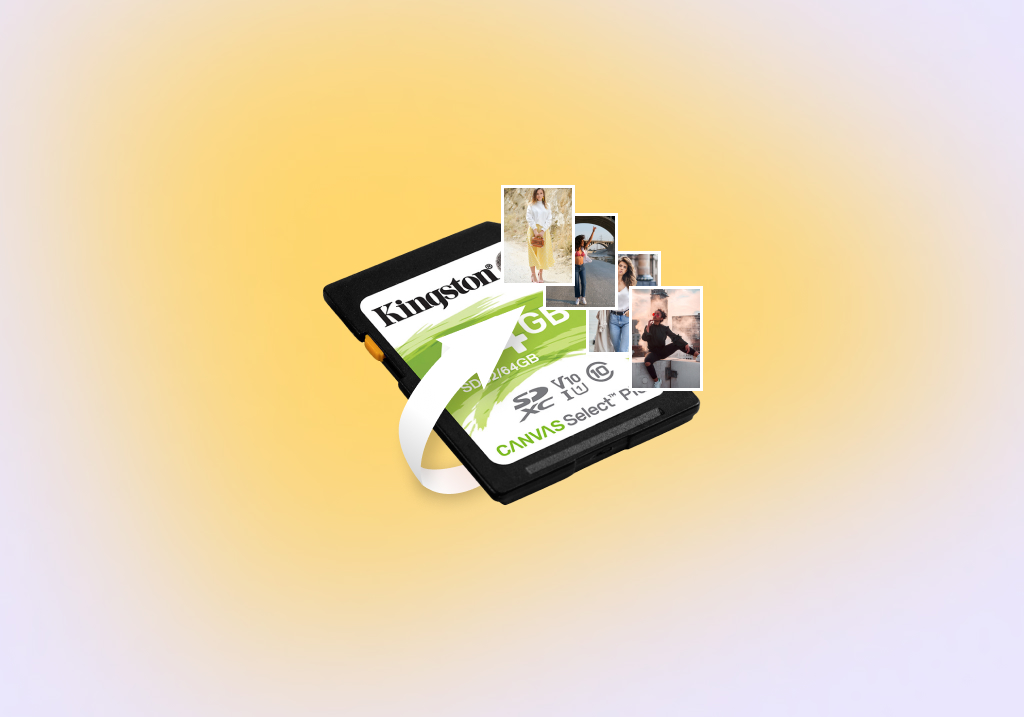
How to Recover Deleted Photos From SD Card
Photographs are frozen moments of time, and it’s frustrating when they get deleted. Well, there is some light at the end of the tunnel because it’s possible to recover deleted photos from SD Card.
This article throws light on recovering deleted images from SD Card – using a Windows, Mac, or Linux PC, and even Android smartphones.
Covering the Absolute Basics
Here are some pretty straightforward tips that we don’t consider to be full-fledged “data recovery techniques.” Still, it’s worth giving them a shot:
Check the Recycle Bin
An absolute no-brainer, right? Nevertheless, many people push the panic button before giving the Recycle Bin a glance.
The Mac and Windows PCs have the Trash can and Recycle Bin, respectively. Additionally, some Android phones have a native “recycle” feature as well.
Look for Backups
You never know! Your Google Photos or iCloud account might have an auto backup instance turned on.
Search through your cloud-hosted accounts for any possible backups. If you do find any, you just struck gold! If not, we got you covered!
Recover Deleted Photos from SD Card: The PC Guide
There’s a myriad of PC data recovery tools, but our technical team particularly like Recuva because:
- The UI is a breeze.
- The features are quite robust.
- Photo recovery is possible on the free version.
Here’s a stripped-down how-to on recovering deleted SD-Card photos using Recuva:
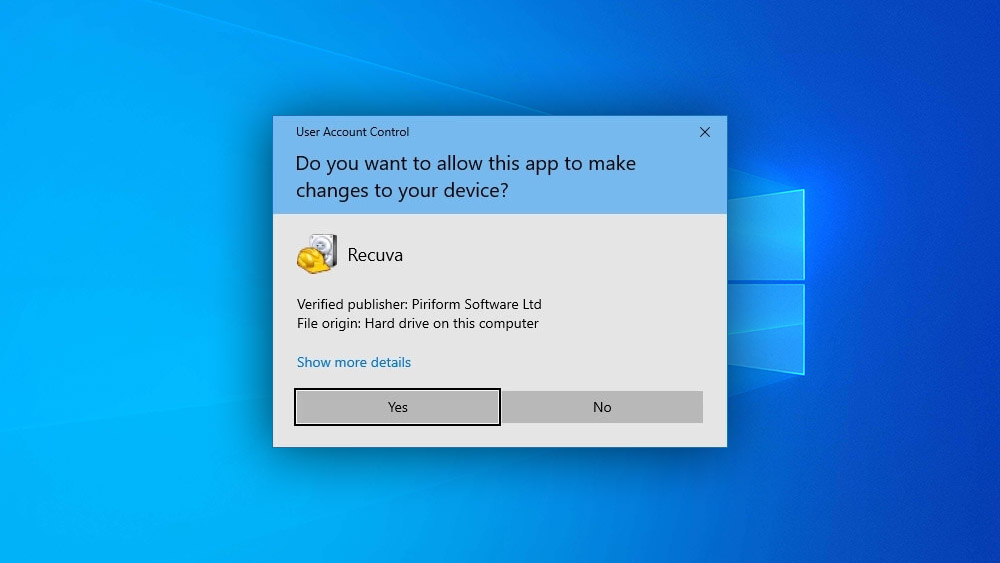
Step 1. Download, Install and run the application.
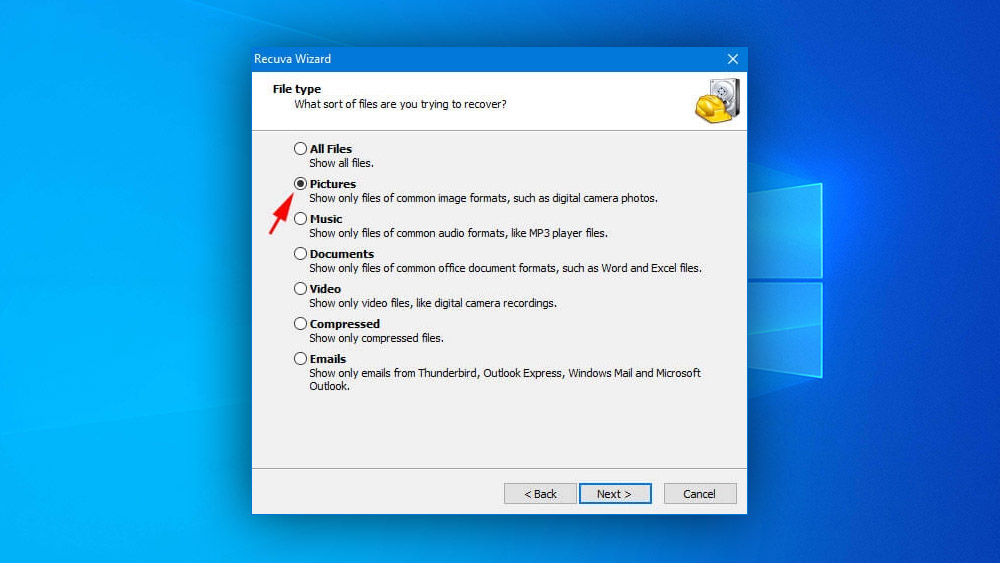
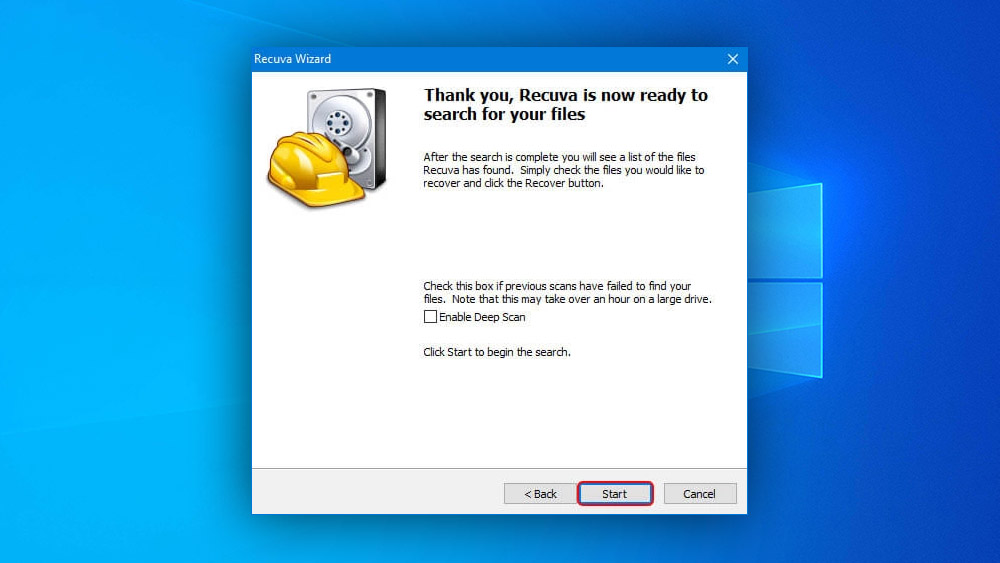
Step 2. Answer the questions that pop up on the Rescue Wizard:
- File Type – Click on Pictures.
- File Location – Click on the most appropriate option.
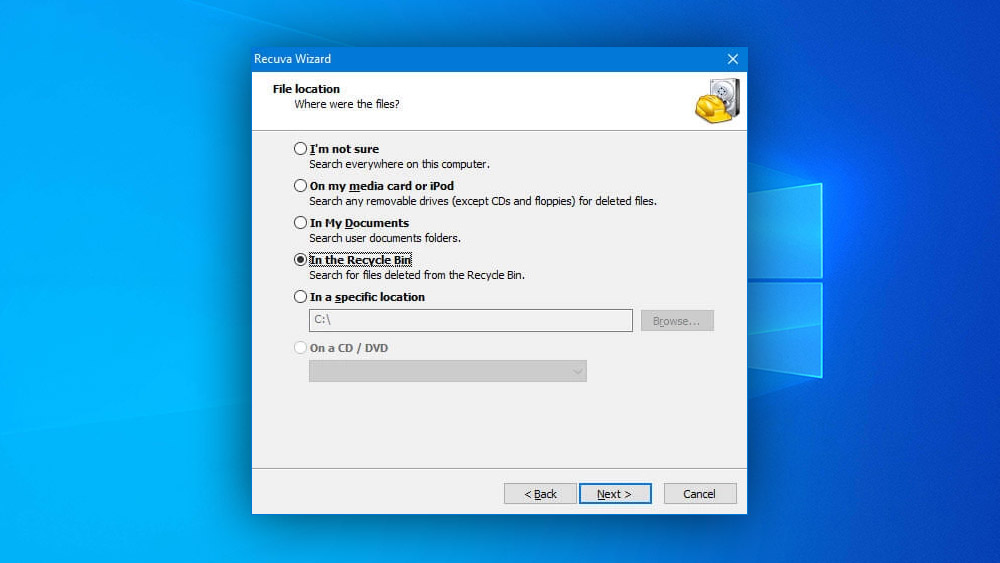 If you are unsure about this answer, you can go ahead and click on “Cancel” to skip straight to Recuva’s scan page.
 - Recuva is all buckled and ready to help you find your deleted photos! Upon clicking on “Start,” you enter the scan page of Recuva.
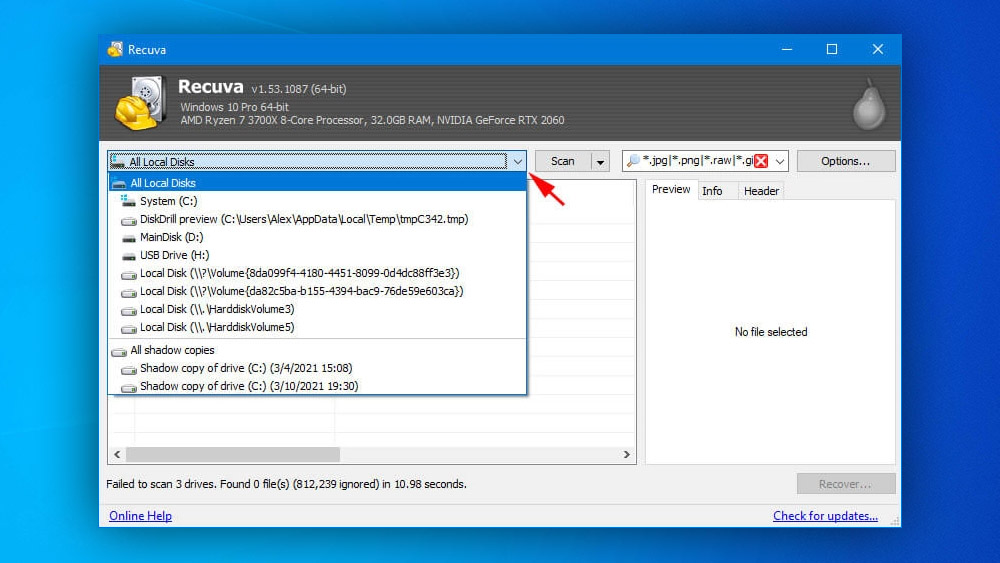
Step 3. Select the drive (from the drop-down) on which you want Recuva to scan and retrieve photos – SD Card in this case.
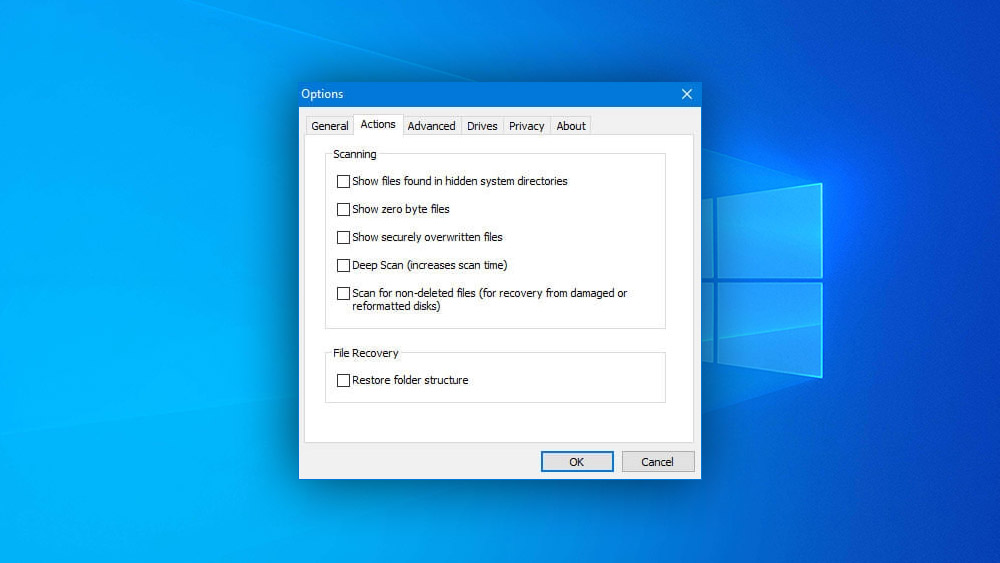
Step 4. Click on Options and go to the “Actions” tab that reveals a bunch of options.
Step 5. Click on “scan” to initiate the scan sequence, and the tool pulls up a list of “recoverable” pictures.
Step 6. Now, check the files you wish to retrieve and click on the “Recover” button.

Step 7. Determine the location for saving the retrieving files from the File Location dialog box.
Step 8. Now, Recuva transfers all the recovered files to the destination location.
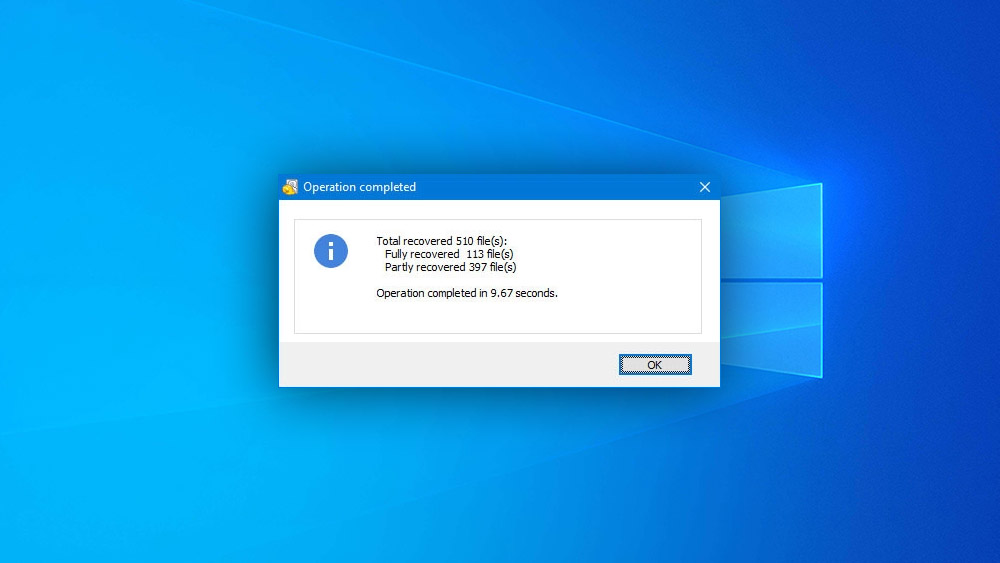
Step 9. Recuva generates a mini scan summary. Click on “OK.”
Step 10. Go to the destination folder and check if you can open the recovered photos.
Weighing the Pros and Cons
Pros
- Comes in both portable and installable versions.
- Fast installation, scan, and recovery speeds.
- The free version permits photo recovery.
Portable applications don’t require conventional installation procedures. You can run such applications straight from a USB drive – thus reducing the chances of any overwriting (which is prone to happen while installing applications on the affected hard drive).
Cons
- Comes in both portable and installable versions.
- Fast installation, scan, and recovery speeds.
- The free version permits photo recovery.
Recuva’s pros outweigh the cons. All in all, it’s our go-to tool for SD Card photo recovery on a Windows PC.
Recover Deleted Photos from SD Card: The Mac Guide
The data recovery market for Mac is no less competitive, with several experienced players stealing the limelight. However, Disk Drill slightly pips out the rest of the competition thanks to the following highlights:
- A genuinely DIY (Do-it-yourself) data recovery app with elementary steps for scan and recovery.
- Multiple scanning algorithms cover numerous data loss scenarios.
- Wide variety of supported digital photo formats ranging from JPEG, JP2, GIF, TIFF, PSP to even Raw DSLR files.
Here’s how you can get started on Disk Drill, and yes, the free version does recover deleted photos from SD Card:
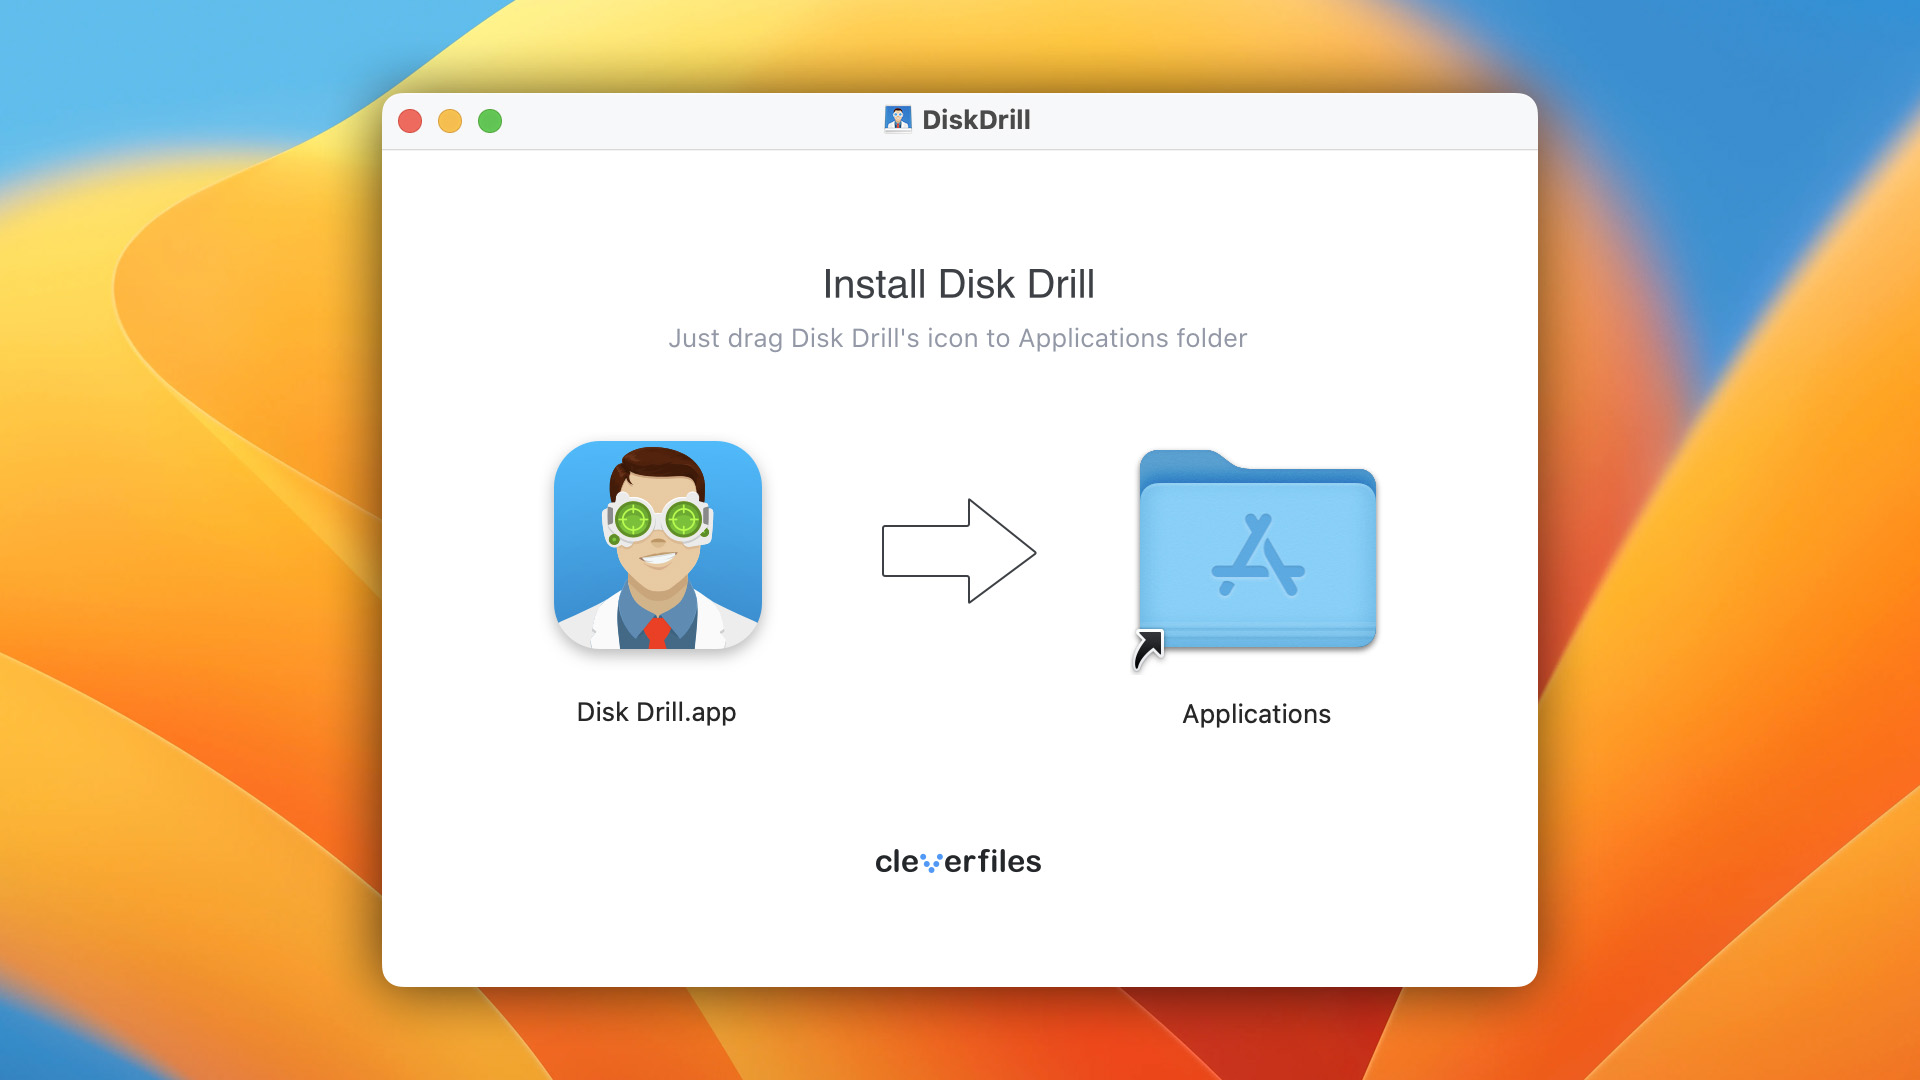
Step 1. Download and install the Mac version of Disk Drill. To install, drag the installation file into the Applications folder.
Step 2. Grant Access
- Before initiating any photo recovery process, you must grant Disk Drill full unrestricted disk access. This step is critical as Apple imposes certain restrictions.
- To do so, head over to System Preferences and select “Security & Privacy:”
- In the Privacy tab, click on the Lock Icon (marked in screenshot).
- On the left pane, click on Full Disk Access.
- Drag and drop the Disk Drill application into this Full Disk Access list.

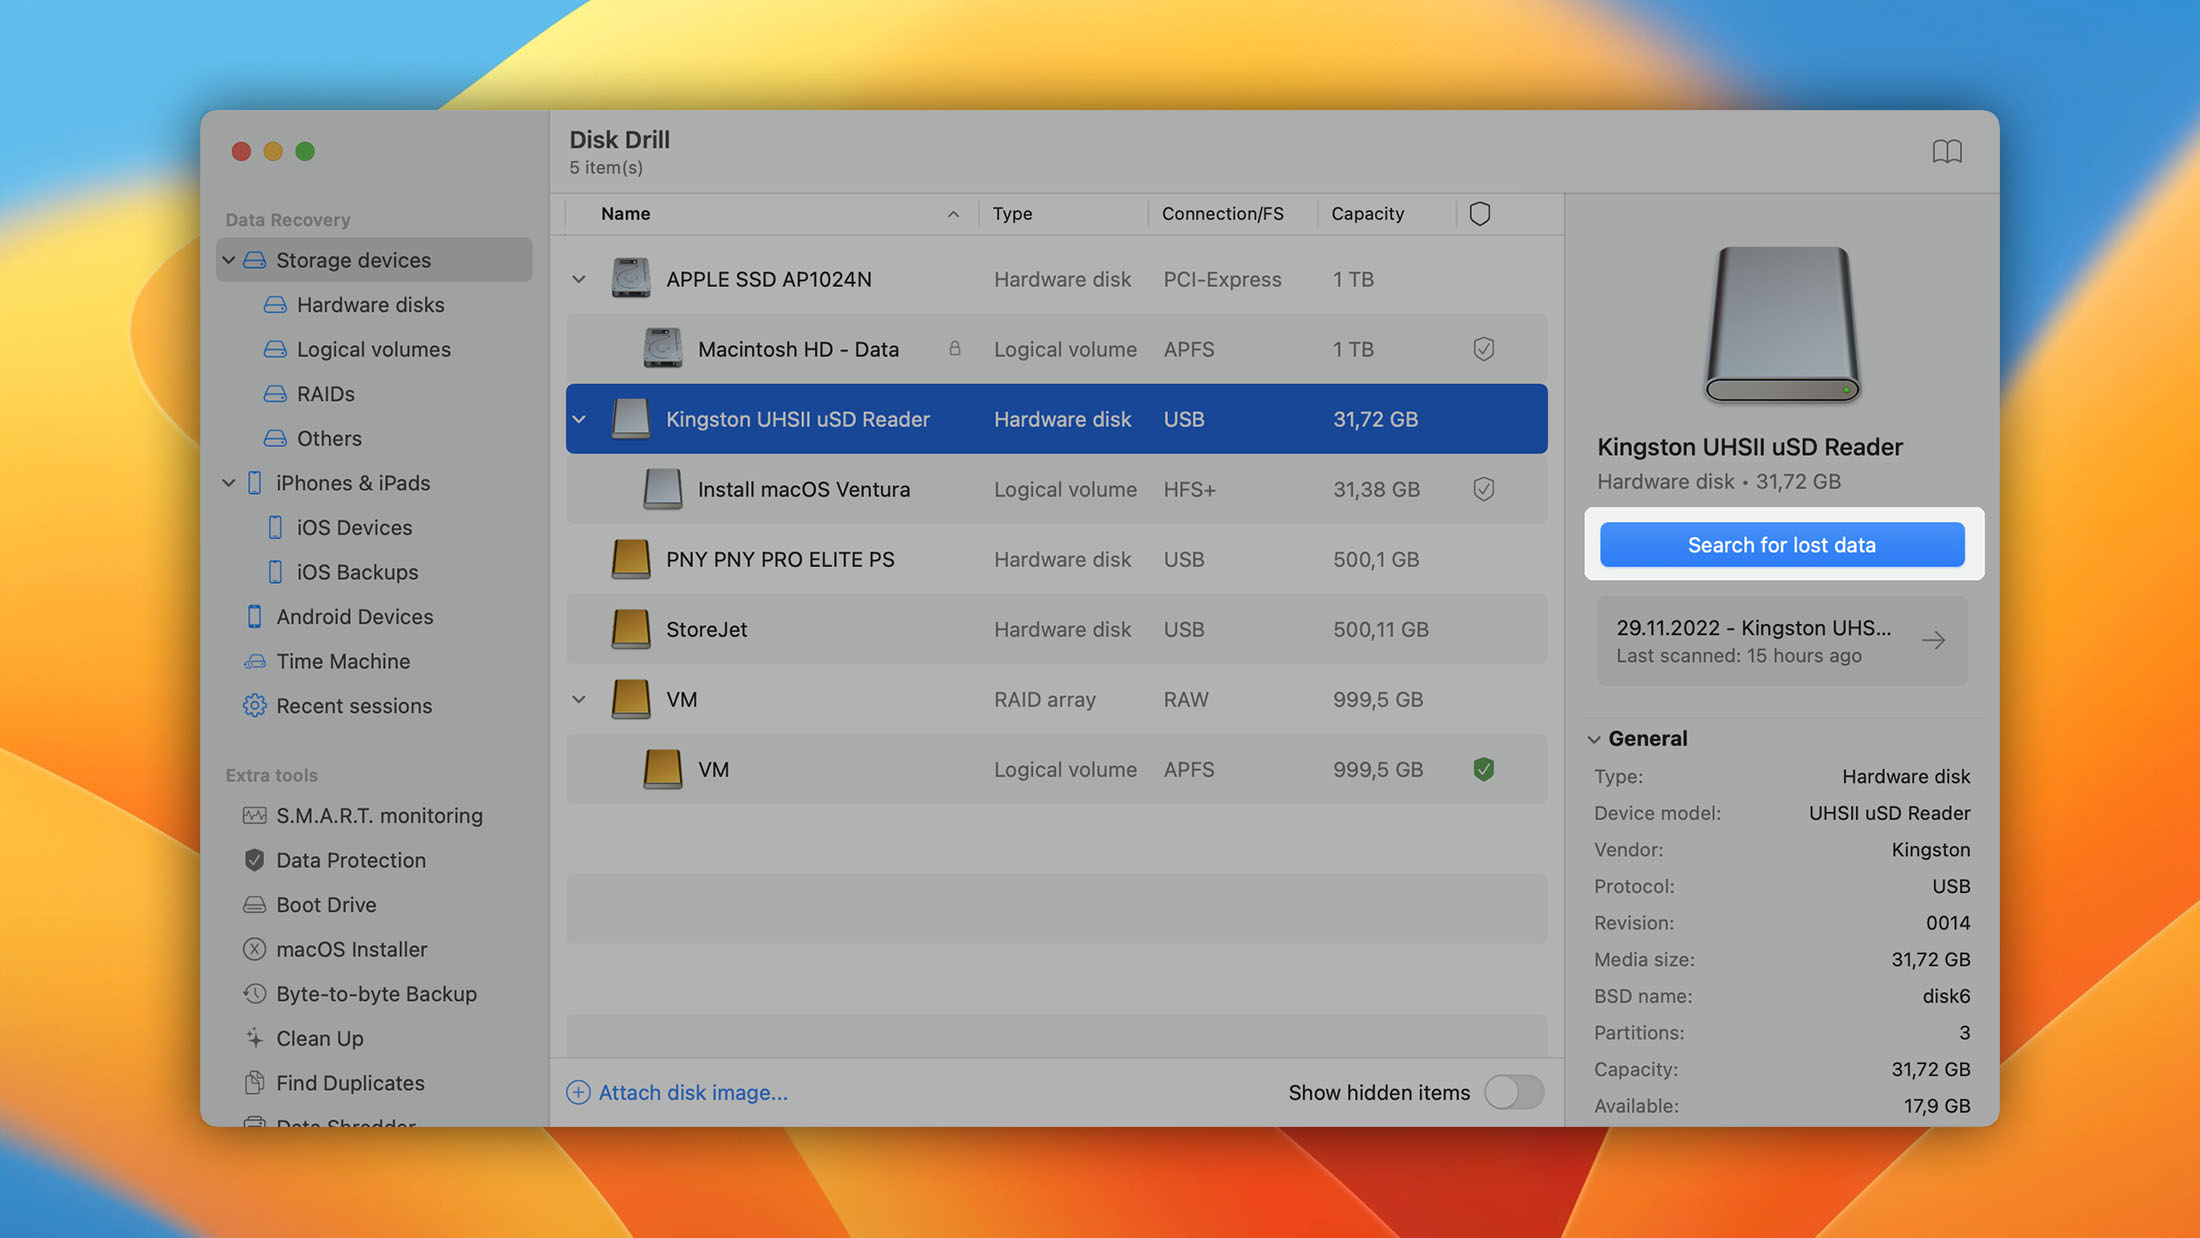
Step 3. Run Disk Drill
- Launch Disk Drill and select the storage device you would like to scan – SD Card, for instance.
- Click on “Search for lost data”.
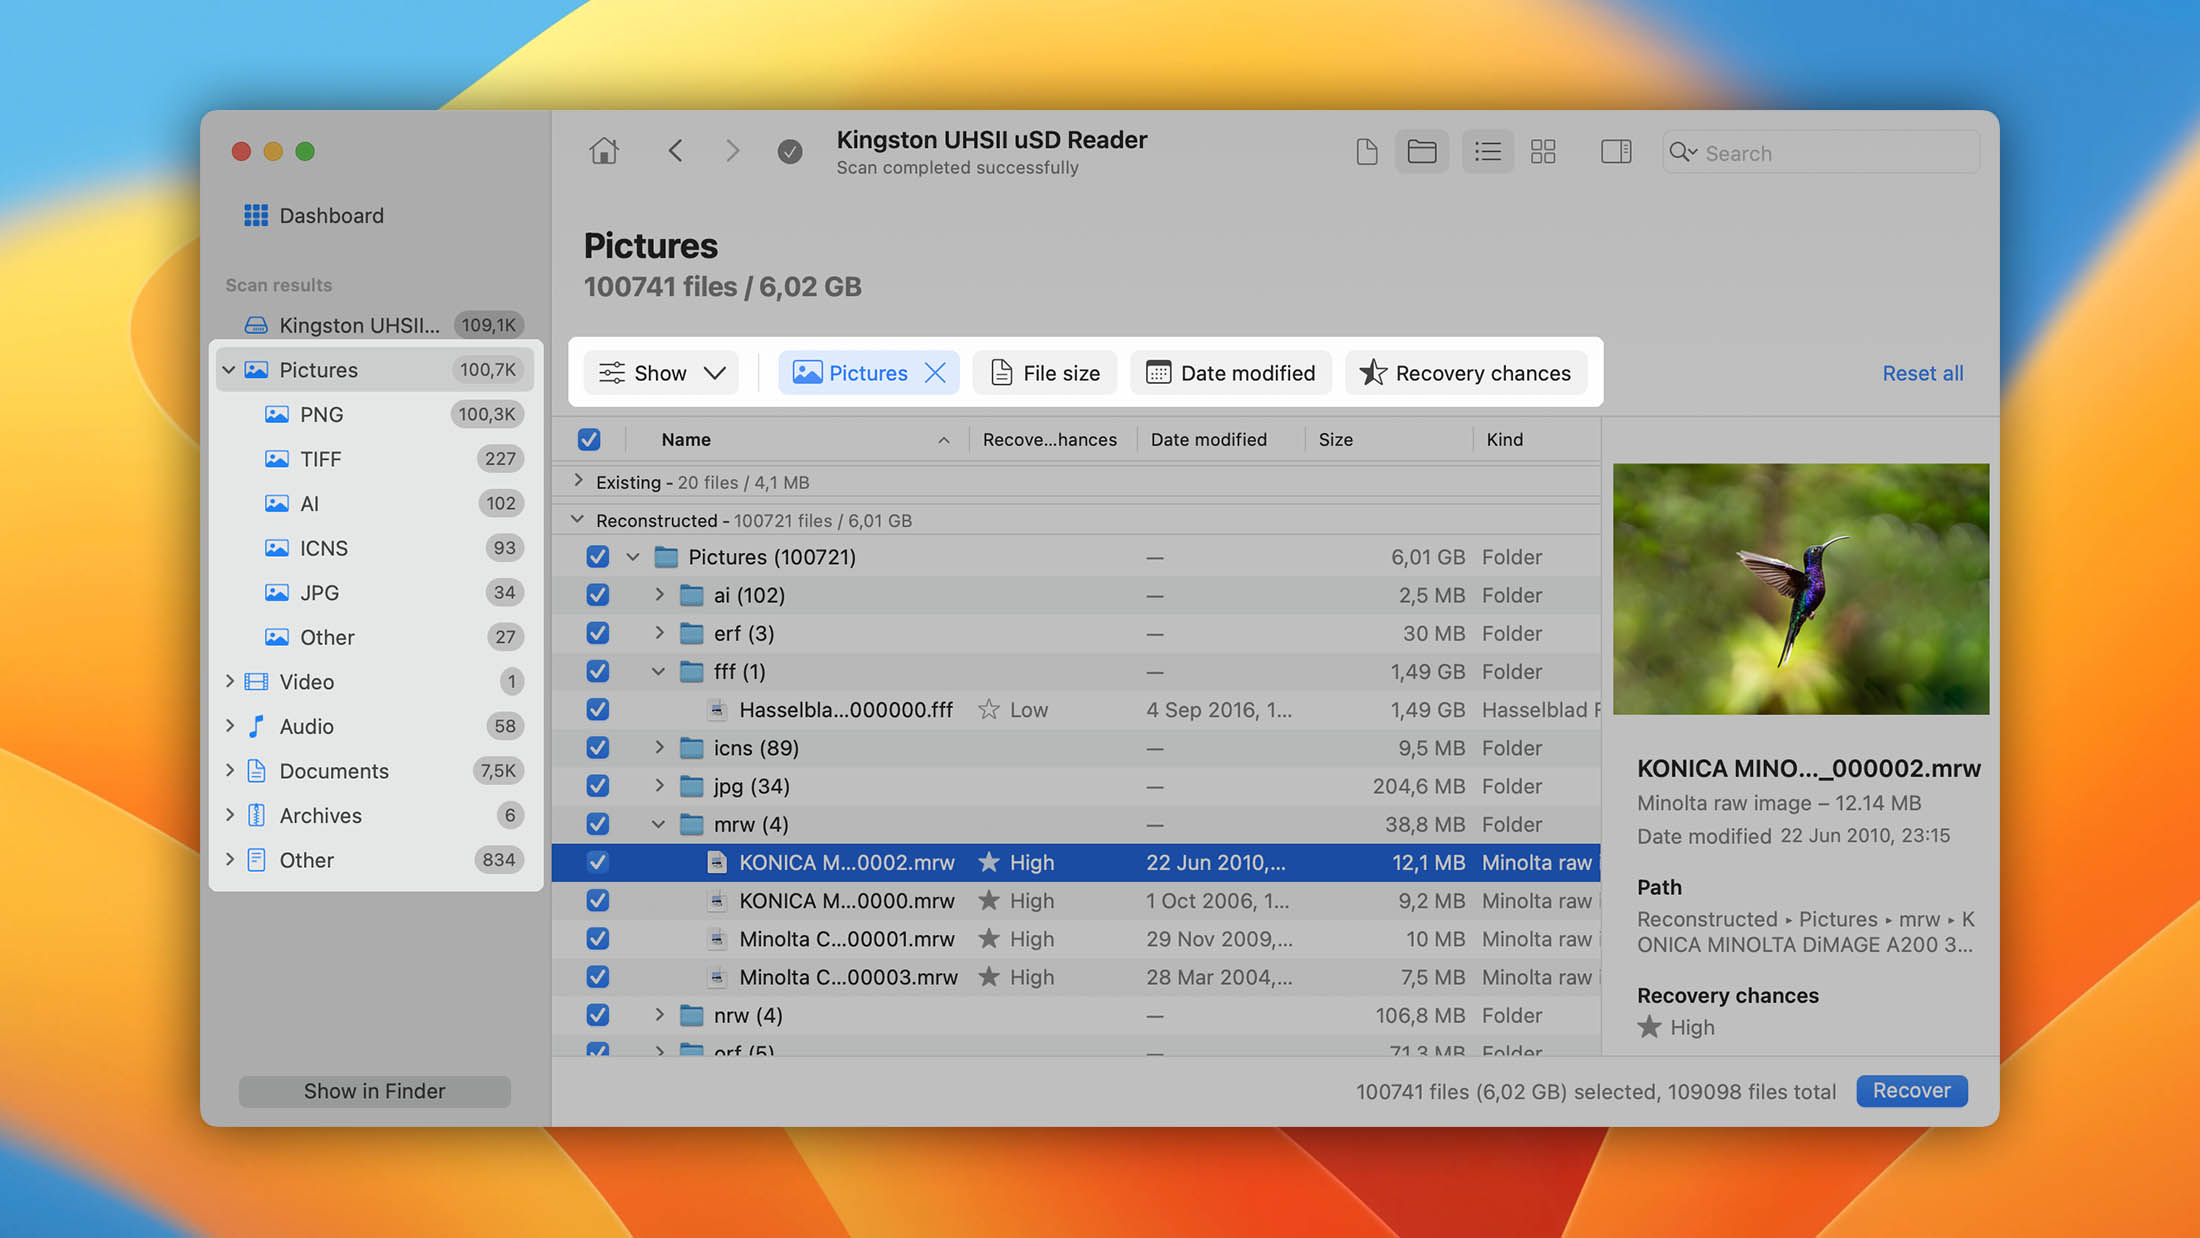
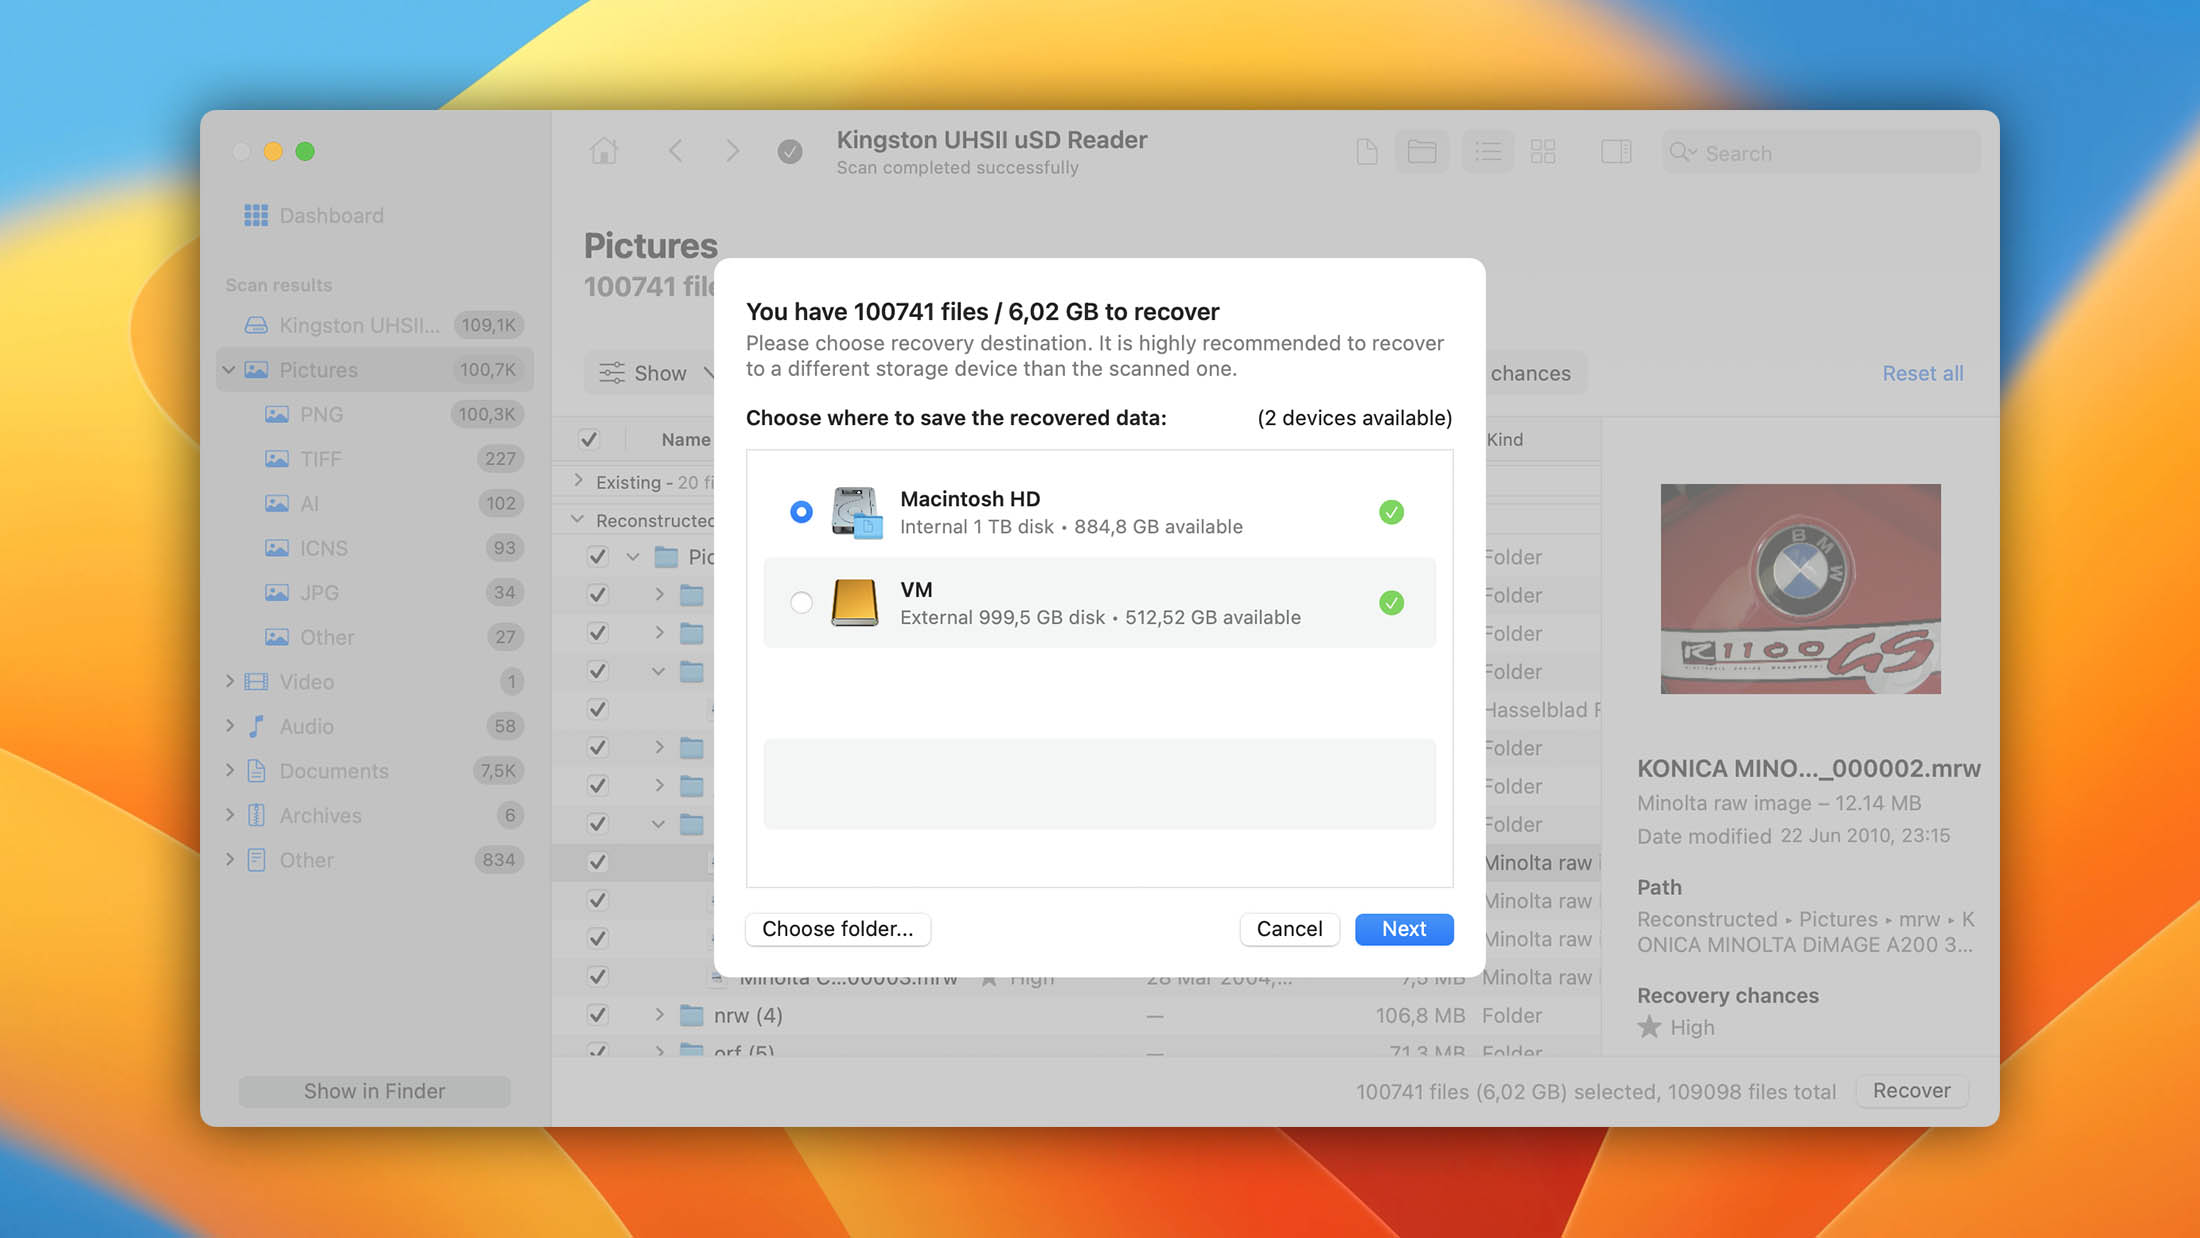
Step 4. File Preview and Selection for Recovery
Once Disk Drill completes scanning, all recoverable files are displayed on the screen. Now, you can select the files you wish to retrieve and click on the “Recover” button.
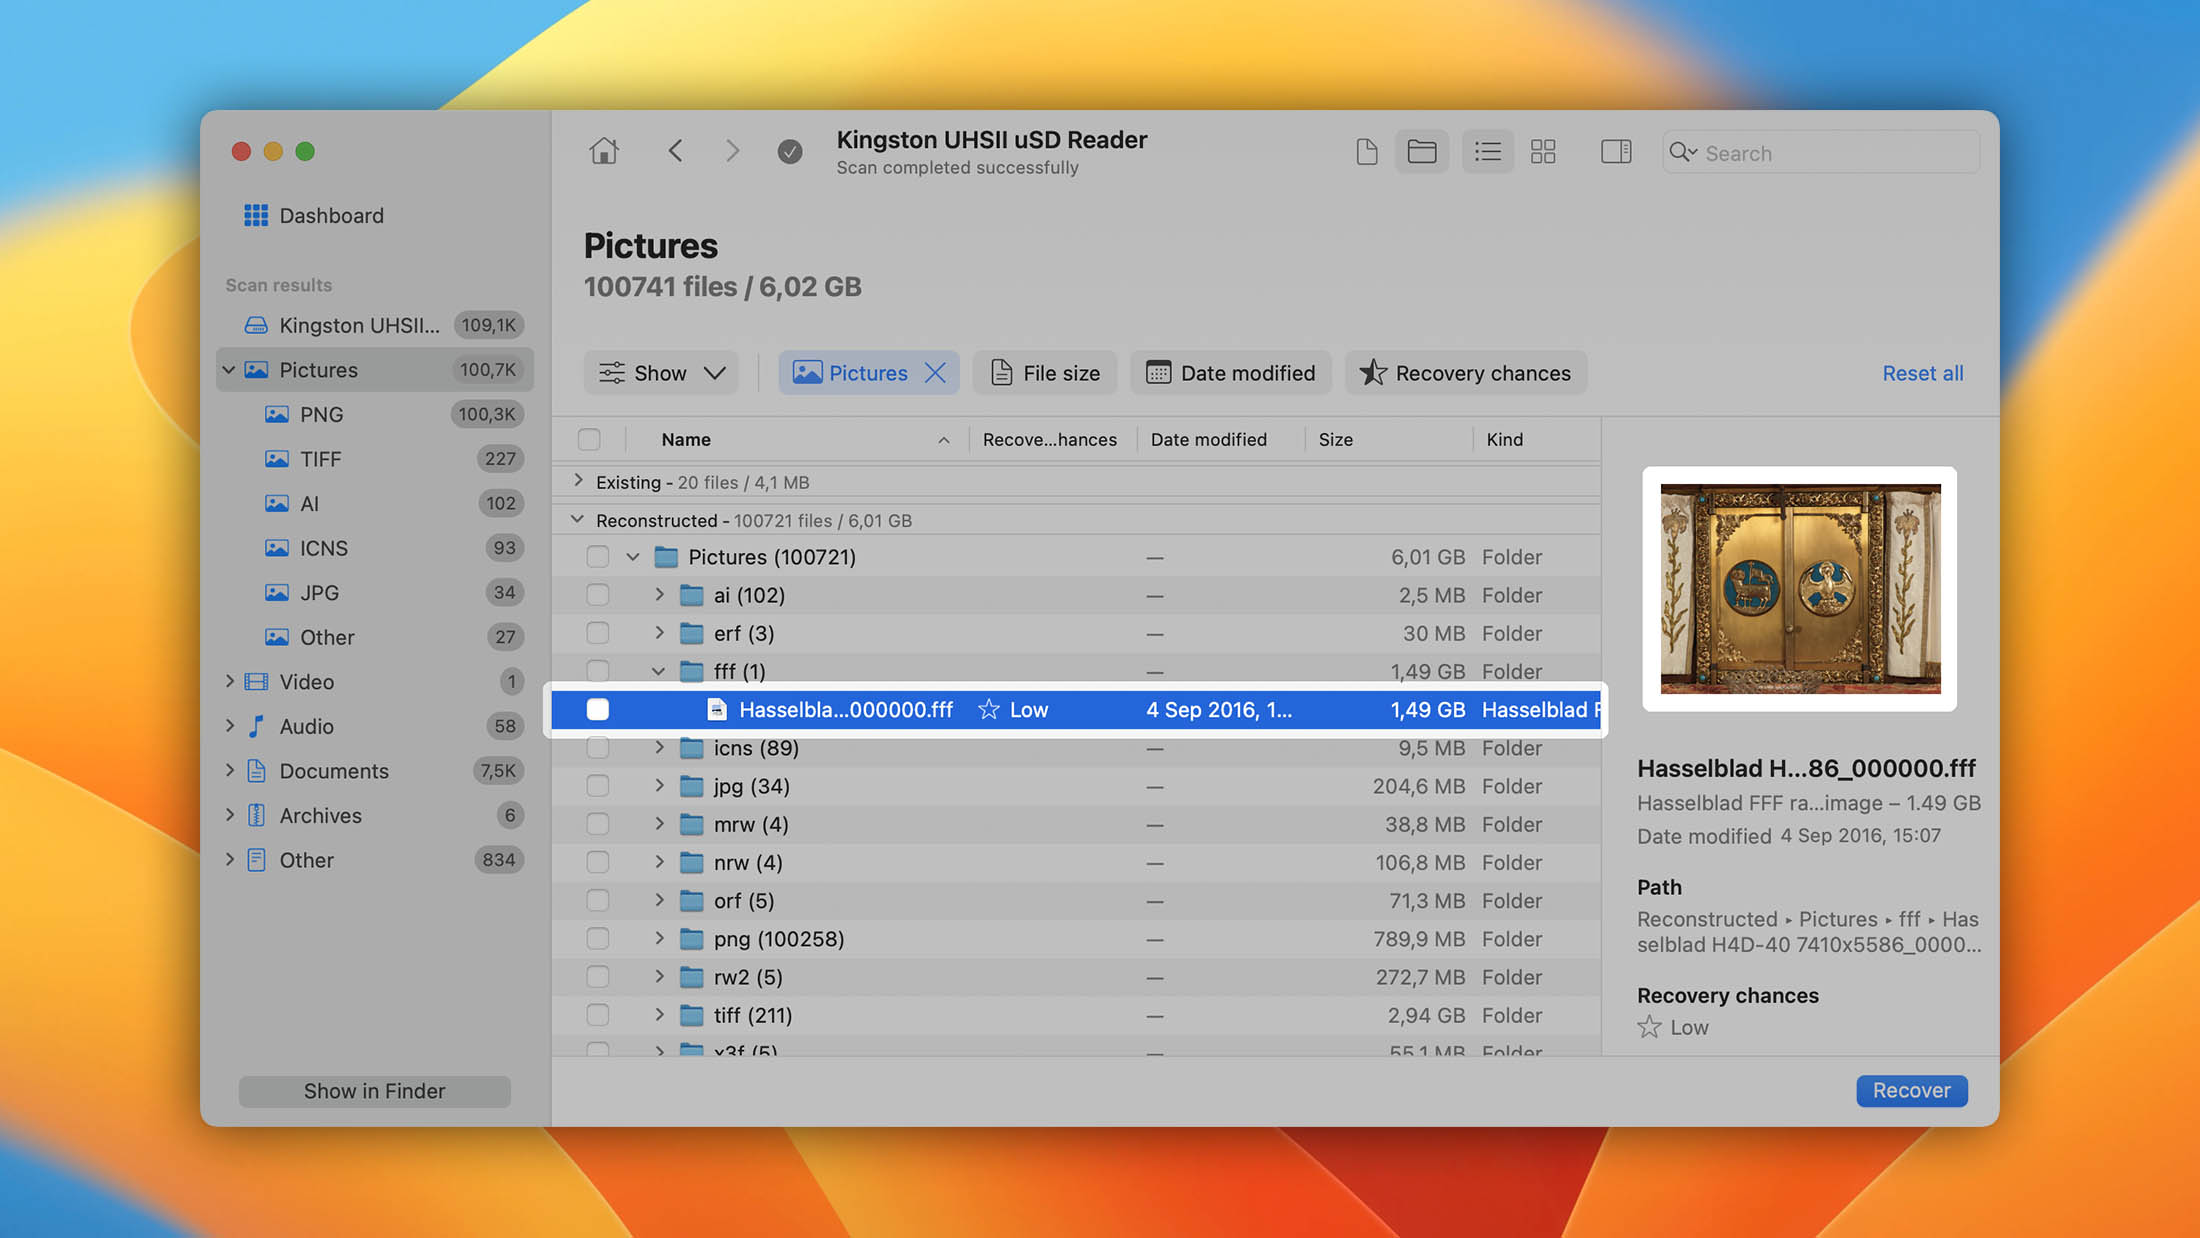
You can utilize the filters available in the toolbar for narrowing down search results. In case you are interested in only recovering photos, click on “Pictures” from the left pane.
Step 5. Select the Recovery Location
- You have to specify the destination for saving the recovered files and click on “OK.”
- In the case of an SD Card, do not select the memory card as the destination as you might end up overwriting the very files you just recovered. Instead, save these files to a USB flash drive or your Mac.
Weighing the Pros and Cons
Pros
- The UI is a breeze.
- Search files by name.
- A preview of scanned files is available.
Cons
- The free version only permits 500MB of data recovery (Windows version).
In a nutshell, Disk Drill is a simple app that packs a good punch on the Mac front – when it comes to SD Card photo recovery.
Recover Deleted Photos from SD Card: The Linux Guide
Well, we covered Windows and Mac, and we aren’t going to abandon the Linux users. PhotoRec is a standout data recovery tool for Linux because of the following reasons:
- PhotoRec pays no regard to the file system. As a result, it can recover even severely damaged files.
- Caters to all memory cards’ nuances (Memory Stick, CompactFlash, MMC, SD, etc.)
- Completely free tool.
Here’s how you can get started with PhotoRec:
Step 1. Install
- To install, run this command: sudo apt -y install testdiskThe above command works only in the Ubuntu distribution of Linux. Here’s a list of commands for some of the other distros.
- Once the setup completes, download and launch the PhotoRec application using this command: sudo photorec
Step 2. Run PhotoRec and Recover Deleted Photos
- To simplify the scanning process, before running the command, ensure you are navigated to the target directory (on which recovery is to be done).
- Now, select the hard drive you wish you run the recovery process on, and hit Enter. In the case of an SD Card, you might have to select something like “Disk dev/sda2 – 32 GB Samsung”.
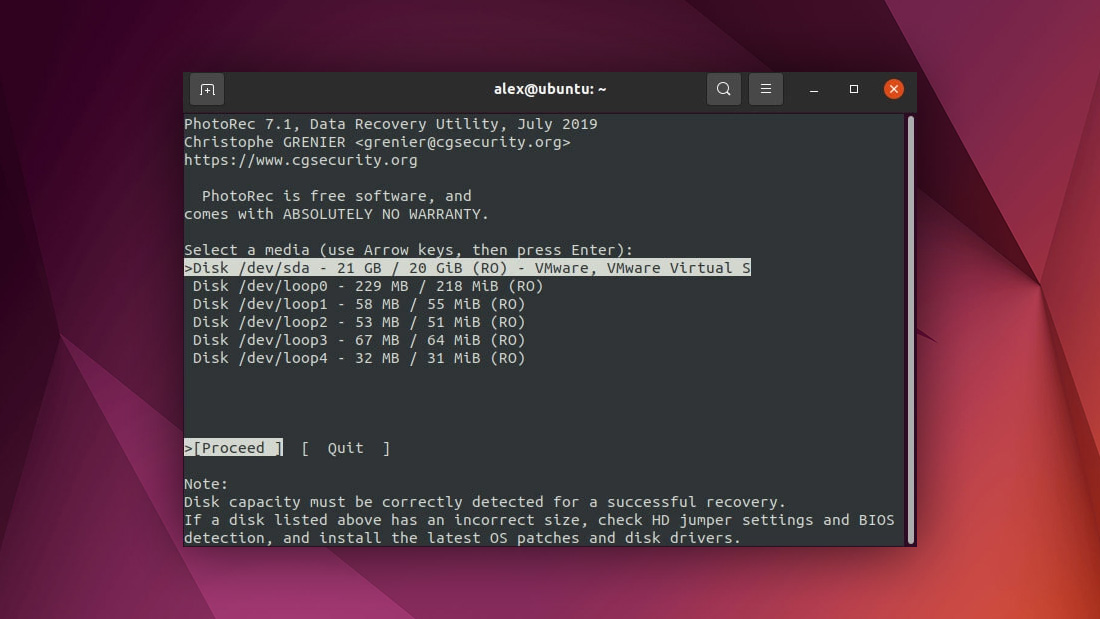 Ensure that you have inserted the SD Card or a card reader into the computer before trying to locate the memory card.
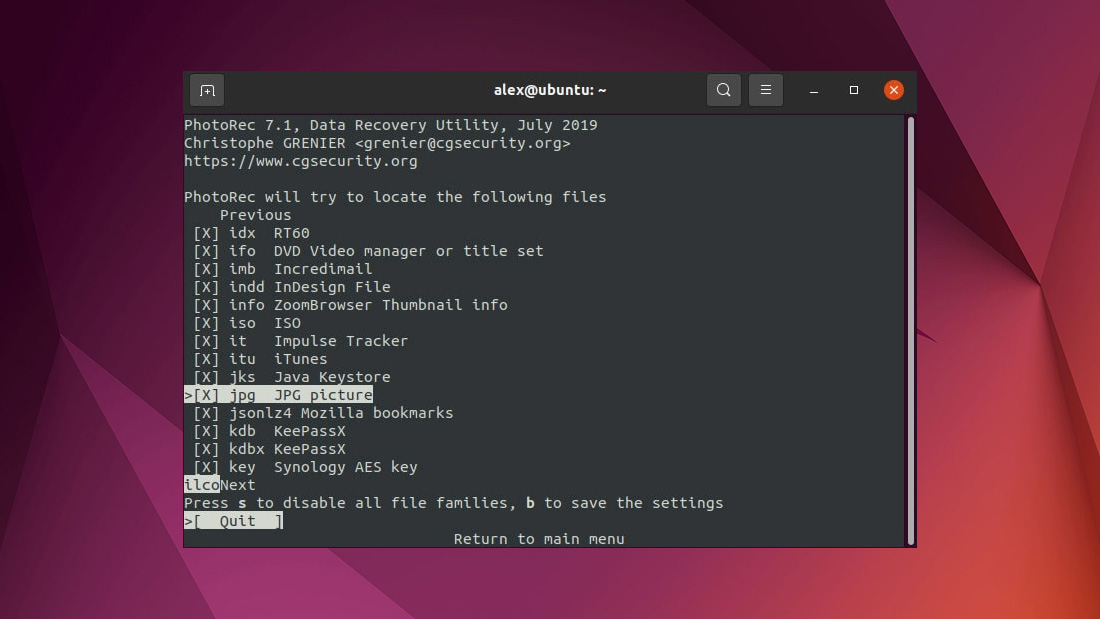
 - The next step is to select the type of files you would like to recover. Using the arrow and “Enter” keys, select a photo format:
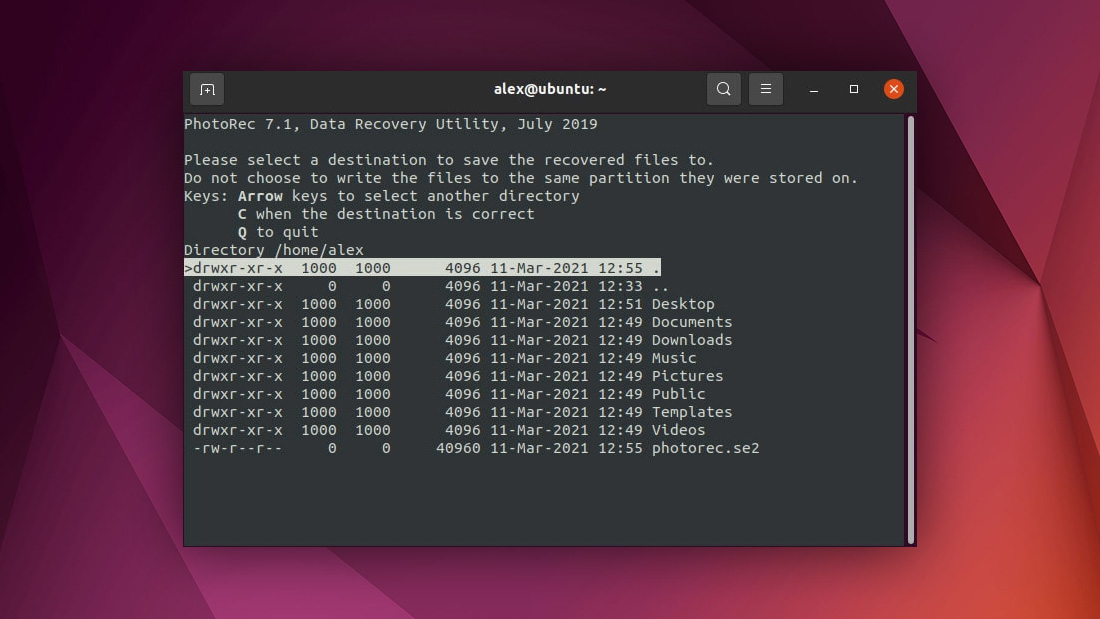
- Now is when you specify the destination for saving the recovered photos. Hit “Y” if you are OK with the files getting saved in the home folder.
- To exit the PhotoRec tool, key in the command “Kill,” and you’re out.
Weighing the Pros and Cons
Pros
- Completely free and open source.
- Ideal for quick SD Card photo recovery.
- Caters to a wide range of photo-types.
Cons
- The entire UI is based in a terminal or console-like environment. Therefore, it’s not user-friendly, especially for first-timers.
PhotoRec fares pretty high for a free tool considering the end result – which is reliable photo recovery.
Recover Deleted Photos from SD Card: The Android Guide
Well, guess what? You don’t need a computer at all to recover deleted photos from an SD Card!
First, you must assess your options: If you have access to a computer, then feel free to explore the other “guides” in this article, depending on your OS. However, if you would like to install an application on your Android device for photo recovery, read along.
We love DiskDigger because it’s a relatively straightforward application that does what it promises: recover photos.
Here’s a quick laser walkthrough of the DiskDigger Android application:
Step 1. Install
To install, head over to the Google Play Store, search for DiskDigger, and press on “Install.”
Step 2. Scan
- Upon launching the application, choose Basic scan.
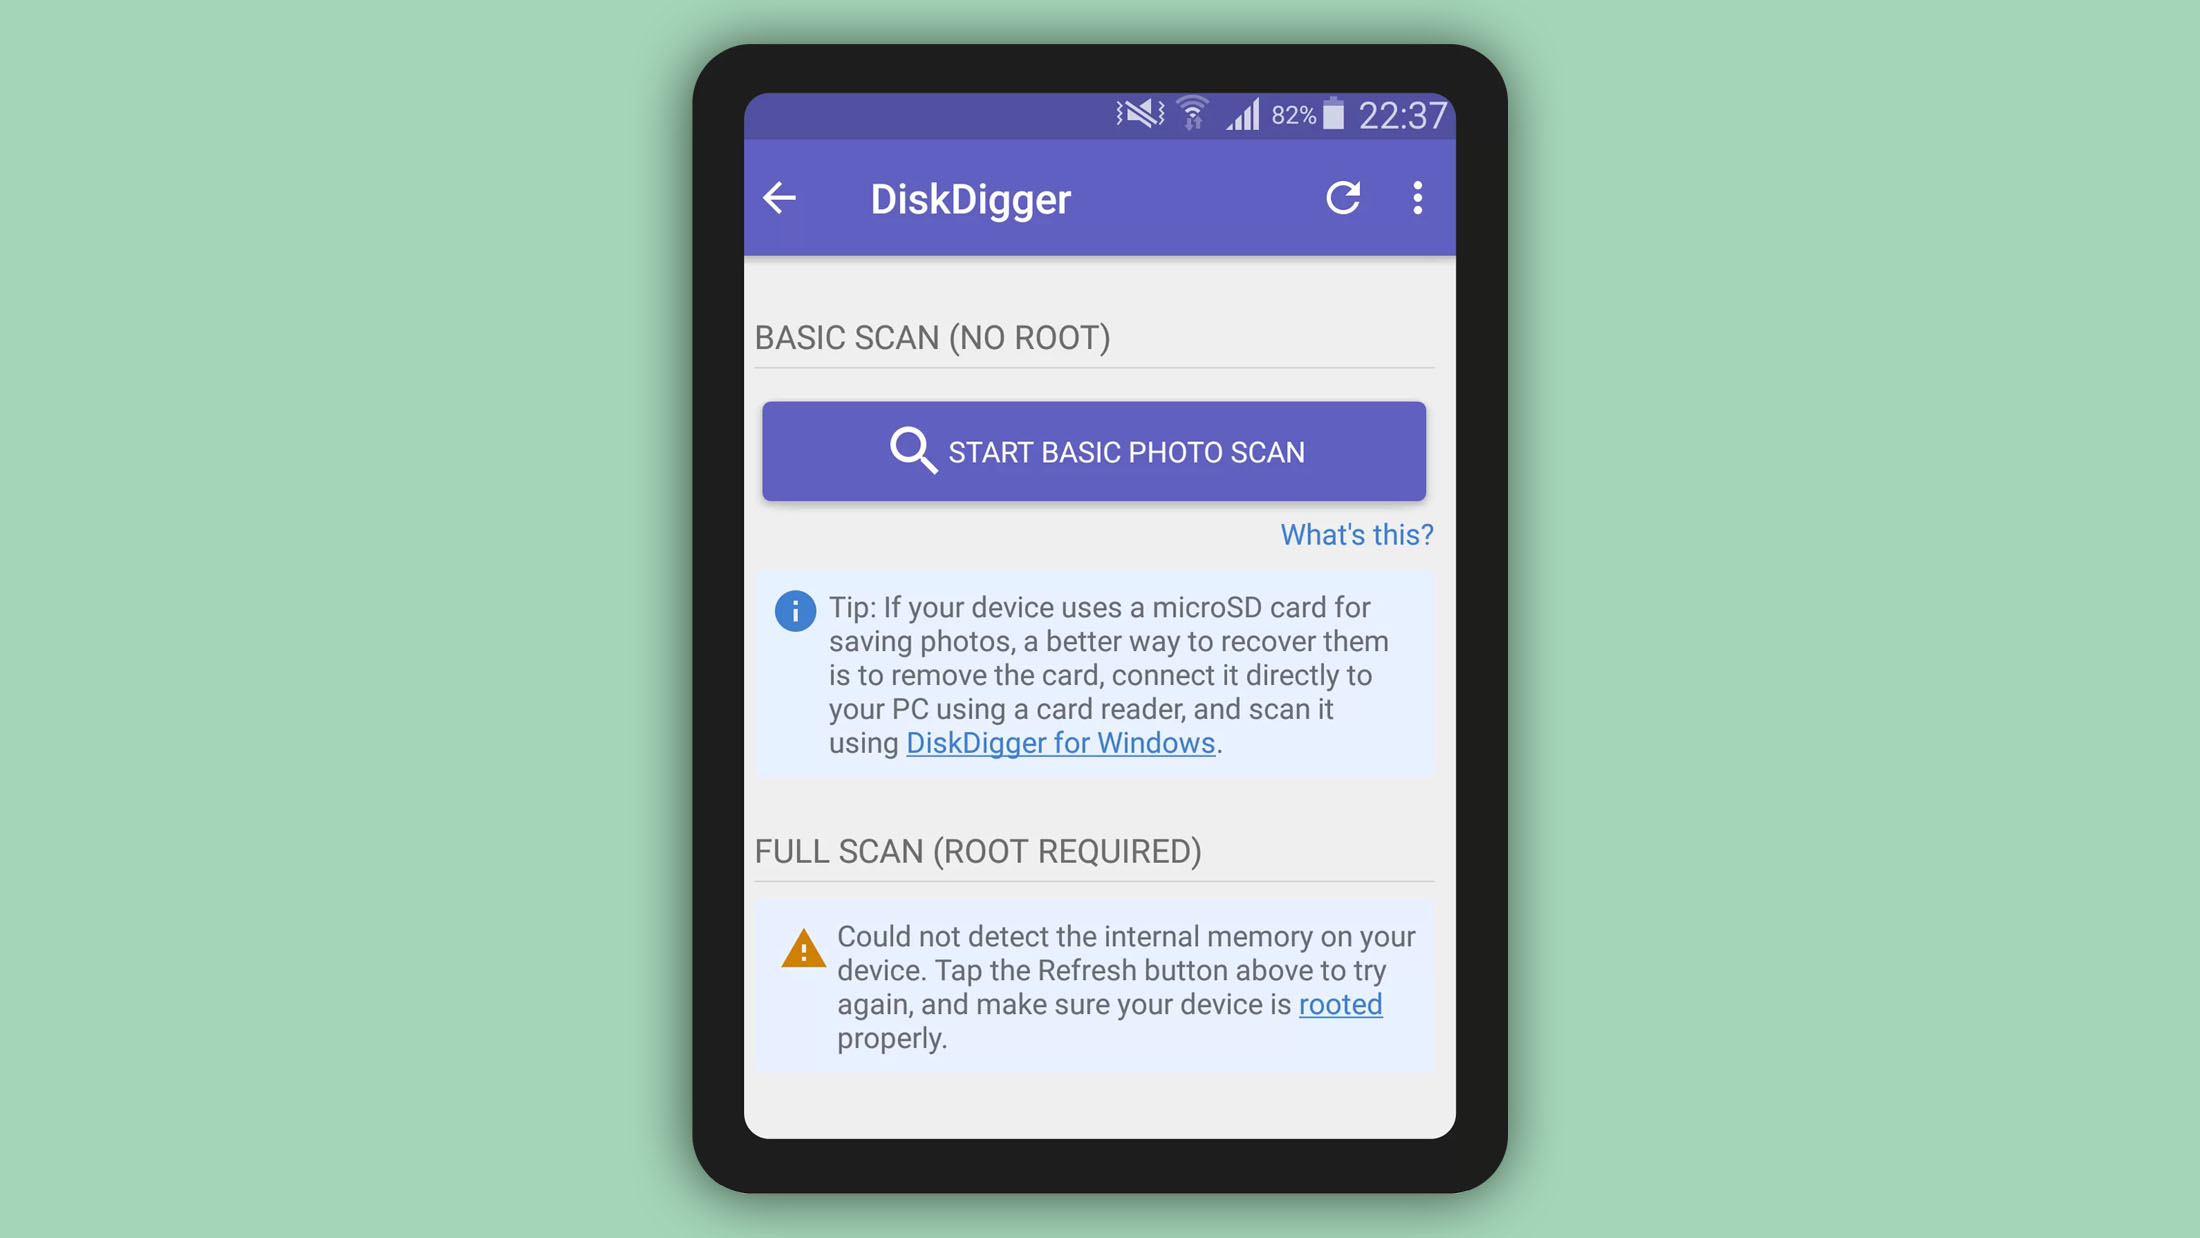 On a rooted device, you can choose the memory partition for conducting the photo recovery. “/data” represents the device’s internal memory, and an SD card usually manifests itself as “/mnt/sdcard”.The “full scan” feature is available only for rooted devices.
 - Click on “start basic photo scan.”
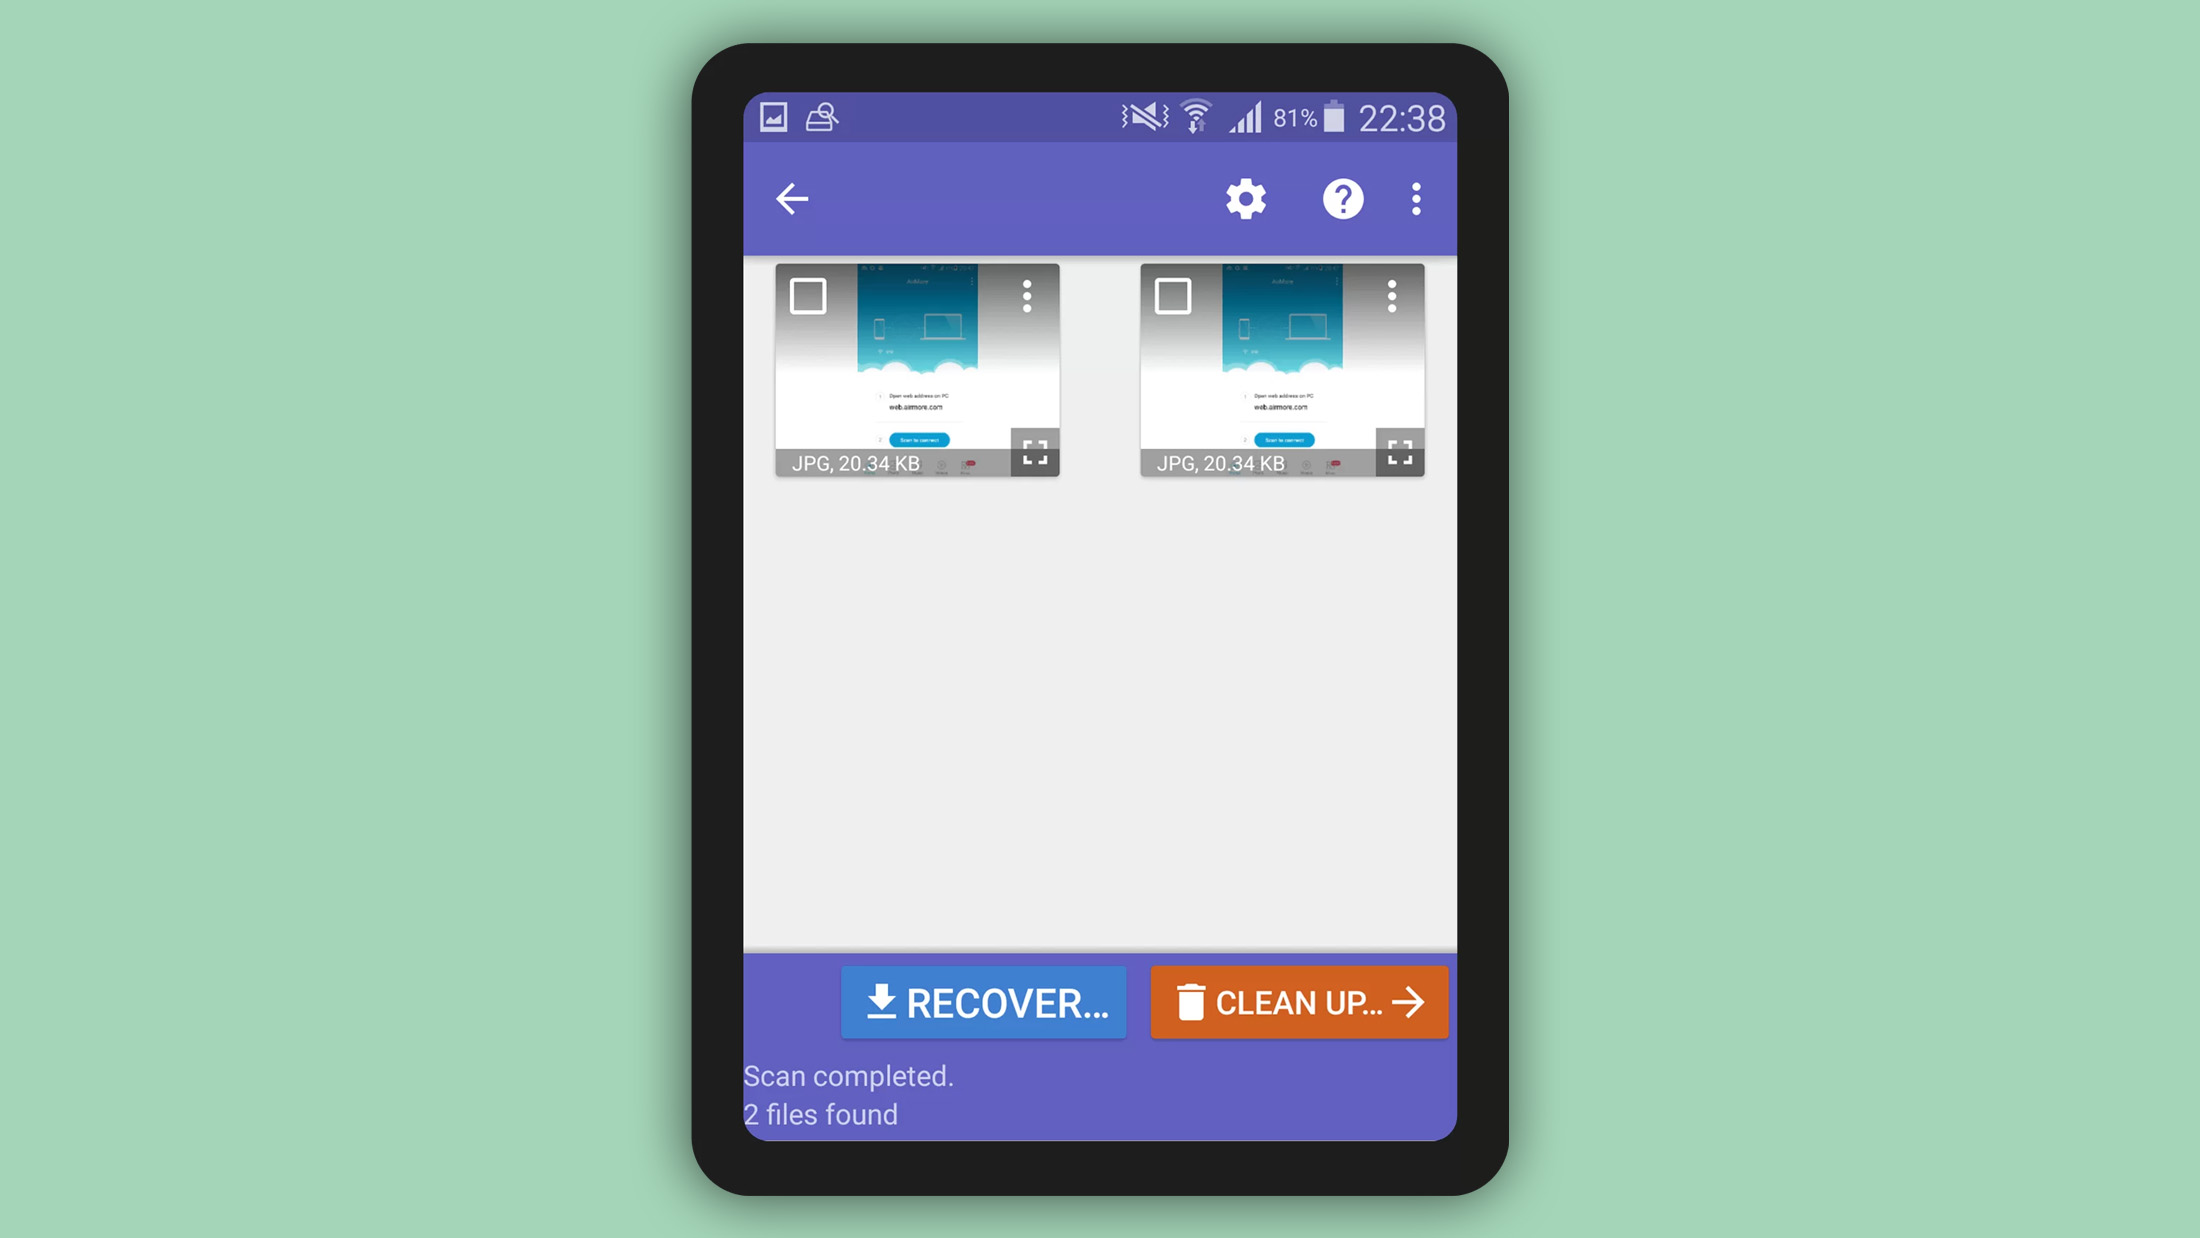
- Now, check the photos you would like to recover.
- If needed, apply a size or file type filter – by pressing the gear button (on the top right corner).
- Tap on the “recover” button.
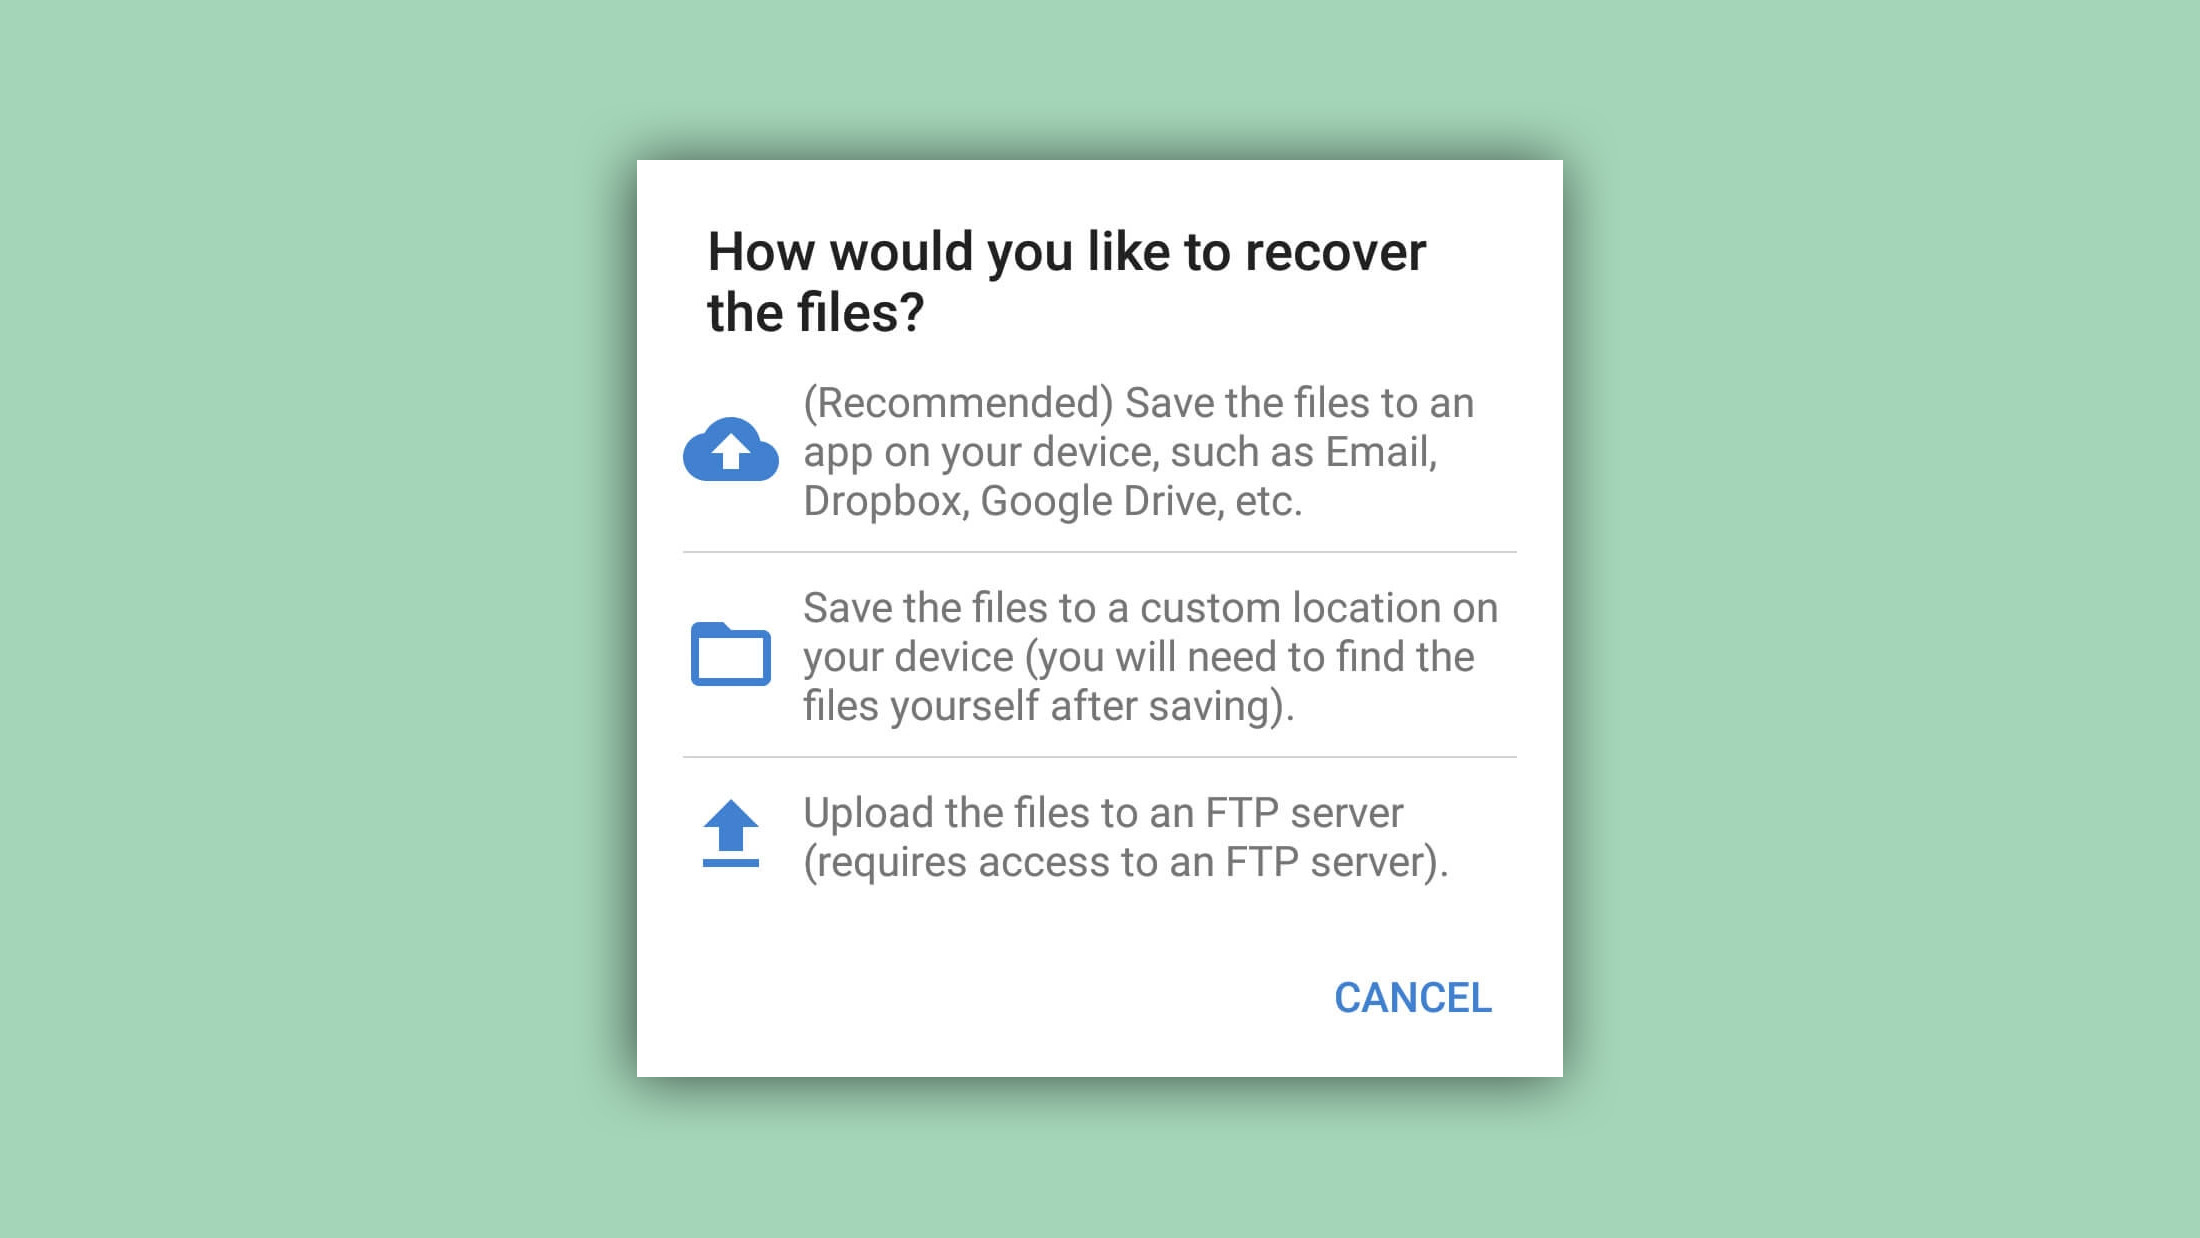
Step 3. Save the Recovered Files
- Disk Digger provides three ways to save the recovered photos:
- Save to an application
- Save locally to the device
- FTP upload
Weighing the Pros and Cons
Pros
- Easy to use UI.
- Multiple save options.
- File type and size filters.
Cons
- Some of the advanced features require a rooted device.
To sum up, Disk Digger is a pretty reliable Android app for recovering deleted photos from an SD Card.
📷 For digital cameras and GoPros, you have two options:
- Eject the SD Card and use a card reader or insert it straight away to your computer, OR,
- Connect the DSLR or GoPro to your computer and ensure that data recovery tools detect the device as a “scannable” disk.
Frequently Asked Questions
How to recover deleted photos from SD-Card without using a computer?
Fortunately, there are Android applications that facilitate photo recovery straight from a smartphone. Disk digger is one such app that allows you to recover deleted photos and even save them straight to your Google Drive.
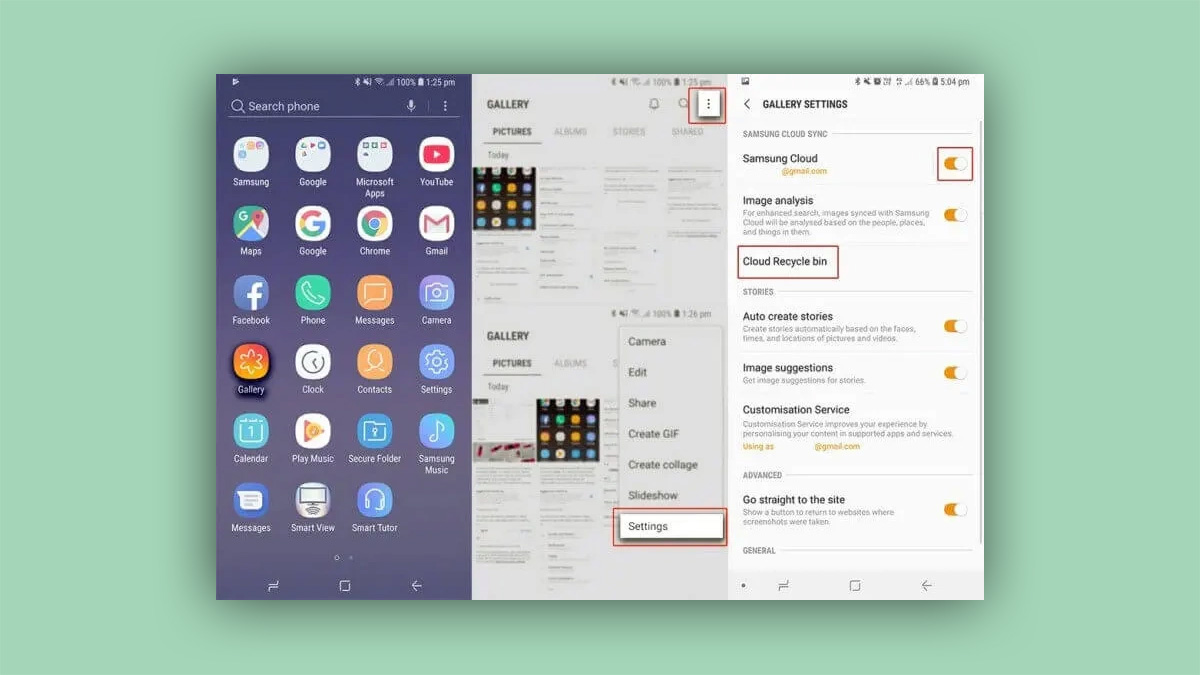
How to recover deleted photos from SD Card on a Samsung phone?
Sometimes, specific Android devices have a native recycle bin like Samsung. On the other hand, there are times when your device already has an ongoing periodic backup regime. In this case, access the backup and download.
Can I restore deleted photos from an SD card using CMD?
Well, you can’t recover deleted photos using CMD. However, sometimes individual files get hidden on an SD Card, and here’s how CMD can help you “unhide” these files:
- Connect your SD card to the computer.
- Right-click on the Windows logo, and click on Search.
- Now type in “Command Prompt” and run it as administrator.
- Type: chkdsk X: /f in the Command Prompt, and press Enter. (Replace X: with whatever letter is assigned to your SD Card)
- Type: Y and press Enter.
- Type: ATTRIB -H -R -S /S /D X:*.* and hit Enter. (Instead of ‘X’ use the letter representing your SD Card.)
- Now, restart your computer and open the SD Card directory again. The hidden files will be viewable now.
Key Takeaways
Data recovery tools have come a long way and can help you recover deleted photos from removable media like an SD Card. Moreover, there are specific data recovery tools for the various OS that facilitate efficient photo recovery.
Most of the data recovery tools have streamlined their navigation and UI – thus enabling easy recovery of files. Furthermore, some additional features like sort, filter, deep scans, etc., differentiate the more useful tools from what the rest of the market offers.
Additionally, even Android smartphones are capable of recovering deleted photos. The fundamental principle to stick to when recovering any deleted media is to stop using the affected device ASAP.

- 5 publishings
Joshua is a content curator for Pandora Recovery. His expertise involves taking intricate IT concepts and breaking them down into super easy to understand chunks. He’s been wielding the writing sword for quite some time now - 3 years to be precise. Digital marketing, data recovery, and anything “techy” are Joshua’s niches.
- Houston, Texas, United States
Nikolay Lankevich has over 15 years of strong experience in various fields and platform includes Disaster Recovery, Windows XP/7. System analysis, design, application (Inter/Intranet) development, and testing. Provided technical supports on desktop and laptops on Win-XP and Macintosh for about 2000 employees.