How to Perform XQD Card Recovery in a Few Simple Steps
Picture this: you’re on an epic adventure in an exotic country, capturing gorgeous views on an XQD card inside your trusted digital camera. Because the memory card is almost full, you decide to delete a few pictures but accidentally select the format option instead. The result? The card becomes empty before you have a chance to act.
Data loss scenarios like this one are extremely common, and you’re probably reading this article because you’re looking for a way to recover data from your own XQD card. Fortunately, you’re in the right place because we’re here to teach you how to perform XQD card recovery in a few simple steps.
Common XQD Card Data Loss Scenarios
Before we explain how to perform XQD card recovery and introduce some of the best recovery apps available, let’s discuss some of the most common XQD card data loss scenarios they can help you with:
- Accidental deletion: It’s easy to mistakenly delete files, especially when you’re in a hurry and are not paying attention. While the consequences of accidental deletion are immediate, they don’t have to be permanent because deleted files are truly gone only when they become overwritten with new data.
- Formatting gone wrong: Similarly, improper or accidental formatting of your XQD card can wipe out all the data stored on it, which can be a major setback. Again, though, this setback can often be overcome using the right formatted memory card recovery.
- Malware infection: Viruses and other malware can damage the file system on your XQD card, corrupting data and resulting in its inaccessibility. This can result in lost or damaged files, making it difficult (but not necessarily impossible) to recover your important data. Malware infections can even destroy the entire file system, leaving you no other choice but to perform raw memory card recovery.
- Inappropriate usage: Attempts to use your XQD card with an incompatible device are guaranteed not to end well, especially if they result in physical damage. Unfortunately, that’s exactly what sometimes happens because the XQD memory card format isn’t backward compatible with CompactFlash or CFast cards.
- Exceeded lifespan: All flash-based data storage devices have a limited lifespan because it’s only a matter of time before bad sectors accumulate and cause data corruption. That’s why it’s important to stop using XQD cards before they become unreliable, but users often ignore this important best practice and are forced to perform a corrupted memory card recovery.
How to Perform XQD Card Data Recovery
Now that you know what the most common XQD card data loss scenarios are, it’s time for us to explain how you can address them using two popular XQD card recovery software solutions: Disk Drill and PhotoRec.
We’ve decided to focus on Disk Drill and PhotoRec because of how well they performed when we put them through their paces as part of our ongoing data recovery review program, whose goal is to evaluate available data recovery software based on factors such as performance, usability, reputation, customer support, and value.
In addition to our in-depth data recovery software reviews, you can also see how Disk Drill and PhotoRec do when compared directly against each other, or you can compare any other reviewed software.
Last but certainly not least, we encourage you to spend a minute or two with our interactive comparison tool, which is designed to recommend you the best data recovery software based on your unique needs and preferences.
Option A: Disk Drill
Disk Drill stands out as the best XQD card recovery software thanks to its fantastic overall performance and, more specifically, because it recovers RAW photo and video file formats better than any other application we’ve ever reviewed.
When performing Sony XQD card recovery, Disk Drill can flawlessly recognize and recover sr2 (Sony raw 2 image file) and srf (Sony raw file) raw photo file formats, and the same is true when recovering nef (Nikon raw image file) and nrw (Nikon raw image file).
Besides being great at recovering the file formats that are most commonly stored on XQD cards, Disk Drill brings to the table the ability to work with corrupted memory cards, create their byte-to-byte backups, and filter + preview recoverable files.
Best of all, the entire data recovery process is a matter of a few simple clicks because Disk Drill has a modern, intuitive user interface. See for yourself:
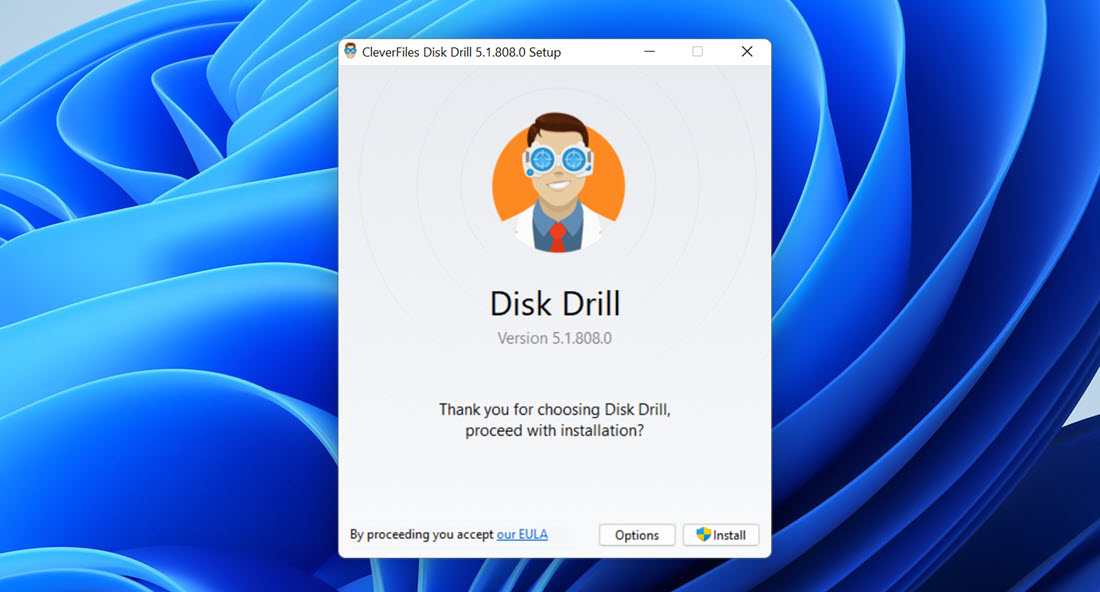
- Start by downloading Disk Drill from its official website. The free version for Windows can be used to recover up to 500 MB of data. Launch the downloaded installer and follow the step-by-step installation wizard to install Disk Drill on your system drive.
- Connect the XQD card to your PC and double-click the Disk Drill icon on your desktop to launch the data recovery application.
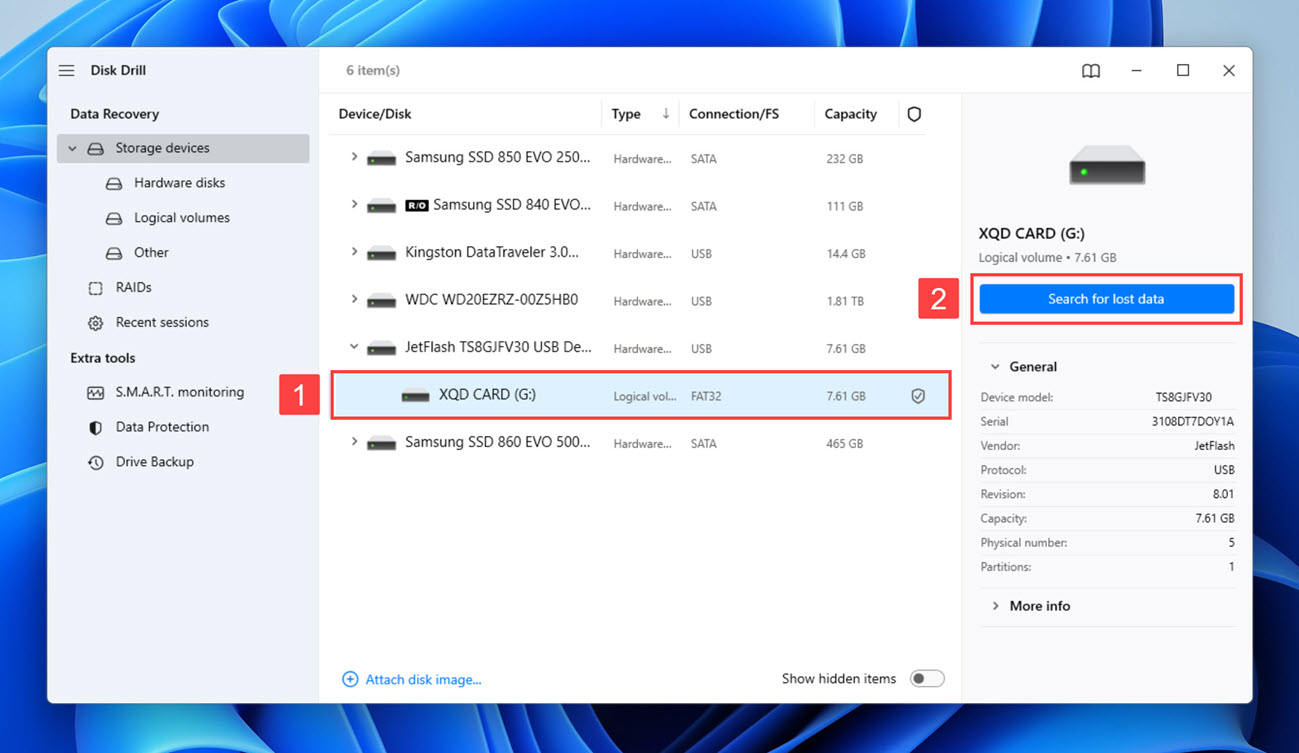
- Select the XQD card and click Search for lost data. You can now wait until Disk Drill finishes scanning, or you can click the Review found items button at any time to see recoverable files immediately.
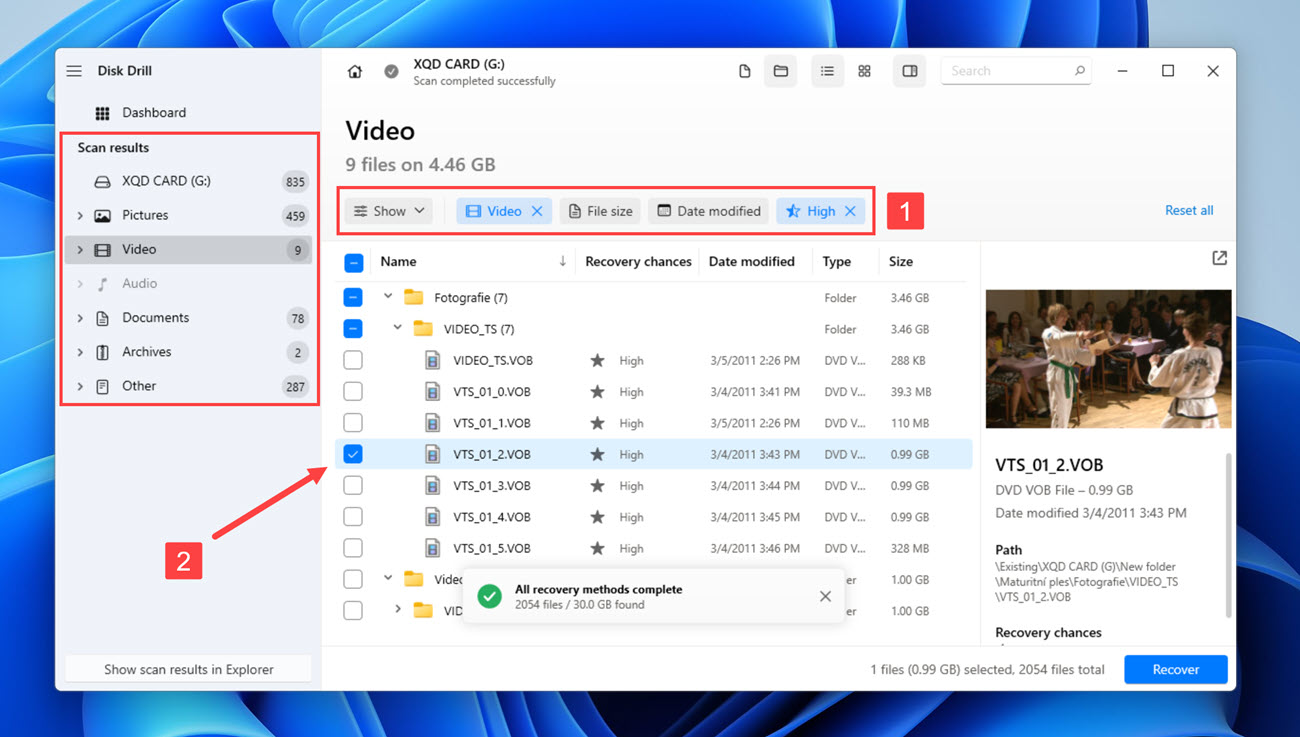
- Go through the scan results and click the checkbox next to each file you want to recover. You can narrow down the list of recoverable files using the available filters. You can also sort the results by name, recovery chances, date modified, type, and size. If you’re looking for a specific file, then the search bar in the top-left corner can save you a lot of time. To preview a file and verify its recoverability, you just need to click on it.
- Click the Recover or Recover all button in the bottom-right corner. Select a suitable recovery destination (your system drive is OK, but your XQD card isn’t) and click finish the recovery process by clicking Next.

Option B: PhotoRec
PhotoRec is our favorite completely free XQD card recovery software solution. While it doesn’t perform nearly as well as Disk Drill (it received only 52% for its recovery performance, whereas Disk Drill received 91%) and can’t recover the original folder structure and file names, the fact that you can use it to undelete an unlimited number of files from your XQD card makes it worth a try.
PhotoRec itself is a command-line program, but it ships with an optional graphical user interface, called QPhotoRec, which makes it slightly easier to use. Here’s how it works:
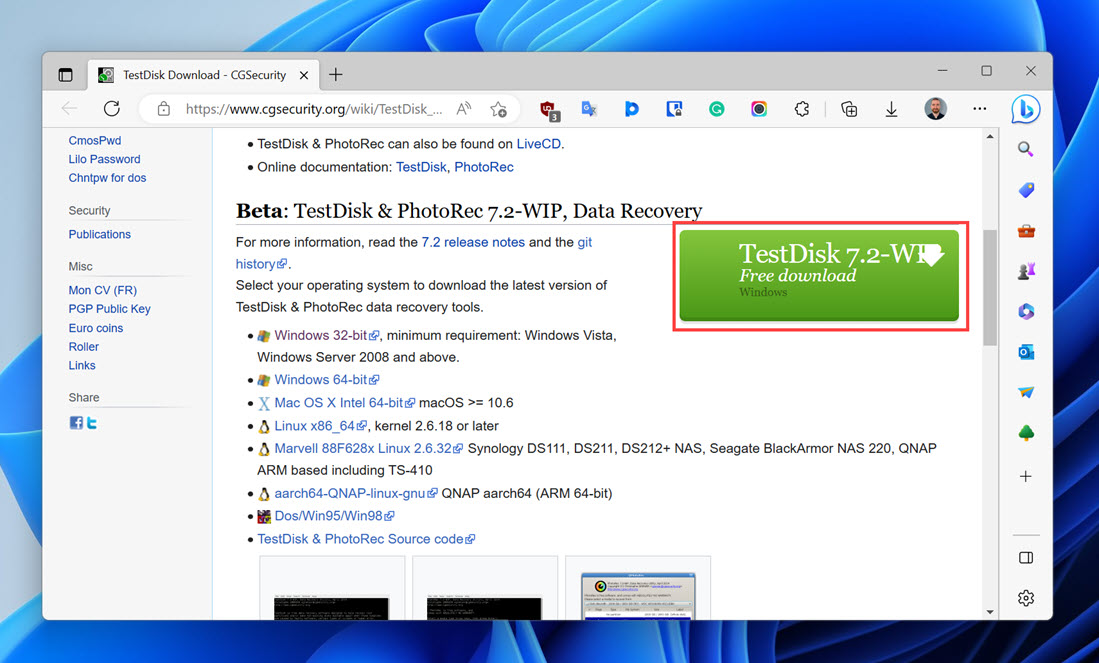
- Download PhotoRec from its official website (PhotoRec ships with TestDisk) and extract the downloaded archive to your system drive.
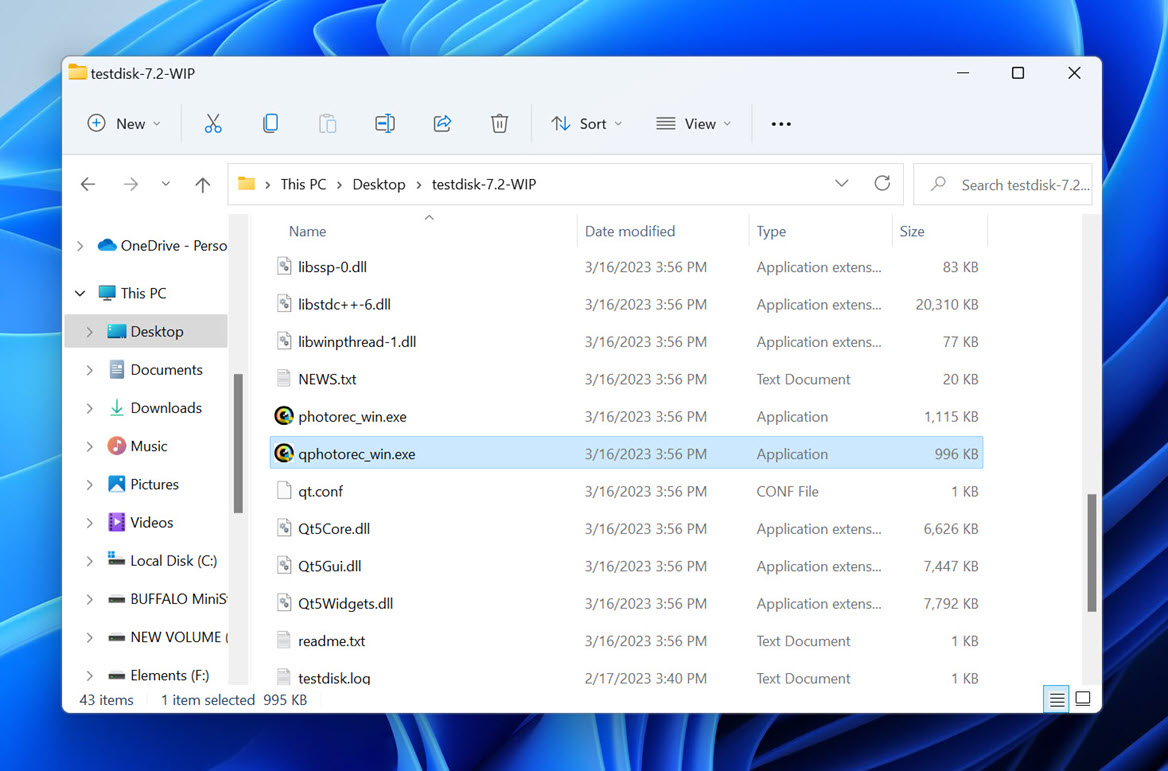
- Connect the XQD card to your PC and open the qphotorec_win.exe file to launch PhotoRec with a graphical user interface.
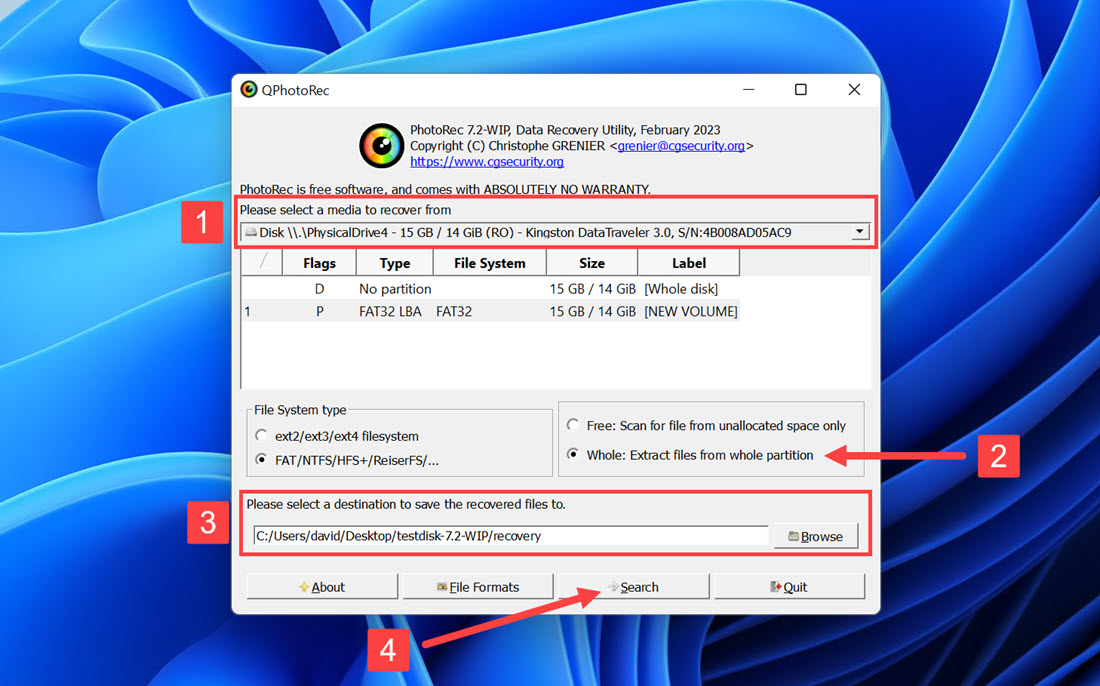
- Select your XQD card and specify the file system type. Make sure the “Whole: Extract files from whole partition” scan option is selected—even if your goal is to recover a formatted XQD card.
- Click Browse and select a suitable destination for the recovered files (your system drive is OK, but your XQD card isn’t).
- Click Search and give PhotoRec some time to scan the XQD card and recover your lost files. You can then use File Explorer to navigate to the recovery destination and check if your files have been recovered.
XQD Cards: What They Are and Why They Were Created
Nowadays, you would be hard-pressed to stumble upon an electronics store with XQD cards in stock, but the same memory cards were all the rage a decade ago.
The XQD memory card format was introduced by SanDisk, Sony, and Nikon in 2010 as a replacement for the aging CompactFlash standard. Using PCI Express as a data transfer interface, XQD cards were able to achieve data transfer speeds of up to 8 Gbit/s (1 GB/s), and they could theoretically store more than 2 TB of data.
We say theoretically because the full potential of XQD cards will forever remain unrealized. Only 6 years after their introduction, in 2016, the CFexpress format was released as the successor of XQD, offering even faster data transfer speeds thanks to its NVMe protocol.
But despite the relatively short timeframe during which XQD cards were manufactured, multiple digital cameras had managed to take advantage of them, including:
- Sony PXW-Z100
- Nikon D4, D4s, D5, and D6
- Nikon D850 and Nikon D500
- Nikon Z6 and Nikon Z7
- Phase One XF IQ4
The following table compares the XQD memory card format with its predecessor, successor, and the most popular alternative currently available, SD cards (yes, many excellent memory card recovery applications with support for SD cards exist):
Memory Card Type | Max. Transfer Speed | Max. Capacity | Dimensions (mm) |
XQD (version 2.0) | 1 GB/s | 2 TB | 38.5 x 29.8 x 3.8 |
CompactFlash (version 4.0) | 167 MB/s | 512 GB | 43×36×3.3 (Type I) or 43×36×5 (Type II) |
CFexpress | 4,000 MB/s | 2 TB | 54 x 74 x 4.8 |
SD Express (SDHC, SDXC, and SDUC) | 3,940 MB/s | 128 TB | 32 x 24 x 2.1 (Full-sized SD) |
Conclusion
Even though most XQD cards have long been retired from service, people still occasionally experience issues with XQD data loss caused by accidental deletion or formatting, malware, corruption, and a whole range of other potential data loss events. The XQD card recovery methods described in this article can reverse the outcome of such data loss events and help you retrieve all lost data back from its digital grave.
Frequently Asked Questions
How to recover files from an XQD card?
To recover files from an XQD card:
- Go to Disk Drill’s official website and install the software.
- Connect the XQD card to your PC.
- Launch Disk Drill and scan the XQD card.
- Select the files you want to recover.
- Recover the selected files.
Can I recover a formatted XQD card?
Yes, a formatted XQD card can be successfully recovered using paid & free XQD card recovery software if the lost data hasn’t been overwritten yet.
How often do XQD cards fail?
Even though online forums contain many lengthy discussions of Sony, SanDisk, Delkin, and Lexar XQD failures, there are no verifiable data that would suggest XQD cards fail more frequently than other memory cards.
How do I reformat my XQD card?
You can reformat your XQD card directly from File Explorer:
- Launch File Explorer.
- Navigate to This PC.
- Right-click your XQD card.
- Choose the Format option.
- Confirm your decision to format the card.
David Morelo is a professional content writer with a specialization in data recovery. He spends his days helping users from around the world recover from data loss and address the numerous issues associated with it.
When not writing about data recovery techniques and solutions, he enjoys tinkering with new technology, working on personal projects, exploring the world on his bike, and, above all else, spending time with his family.
- Klennet Recovery Review (Formerly Zero Assumption Recovery)
- iBeesoft Data Recovery Review – A Likable Clone With Limited Features
- DMDE Review – A Data Recovery Powerhouse or a Usability Nightmare?
- Cisdem Data Recovery for Mac Review – A Clone in Disguise
- Tenorshare 4DDiG Review – All That Glitters Is Not Gold
- Frisco, Texas, United States
Yevgeniy Tolkunov is Hardware Engineer at ACE Data Recovery. Yevgeniy has a Master's Degree in Physics, Information Technology; 15+ years of experience.