
3 Best Methods to Recover Deleted Folders on Mac
Have you just accidentally hit ‘delete’ on a whole folder full of crucial files and cherished photos? No need to panic! With the right steps, you can recover your deleted folder on Mac and get back all those precious files you thought were lost forever. Read on, and we’ll show you exactly how.
How to Recover Deleted Folders on Mac
Below we’ll look at three proven methods to recover deleted folders on macOS.
Method 1: Recover Recently Deleted Folders From Trash Bin
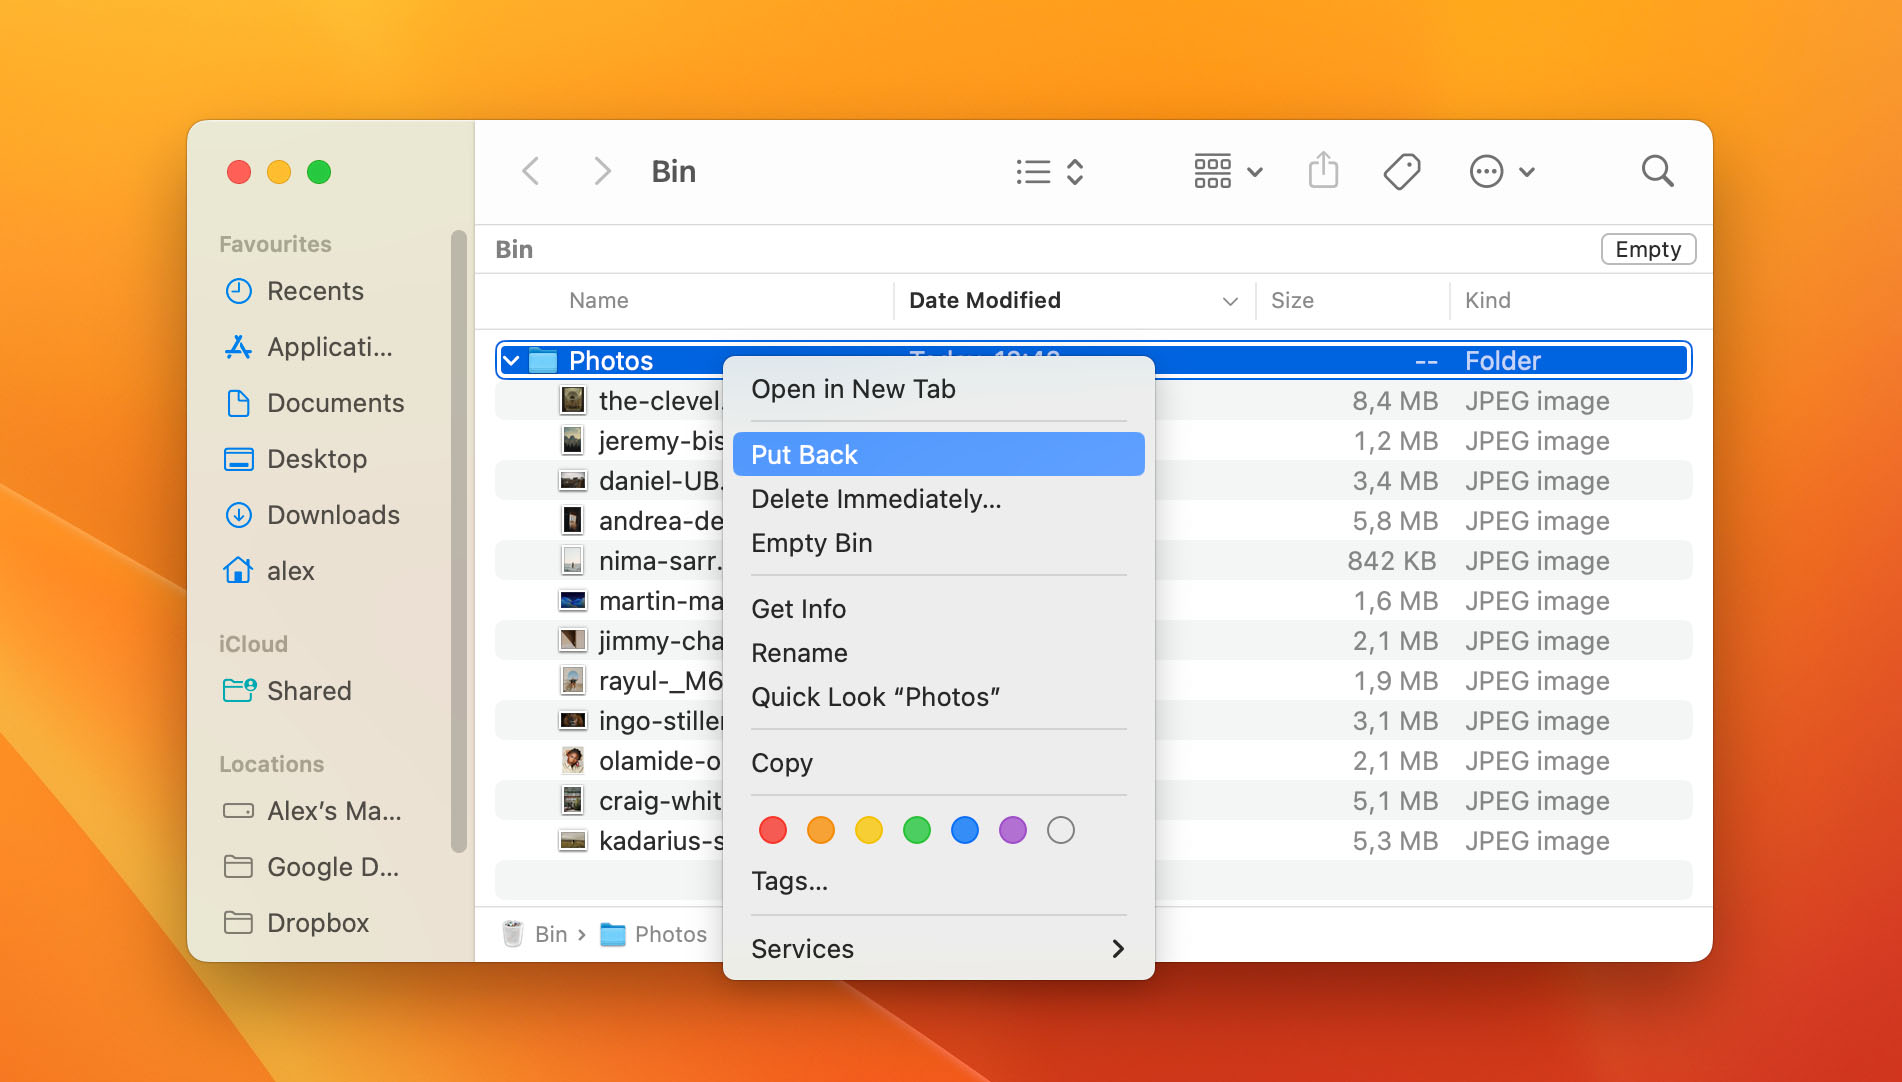
Unless you press Option + Command + Delete on your keyboard or select the Delete Immediately option from the File menu in Finder (available only when you hold the Option key), deleted folders on Mac are moved to Trash, where they sit until you empty Trash or recover them.
To recover a folder from trash:
- Click the Trash icon in the Dock.

- Select the folder you want to recover and either:
- Drag it from Trash to your desktop or some other folder.
- Right-click on the folder and select Put Back.
Method 2: Recover Permanently Deleted Mac Folders Using Data Recovery Software
If you haven’t found the deleted folder in Trash, not all hope is lost. There are many data recovery software applications that can help you retrieve your valuable files.
One fantastic data recovery software application is Disk Drill for Mac. This data recovery software application can recover deleted files and folders after emptying Trash thanks to its powerful scanning algorithms, which can recognize hundreds of different file formats.
In many situations, Disk Drill is capable of restoring the original folder structure and file names—a lifesaver when dealing with extensive data loss. Additionally, Disk Drill boasts a super user-friendly interface, impressive recovery rates, and flawless support for the latest macOS versions, including the recently launched macOS Ventura for Intel and Apple Silicon Macs.
To recover a deleted folder via Disk Drill:
- Download Disk Drill from its website and install the app.
- Go to the Applications folder and launch Disk Drill by clicking on its icon.
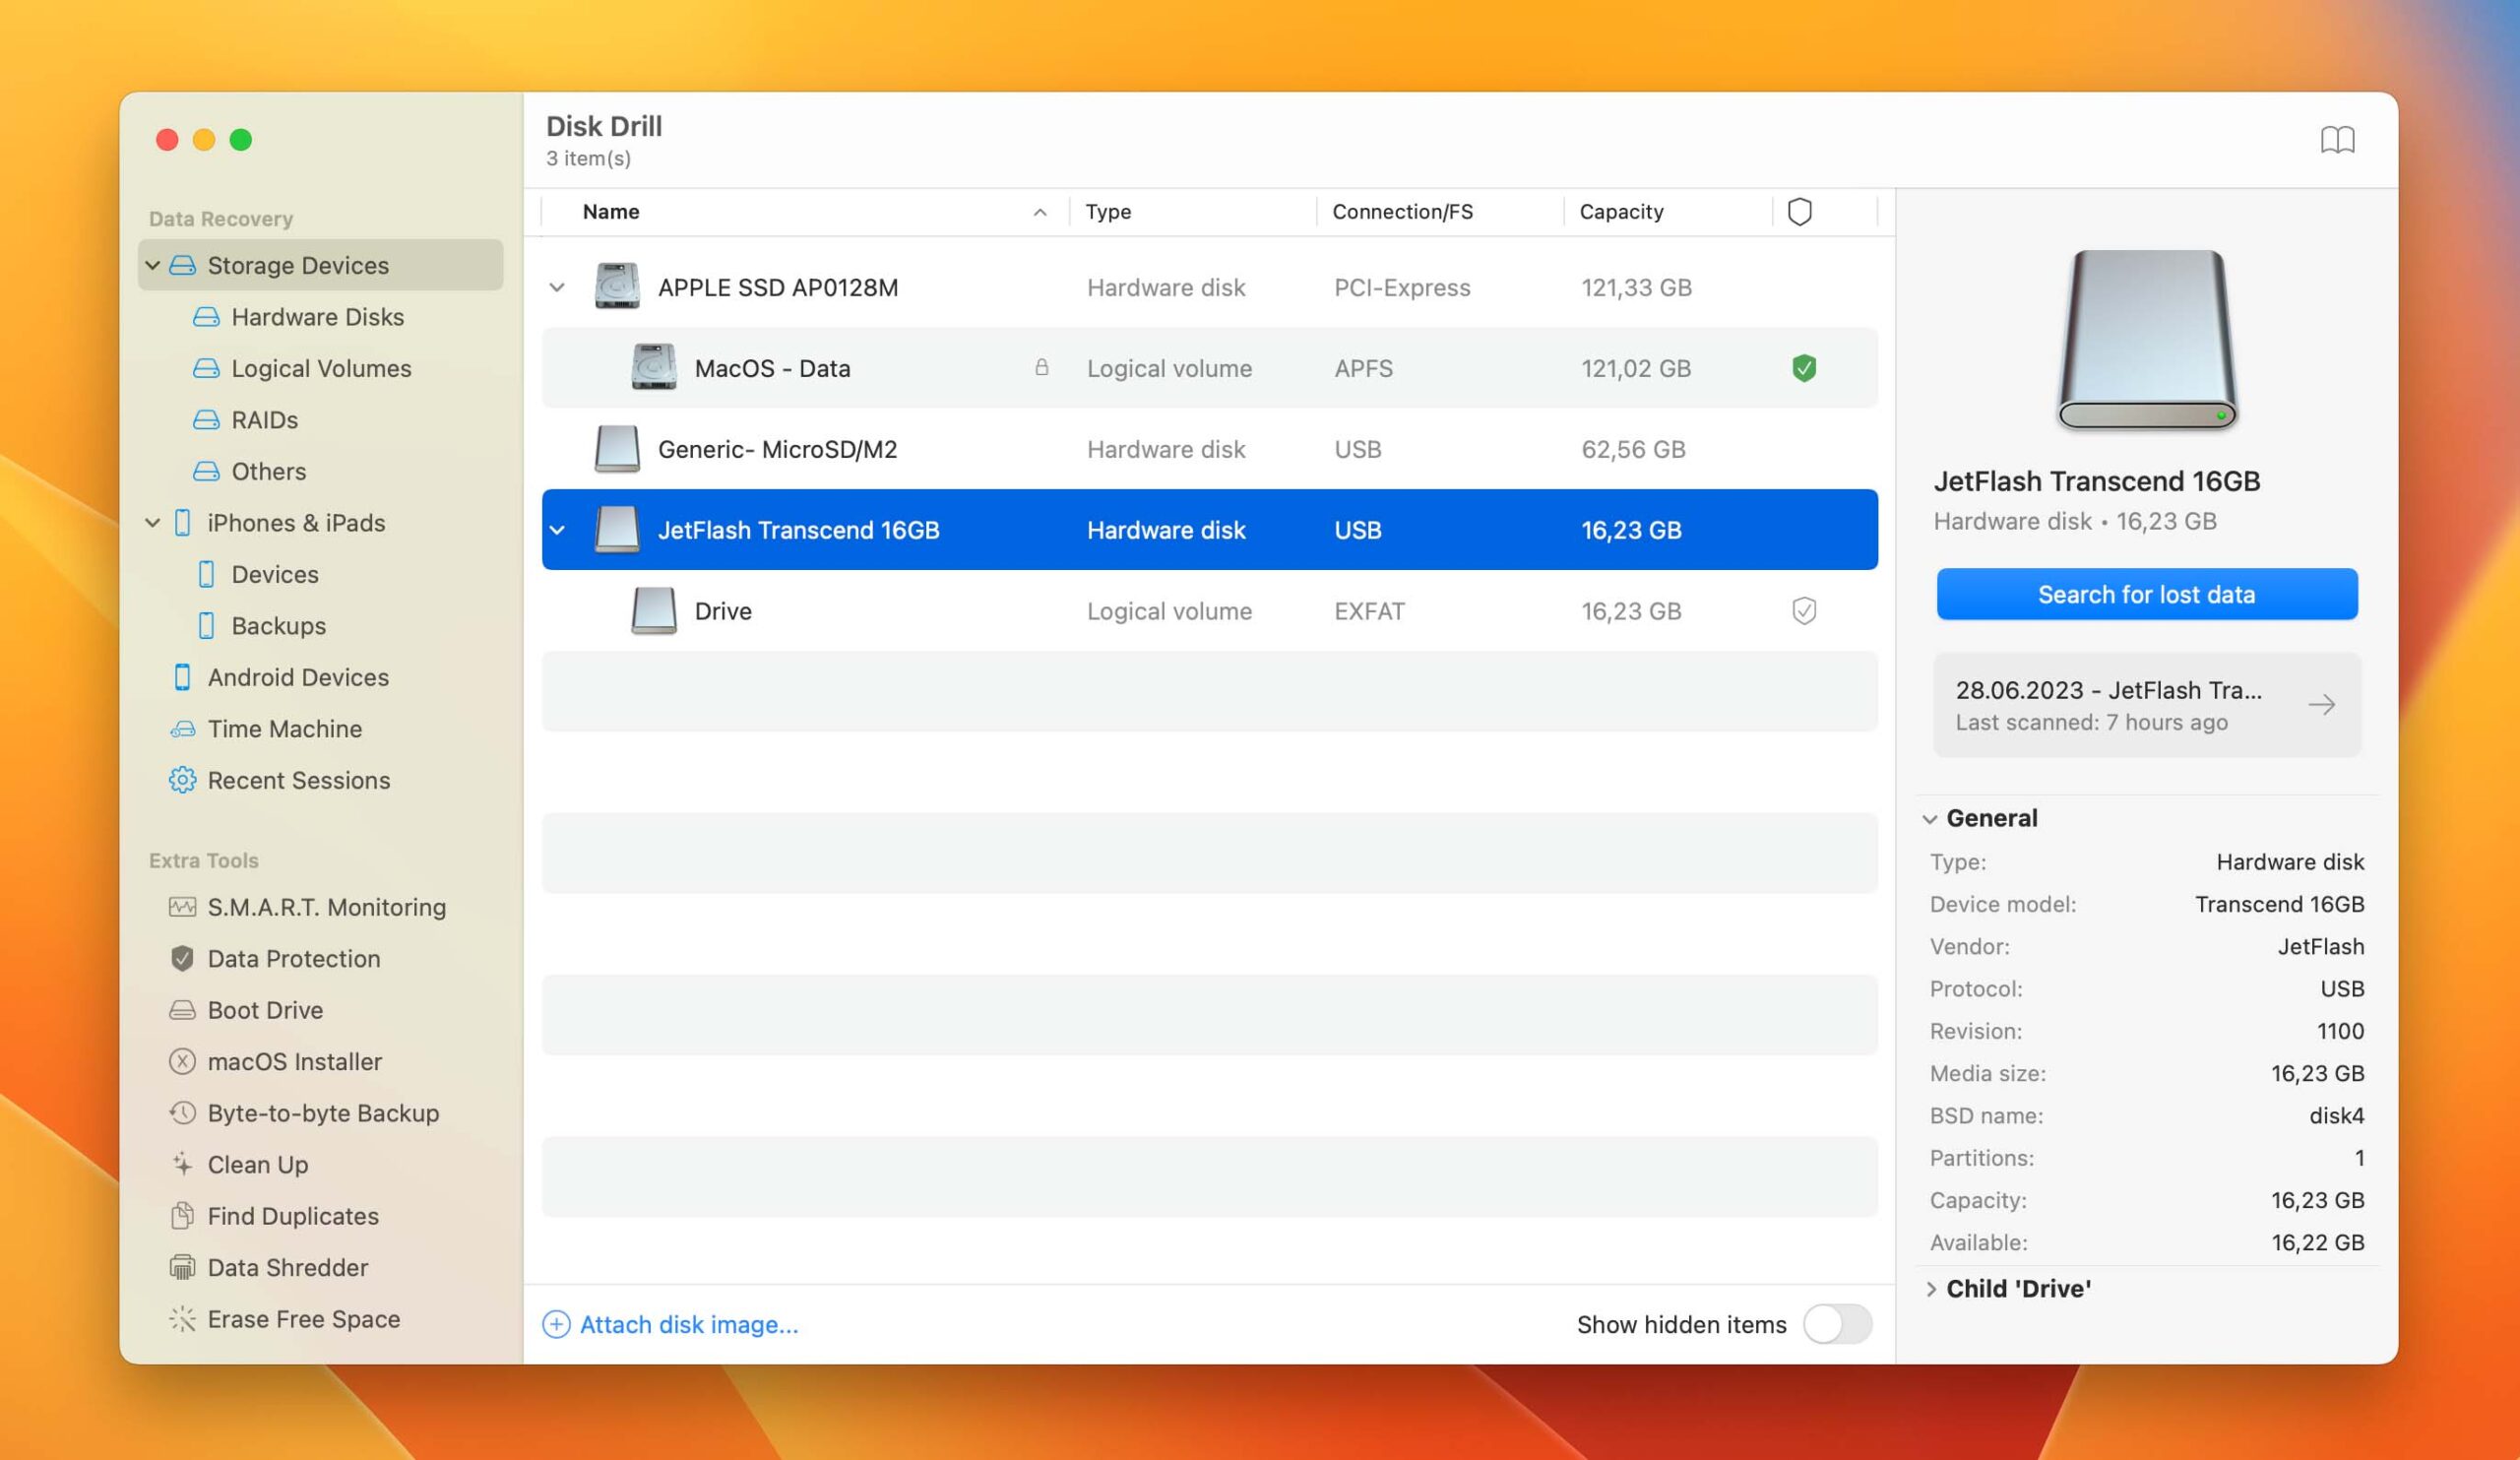
- Click the Search for lost data button next to the drive where the deleted folder was located.
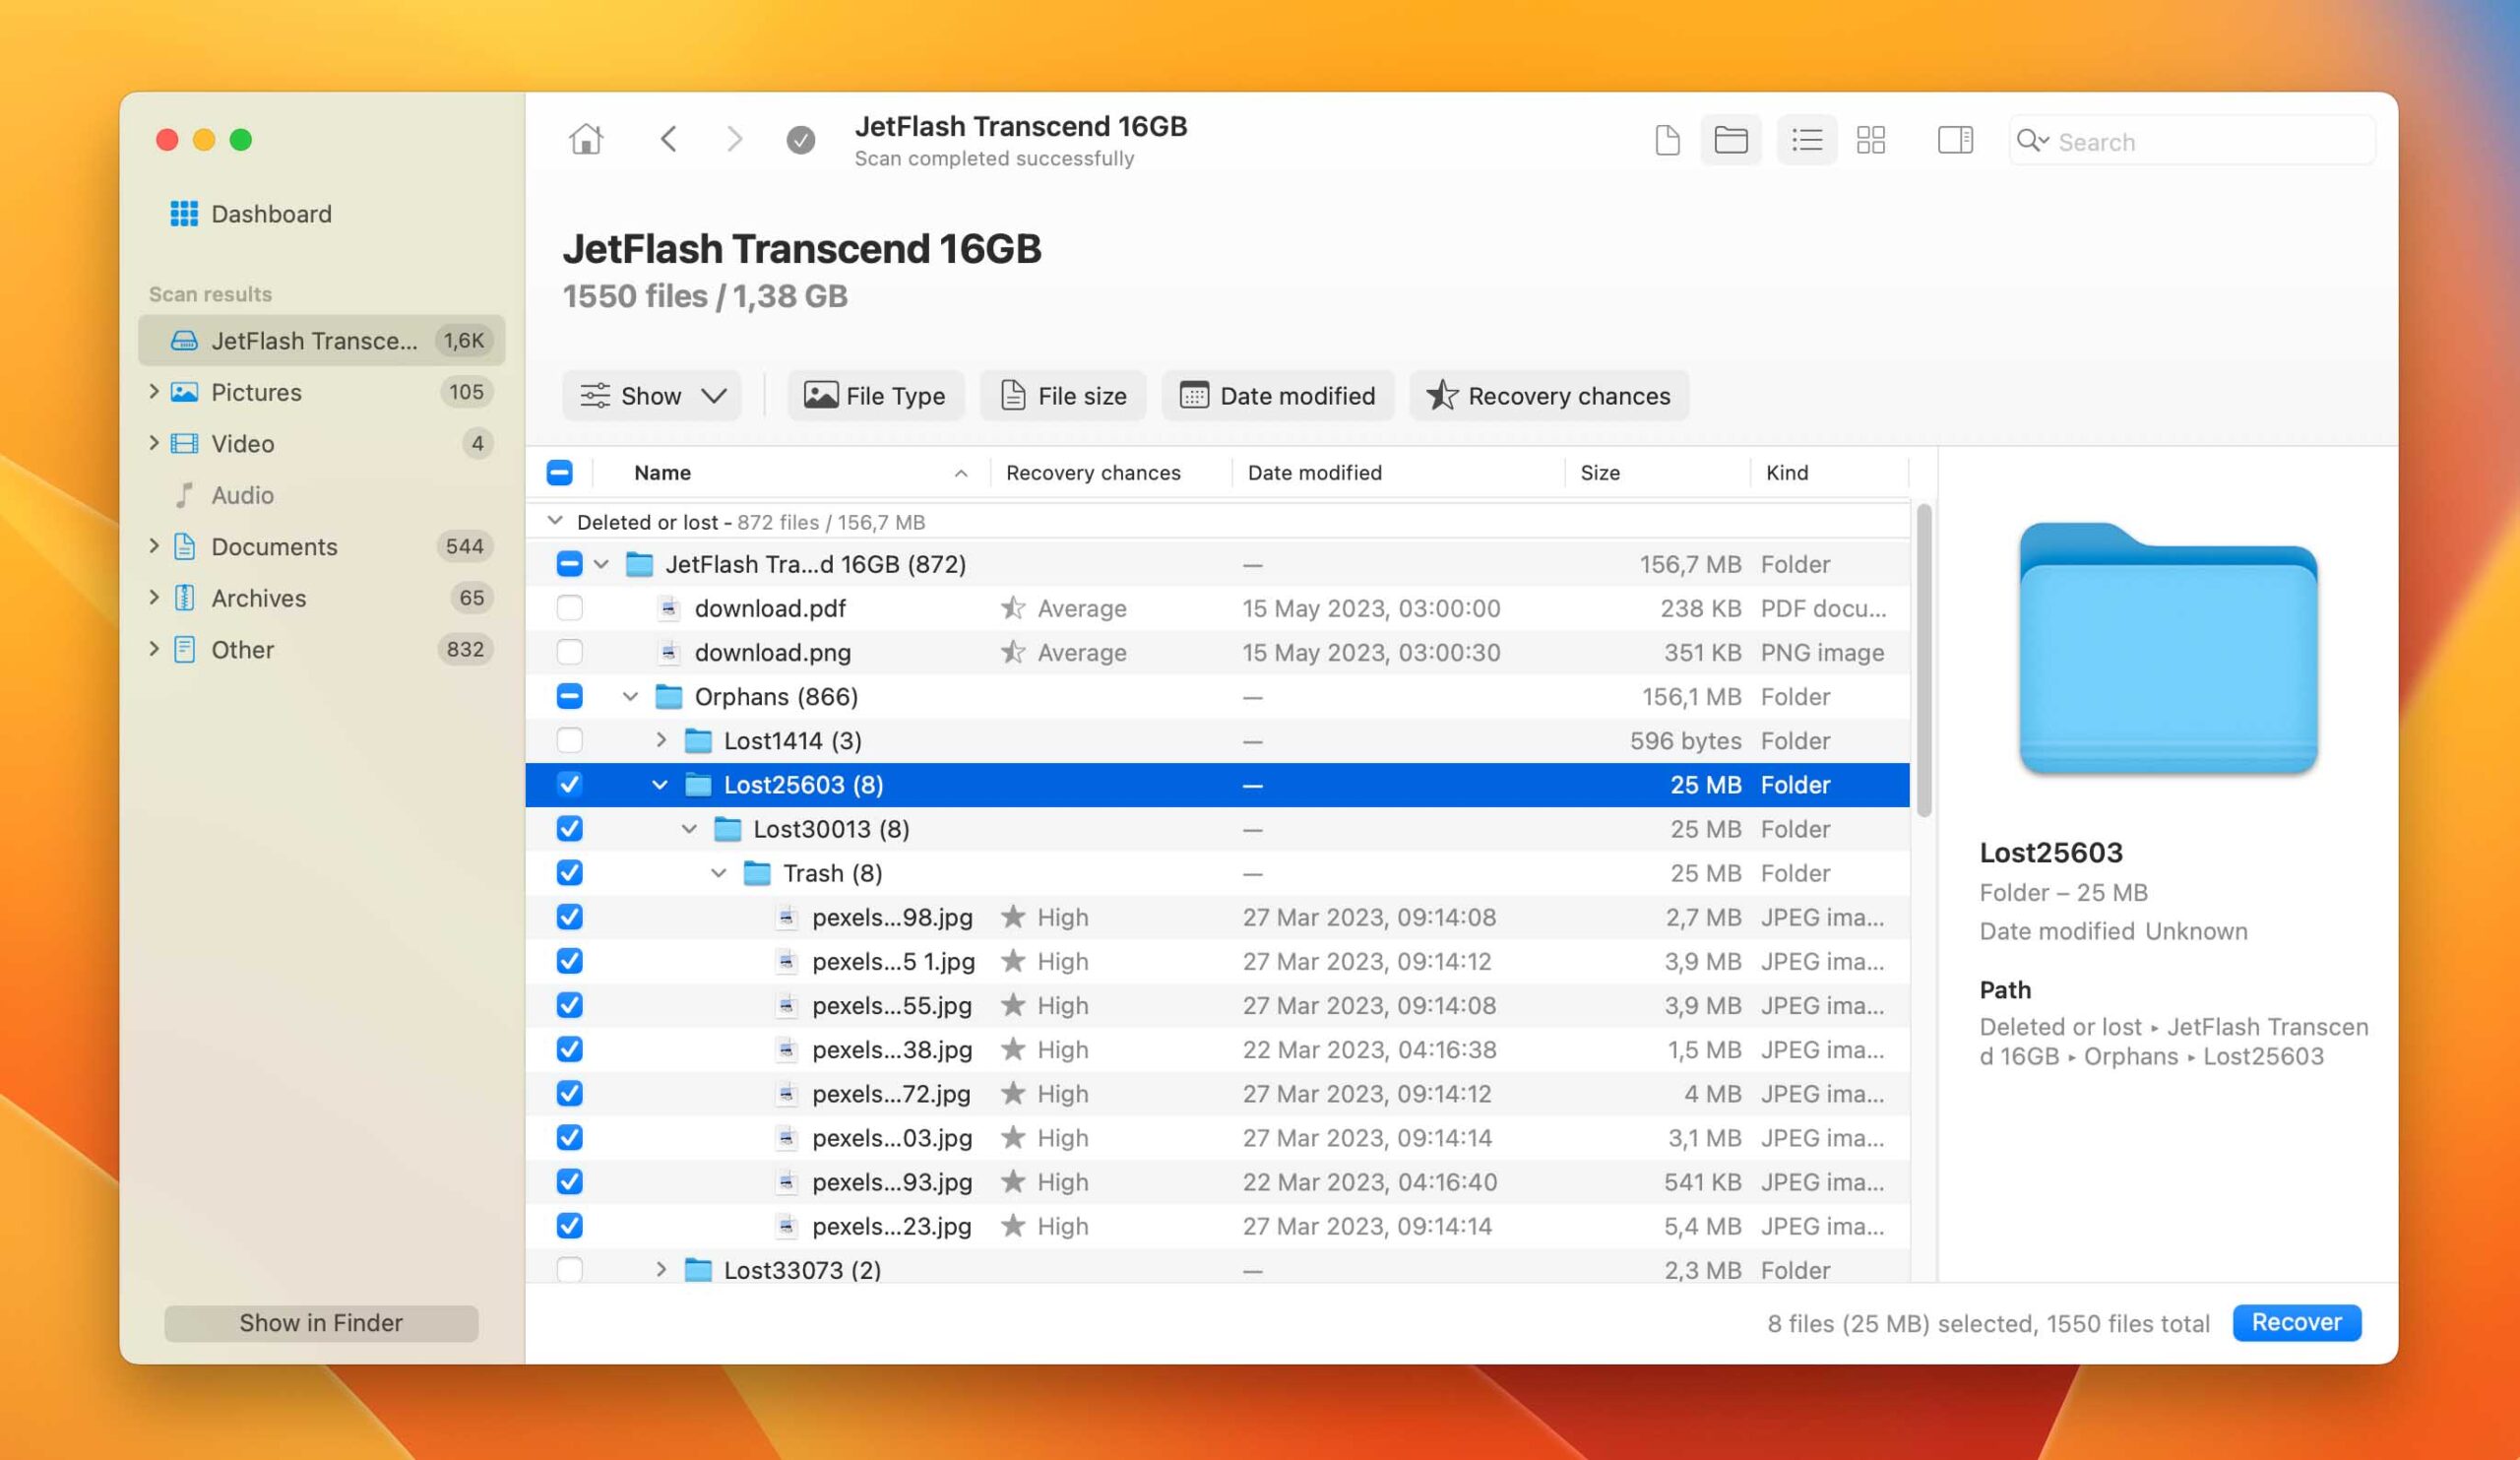
- Locate the deleted folder you are interested in. If Disk Drill was unable to restore the original folder structure, find the files that were contained in the folder you deleted.
- Click on the checkbox next to it to select it.
- Click the Recover button in the lower-right corner to recover it.
- Select where you want Disk Drill to recover the deleted folder and click Next.
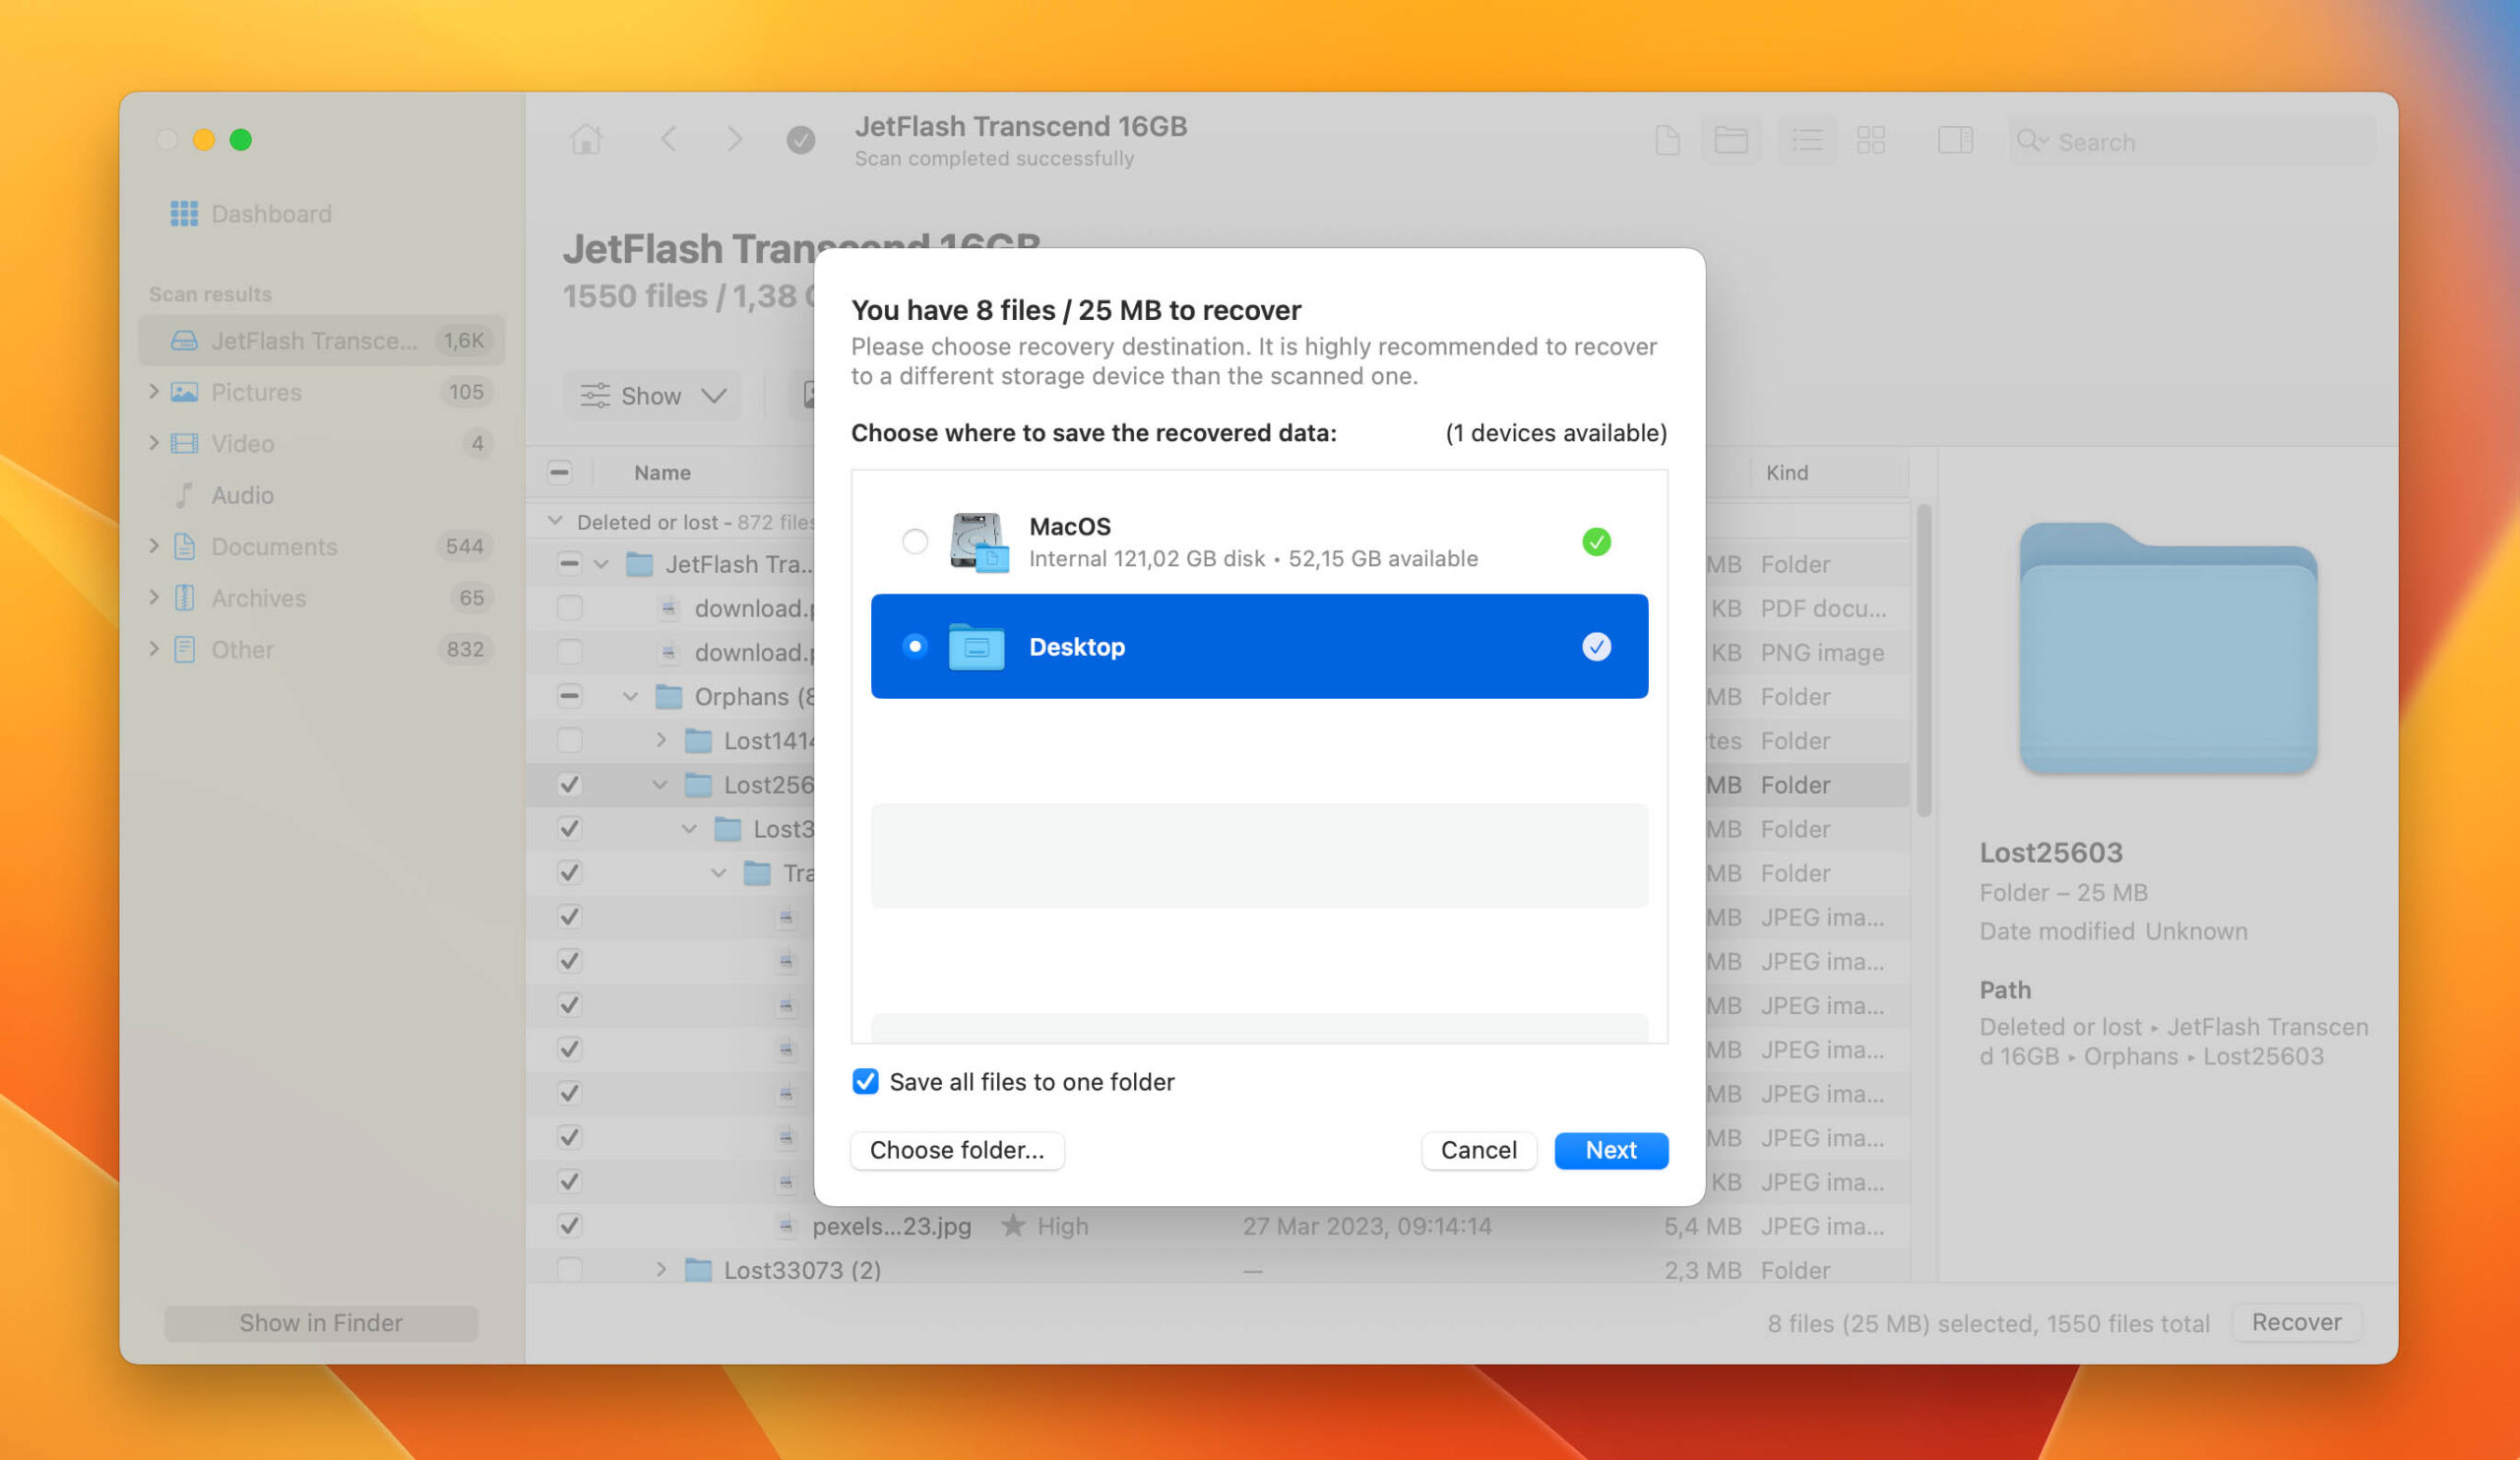
That’s it! The deleted folder should now be restored, and all of its content with it.
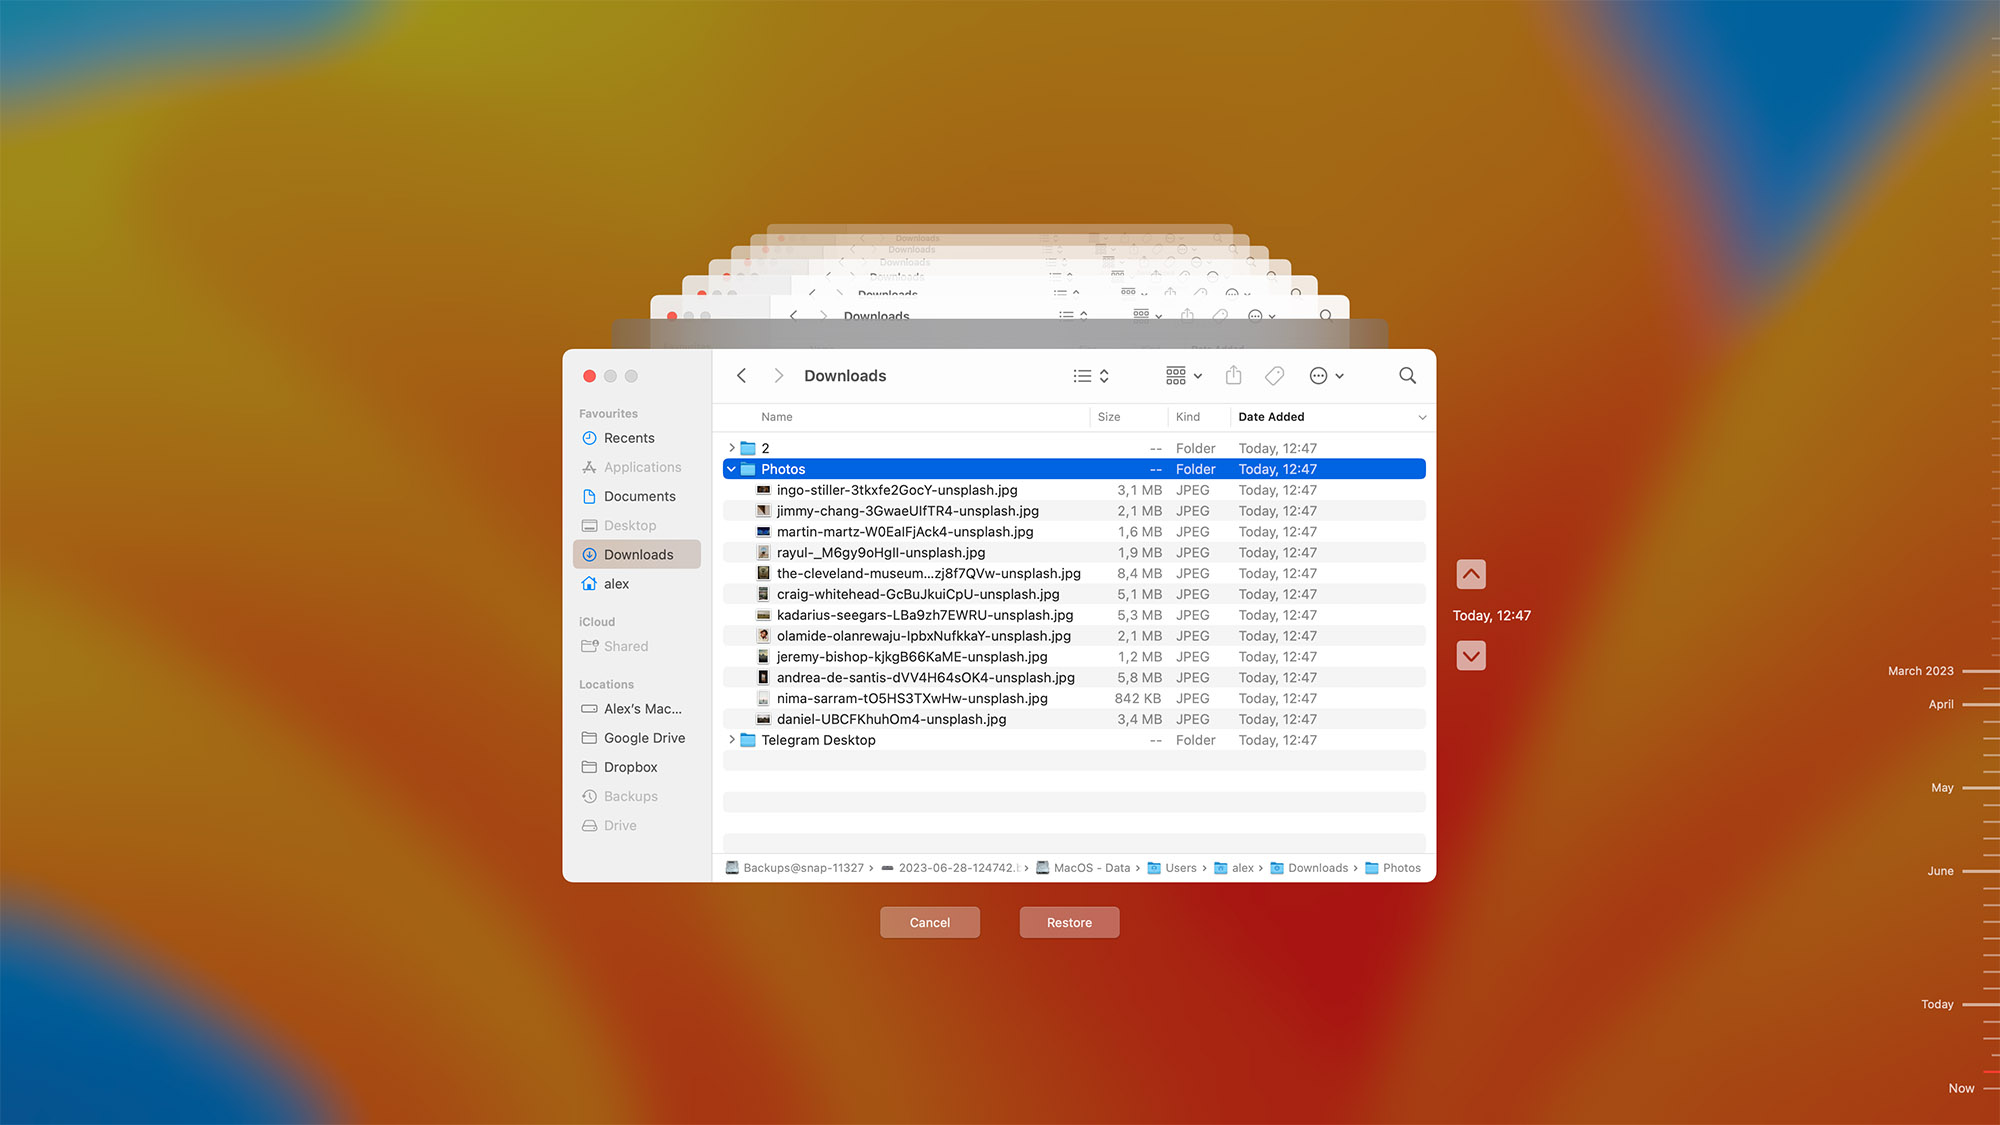
Method 3: Restore Deleted Folder from Time Machine
If you use Time Machine to automatically back up your data, you can enter it to restore the deleted folder from an earlier backup.
But what if you don’t have an external backup disk handy? No worries! Time Machine’s got you covered with local snapshots. These snapshots are automatically saved on your system drive about every hour and retained for 24 hours, and they essentially work as a lifeline for when your backup disk isn’t within reach.
Best of all, the steps to recover a deleted folder on your MacBook are always the same regardless of whether you’re restoring from an external backup disk or a local snapshot.
To recover a deleted folder from Time Machine:
- Connect your Time Machine backup disk to your Mac if the disk is available. If not, then you can start from the second step and rely only on local snapshots.
- Launch Finder and navigate to the folder where the folder you want to recover was located.
- Select Enter Time Machine from the Time Machine menu.
- Find the folder you want to recover and select it.
- Click Restore to restore the selected folder.
Is It Possible to Recover Deleted Folders Using Terminal?
Yes, you can recover a deleted folder using the Mac Terminal, but there’s a caveat: Terminal isn’t a recovery tool per se. Instead, it’s merely a different path that you can take to access the contents of the Trash folder. That’s why this method works only as long as the Trash hasn’t been emptied. Once you’ve hit the Empty option, even Terminal can’t perform any magic to recover your deleted files.
Still, it can be useful to know how to recover a deleted folder using the Mac Terminal because you might encounter a data loss situation made even worse by issues with Finder, the default file manager and graphical user interface shell of macOS.
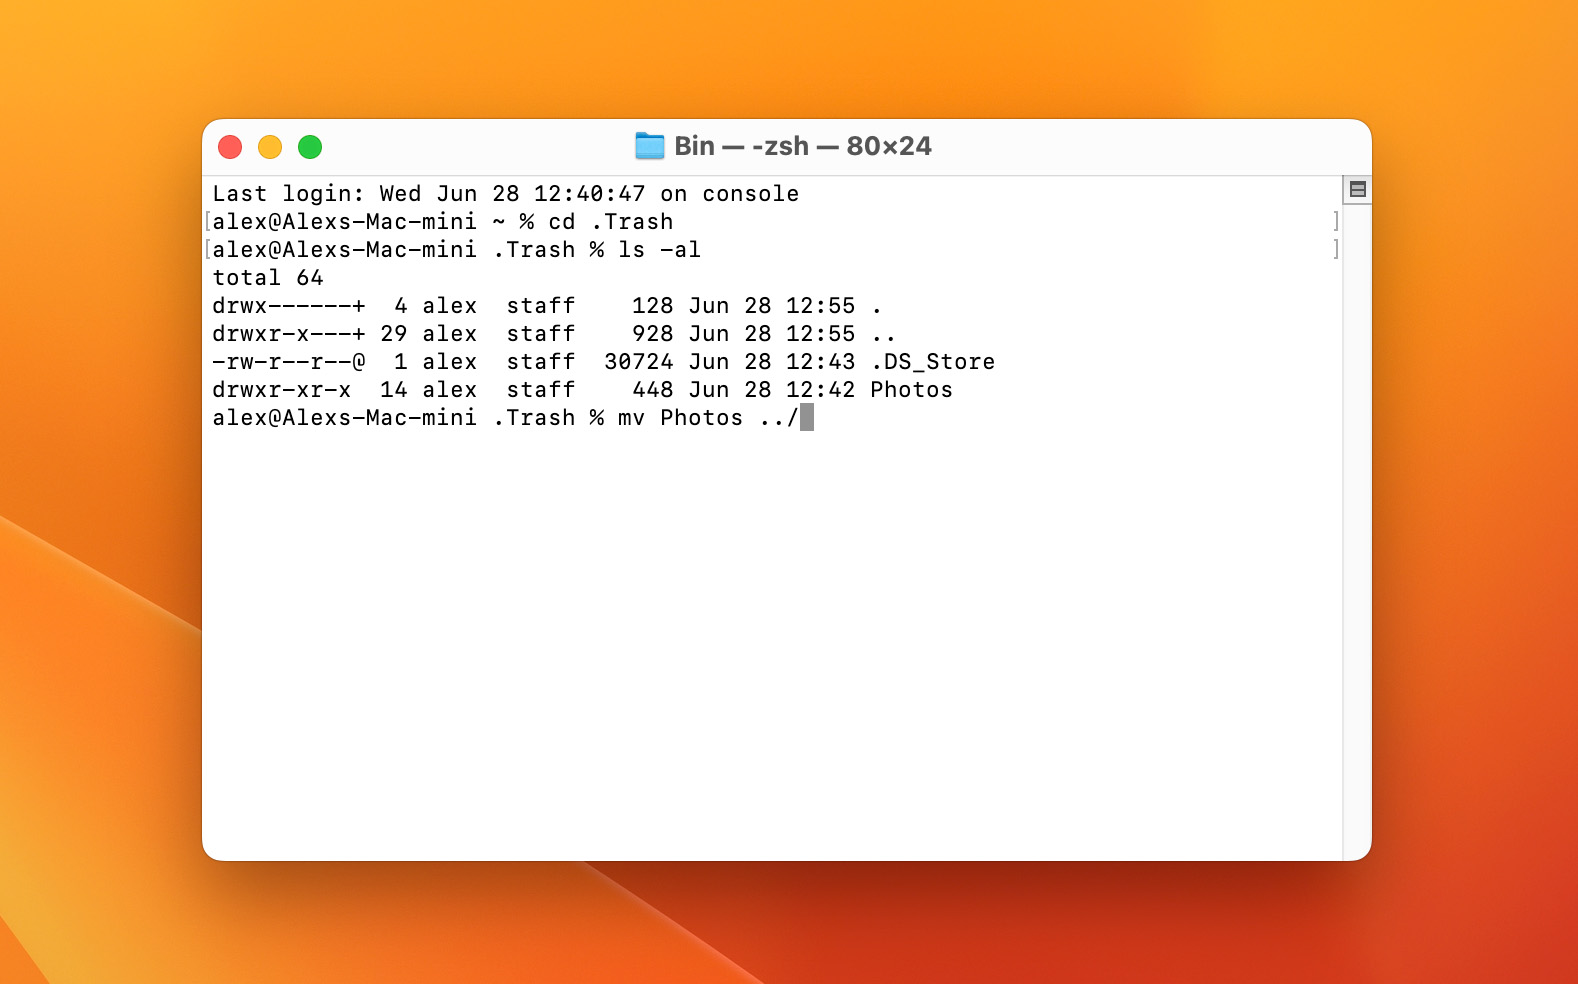
To pull out your deleted folder from the Trash folder using Terminal, you need to:
- Launch Terminal. You can find it in Applications > Utilities.
- Type “cd .Trash” and press Return to navigate to the Trash folder.
- Type “ls -al” to list the contents of the Trash folder.
- Type “mv foldername ../” to move a folder from Trash to your home directory.
Common Problems that May Lead to Loss of Files and Folders on Your Mac
Data loss on Mac computers can be caused by multiple issues, each of which requires a slightly different approach to data recovery.
As interesting as data loss statistics can be, they represent only the imaginary average user, who may or may not have anything in common with you.
For example, if you consider yourself to be an advanced Mac user, you’re probably very unlikely to lose data by mistake. But there’s a chance that you own a more expensive Mac than the average user, which increases the chance of someone stealing your computer and your data along with it. That’s why you should familiarize yourself with all common issues that can cause data loss on Mac and prepare for them.
| Human Error | Mistakes happen, and sometimes they lead to data loss. Overwriting folders or accidentally hitting using the Move to Trash option can result in losing your precious files. To minimize such issues, a combination of user education and robust backup and recovery solutions are needed. |
| Mechanical Damage | Even though it’s not an everyday occurrence, hard drive failures do happen due to various reasons like excessive heat, drops, or liquid spills. Some types of mechanical damage can make data recovery impossible, highlighting the importance of having a backup ready. |
| Viruses and Malware | Despite Apple’s best efforts to secure your data, viruses and other malicious applications can still delete files and folders, especially if the user unknowingly allows them to do so. Hence, extra caution should be taken when installing applications from unknown sources. |
| Power Failures | Sudden power outages can lead to data loss or even corrupt your entire hard drive. While Uninterruptible Power Supplies (UPS) can offer protection, they can’t prevent failures caused by the power supply itself. Automated cloud backups can be a lifesaver in such situations. |
| Theft | The risk of theft is always present. Even if you recover your stolen Mac, it’s likely to have been erased and reinstalled already. In such situations, reliable data recovery software can help you get some of your data back, but it’s not guaranteed. |
Frequently Asked Questions
How to find folders on Mac?
You can find folders on Mac using Finder, the default file manager. To do so:
- Launch Finder.
- Select the search bar in the top-right corner.
- Enter the name of the folder you’re looking for and press Return.
How to recover permanently deleted folders on Mac?
Here’s a simple way to recover permanently deleted folders on a Mac:
- Download and install Disk Drill on your Mac.
- Launch the app and scan the device containing permanently deleted folders.
- Preview the scan results and select the folders you need to recover.
- Choose a safe recovery location.
- Complete the deleted folder recovery.
How to recover deleted home folder Mac?
You have two options on how to recover a deleted home folder: you can either restore it from a disk image or use a data recovery software application to analyze your hard drive and find its remains. If you don’t have a backup disk image and decide to use data recovery software, you can simply follow the second solution provided in the first section of this article.
How to undo an accidentally deleted folder?
Right after you’ve accidentally deleted a folder, you can press the Command + Z shortcut. This is a universal undo command on Mac that reverts the last action, effectively bringing your folder back.
How to restore a folder to a previous version on Mac?
If you have Time Machine, Apple’s incremental backup tool, enabled on your Mac, then you can restore any backed-up folder to a previous version with ease:
- Open the Folder you want to restore using Finder.
- Enter Time Machine using Spotlight.
- Choose the date of the version you want to restore.
- Click the Restore button.
Where is the Recently Deleted folder in the Mac Photos app?
You can find the Recently Deleted folder in the Mac Photos app in the Photos section of the left sidebar.
David Morelo is a professional content writer with a specialization in data recovery. He spends his days helping users from around the world recover from data loss and address the numerous issues associated with it.
When not writing about data recovery techniques and solutions, he enjoys tinkering with new technology, working on personal projects, exploring the world on his bike, and, above all else, spending time with his family.
- Klennet Recovery Review (Formerly Zero Assumption Recovery)
- iBeesoft Data Recovery Review – A Likable Clone With Limited Features
- DMDE Review – A Data Recovery Powerhouse or a Usability Nightmare?
- Cisdem Data Recovery for Mac Review – A Clone in Disguise
- Tenorshare 4DDiG Review – All That Glitters Is Not Gold
- Houston, Texas, United States
Nikolay Lankevich has over 15 years of strong experience in various fields and platform includes Disaster Recovery, Windows XP/7. System analysis, design, application (Inter/Intranet) development, and testing. Provided technical supports on desktop and laptops on Win-XP and Macintosh for about 2000 employees.