
How to Recover Files Deleted By CHKDSK
The CHKDSK utility is commonly used to repair a wide variety of disk-related errors in Windows. But occasionally, it can do more harm than good – like deleting important data from the drive. Fortunately, you can recover files that were deleted by CHKDSK, provided you act quickly and follow the instructions in our guide carefully.
Does CHKDSK Delete Files?
In a line, deleted files are essentially collateral damage after a CHKDSK CMD scan.
The utility’s job is to find and resolve logical errors on your storage drive. It checks the integrity of the drive’s file system and also looks for bad sectors on the drive. Depending on the parameters you use, CHKDSK can either display a status report of your disk or – if you used the chkdsk /f or chkdsk /r commands – attempt to repair the errors as well.
Here are some specific cases that could lead to data loss after running the CHKDSK command:
- 🕘 The scan is interrupted. A CHKDSK scan, especially with /r or /f parameters, should be allowed to be complete. If it’s interrupted due to any reason (forced shutdowns, power cuts, etc.), it could lead to data loss.
- ❌ CHKDSK encounters bad sectors. Running the CHKDSK utility with the /r parameters makes the utility check the drive for bad sectors and fix them. When CHKDSK encounters a bad sector, it’ll ask Windows to mark that sector and never use it again to store data. Any files or file fragments are then assigned to a clean sector, which may or may not work since the files were stored in a bad sector in the first place and could’ve been corrupt.
- 🛠️ The drive is physically or electronically damaged. You should never run CHKDSK on a drive that displays signs of physical or electronic damage (whirring, clicking, or beeping sounds). That’s because there’s nothing CHKDSK can do to tackle physical damage. Instead, it’ll just worsen the problem because the scan is physically strenuous for the drive. You’re better off contacting a professional data recovery service.
How to Restore CHKDSK Deleted Files
There are several ways to undelete files deleted by CHKDSK, and we’ll take a look at those methods below.
But before that, ensure that the View hidden files option is enabled in Windows Explorer and the “Hide protected operating system files” option is disabled. Then, look for a “FOUND.000” folder or similar in the C:\ drive. If the folder exists, open it, and you should see old CHKDSK recovered files with the same extension, .chk. These are recovered file fragments that CHKDSK recovered during its scan, and you won’t be able to open or access them right away.
But, according to an answer in the Microsoft forum, tools like deCHK can help you recover some of these files. This is worth a try before moving on to the other methods below, but we recommend you proceed with caution since there are no verified reviews of such tools.
Now, let’s take a look at some verified ways to recover files deleted by CHKDSK:
Method 1: Using Data Recovery Software
Data recovery programs are, by far, the easiest way to recover deleted files after a CHKDSK scan. However, there are so many such apps available on the web that deciding which ones are the best and worth your time and money can be exhausting.
To help you out, we at Pandora Recovery created an intuitive software picker to help you decide which program is best for your specific data recovery scenario. Simply answer a few questions regarding your requirements, and you’re good to go.
If you wish to know detailed information about the most popular data recovery programs and how they compare with each other, our reviews and comparison sections have got you covered.
When it comes to retrieving CHKDSK deleted files, you should look for a program that:
- 📂 Recovers files with the original folder structure intact. CHKDSK frequently messes up the folder structure of the deleted files and orphans them. Without knowing the folder structure, it can be cumbersome to identify the files you wish to recover and where they were originally located. A data recovery program that restores the original filenames and folder structure is non-negotiable.
- 👷 Reconstructs files. Some data recovery programs are unable to recover files that don’t have any metadata. This can severely limit the extent of possible data recovery. You should choose a program that can reconstruct files that are missing their metadata. While these files won’t have their filenames and folder structure intact, they will have their original extension, and you can open them.
- 🔁 Has a proven track record. Data recovery scans are stressful to your drive, and you stand to recover most of your data in the first scan itself. Subsequent scans may not be as successful. Right from the get-go, it’s important to pick a program that you can trust and that has helped other users in a similar scenario.
Option A: Disk Drill
![]() Our top pick when it comes to data recovery software is Disk Drill, which, in our review, checked all the boxes of an excellent data recovery program. It works with all storage media types across a wide range of file systems, including cases where the drive may not have a file system at all (RAW). The app will also reconstruct any files that are missing their metadata. On Windows, you can take advantage of Disk Drill’s free trial that lets you recover up to 500 MB of data without spending a penny.
Our top pick when it comes to data recovery software is Disk Drill, which, in our review, checked all the boxes of an excellent data recovery program. It works with all storage media types across a wide range of file systems, including cases where the drive may not have a file system at all (RAW). The app will also reconstruct any files that are missing their metadata. On Windows, you can take advantage of Disk Drill’s free trial that lets you recover up to 500 MB of data without spending a penny.
Here’s how to use Disk Drill to recover data deleted by CHKDSK:
- Download and install Disk Drill. Do this on a drive apart from the one which you wish to recover data from.
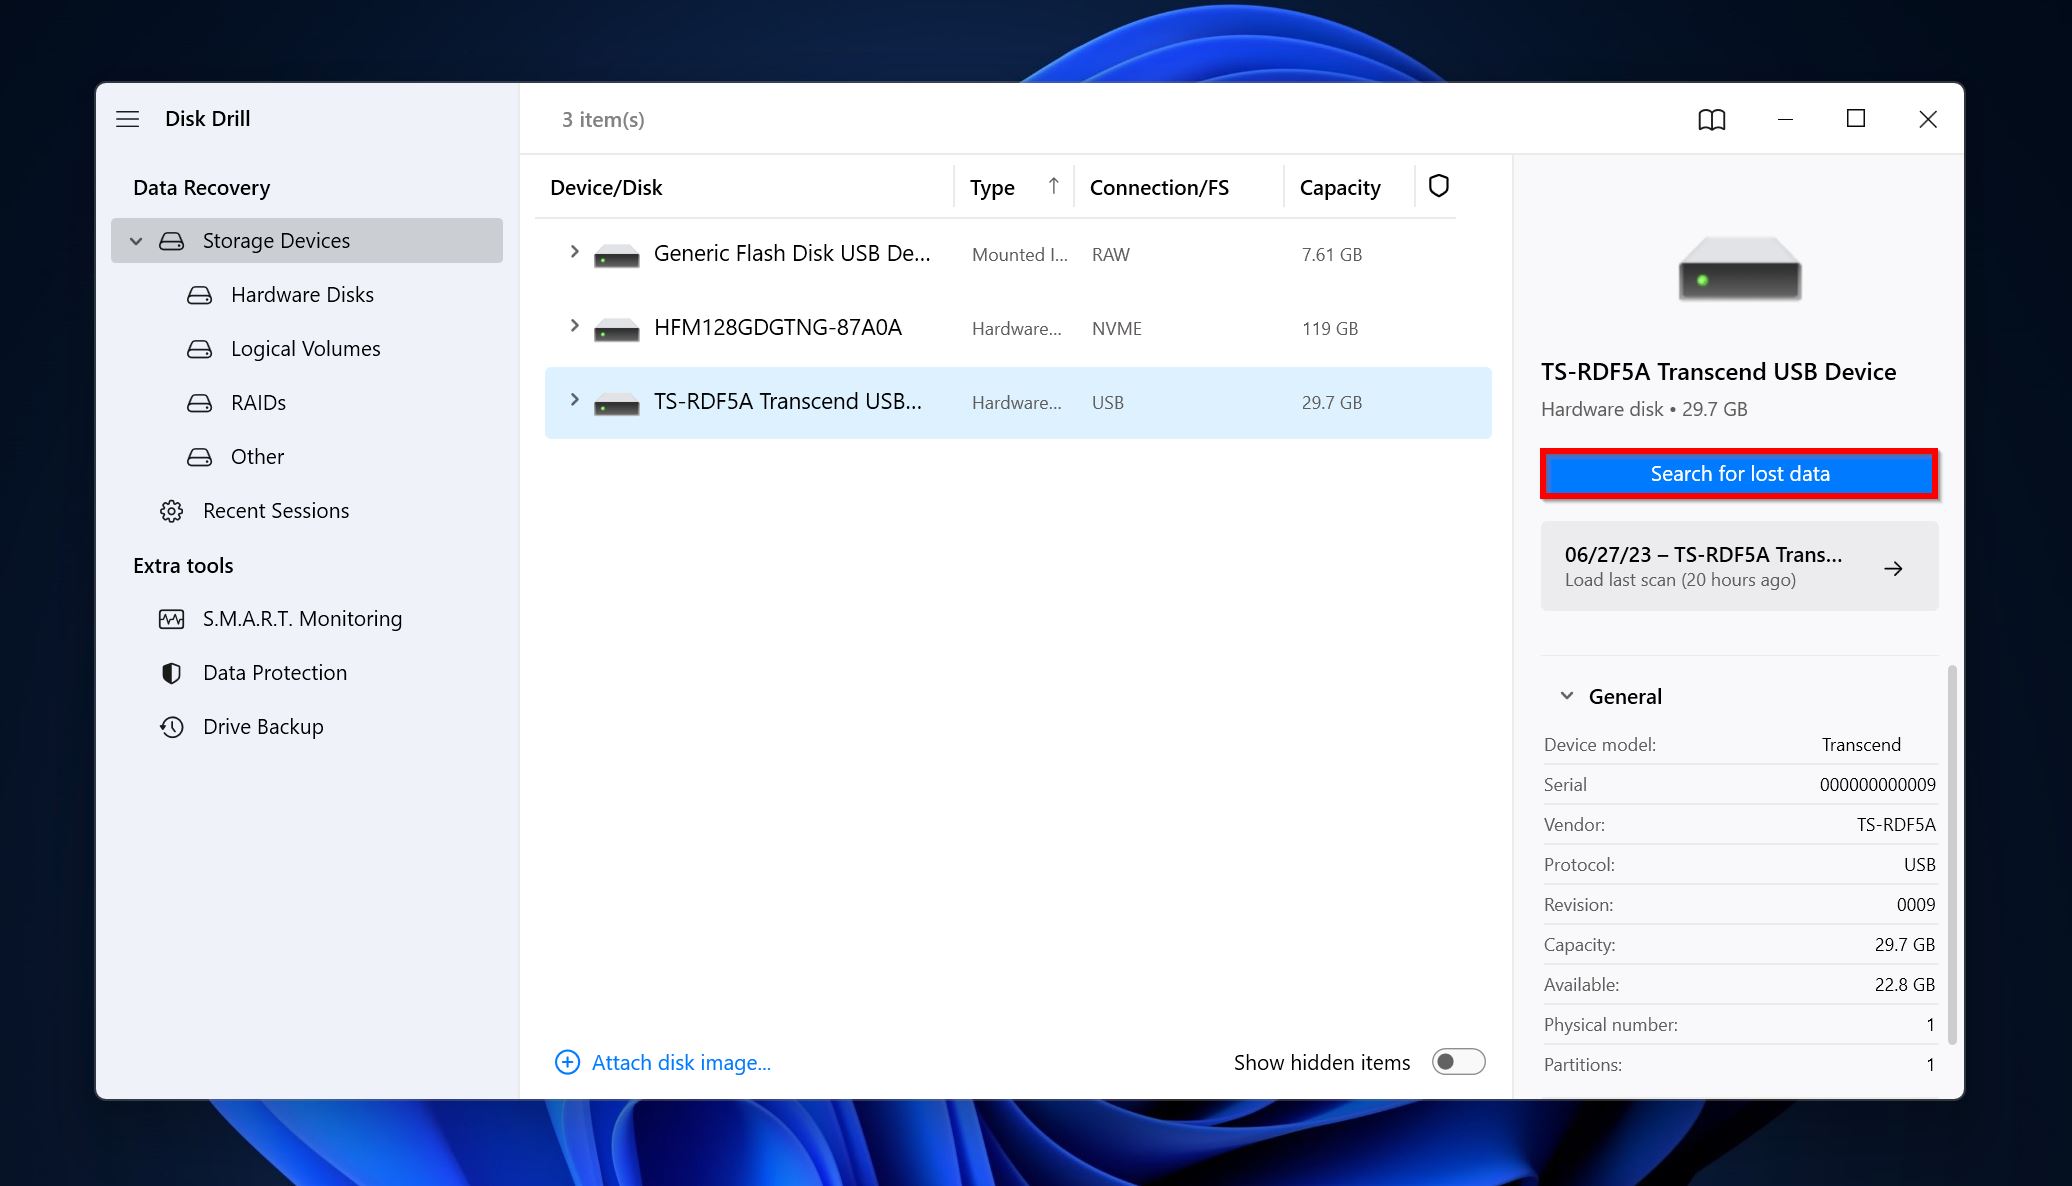
- Open Disk Drill, select the drive on which you ran the CHKDSK or ScanDisk utility, and click on Search for lost data.
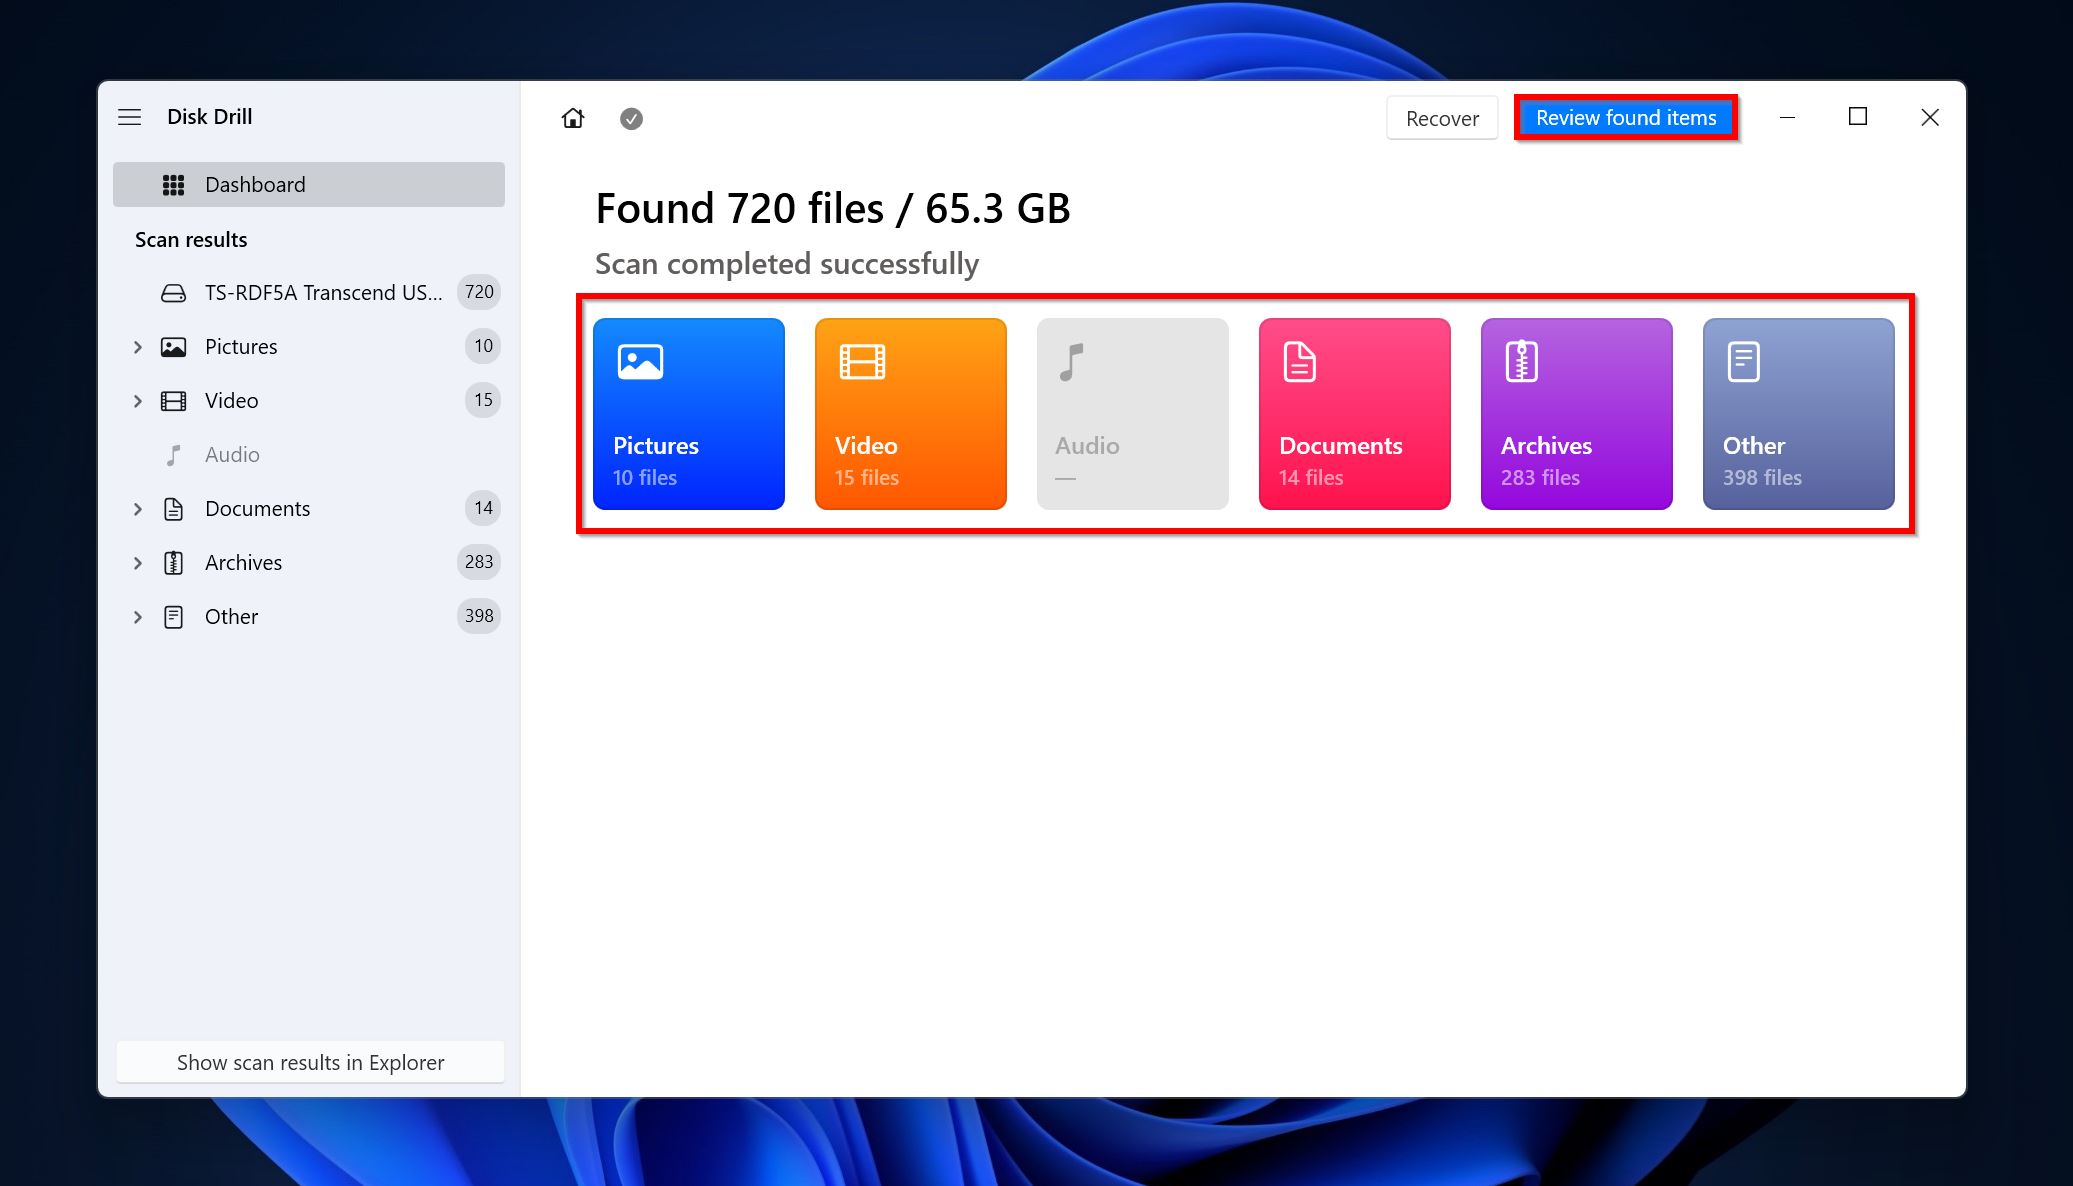
- Click on Review found items to view the recoverable data. Alternatively, you can filter out the results by clicking on the relevant file type instead (Pictures, Video, Audio, Documents, Archives, and Other).
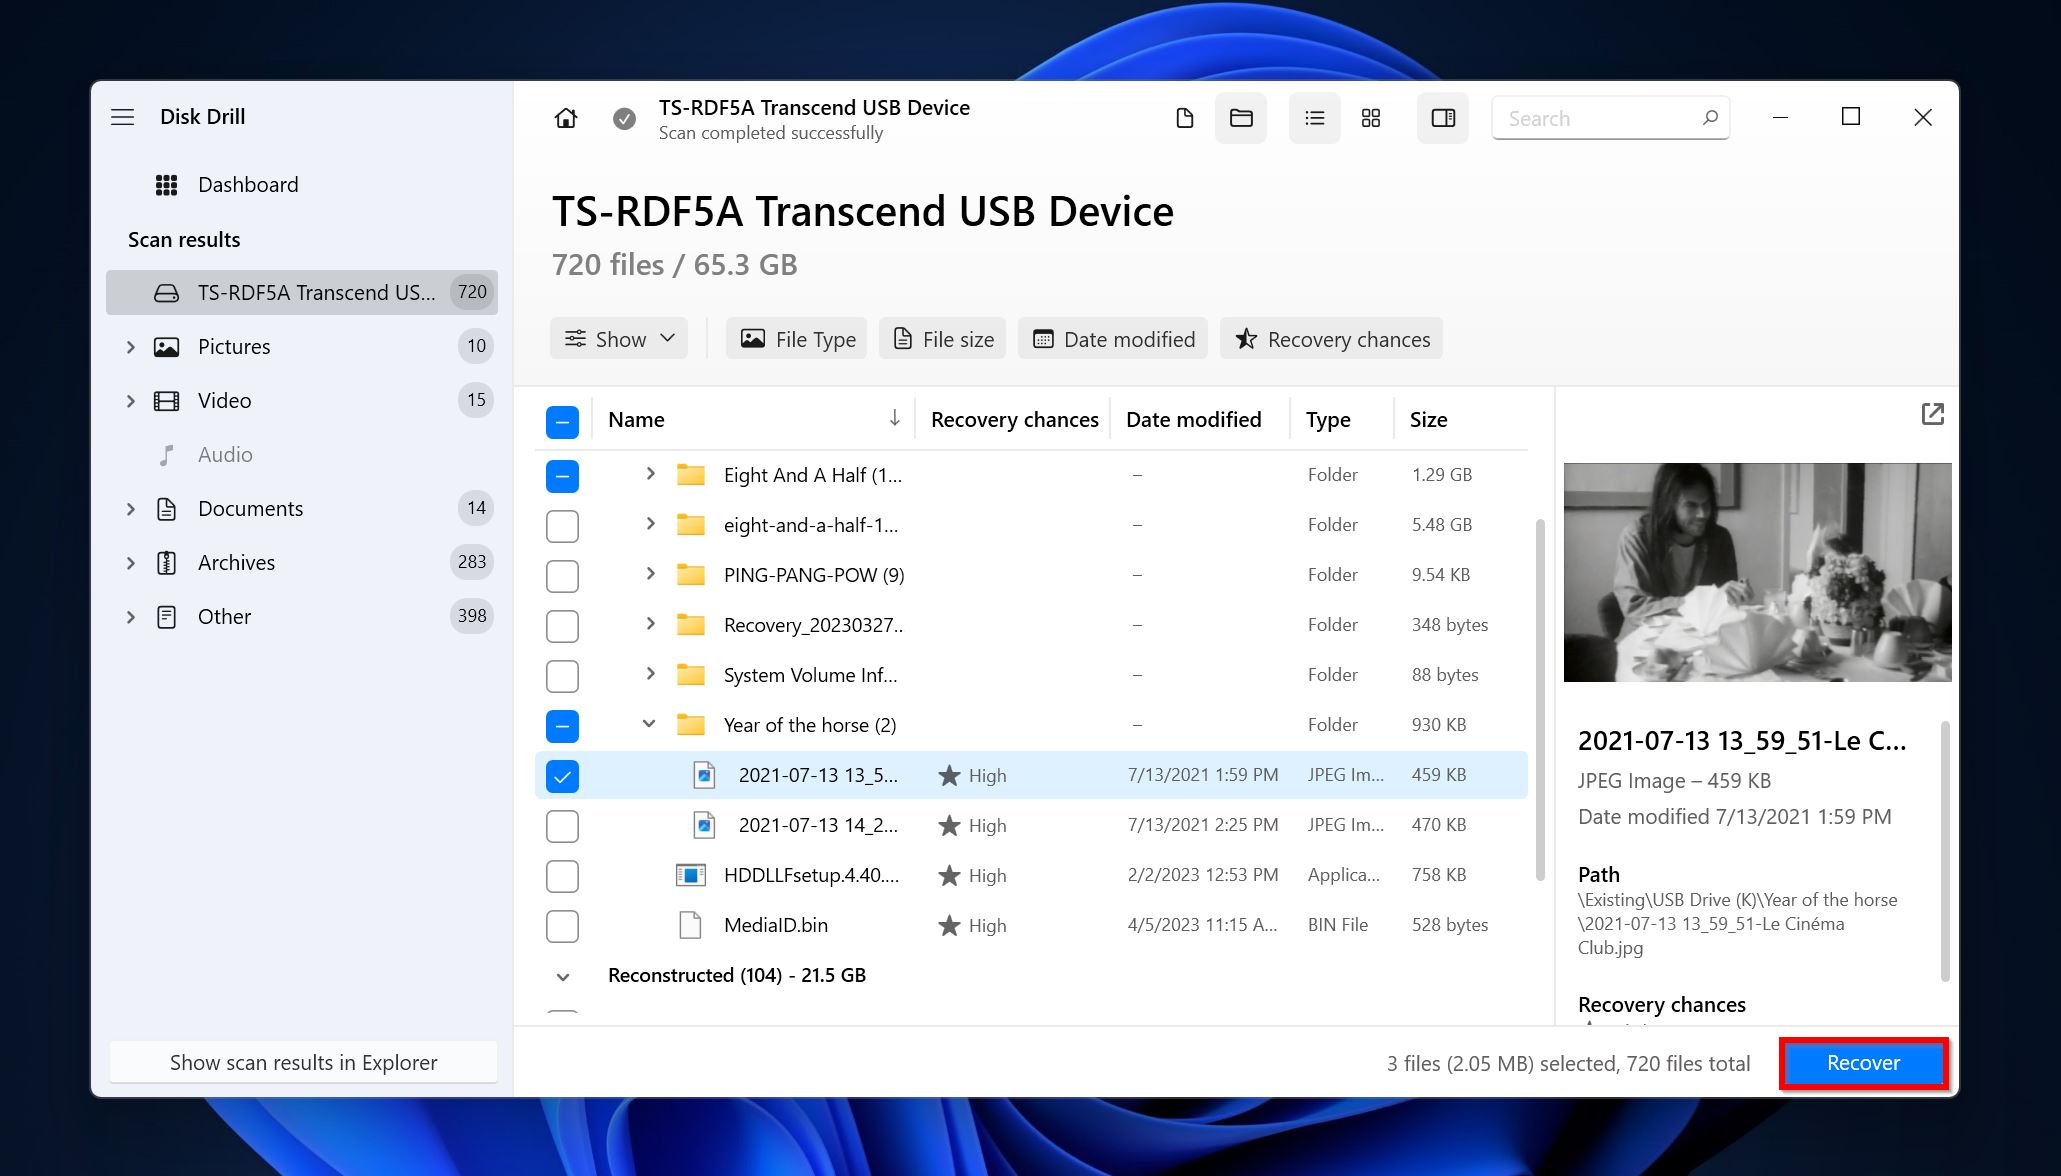
- Expand the Deleted or lost and Reconstructed sections.

- Select the files you wish to recover. Disk Drill will display a preview of the currently selected file, however, you can manually preview a file by clicking the eye icon next to the filename. Click on Recover after confirming your selection.
- Choose a recovery destination and click Next. It’s best to restore them to another drive.
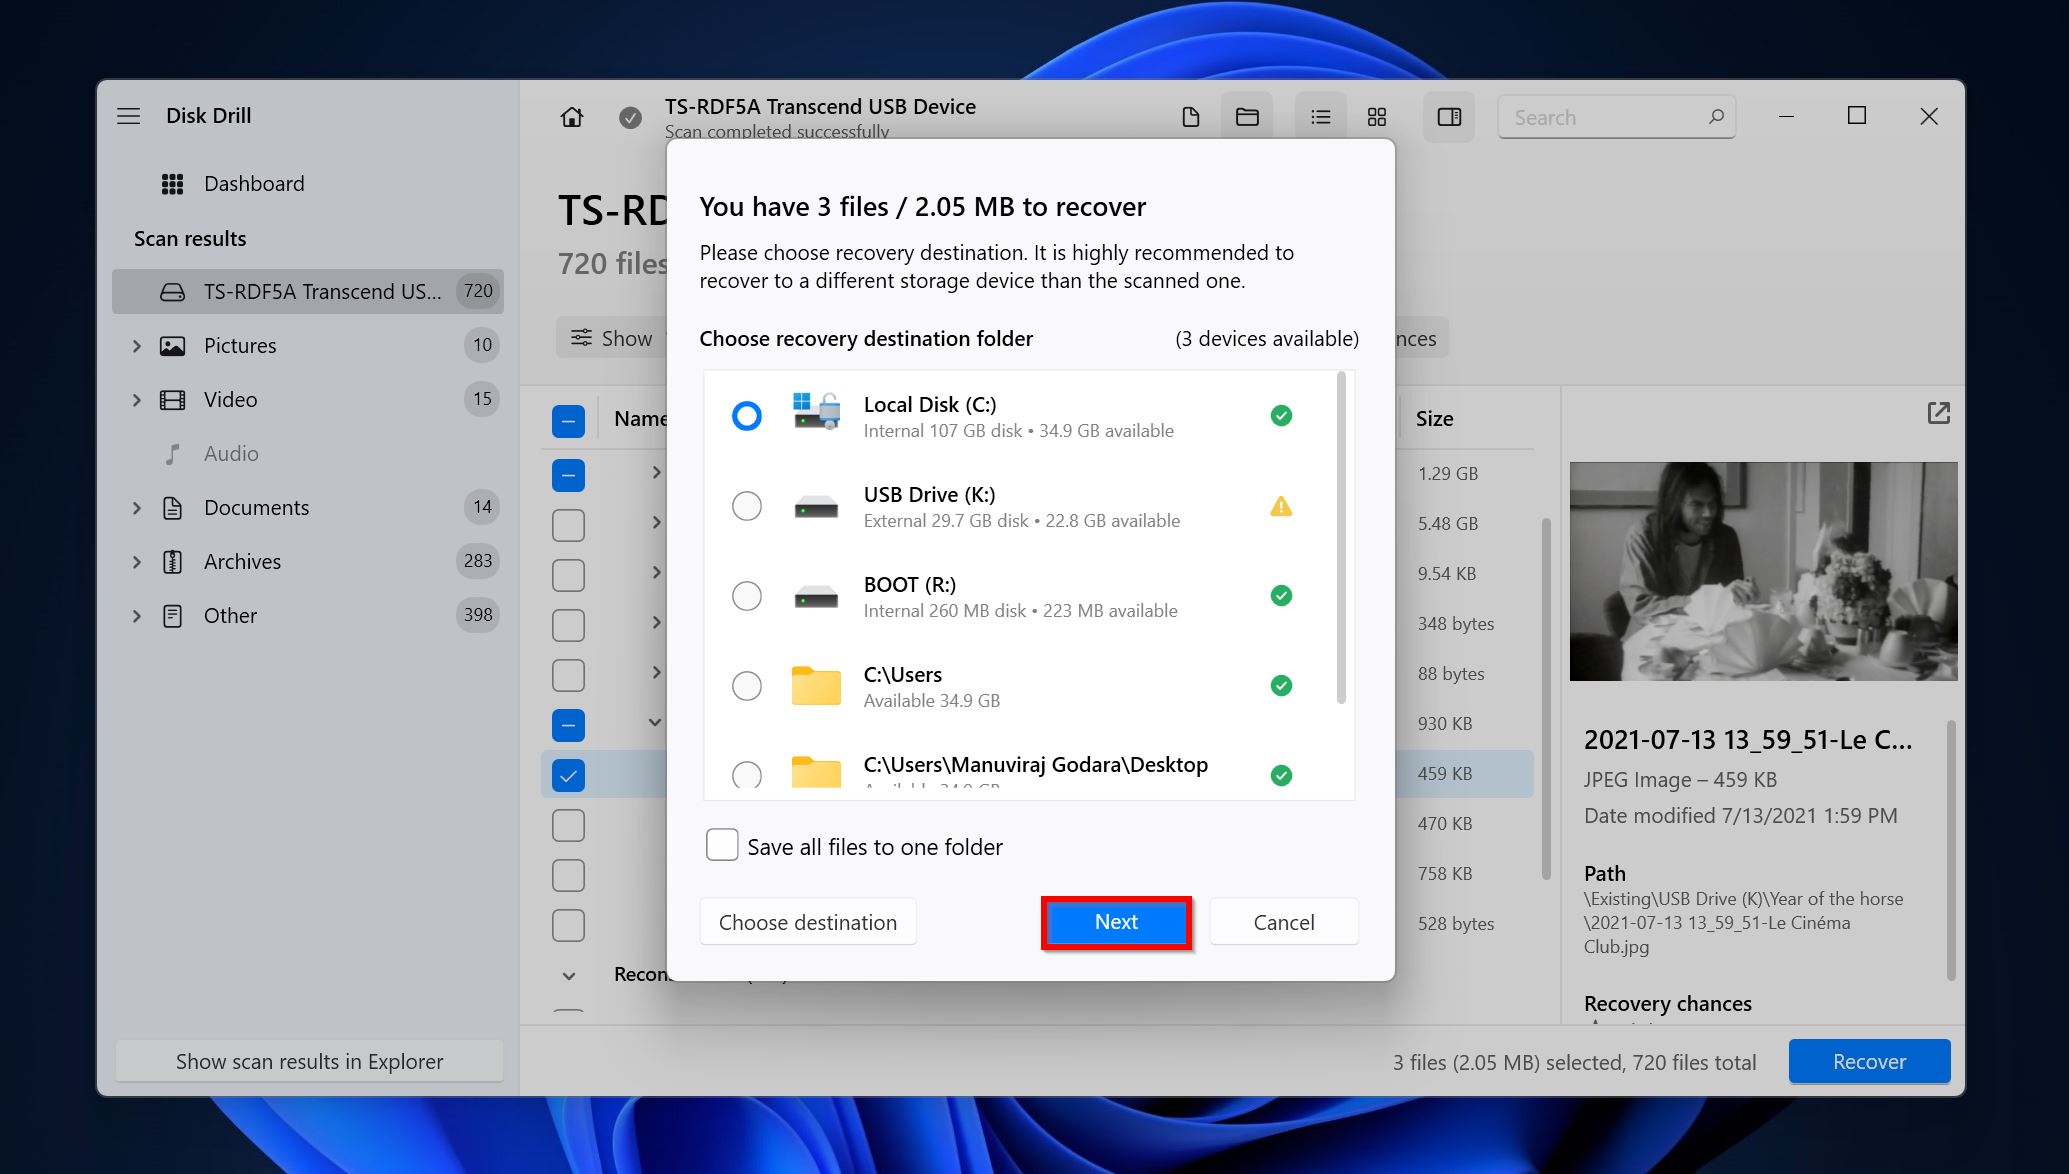
- Disk Drill will recover your files.
Option B: Windows File Recovery Tool
![]() If you don’t wish to use a third-party data recovery app. Windows File Recovery is a free tool that can help you recover CHKDSK deleted files. You can find it on the Microsoft Store. However, there are some major drawbacks to using this tool – it doesn’t have a GUI, and it is rated at a measly 2.5/5 stars on the Microsoft Store (most bad reviews complain about the lack of a GUI, not its functionality). Additionally, the app cannot scan entire disks, only specific partitions, with support only for a limited number of file systems.
If you don’t wish to use a third-party data recovery app. Windows File Recovery is a free tool that can help you recover CHKDSK deleted files. You can find it on the Microsoft Store. However, there are some major drawbacks to using this tool – it doesn’t have a GUI, and it is rated at a measly 2.5/5 stars on the Microsoft Store (most bad reviews complain about the lack of a GUI, not its functionality). Additionally, the app cannot scan entire disks, only specific partitions, with support only for a limited number of file systems.
Here’s how to use Windows File Recovery Tool to undelete files deleted by CHKDSK:
- Get the Windows File Recovery Tool from the Microsoft Store.
- Run the app, and you’ll be loaded into a Command Prompt-esque interface.
- Type winfr X: Y:\ /extensive and press Enter. Replace X with the drive or partition letter from where you wish to recover data and Y with the recovery destination. There are various parameters that you can use to modify the data recovery process according to your needs. You can find them in the Windows File Recovery user guide.

It’s important to know that regardless of which data recovery app you use, the extent of data recovery will depend on a few factors:
- ⏰ Time elapsed since data loss. The sooner you scan your disk, the higher your chances of recovering all your data. This is especially true in the case of SSDs, as they have a TRIM feature that clears up unused data blocks at regular intervals.
- ✔️ Supported file systems and file types. Some data recovery programs support all major file systems and recognize a wide variety of file types, whereas some may only work with specific file systems and file types. Always be sure to double-check that the data recovery app you pick supports your drive’s file system and the files you want to recover.
- ⚠️ Fragmentation of data. If the files on your hard drive are heavily fragmented, it will be trickier to recover them, and complete recovery may be impossible.
- 💽 Drive usage after data loss. Continued usage of your drive after data loss will hamper your chances of data recovery, as new files are constantly being written to a drive when it’s in use. These files overwrite the previously deleted files that actually exist on your drive, but the data blocks they occupy are simply marked available for use.
Method 3: Using Windows File History
Windows File History is the default backup and restore tool in Windows versions 8 and above. If you’d set it up properly before losing your data, you can use it to restore the deleted files. However, the relevant folders should’ve been backed up in File History.
Here’s how to use Windows File History and get back data deleted by CHKDSK:
- Ensure the drive you used to set up File History is connected to your PC.
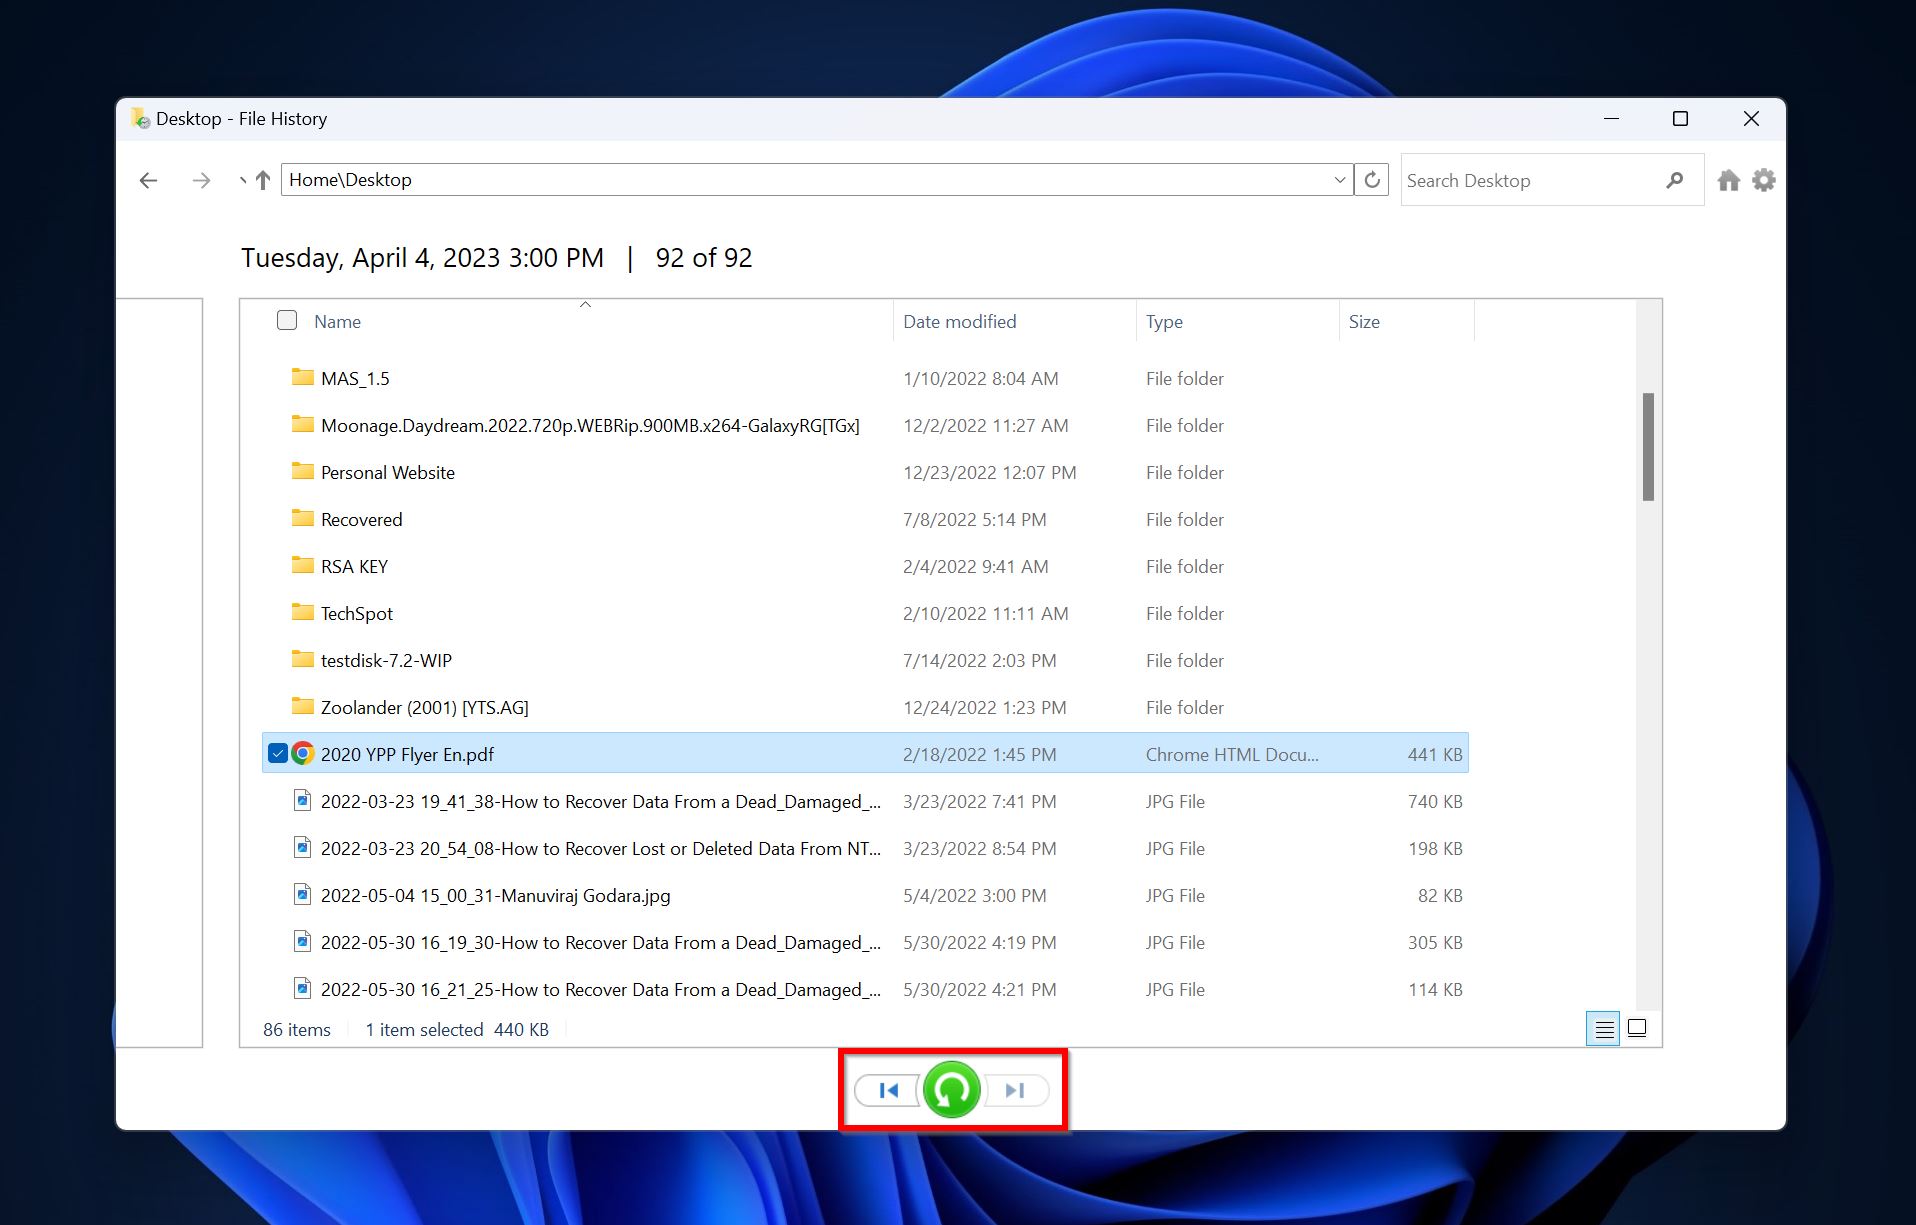
- Type “file history” in Windows Search (Windows Key + S). Click on Restore your files with file history from the search results.
- Navigate through the backups until you find one that contains the files you wish to recover.
- Click on the green recover button at the bottom to restore the file to its original location.
Method 4: Windows Backup and Restore
If you used the Backup and Restore (Windows 7) feature to back up your previous data, the restore process will differ from Windows File History.
Here’s how to use Backup and Restore (Windows 7) to recover data deleted by CHKDSK:
- Ensure the drive you used to set up Backup and Restore (Windows 7) is connected to your PC.
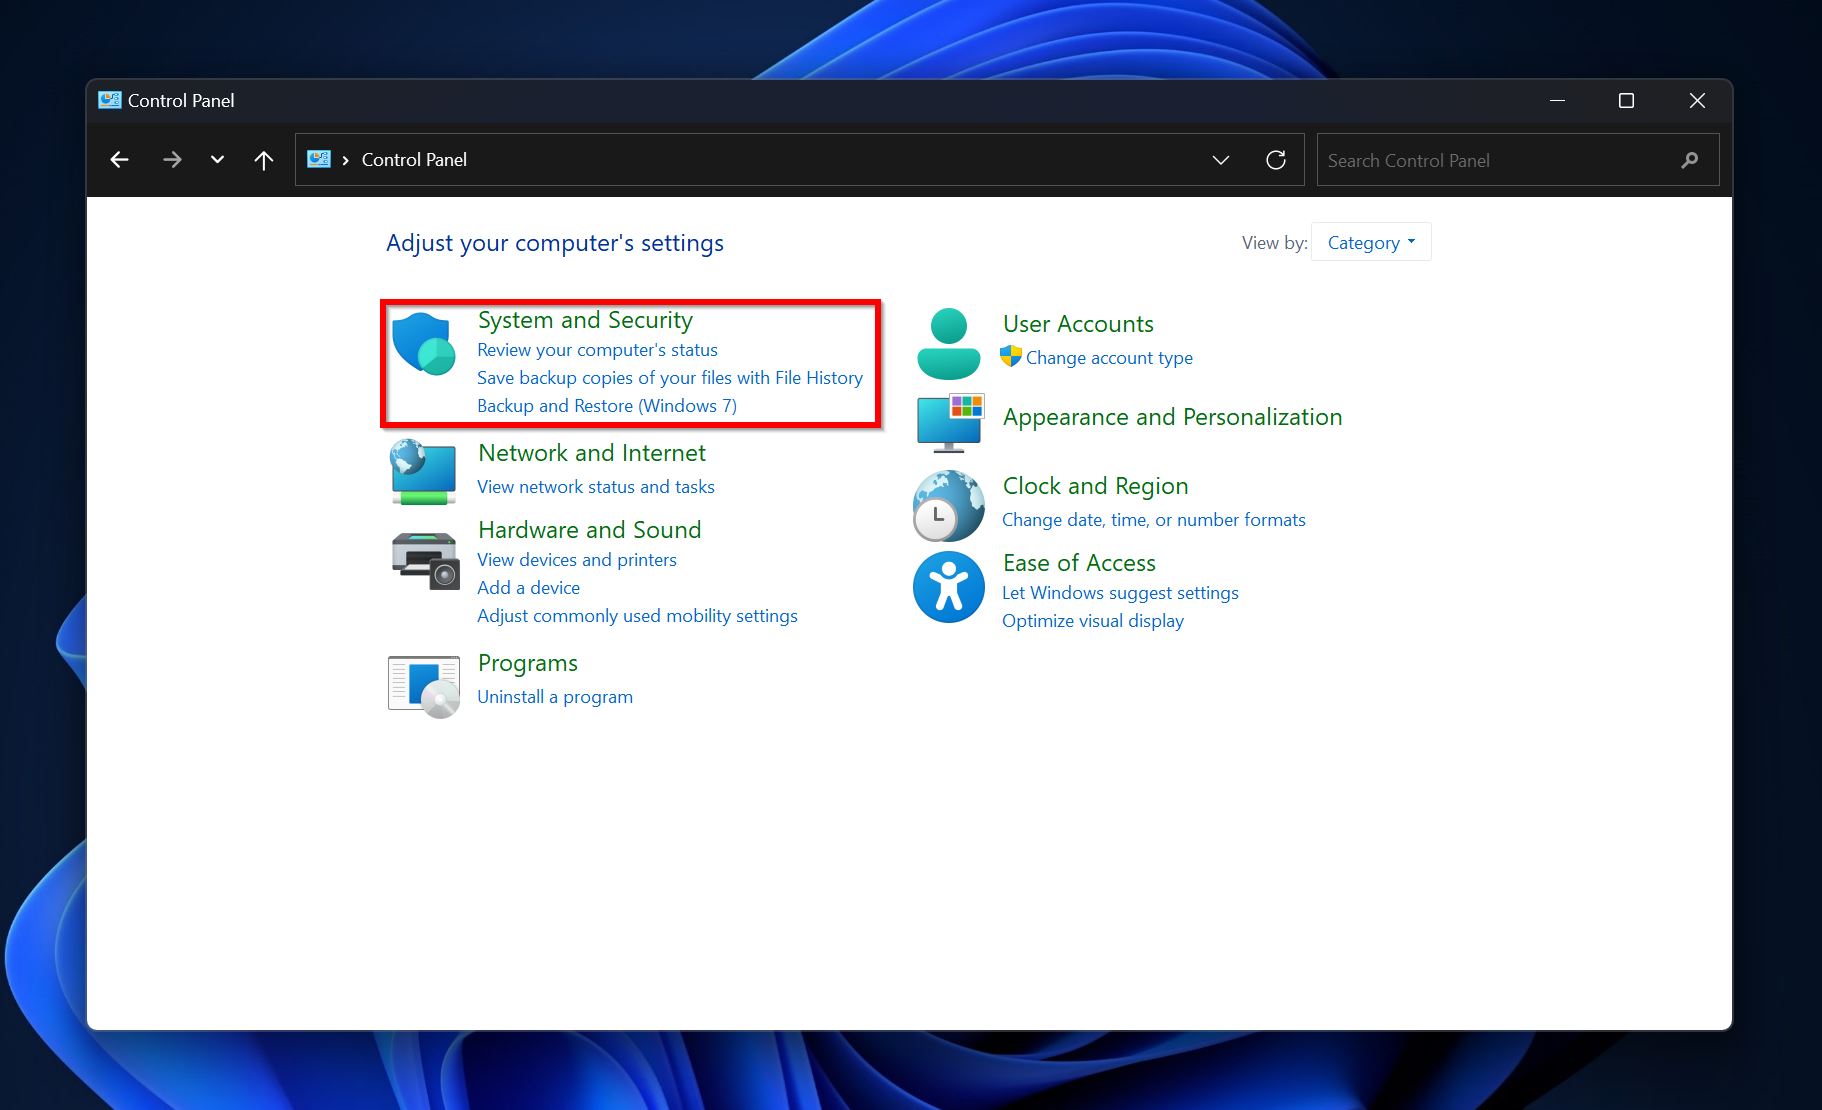
- Search for the Control Panel in Windows Search (Windows Key + S) and open it.
- Click on Backup and Restore (Windows 7) under System Security.
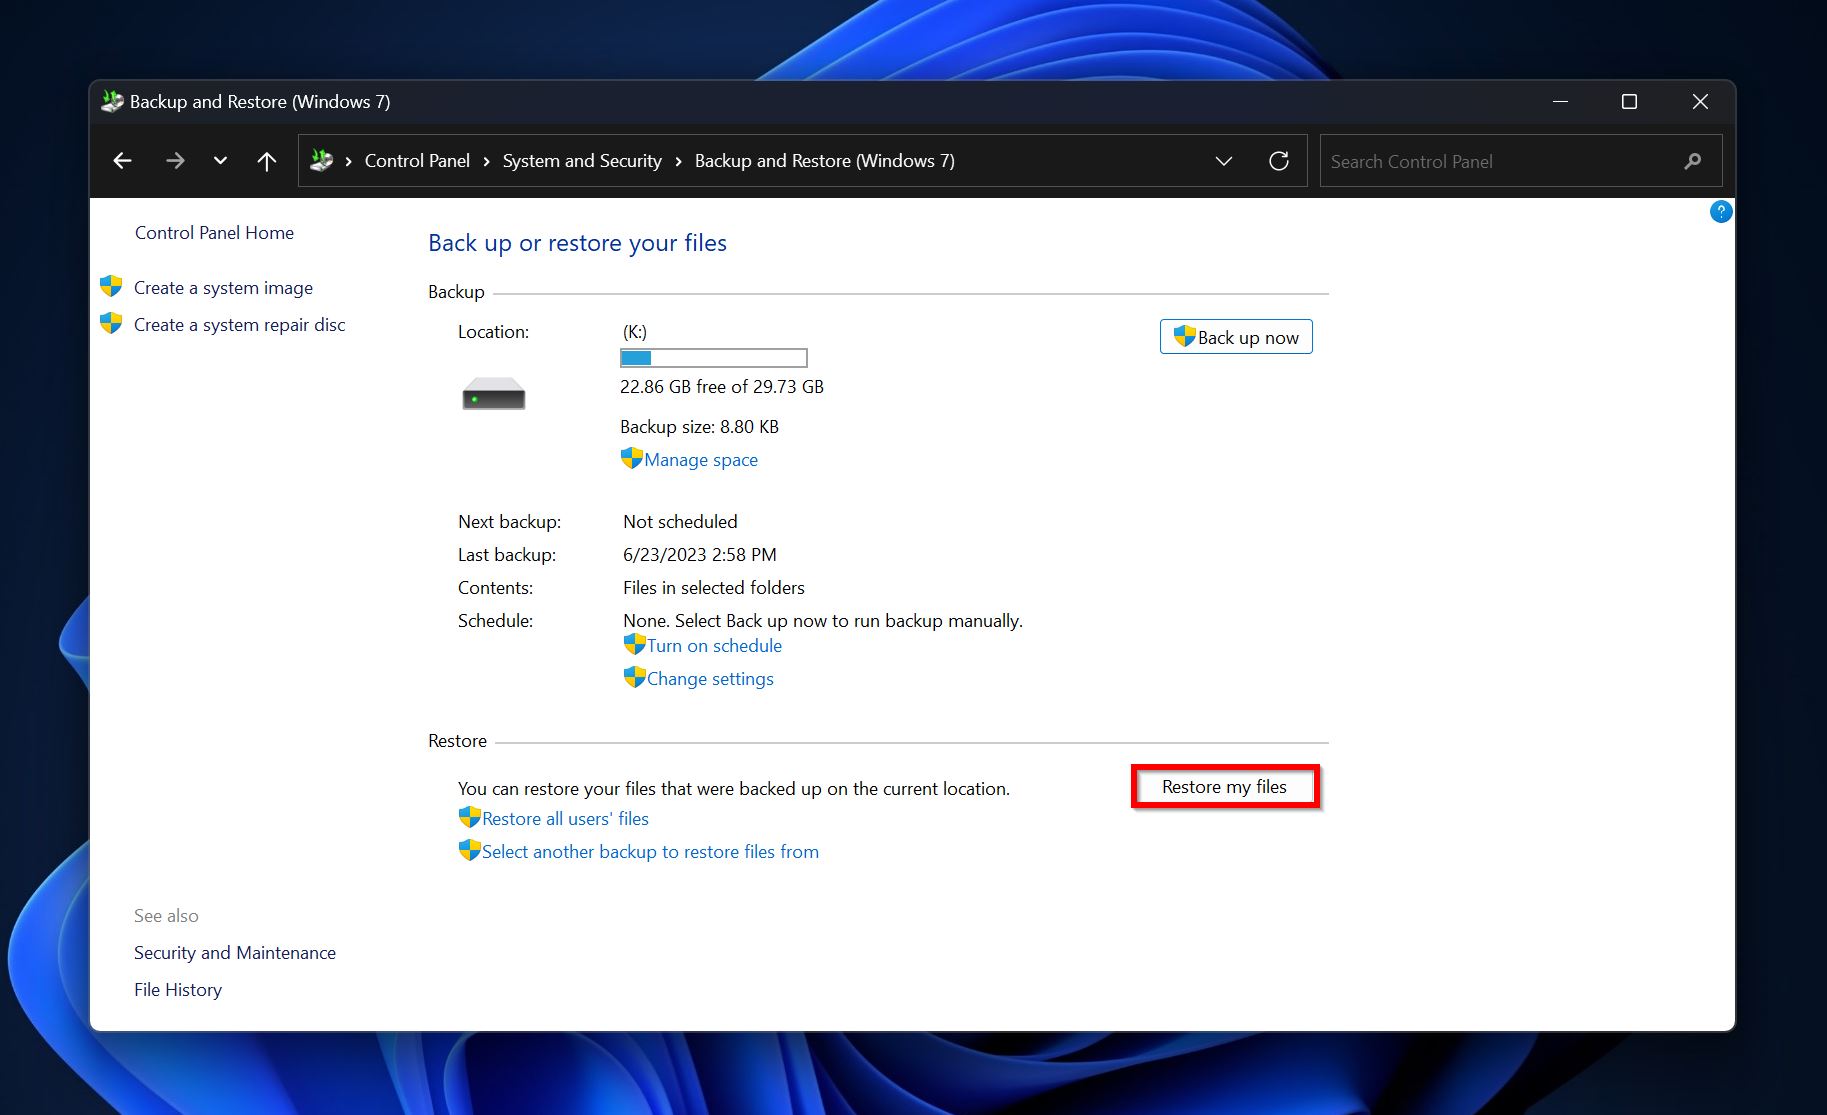
- Click on Restore my files.
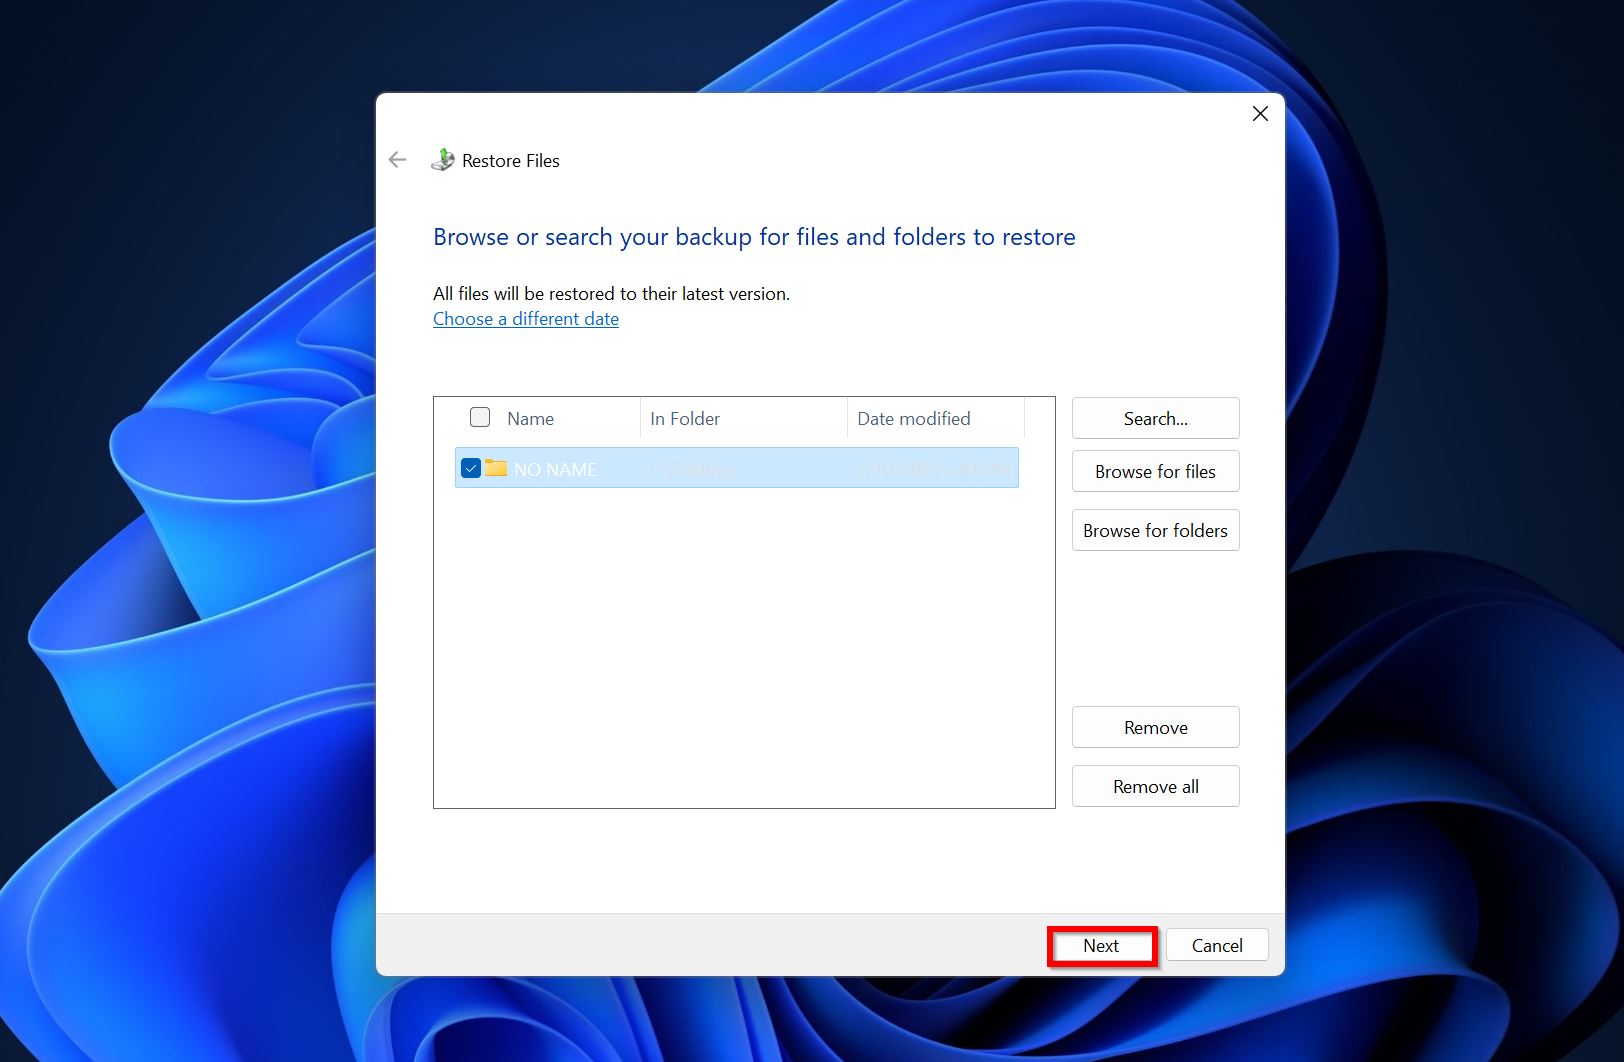
- Click on Browse for folder, Browse for files, or Search, depending on your needs. Select the files/folders and click Add folder.
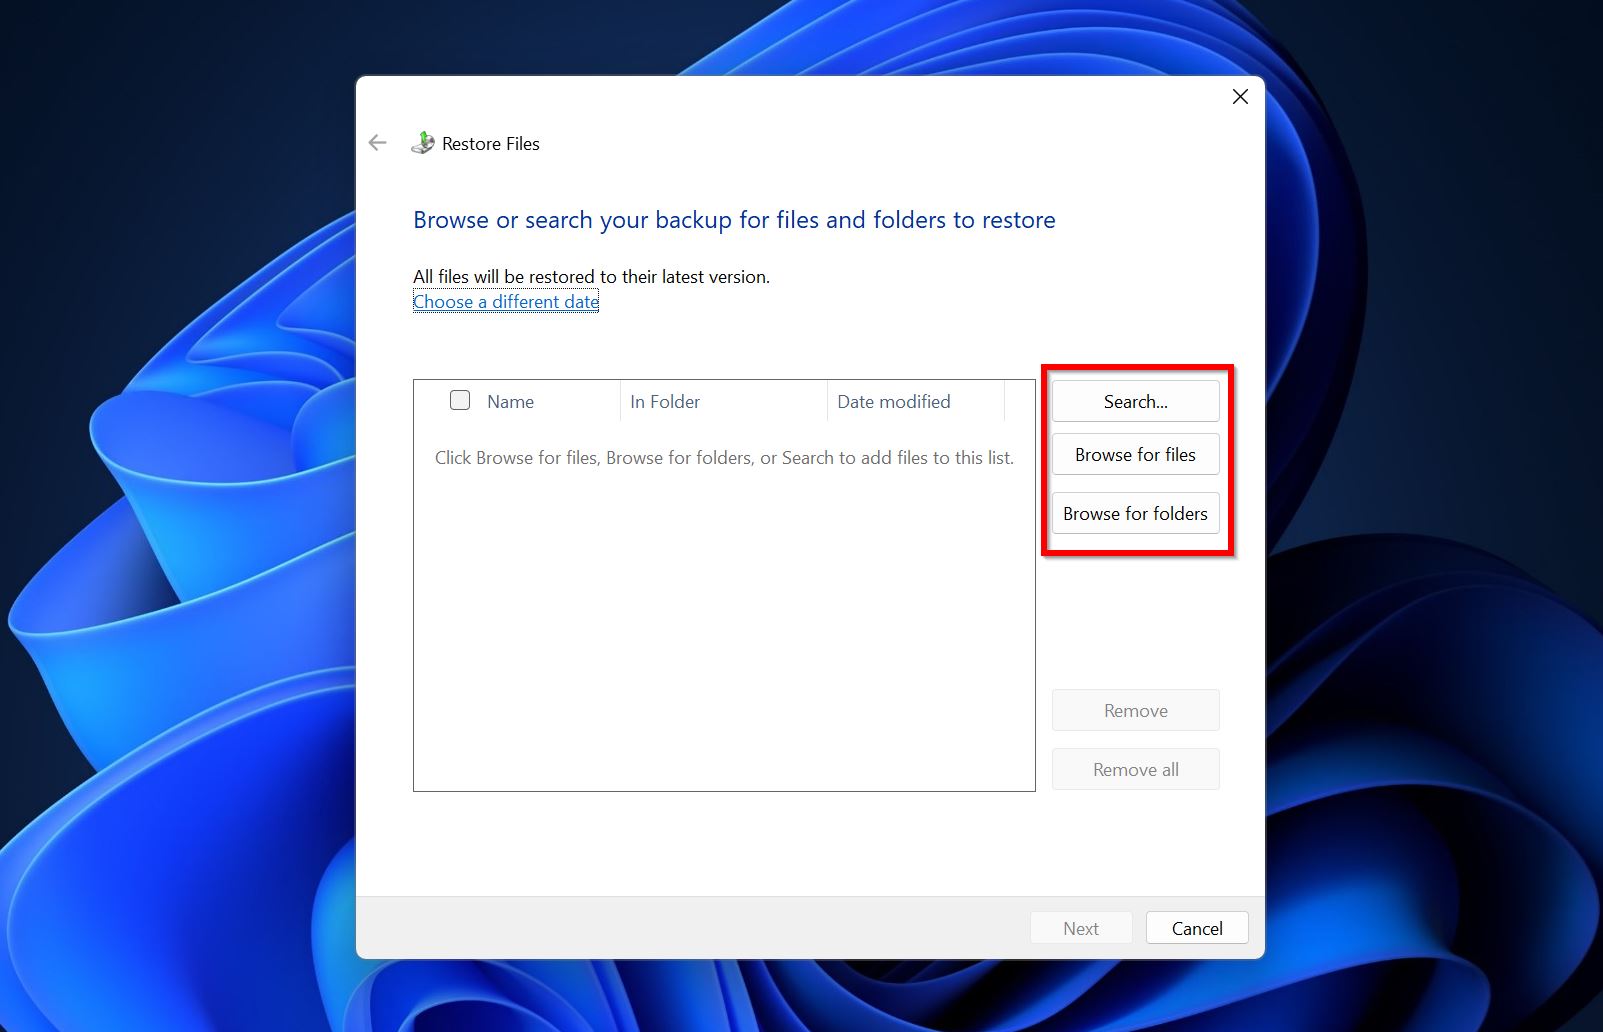
- Click on Next.
- Choose whether you wish to restore the files to their original location or to a different one. Click on Restore.
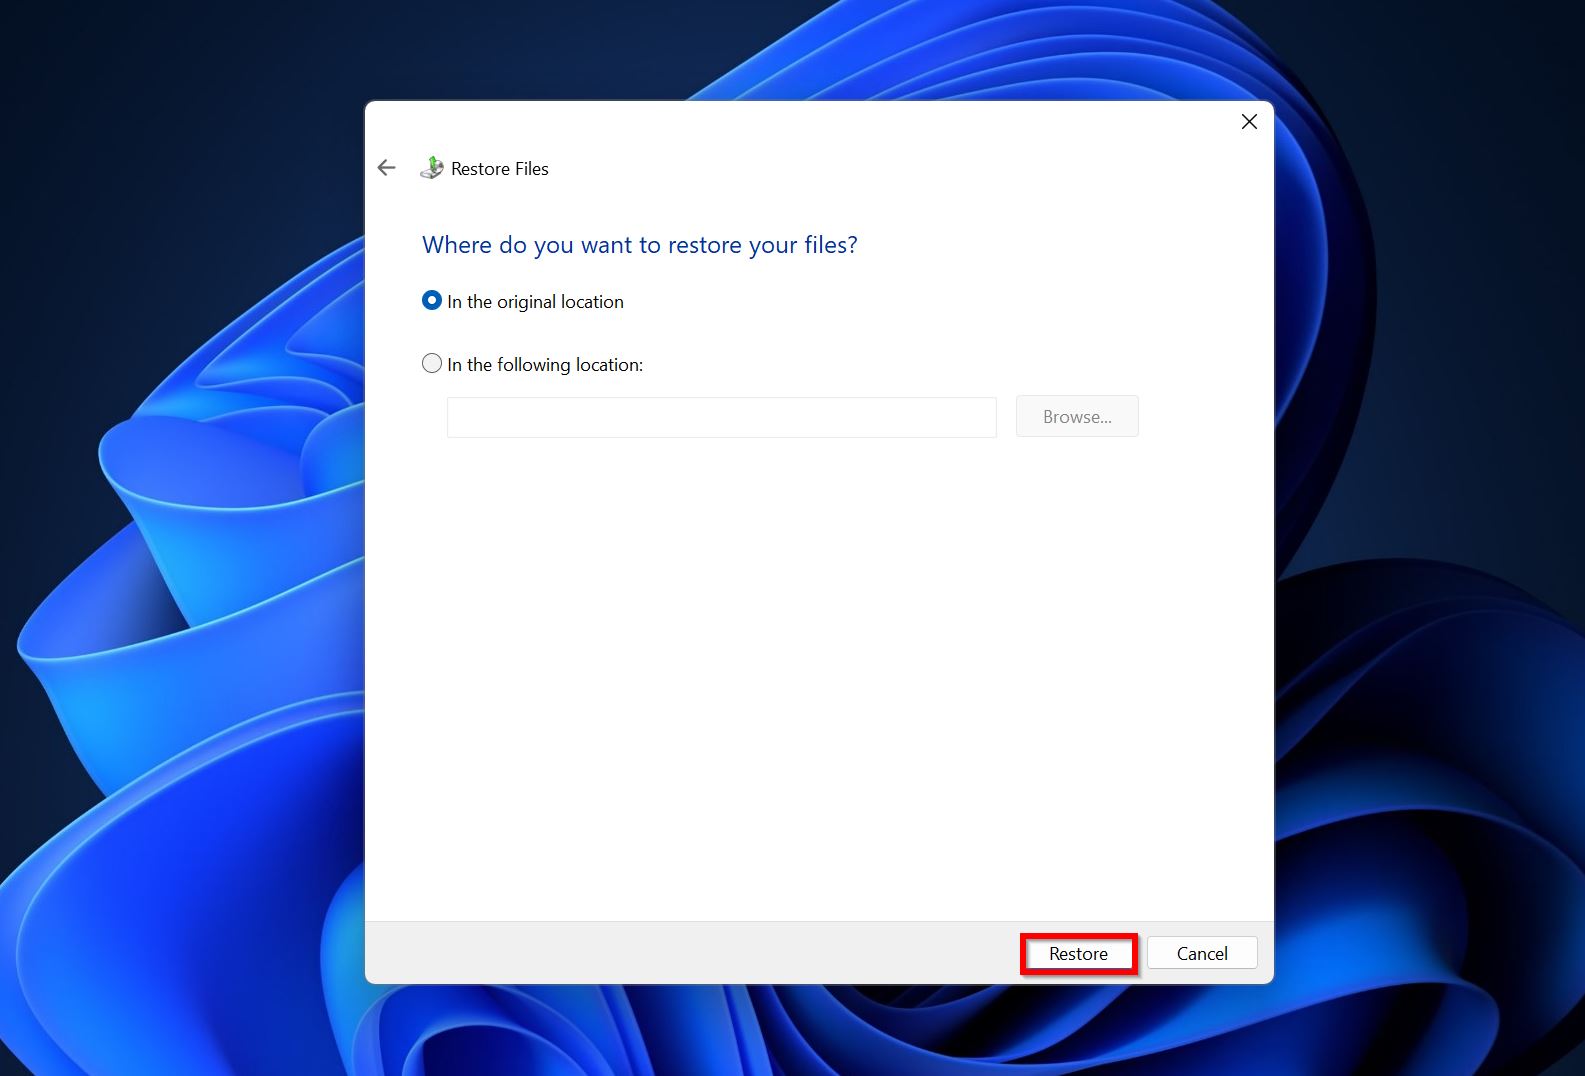
- The files will be restored to your desired location.
Frequently Asked Questions
Can CHKDSK delete files?
Yes, file deletion can occur when CHKDSK attempts to repair the file system and bad sectors on your disk. It can also happen if you scan a physically or electronically damaged drive or the scan is interrupted.
Why did CHKDSK /f delete my files?
While CHKDSK /f does not search for bad sectors, it could delete your data as it attempts to repair the drive’s file system.
Where does CHKDSK put recovered files?
CHKDSK puts recovered files in a folder called “FOUND.000” in the C:\ root directory. All these files have a .chk extension.
Can CHKDSK recover files?
CHKDSK does recover files, but in most cases, they’re not usable. The files have a .chk extension that needs to be put back together using tools like deCHK. Many users opt to simply recover the files using data recovery software.
Conclusion
Creating regular backups of all your important files is the only way to shield yourself against data loss completely. We recommend storing these backups on a local storage drive as well as a cloud storage solution. Additionally, never attempt DIY data recovery if the drive makes whirring, clicking, and beeping sounds.

- 4 publishings
Manuviraj Godara is a professional content writer with over four years of experience, specializing in technology and data recovery topics. His passion for technology began when he got his first computer, sparking a fascination that has never ceased to amaze him. He is also an avid gamer who enjoys spending his free time exploring his favorite music albums and reading. Apart from writing, Manuviraj has a penchant for gaming, motorcycling, and listening to Steely Dan. With his ever-growing expertise in technology, Manuviraj consistently delivers engaging content, helping readers make the most out of their devices and computers.
- Frisco, Texas, United States
Yevgeniy Tolkunov is Hardware Engineer at ACE Data Recovery. Yevgeniy has a Master's Degree in Physics, Information Technology; 15+ years of experience.