How to Recover Deleted Files from a USB Flash Drive on Mac
Having your files disappear suddenly can be devastating, depending on what exactly was lost. In some cases, you might see dozens of hours of work go away in an instant.
Don’t be quick to worry though – not all hope is lost. Knowing how to recover deleted files from a USB drive on a Mac is a skill like any other, and taking the time to learn it can be very beneficial in preventing such incidents from getting out of control.
Why Have My Files Disappeared from My Flash Drive on Mac?
Your files can disappear from a flash drive for a number of reasons. Some of those are preventable, while others are down to bad luck. Sometimes, it’s possible that the files aren’t actually deleted but are rather just hidden. In this case, it’s important to know how to recover data from a flash drive on a Mac using different approaches.
Common scenario | Solution |
Files were accidentally or intentionally deleted from the flash drive | Method 3: Restore permanently deleted files using a recovery tool – if you permanently deleted the files but haven’t used this drive too much since then |
Files randomly disappeared | Method 2: Unhide hidden files on a USB stick – if the files are currently hidden. Method 3: Restore permanently deleted files using a recovery tool. |
Flash drive is corrupted | Method 4: Fix inaccessible flash drive using First Aid – if the drive is corrupted in a way that First Aid could address |
How to Recover Deleted Files from a Flash Drive on a Mac
If you want to recover files from a flash drive on a Mac, there are several main approaches you can take. You should pick the one that best matches your current situation, although don’t be afraid to try an alternative solution if that doesn’t work.
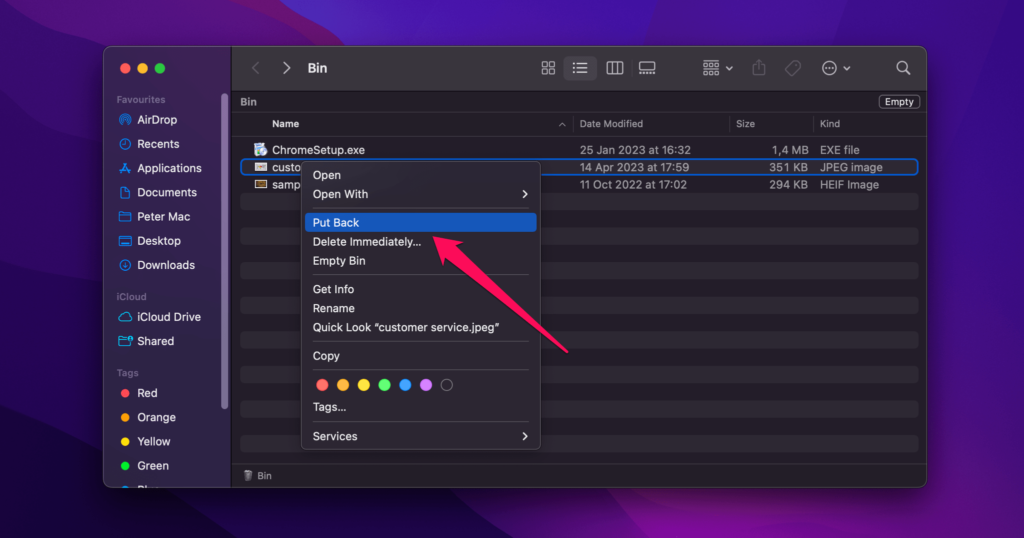
Method 1: Recover Files from Trash
The Trash serves as a temporary place for storing files that were deleted before they are permanently deleted. It gives you a chance to get your files back in case you accidentally delete something.
It’s important to understand how the Trash works though. It only shows files which are currently available for recovery. This means that if you want to recover files from a flash drive, the drive must be currently mounted, otherwise its files won’t show up in your Trash. To recover files from the Trash, follow these steps:
- Open Trash.
- Check if any of your files are visible in the list. Use the filtering/sorting options to navigate the list more easily if there are lots of files in your Trash.

- Right-click on any files you want to recover, and select Put Back.
If you don’t see your files. it’s possible that you’re affected by a recent update to your OS which hides them in Finder. Try using an alternative file explorer in that case.
Method 2: Unhide Hidden Files on a USB Stick
Sometimes files may just be hidden and not actually deleted. This can happen for a number of reasons. Sometimes applications might set a file to be hidden, or you might have done it accidentally. In any case, revealing those hidden files is easy once you know the right shortcut.
- Navigate to the folder where your files were last stored.
- Press Command + Shift + . (period)
- If there are any hidden files in the folder, they should now be visible. You might have to do this for any additional sub-folders if your files were spread over multiple different locations.
If you want to permanently mark the files as visible, follow these steps:
- Open Terminal.
- Type in the following: chflags nohidden [path to your files or folder] and press Enter

- Type in the following: killall Finder and press Enter.
Method 3: Restore Permanently Deleted Files Using a Recovery Tool
If the above solutions don’t work, you might have to use specialized USB data recovery software instead. These programs allow you to restore files that have been completely deleted, e.g. not just sent to the Trash (as long as they have not been physically overwritten on the disk).
We’ve taken a lot of time to evaluate the different solutions on the current market, and we’ve identified two tools that cover most features the average person would be interested in: Disk Drill and PhotoRec. Both have their advantages and disadvantages, but they both offer a good balance between all features that we’ve evaluated. Namely, functionality, price, operating system and file system compatibility, as well as ease of use. Disk Drill is also one of the fastest file recovery tools on the market right now.
Option A: Disk Drill
![]() Disk Drill is a great way to recover deleted files from a flash drive on a Mac, even if you’ve already deleted them from the Trash. The program is relatively simple to use once you get the hang of it. We especially recommend using Disk Drill if you’re an inexperienced user for several reasons:
Disk Drill is a great way to recover deleted files from a flash drive on a Mac, even if you’ve already deleted them from the Trash. The program is relatively simple to use once you get the hang of it. We especially recommend using Disk Drill if you’re an inexperienced user for several reasons:
- Disk Drill is great at recovering the type of data commonly stored on flash drives, like images, music, and other media
- It supports all file systems commonly used with flash drives
- It allows you to backup your drive before attempting to recover it
To use Disk Drill to recover files from your thumb drive, follow these steps:
- Download Disk Drill from its official website. Save it to your computer and install it.
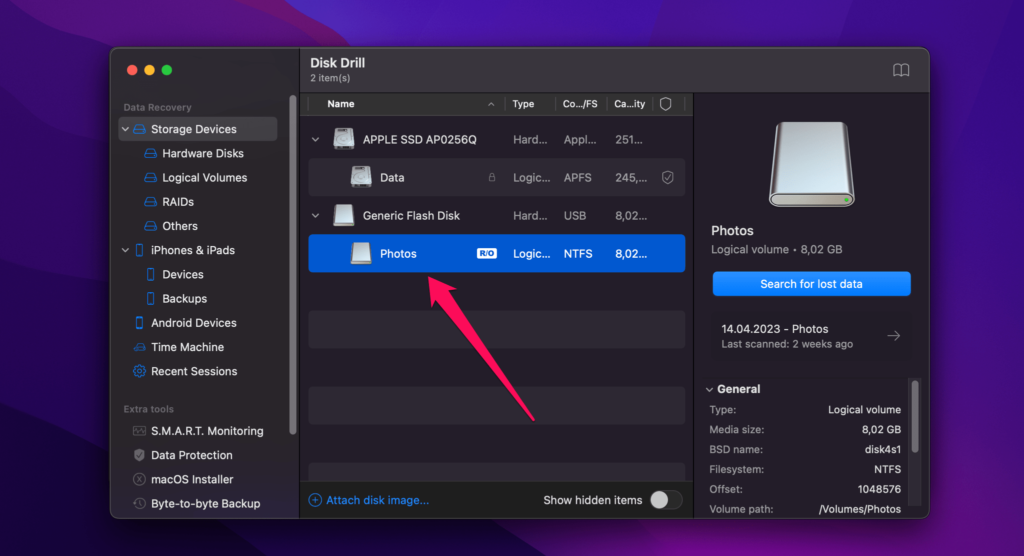
- Connect your USB drive to your Mac. If you’ve previously experienced issues connecting it, try using a different USB port.
- Launch Disk Drill.
- On the main screen, you’ll see a list of your current drives. Check the list to see if your USB drive is in it. If it’s there, click it to select it. If the drive isn’t showing up, it might be corrupted in which case you would need to attempt to recover it through another tool first.
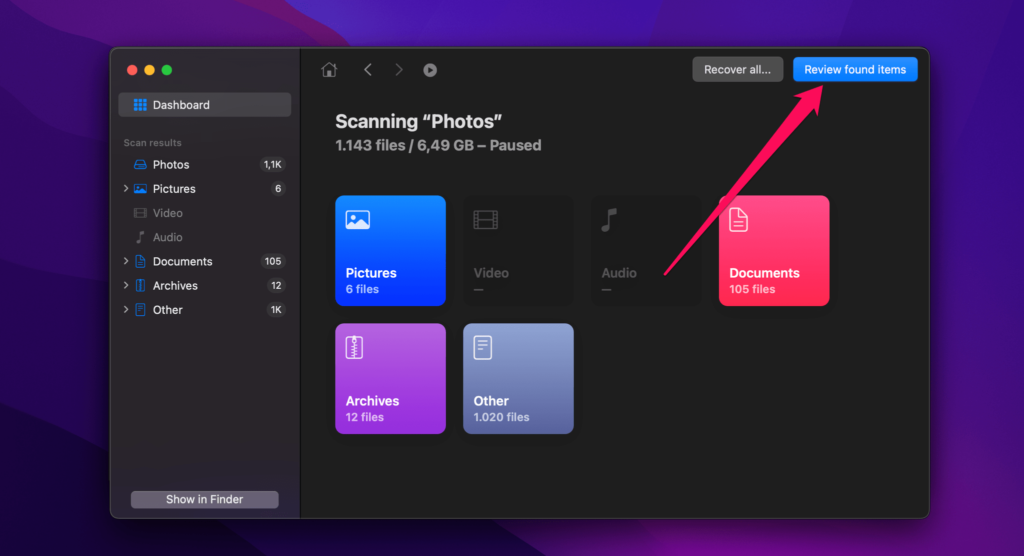
- Click on Search for lost data and wait for the scan to finish. Keep in mind that the process can be very slow if your media contains lots of bad blocks. If you need to pause or cancel it at any time, use the Home or Pause buttons respectively.

- Once the scan is finished, click on Review found items to see what was discovered. You can also click this at any time during the scanning process without waiting for it to finish.
- You will now see a list of files that can be recovered. Go over it and identify the files you want to save. You can also use Disk Drill’s preview feature to examine files before recovering them.
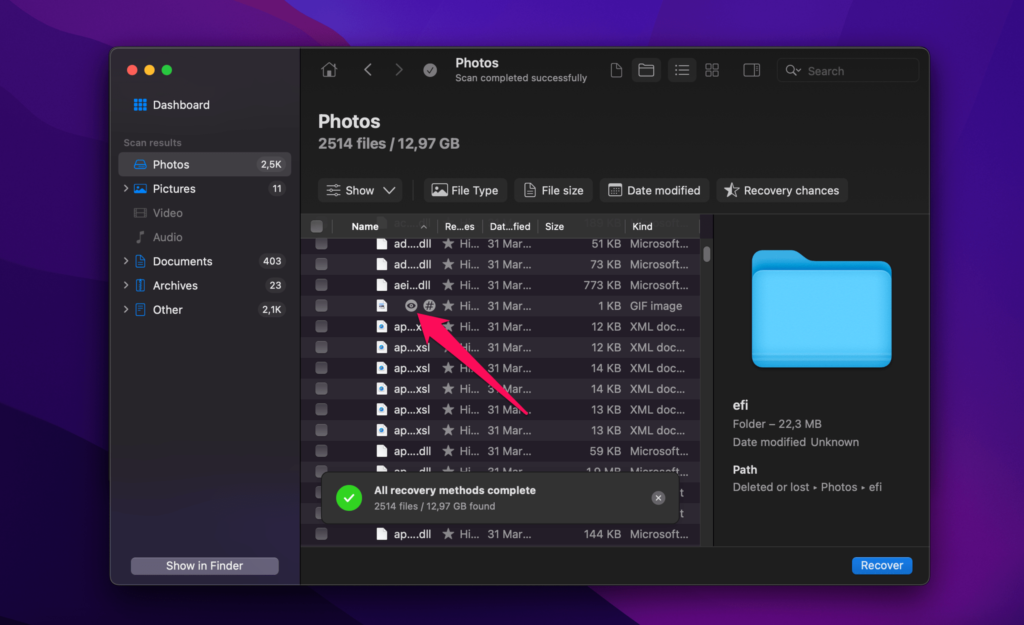
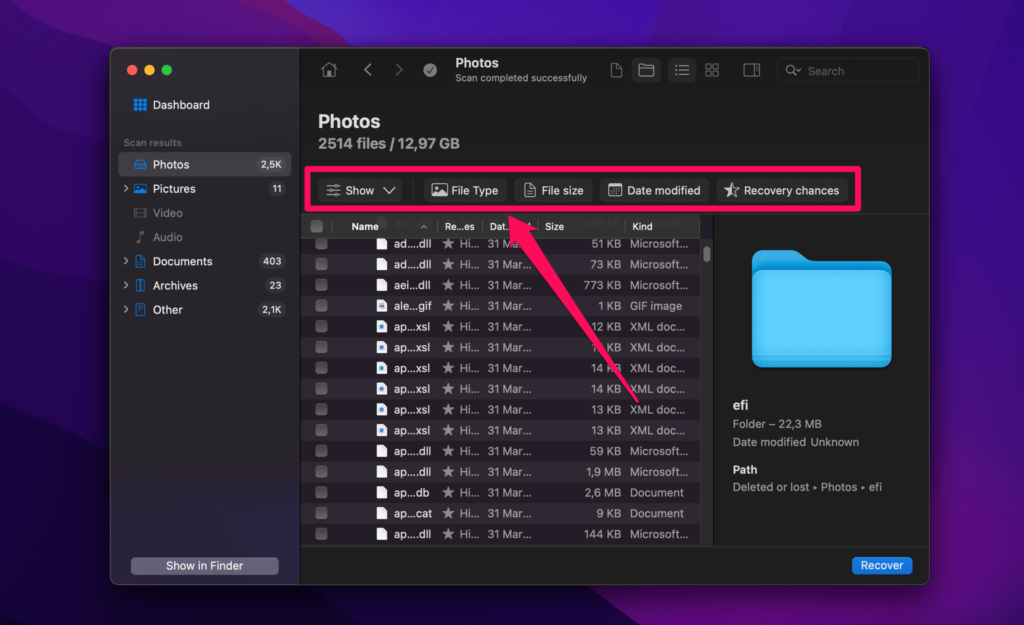
- Use the built-in filtering tools to narrow down your search if you’re only looking for specific files of file types. This is a powerful feature of Disk Drill that can streamline your recovery workflow significantly.
- Choose where to recover your files. Use a separate drive in all cases. You should never attempt to recover your files on the same drive, as this carries a risk of overwriting them.
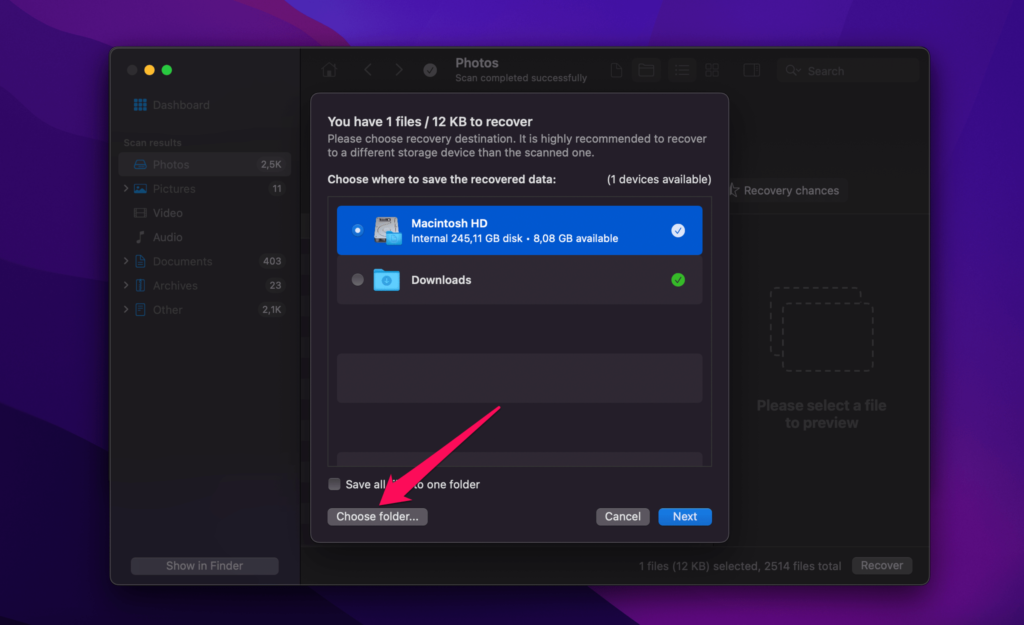
- Once the recovery is finished, you can click Show results in Finder to navigate straight to the recovered files in your preferred file manager.
Option B: PhotoRec
![]() PhotoRec is another great tool that can get the job done when you need to retrieve deleted files from a USB flash drive on a Mac. Its main advantage is that it’s completely free and open-source, although this does come with some compromises. The tool is a bit limited in certain areas of its functionality – for example, it can’t recover the original folder structure or even the names of the deleted files. It’s also a bit clunky and requires some familiarity with the terminal, unlike other tools that come with a visual interface. Still, it can work well for less structured data like a collection of photos. To use PhotoRec to recover deleted files from a USB flash drive on Mac, follow these steps:
PhotoRec is another great tool that can get the job done when you need to retrieve deleted files from a USB flash drive on a Mac. Its main advantage is that it’s completely free and open-source, although this does come with some compromises. The tool is a bit limited in certain areas of its functionality – for example, it can’t recover the original folder structure or even the names of the deleted files. It’s also a bit clunky and requires some familiarity with the terminal, unlike other tools that come with a visual interface. Still, it can work well for less structured data like a collection of photos. To use PhotoRec to recover deleted files from a USB flash drive on Mac, follow these steps:
- Download and unarchive PhotoRec.
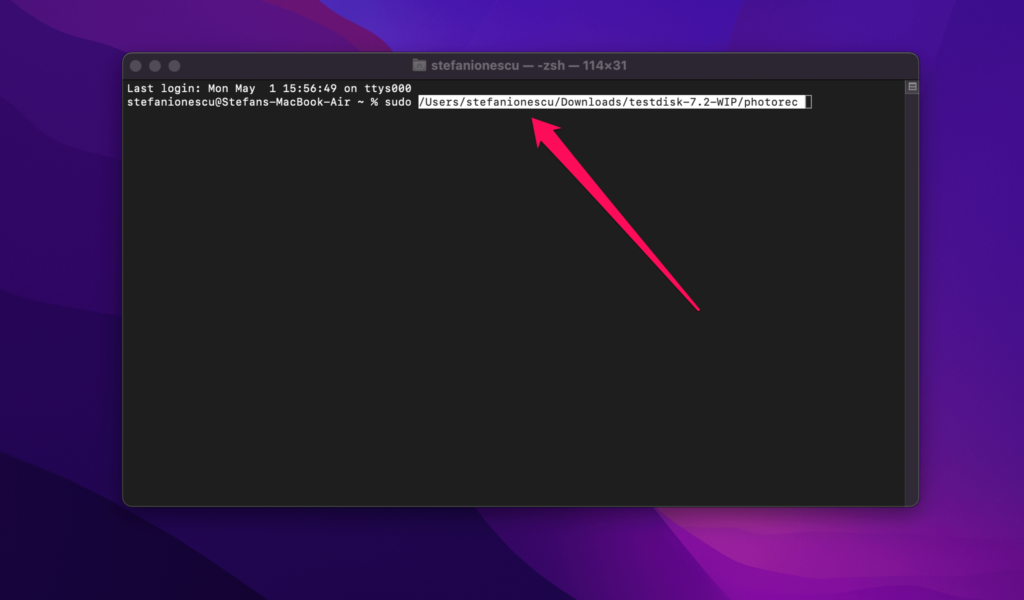
- Launch PhotoRec – this must be done using Terminal – copy the path to PhotoRec, paste it into Terminal, and hit Enter. If nothing happens, add sudo in front of the path like in the example below.
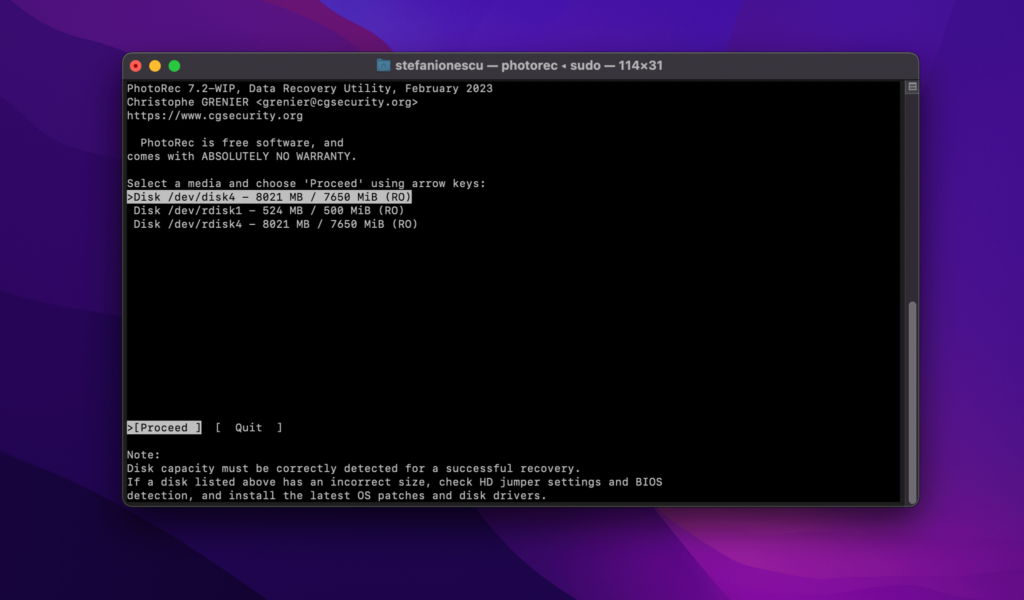
- Enter your password (in case you have one) and you will see a list of drives that can be scanned for recovery. Navigate to your USB drive using the arrow keys and select it with Enter.
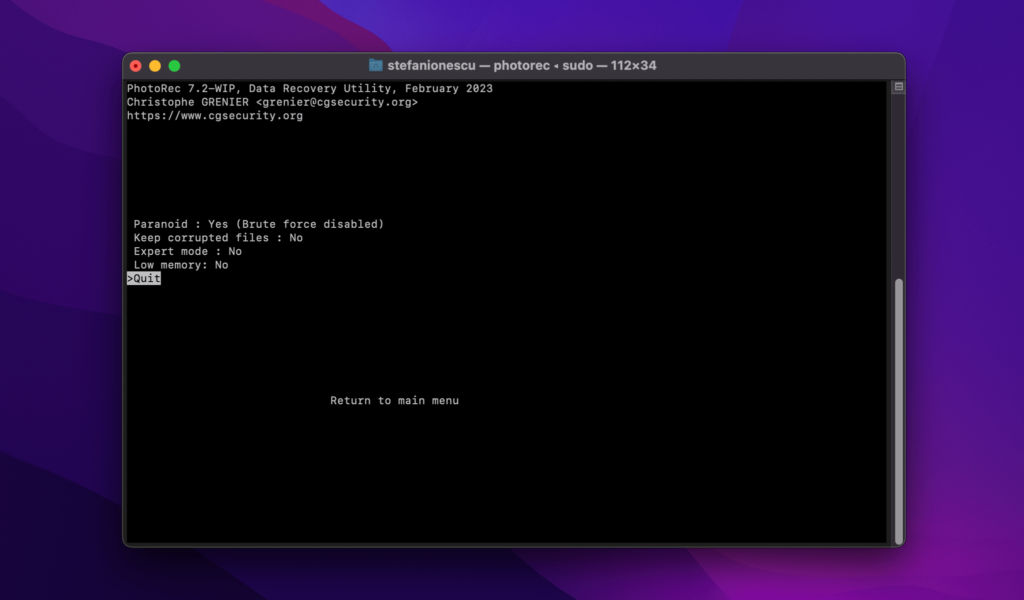
- Configure the recovery process using the list of options on the next screen. We recommend disabling Expert Mode and Low Memory. Enabling Keep Corrupted Files can be useful if you want to attempt to at least partially recover some damaged files.
- On the next screen, pick the file types that you want to recover. By default, all options will be selected.
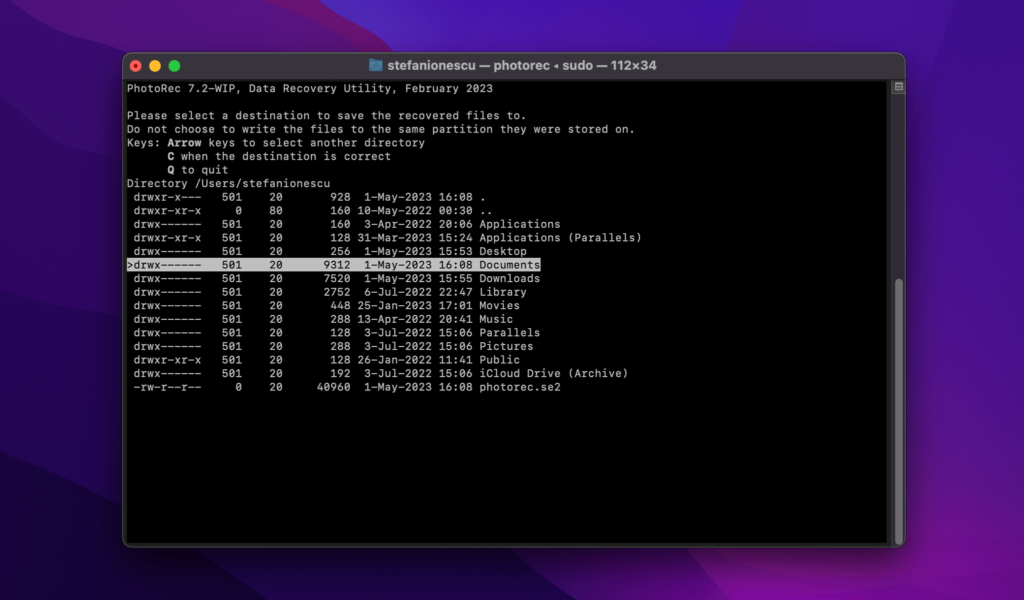
- Choose the partition and location for recovering your data. Always use a separate partition from the one you’re recovering from! Use the arrow keys to navigate the list, and press C to confirm your selection once you’re done.
- Wait for the recovery process to finish. Once that’s done, navigate to the target folder and verify that the files were successfully recovered.
Method 4: Fix Inaccessible Flash Drive Using First Aid
First Aid is another reliable tool for recovering data in cases where your drive is corrupted or otherwise inaccessible. If you can’t even get to the point of entering your drive, it’s a good idea to try this. If you’re successful in making your drive reappear but your files are still missing, you should use a data recovery tool like in the steps we outlined above.
- Launch Disk Utility.
- Choose your drive from the list on the left-hand side.
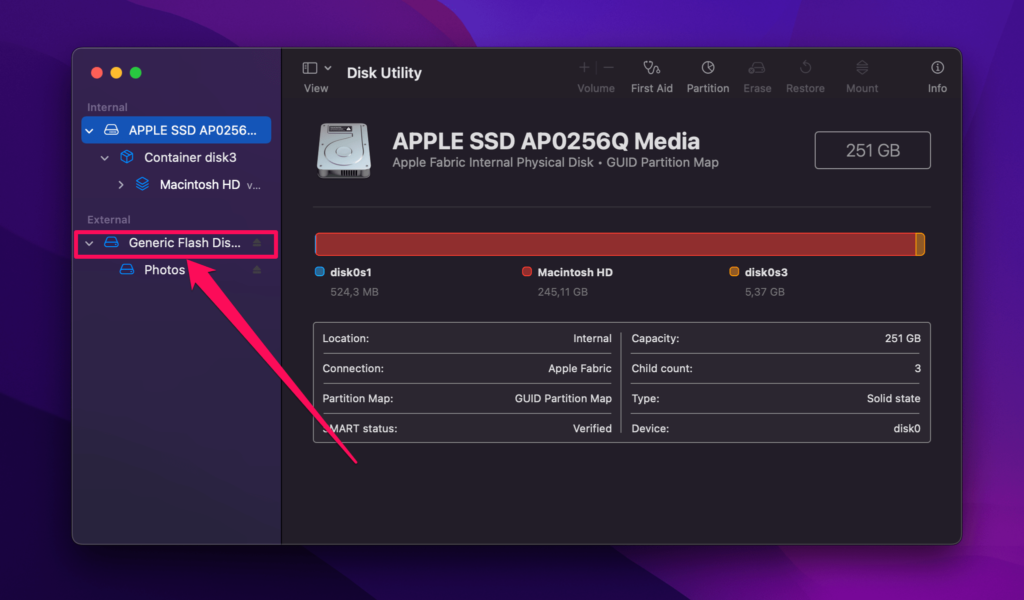
- At the top of the screen, click on First Aid.
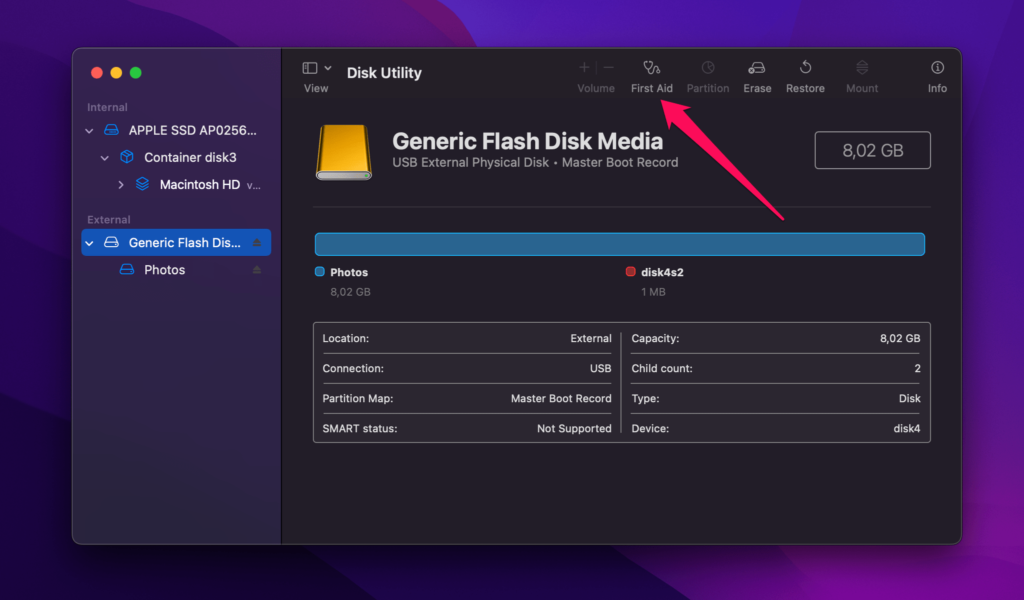
- Click Run and wait for the process to finish. Once it’s done, check if your drive is now accessible. If it is, proceed to use a data recovery tool to get your files back.
Conclusion
If your files have disappeared from a flash drive on a Mac, you must act quickly. Unplug the drive and stop using it until you’re ready to initiate the recovery process. Otherwise you can lose even more of your data as it gets overwritten. Flash drive recovery on a Mac can be done with the help of specialized software like Disk Drill and PhotoRec, or it can also work with built-in solutions like the Trash folder if you’re lucky.
In some cases, you might not be able to recover your files without professional help. In this situation, your only option is to send your drive to a data recovery service and hope that they can get your data back. Keep in mind that your success is not guaranteed in this case. It’s entirely possible that your data is lost forever. But if it was valuable to you, you should at least exhaust your list of options.
Frequently Asked Questions
How to access a USB drive on a Mac?
To access a USB drive on a Mac, simply follow these steps:
- Open Finder.
- From the list of drives on the left-hand side, find your drive and click on it.
- If your drive works properly and is accessible, its contents should show up in the Finder window.
How can I retrieve deleted files from a USB flash drive on a Mac?
To retrieve deleted files from a USB flash drive on a Mac, you can use a tool like Disk Drill. Follow these steps:
- Download and install Disk Drill.
- Connect your USB drive to your Mac.
- Launch Disk Drill and scan the USB drive.
- Select all files you want to get back.
- Click Recover to recover data from a flash drive on a Mac.
How can I recover files from a USB on a Mac for free?
Tools like PhotoRec are a good choice for recovering files from a USB drive on a Mac without spending money on specialized software. Keep in mind that those tools are usually less intuitive to use than their premium counterparts and may be more limited in some of their functionality. If you aren’t comfortable navigating a text-based interface or want a full set of recovery features, we recommend using a solution like Disk Drill or even R-Studio instead.
How to recover deleted files from a flash drive without software on a Mac?
If you don’t want to use any external software at all, your best bet is to check the Trash and see if your files can be recovered from there. You should also verify that the files are not hidden – in this case, a simple keyboard shortcut can reveal them.

- 2 publishings
Stefan Ionescu is a passionate technology enthusiast and freelance writer with an MSc in Geological Engineering. Despite his educational background, his love for technology and natural flair for writing have led him to carve out a successful career in the world of tech content creation. Stefan has also developed a strong expertise in data recovery topics, providing valuable insights and guidance for those facing data loss challenges. He is an advocate for both Windows and Mac, emphasizing the advantages and innovations they bring to the world, including their data recovery capabilities. With vast experience and a deep understanding of technical aspects, he is adept at breaking down complex technological topics into easily digestible content for a broad audience.
- Houston, Texas, United States
Nikolay Lankevich has over 15 years of strong experience in various fields and platform includes Disaster Recovery, Windows XP/7. System analysis, design, application (Inter/Intranet) development, and testing. Provided technical supports on desktop and laptops on Win-XP and Macintosh for about 2000 employees.