NVMe Data Recovery: How to Restore Data From NVMe/M2 SSD
NVMe drives are slightly different from other SSDs, which can make recovering data more difficult. However, NVMe data recovery is not only possible, but you also have a good chance of succeeding as long as you make the right preparations.
In this article, we’ll break down the difference between NVMe drives and other common SSDs, how those differences affect data recovery, and how to recover data from an NVMe SSD. Read on!
NVMe M.2 SSDs: Understanding the Technical Details
NVMe M.2, SATA, and PCIe SSDs are the most common types of SSDs available. Let’s break them down:
- SATA (Serial Advanced Technology Attachment) – The oldest technology among the 3. Its interface was originally designed for hard drives and it runs slower than PCIe and NVMe SSDs. SATA SSDs use a cable to communicate with other components of the computer. Many tools have been designed to work with SATA SSDs.
- PCIe (Peripheral Component Interconnect Express) – Newer and more efficient than SATA SSDs. PCIe SSDs are faster and can handle a lot more data at once. It transfers data using tiny copper wires directly on the motherboard, which allows accurate and high-speed connections. PCIe is a well-established technology, so many tools have been designed to work with it.
- NVMe (Non-Volatile Memory Express) – The newest and fastest technology among the 3. While it also uses the PCIe interface to connect to the motherboard, the NVMe protocol is better at maximizing the interface’s high-speed capabilities. Since it’s a newer technology, there are fewer tools that can work with it.
A feature they all have in common is the TRIM command. TRIM is an SSD-only feature that “proactively” erases blocks of data. Without TRIM, the drive’s normal behavior is to simply mark data for overwriting and wait for new data (like a downloaded PDF or MP3 file) to overwrite it.
TRIM improves an SSDs performance by clearing the drive’s data blocks quickly (almost as soon as a user deletes a file). So when new data is saved, the drive doesn’t have to spend extra time looking for available blocks. However, this also makes it harder to restore files from the drive.
How Does TRIM Affect NVMe Data Recovery?
TRIM generally makes it harder to recover SSDs. However, the task is made even more challenging on NVMe SSDs. Aside from the TRIM command, the NVMe protocol also uses a more advanced garbage collection algorithm than SATA and PCIe.
However, data recovery is still possible with the right preparation (and the right tools). In the section below, we’ll show you the immediate next steps you should take to greatly increase your chances of recovering your data.
Boosting Your Chances of Recovering Data from NVMe SSDs
We recommend the following tips to improve NVMe recovery success rate:
Tip 1: Act Now!
Your M2 data recovery success rate decreases the longer you wait. This is especially true if you continue to use your SSD or you connect it to your computer. And by delaying your efforts, you are giving TRIM more time to erase your data.
Tip 2: Disable TRIM
While disabling TRIM may possibly lessen the extent of data loss, this tip is considered more of a prevention method for the future. Disable TRIM to make it easier for you to restore your data down the line. However, this tip can’t really help you right now because it’s likely that TRIM has already worked on your SSD.
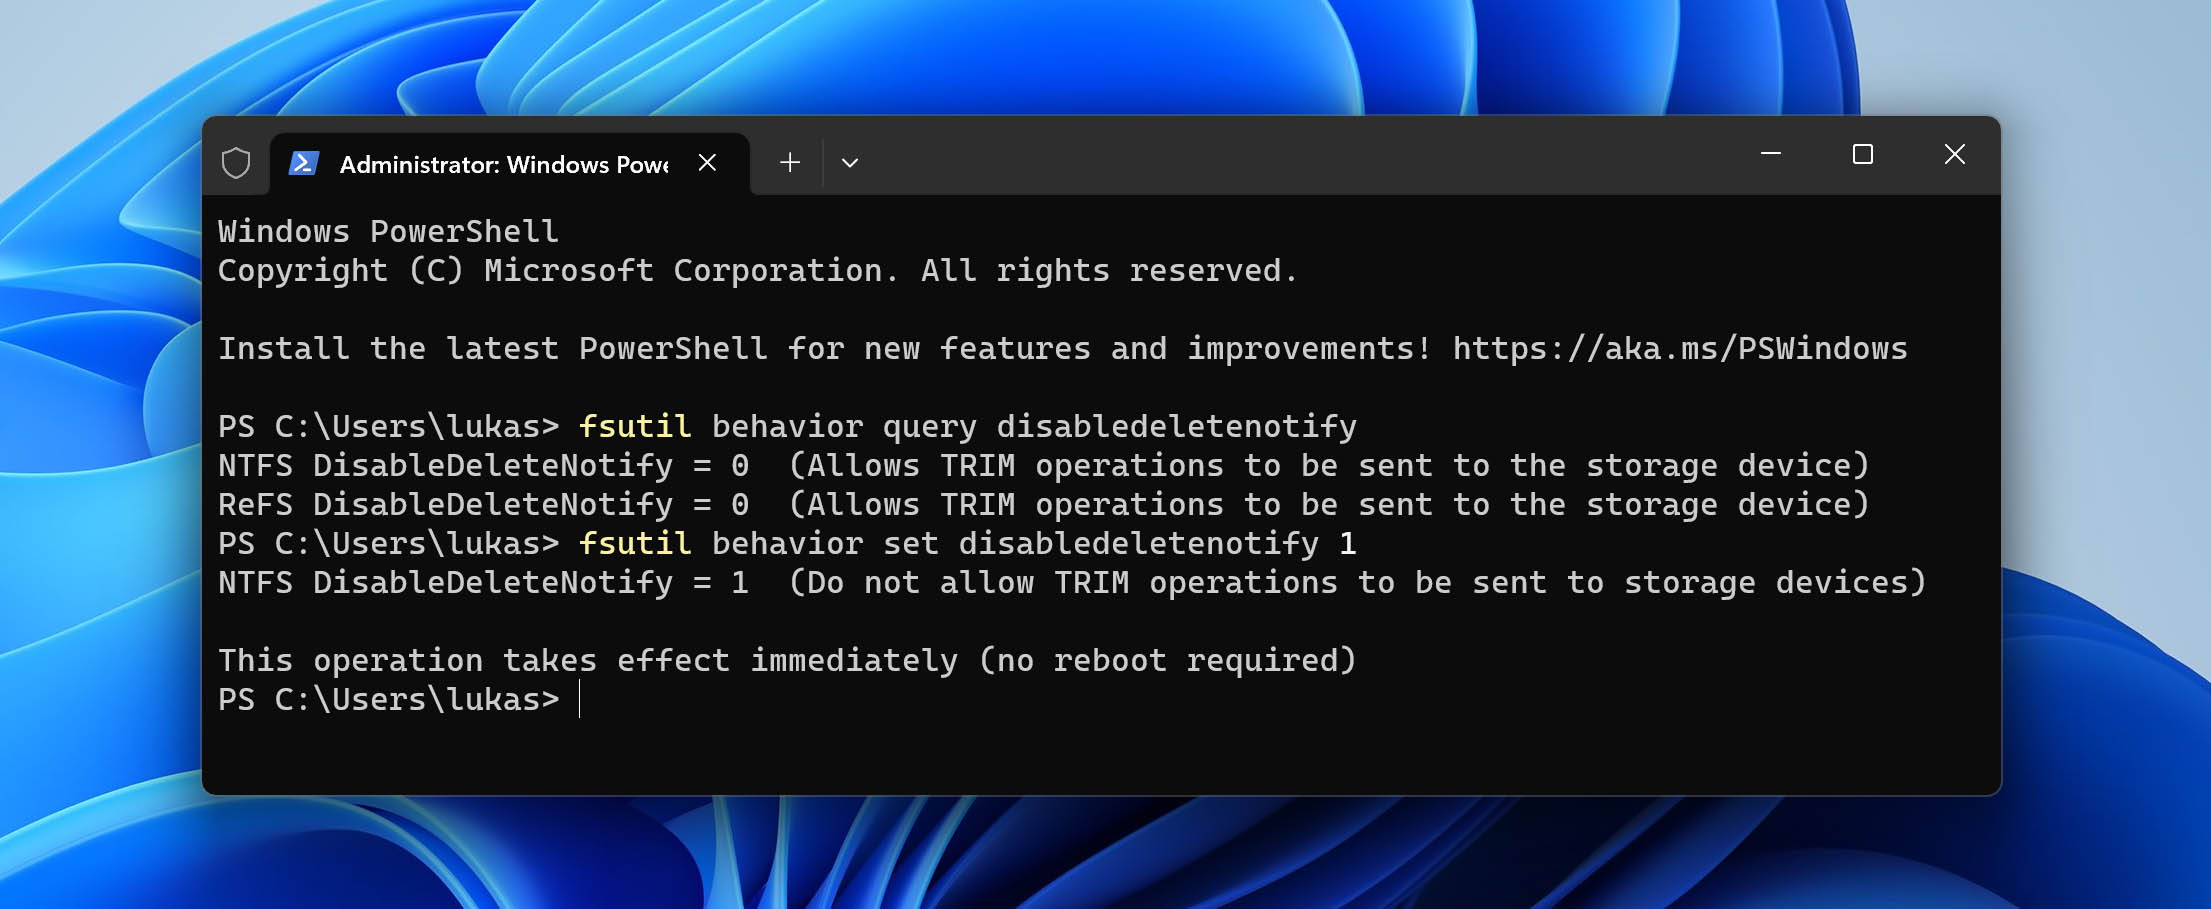
To disable TRIM on Windows:
- Launch Command Prompt as Administrator via the Start menu.
- Type the following command and hit Enter: fsutil behavior query disabledeletenotify. It will display the status of your TRIM command.
- If you see DisableDeleteNotify = 1, then TRIM is already disabled. If you see DisableDeleteNotify = 0, type the following command and hit Enter: fsutil behavior set disabledeletenotify 1
- Reboot your PC.
Tip 3: Stop Using Your SSD
Once you’ve disabled TRIM, your deleted data should be safe as long as you don’t write anything to the SSD. So don’t save anything to your drive!
Even connecting your SSD to your computer may prompt the operating system to save temporary files, such as logs. So only connect your SSD to your computer when you’re ready to begin the data recovery process.
Tip 4: Use a Trusted NVMe Data Recovery Tool
Another important factor is choosing the right NVMe data recovery software. They are powerful tools that can restore data directly from your SSD. Even if your SSD is corrupted and is not showing up or not detected on Windows, data recovery tools can still scan and restore it.
There are loads of software on the market, but not all of them are optimal for NVMe drives. At the minimum, you want a tool that is regularly updated (as NVMe is a relatively newer technology) and one that has advanced scanning capabilities to deal with NVMe’s complex architecture.
Tip 5: Decrypt Your NVMe SSD
If your SSD is BitLocker-encrypted, it can affect the data recovery tool’s ability to restore data. Fortunately, the software we’ll demonstrate below have excellent BitLocker support. You only need to know the password.
If the data recovery software you choose doesn’t support BitLocker-encrypted drives, you’ll have to decrypt your NVMe SSD before attempting recovery.
How to Recover Data from NVMe M.2 SSD
In this section, we’ll show you how to recover data from your NVMe M.2 SSD. Given the more complex makeup of NVMe SSDs, we knew that we had to be extra careful with selecting the tools we’d recommend.
Below, we feature two unique tools that fully support NVMe SSD recovery. After testing dozens of data recovery software, we chose them for their excellent recovery rate, reliability, and value for money (they both offer free trials).
If you’re new here, Pandora Recovery is a blog dedicated to helping users find the right data recovery solutions for their individual needs. We have in-depth review and comparison articles on both Windows and Mac data recovery software, as well as some useful (free) tools on the website.
One of our most popular tools is our free interactive survey tool, which recommends the best software based on your answers. Check it out here!
Method 1: Using Disk Drill
![]() Disk Drill is a popular data recovery software that provides full NVMe support. That means that Disk Drill is optimized to handle the complex architecture of NVMe SSDs, whereas other data recovery software may only be designed to work for traditional hard drives or older protocols.
Disk Drill is a popular data recovery software that provides full NVMe support. That means that Disk Drill is optimized to handle the complex architecture of NVMe SSDs, whereas other data recovery software may only be designed to work for traditional hard drives or older protocols.
Disk Drill is also very easy to use and provides a simple and modern interface, making it a great tool for users at any level. It provides a preview feature, which can tell you if your data is still recoverable.
Disk Drill can recover a wide variety of file types including photos, videos, and documents. It works for both Windows and Mac file systems, with the ability to restore NTFS, exFAT, FAT32, APFS, and HFS+ file systems.
- Download and install Disk Drill on your computer.
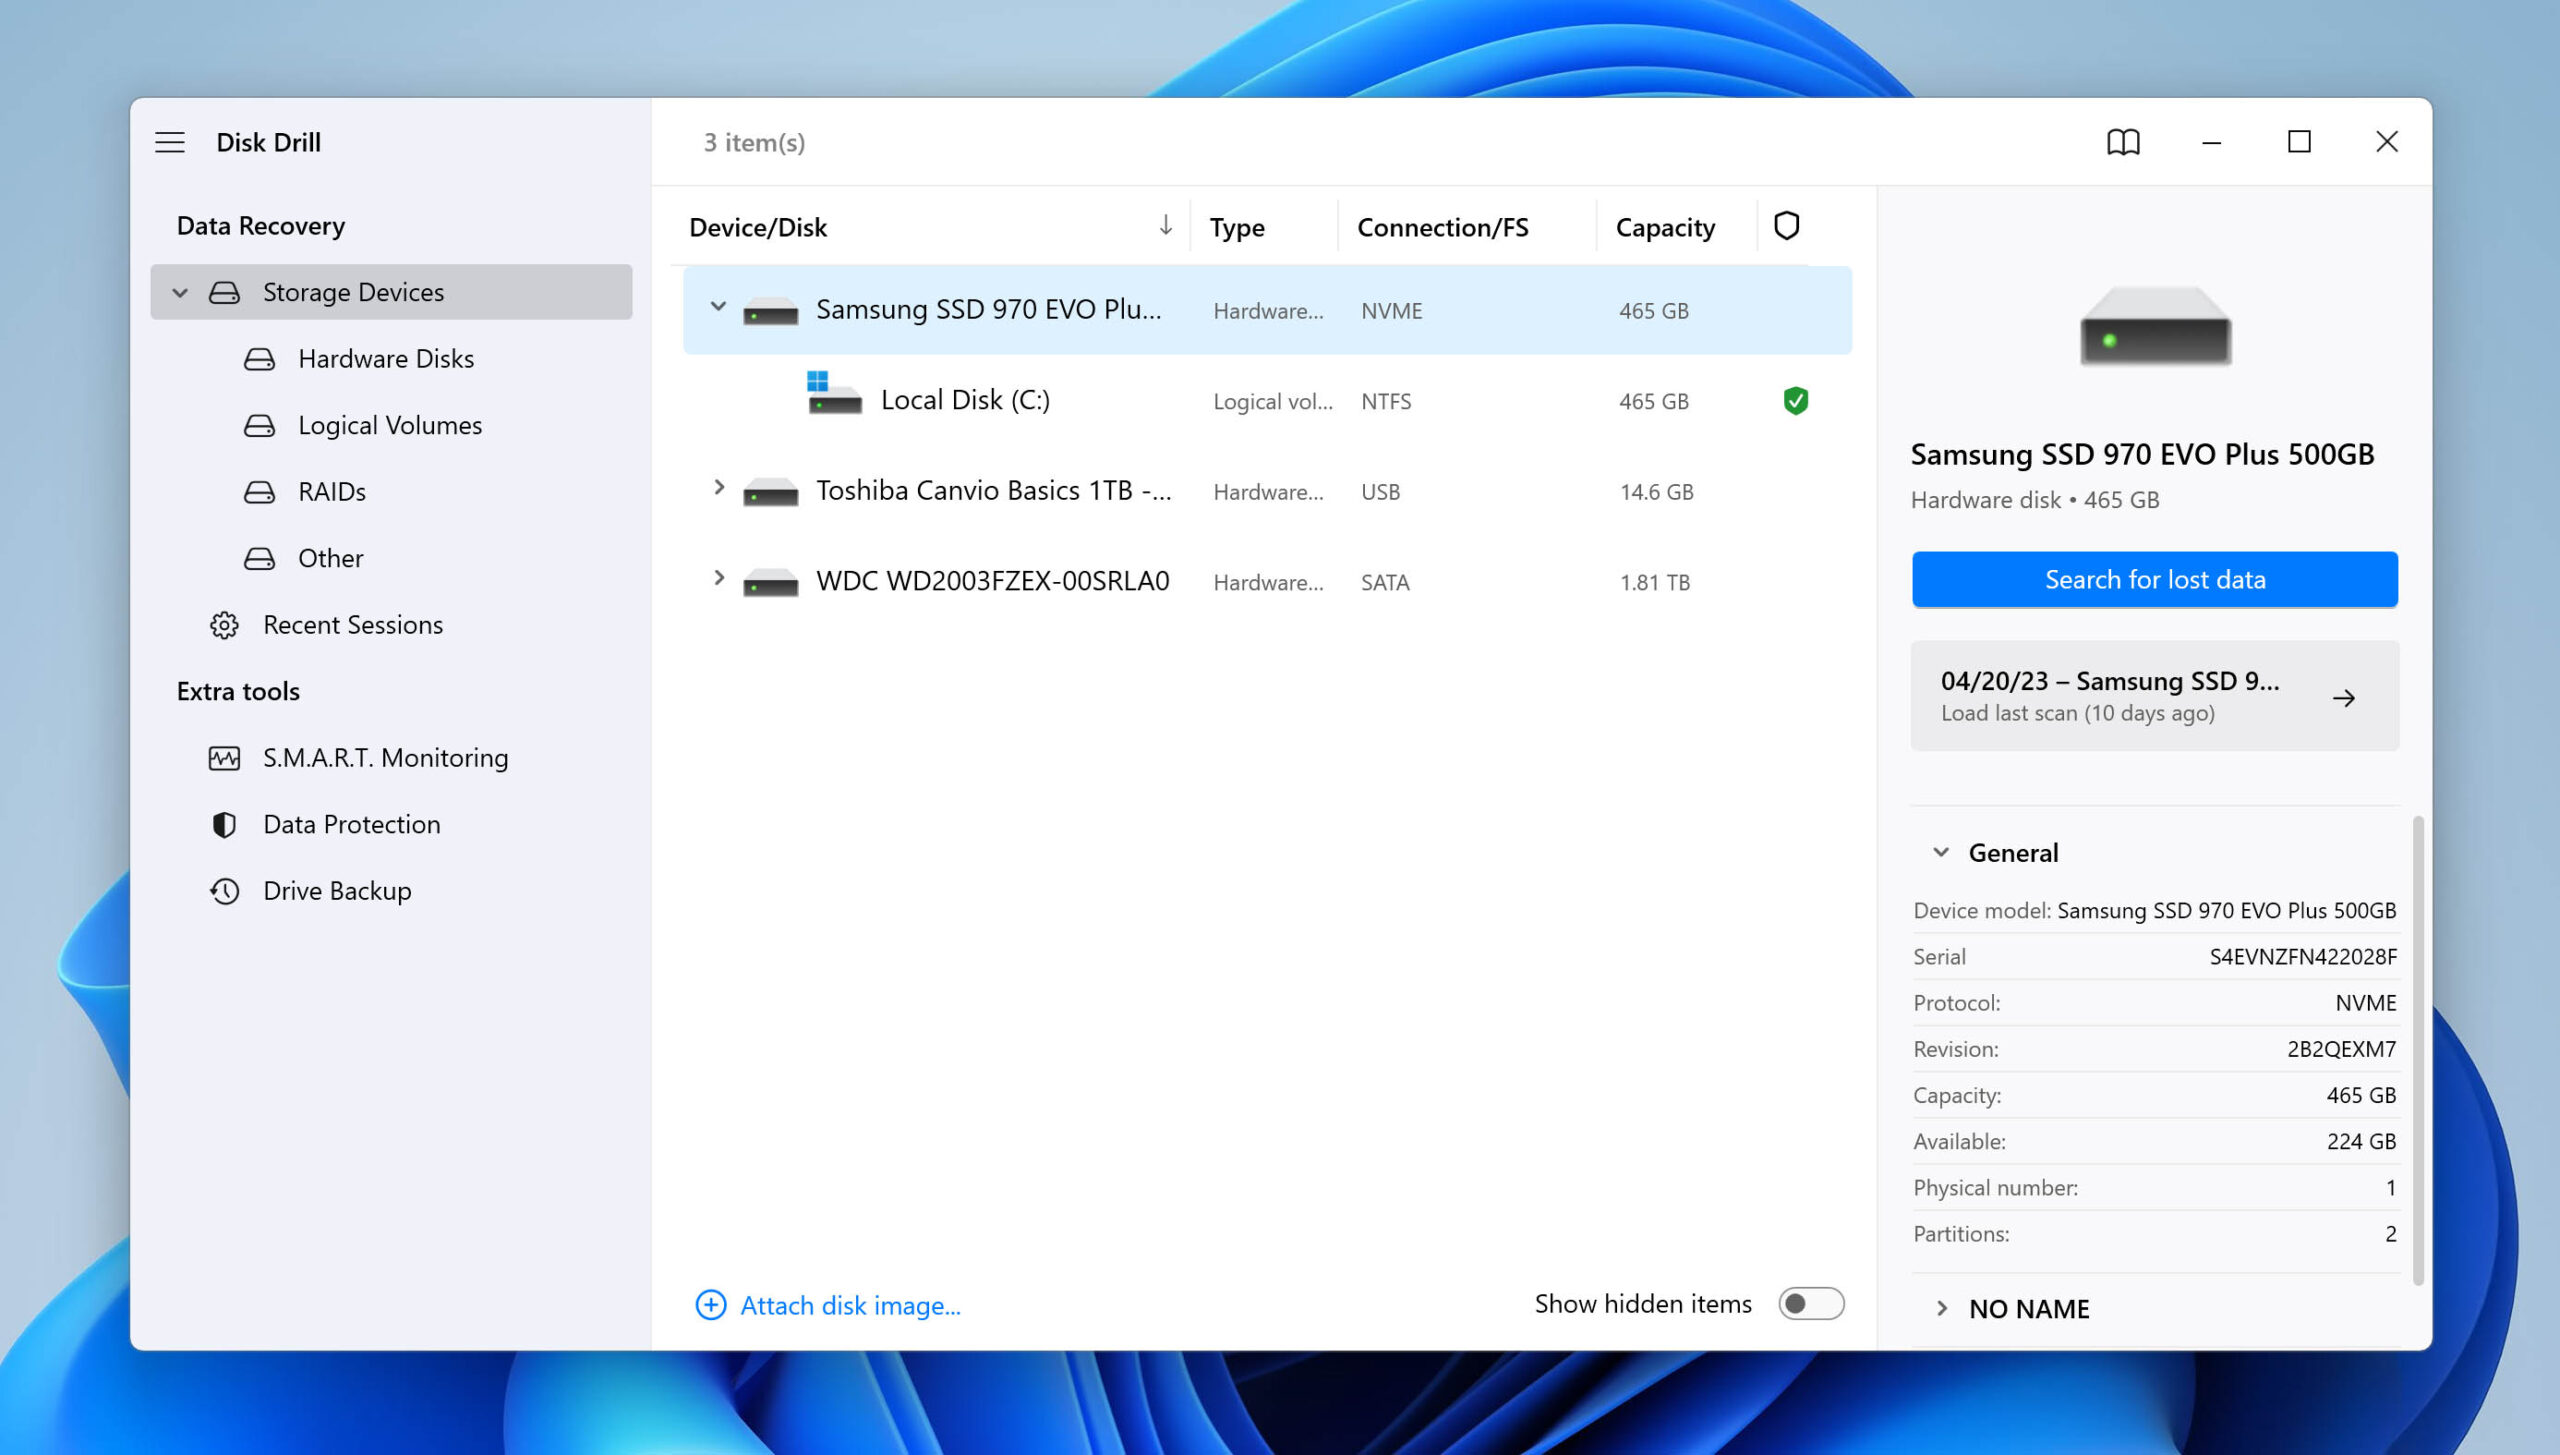
- If you use your NVMe SSD externally, connect it to your computer. Then, launch Disk Drill from your Desktop or Start menu.
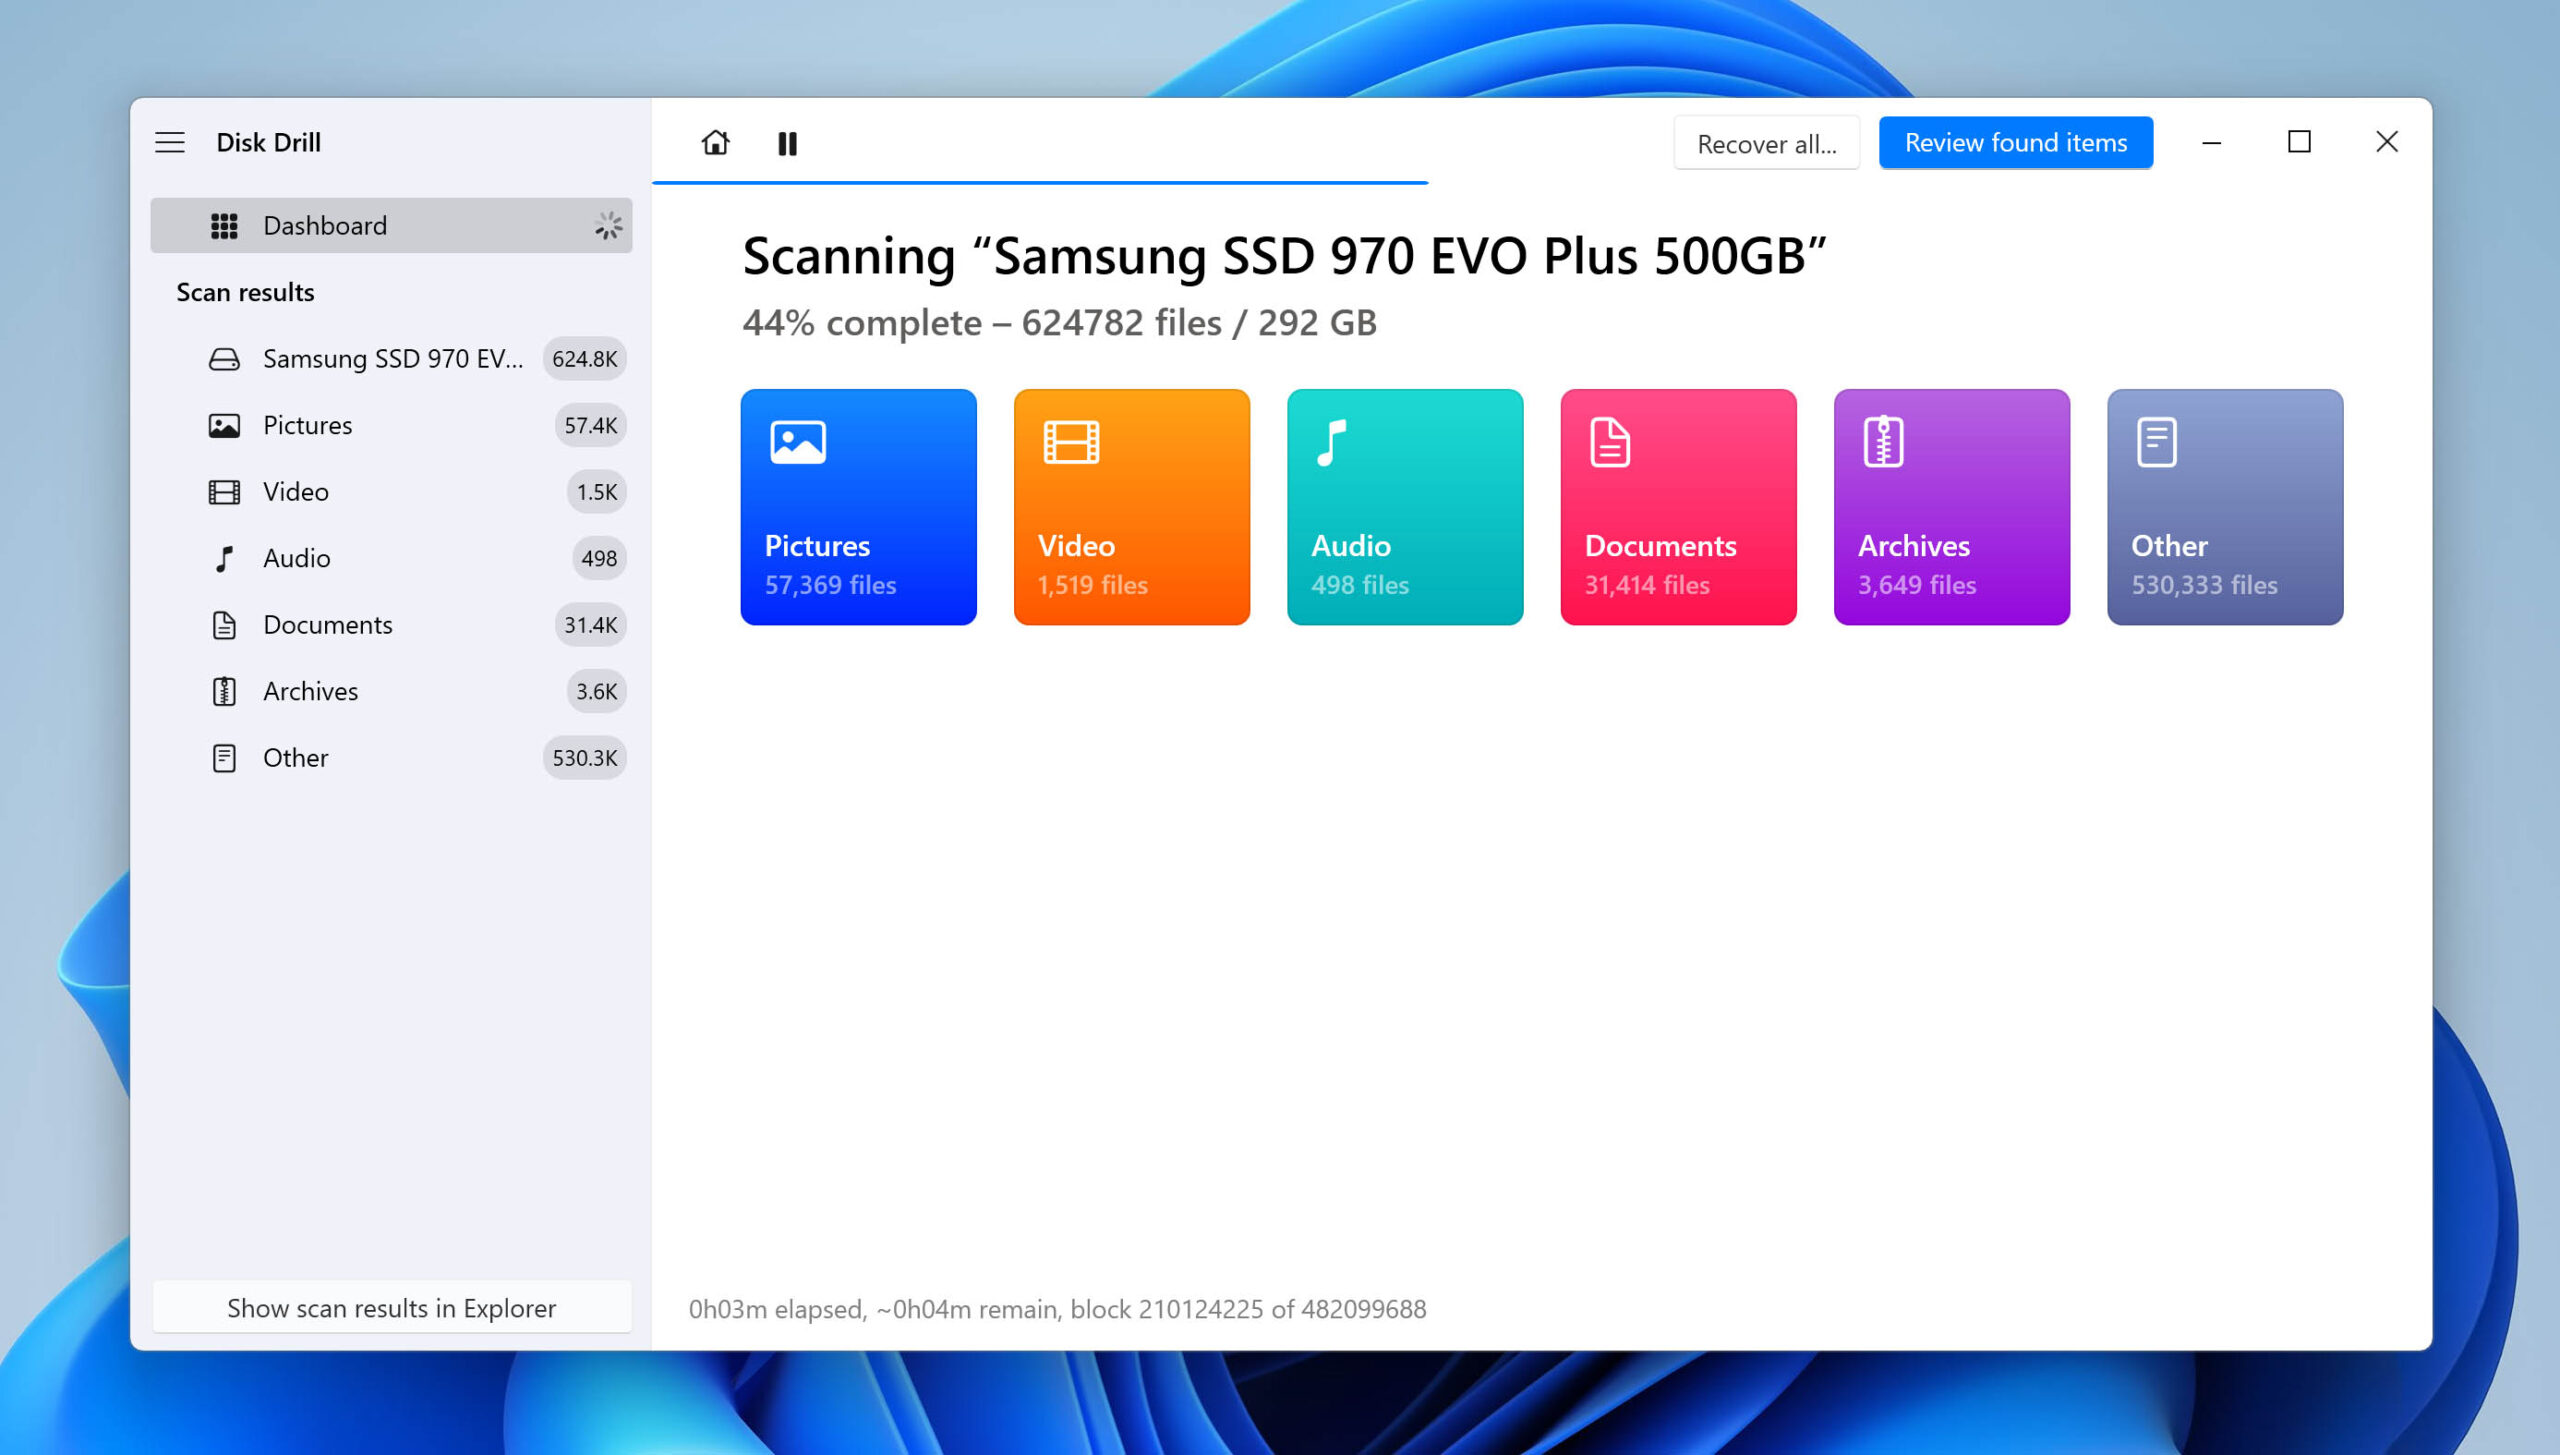
- Select your NVMe SSD from the drive list and click Search for lost data.
- Wait for Disk Drill to finish scanning your SSD. Once it’s done, click Review found items.
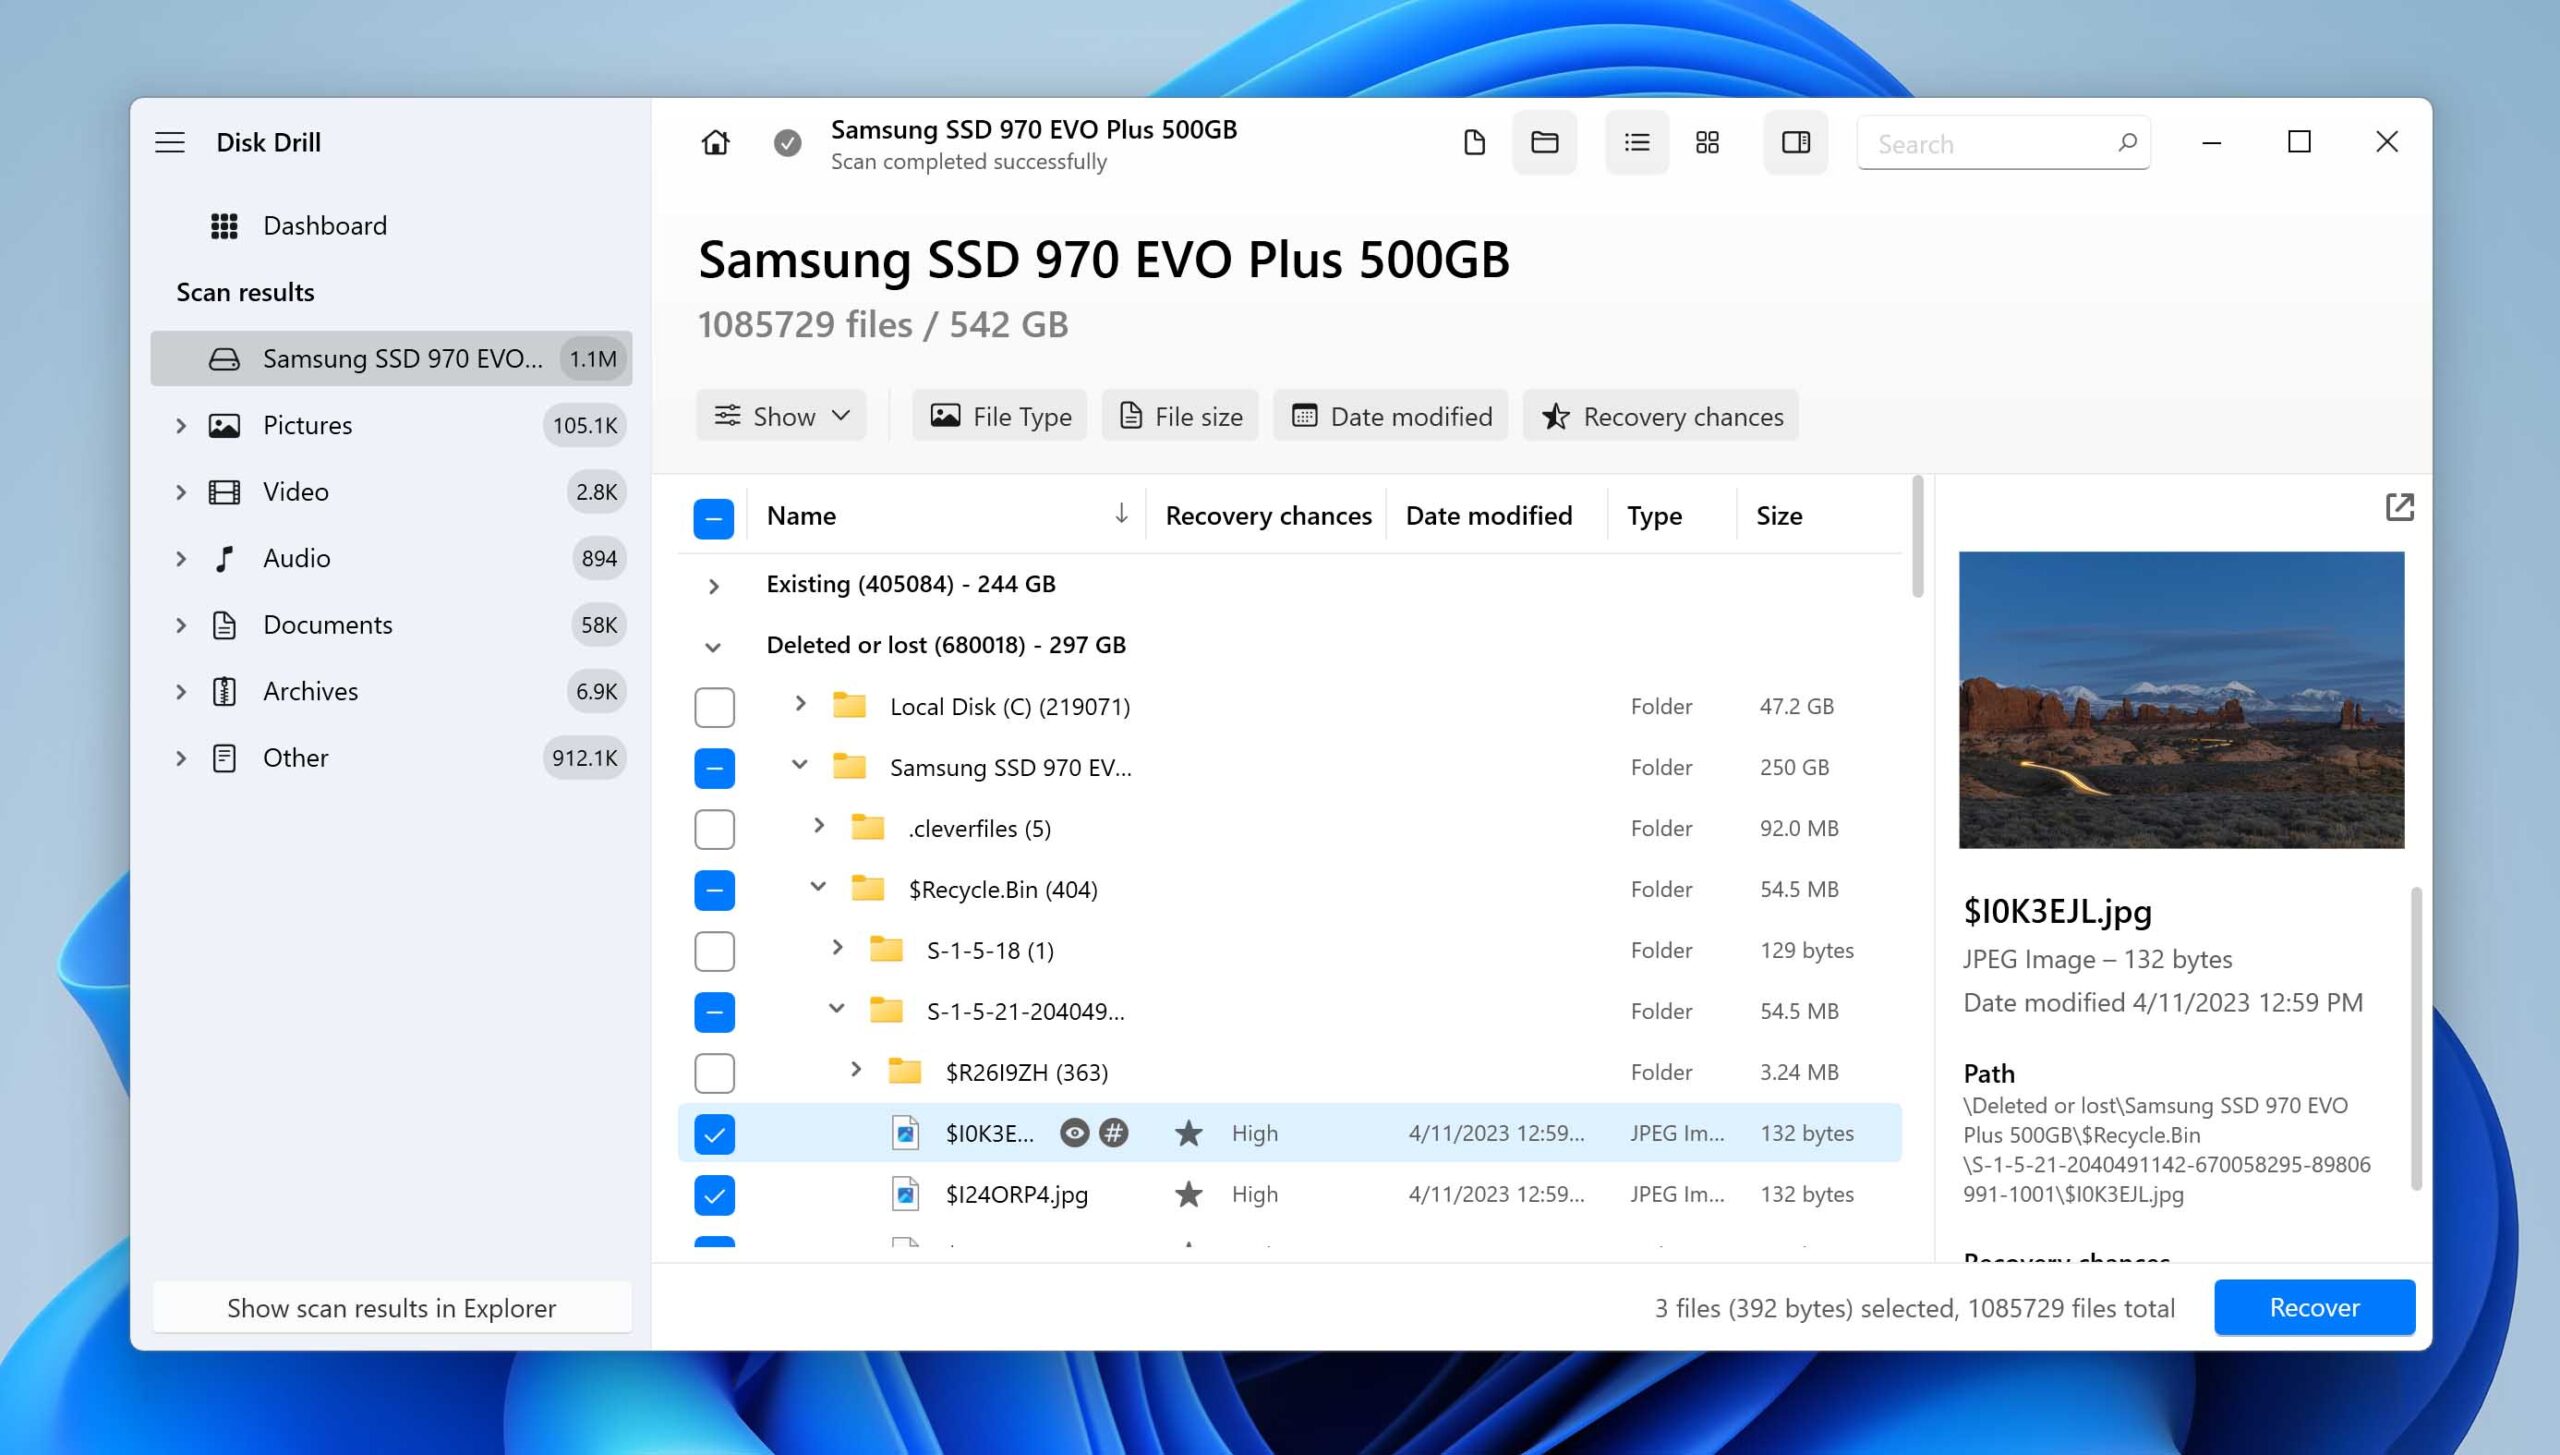
- The Existing tab will display all the data currently on your drive. If you want to restore deleted files, expand the Deleted or lost tab. If your drive is corrupted, you can also try the Reconstructed tab. Click the file you want to preview and click on the eye button beside it to enable and disable the preview window.
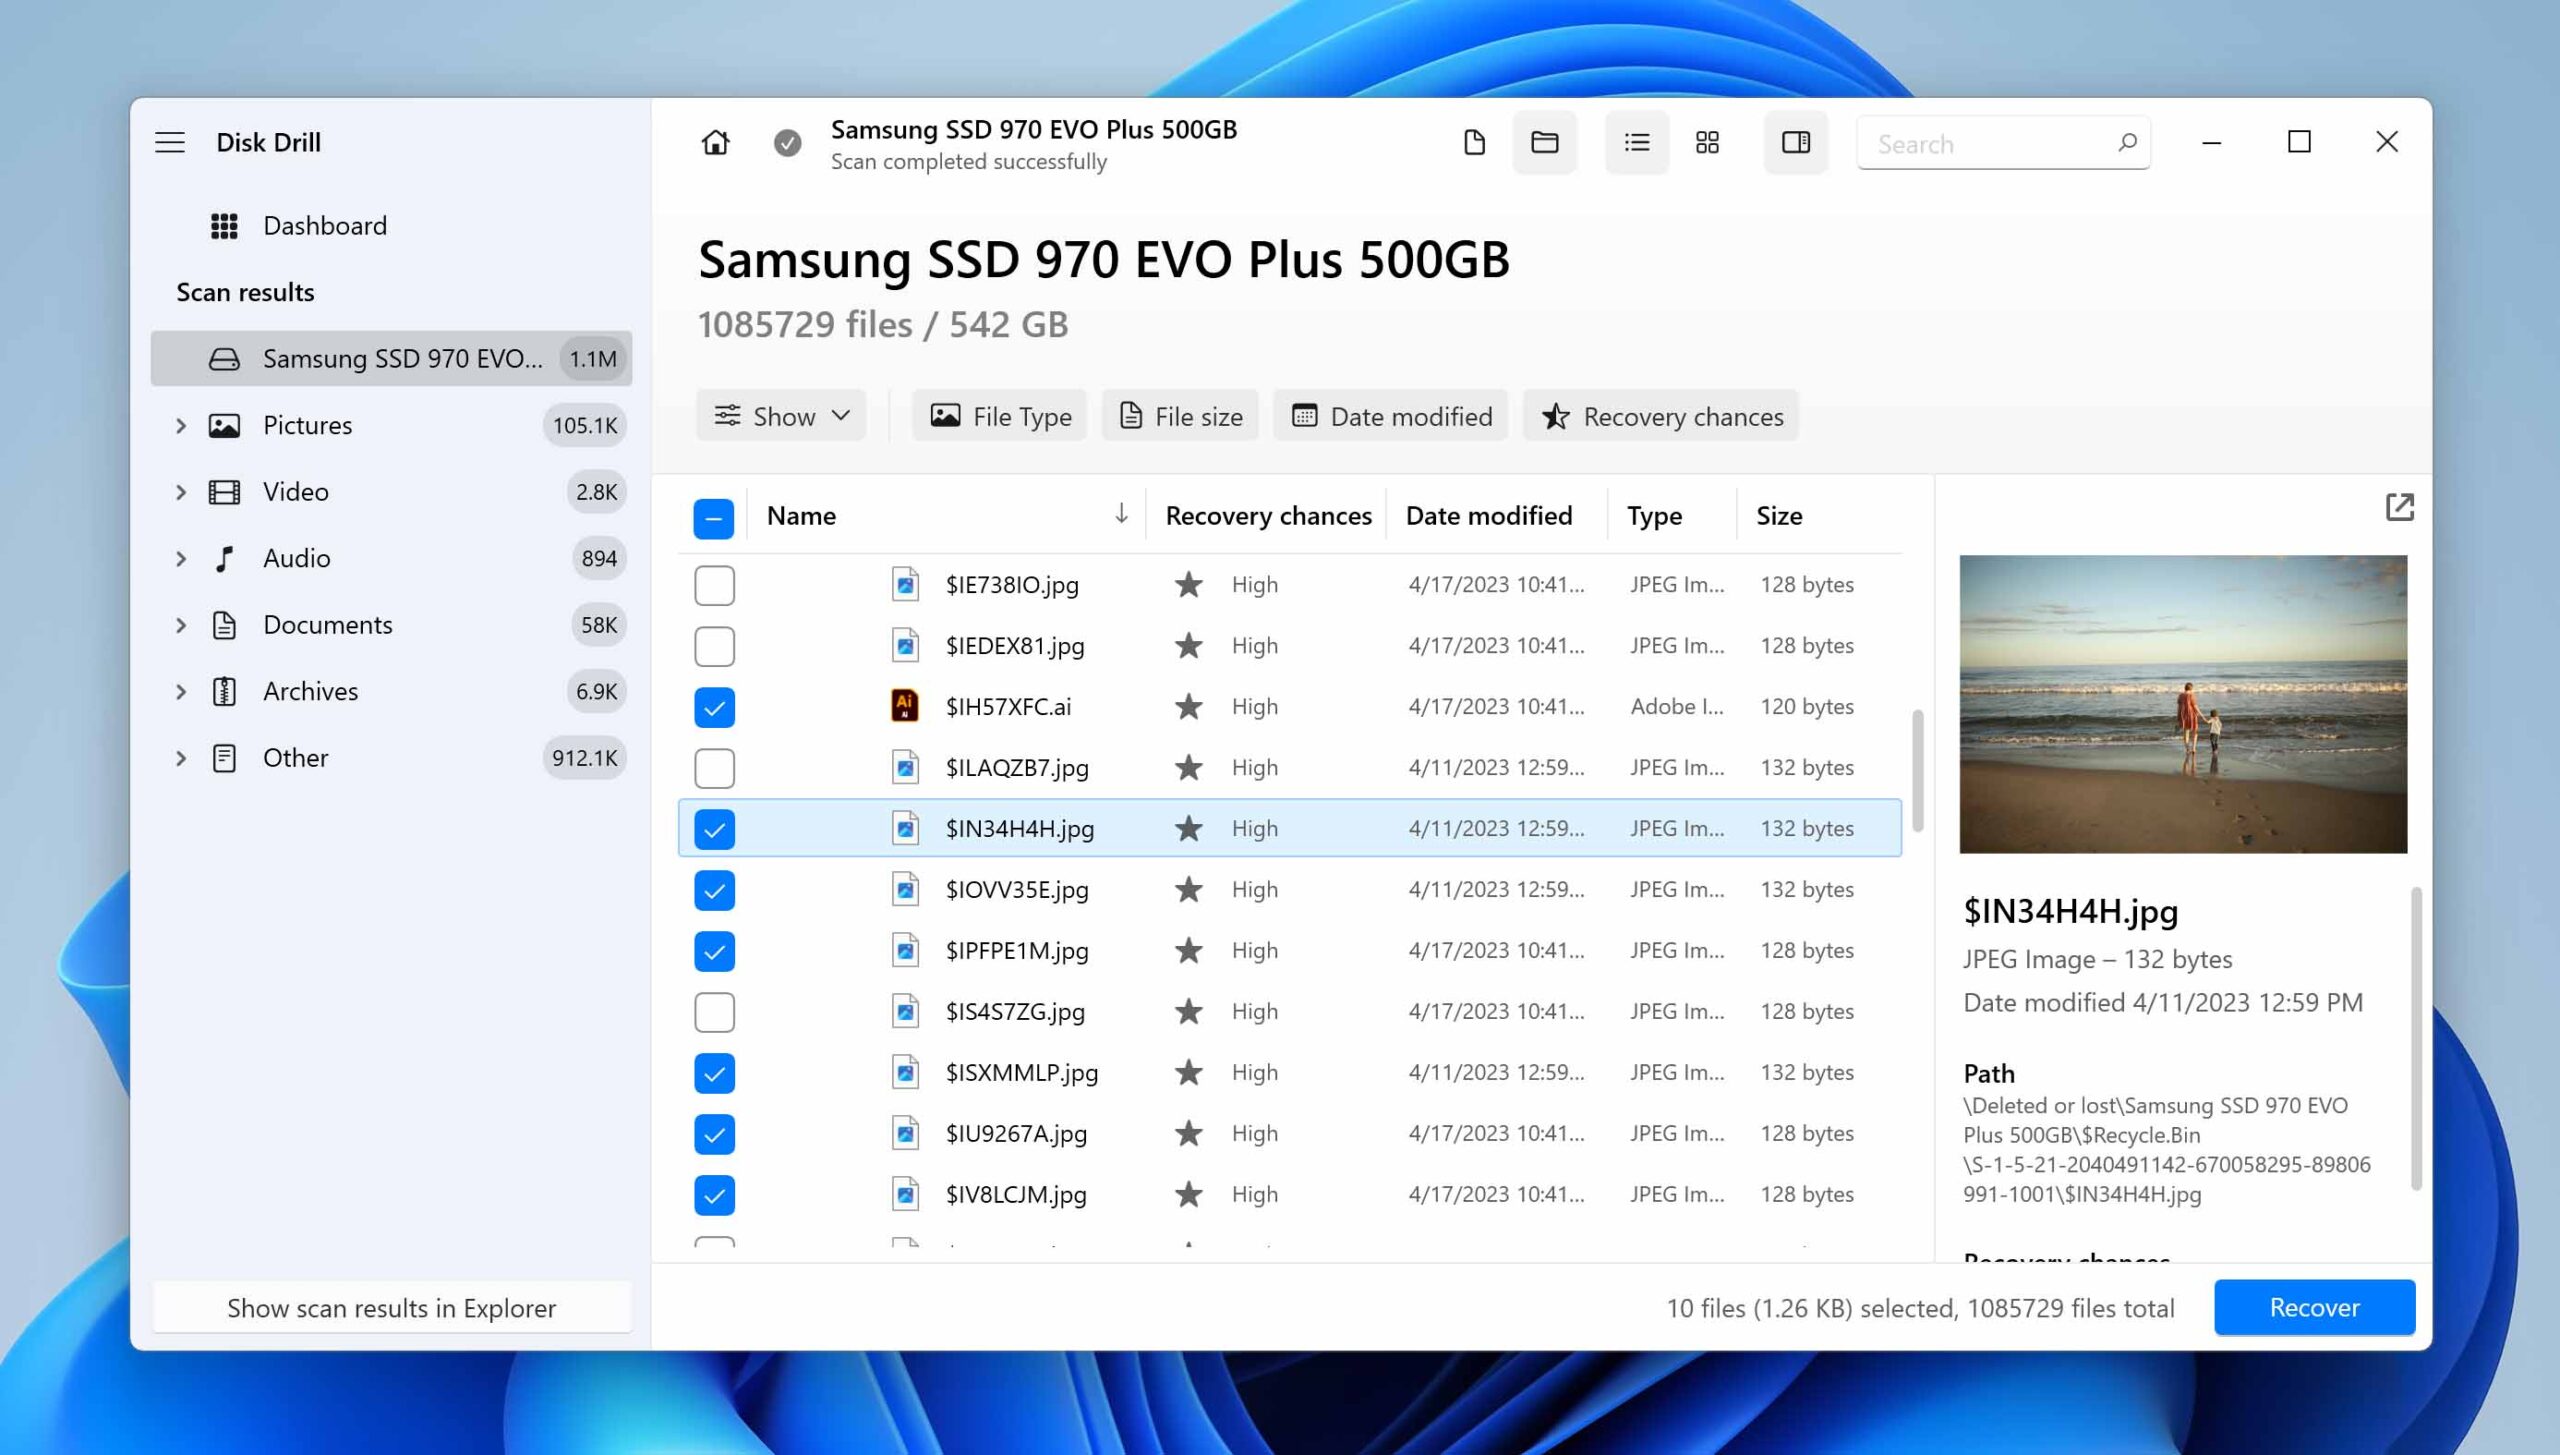
- Select the files or folders you want to restore from your NVMe SSD, then click Recover.
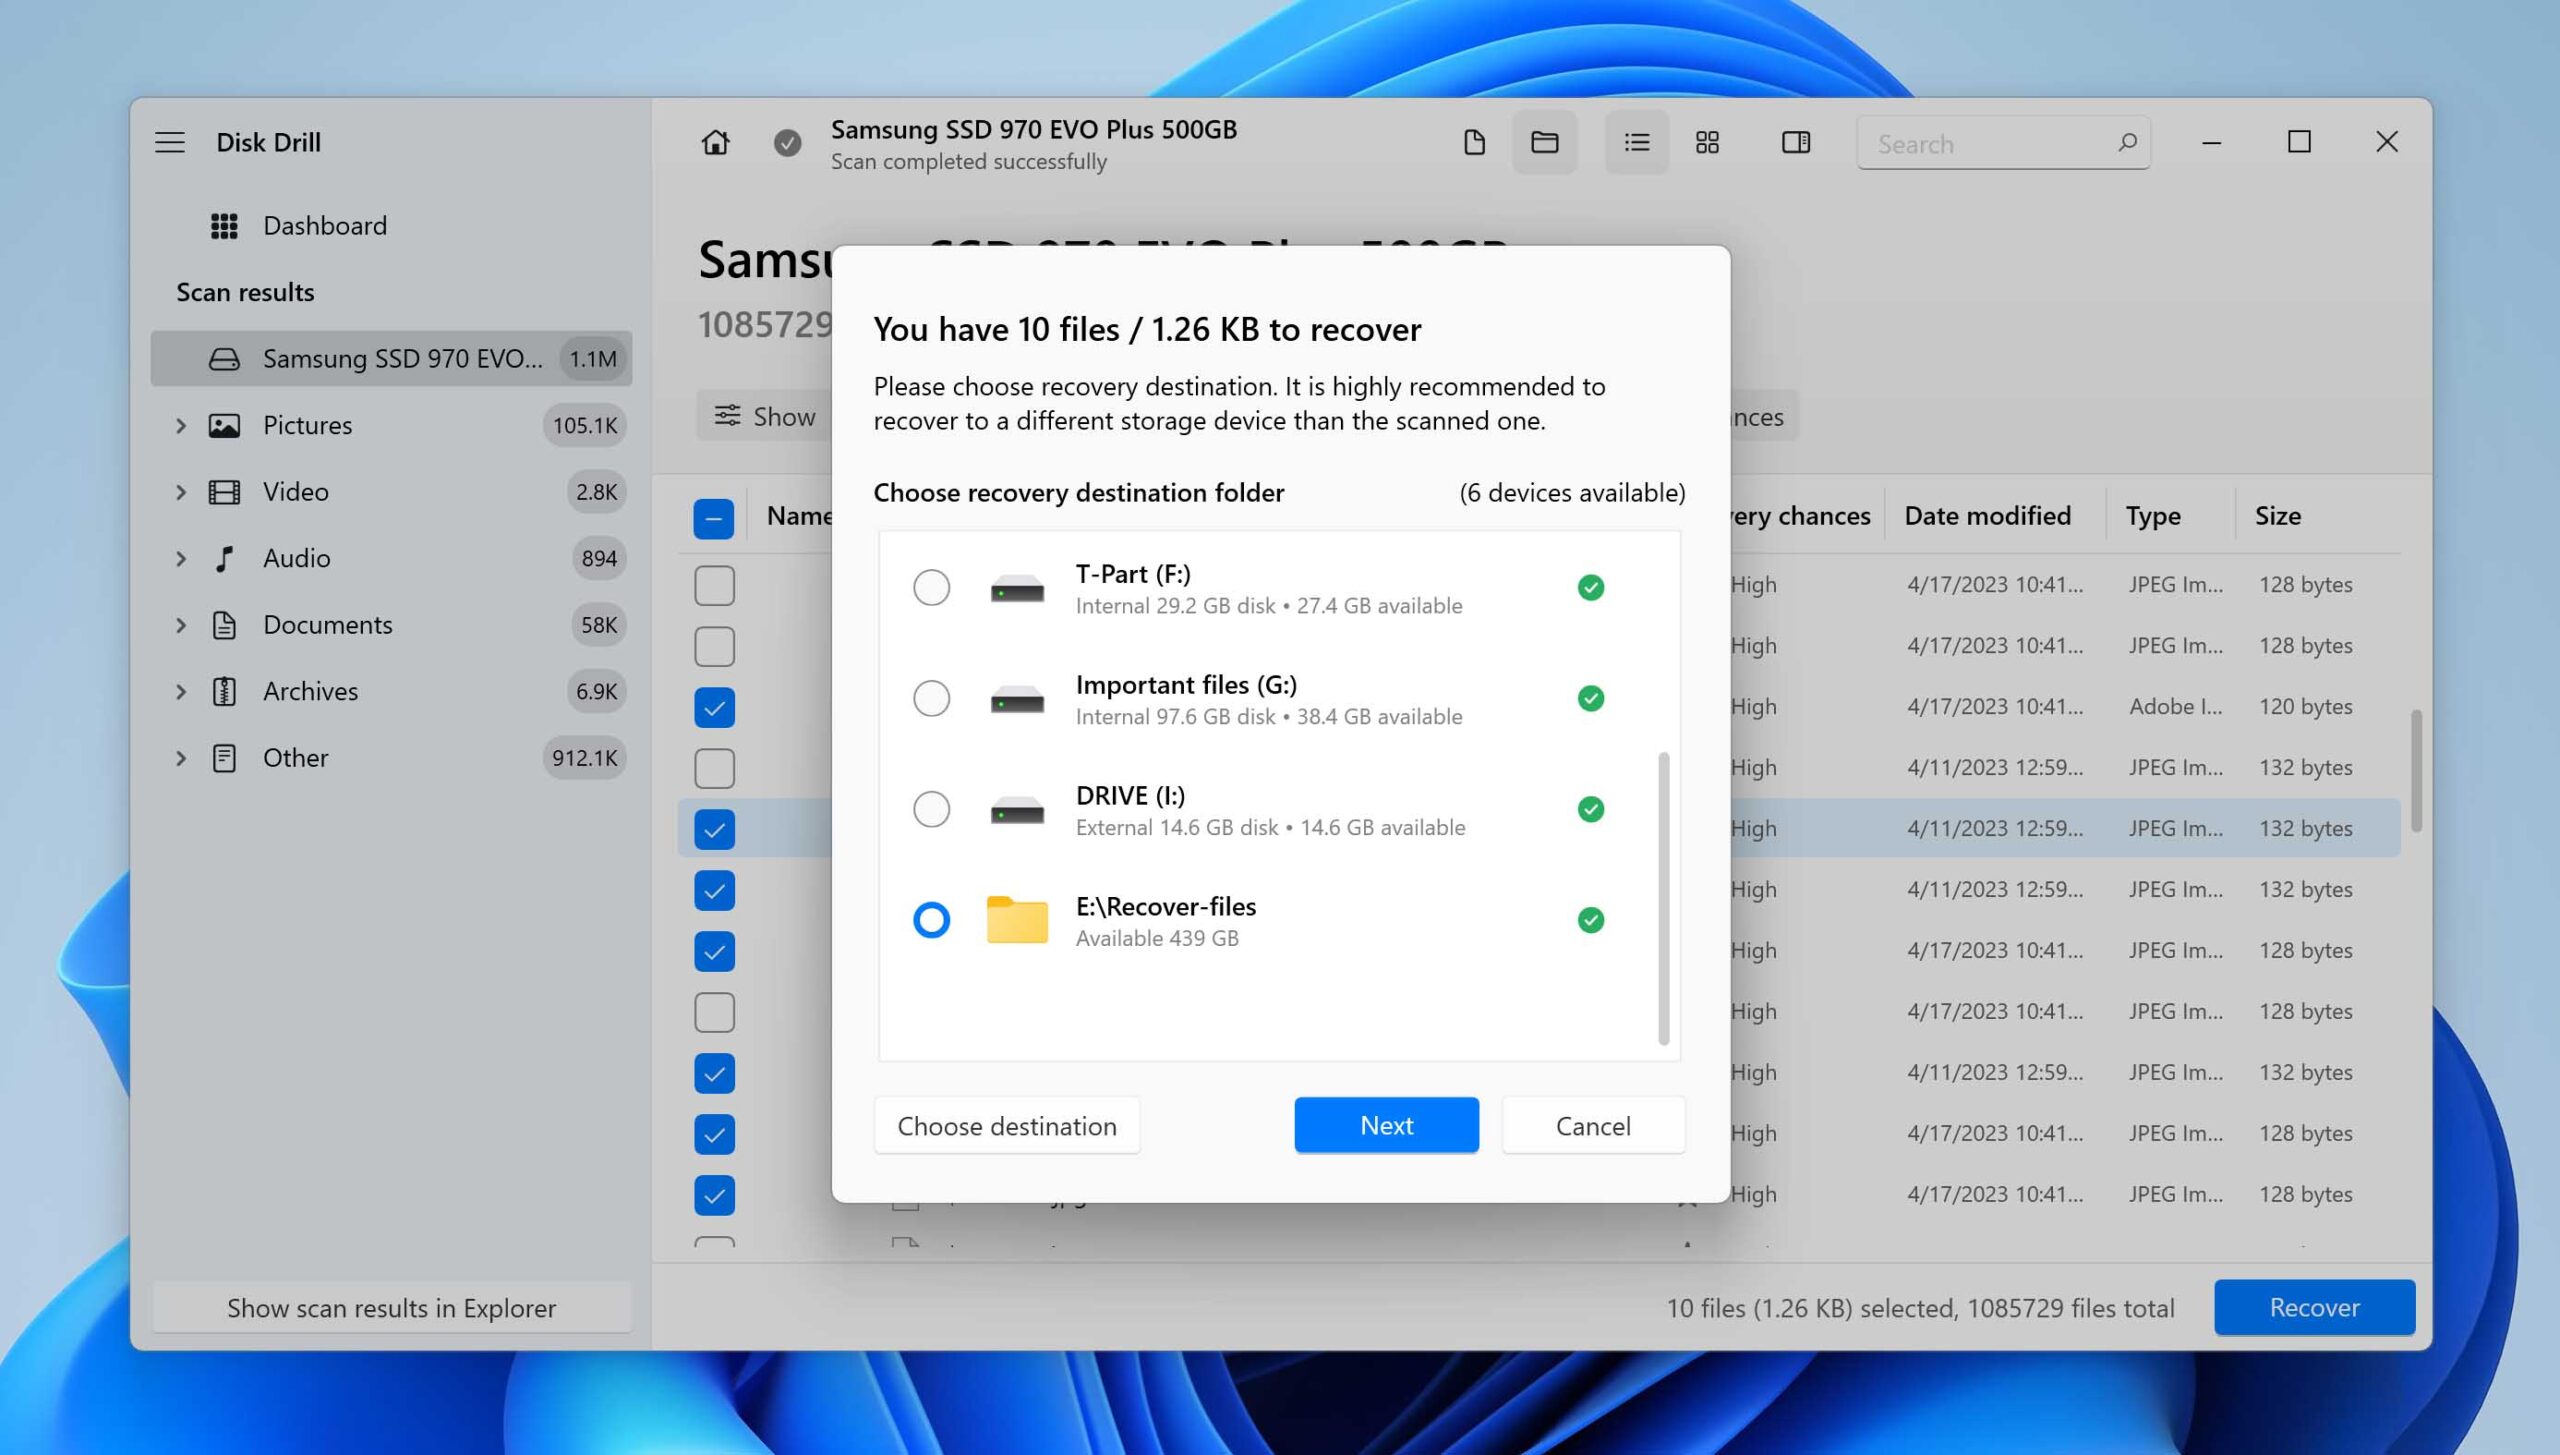
- Select a location on your computer for the recovered files. Make sure you select a folder that is not located on your SSD. You can specify other locations by clicking Choose destination. Then, click Next to proceed with recovery.
Method 2: Using R-Studio
![]() R-Studio is another excellent choice for NVMe data recovery. Like Disk Drill, R-Studio fully supports NVMe drives. It also works for NTFS, exFAT, FAT32, APFS, or HFS+ file systems.
R-Studio is another excellent choice for NVMe data recovery. Like Disk Drill, R-Studio fully supports NVMe drives. It also works for NTFS, exFAT, FAT32, APFS, or HFS+ file systems.
R-Studio is well-known in the IT crowd thanks to its many advanced features. It does throw a lot of tools at you, but as long as you follow the instructions below, you should be fine!
- Download and install R-Studio.
- If you use your NVMe SSD externally, connect it to your computer. Then, launch R-Studio via your Desktop or the Start menu.
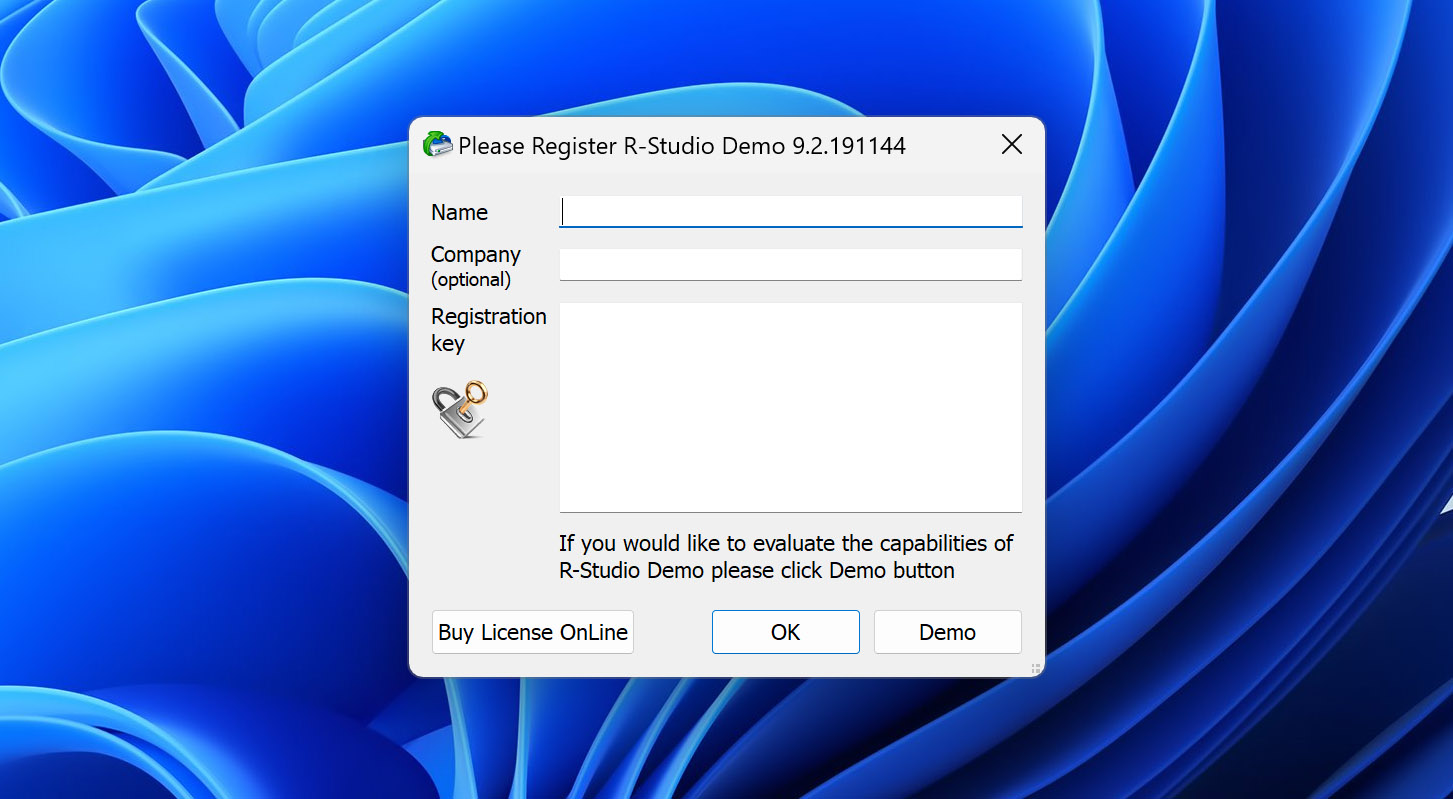
- When prompted, click Demo to proceed with the free version. You may also click Buy License OnLine if you want to purchase a license or enter your details in the appropriate fields if you already have one.
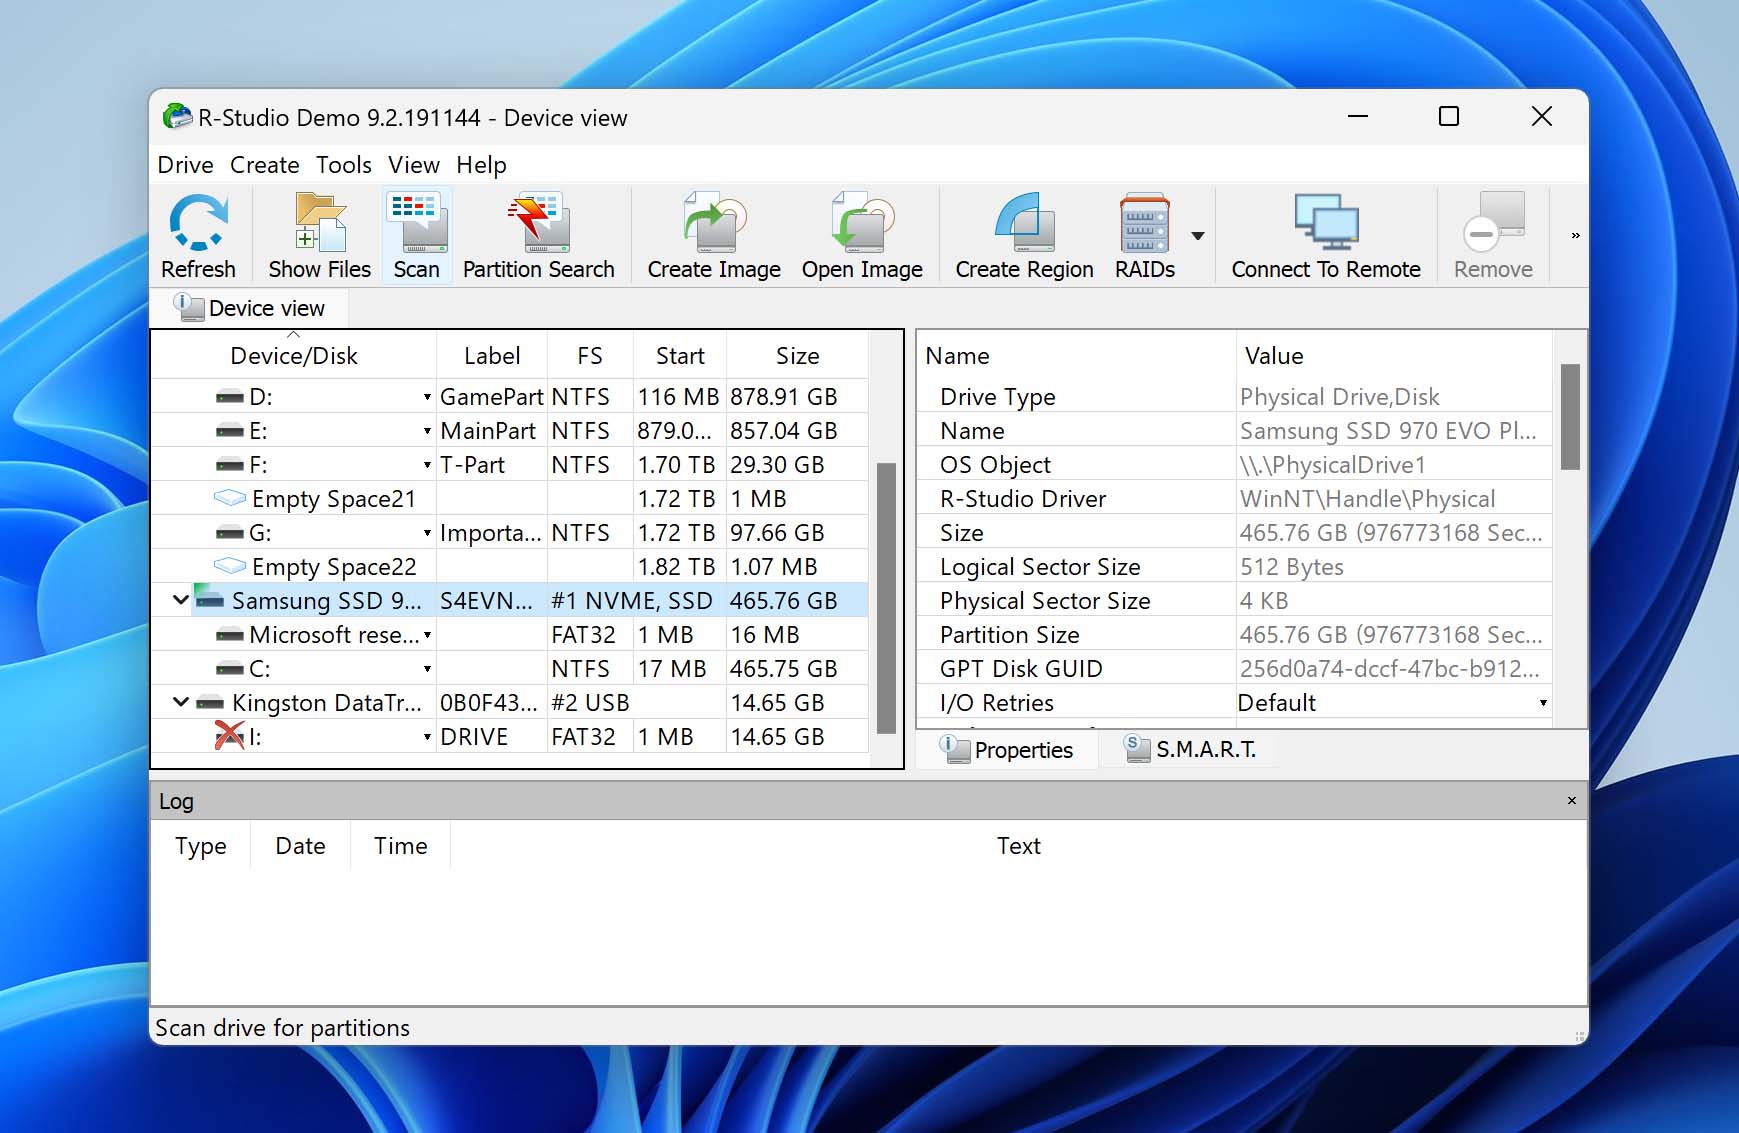
- Select your NVMe SSD from the drive list and click Scan.
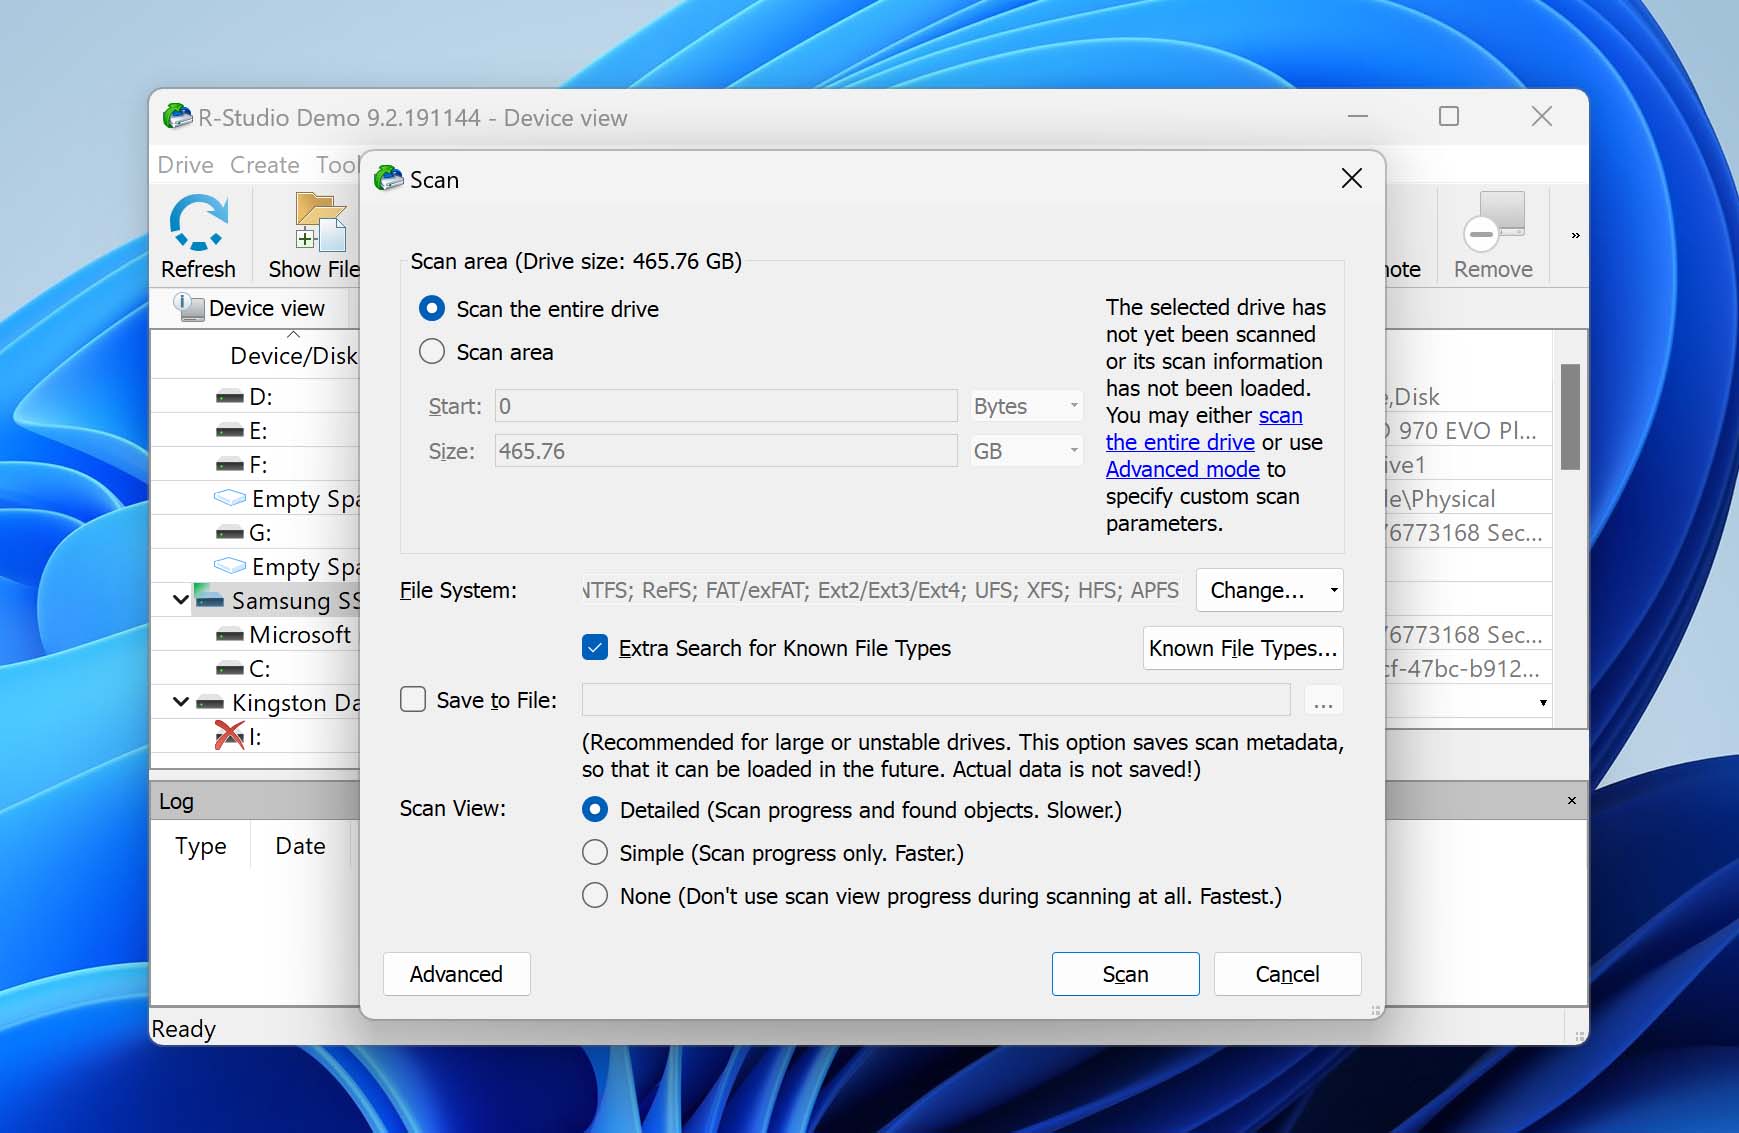
- Select Scan the entire drive and opt for the Detailed Scan View. Make sure Extra Search for Known File Types is also selected. Then, click Scan.
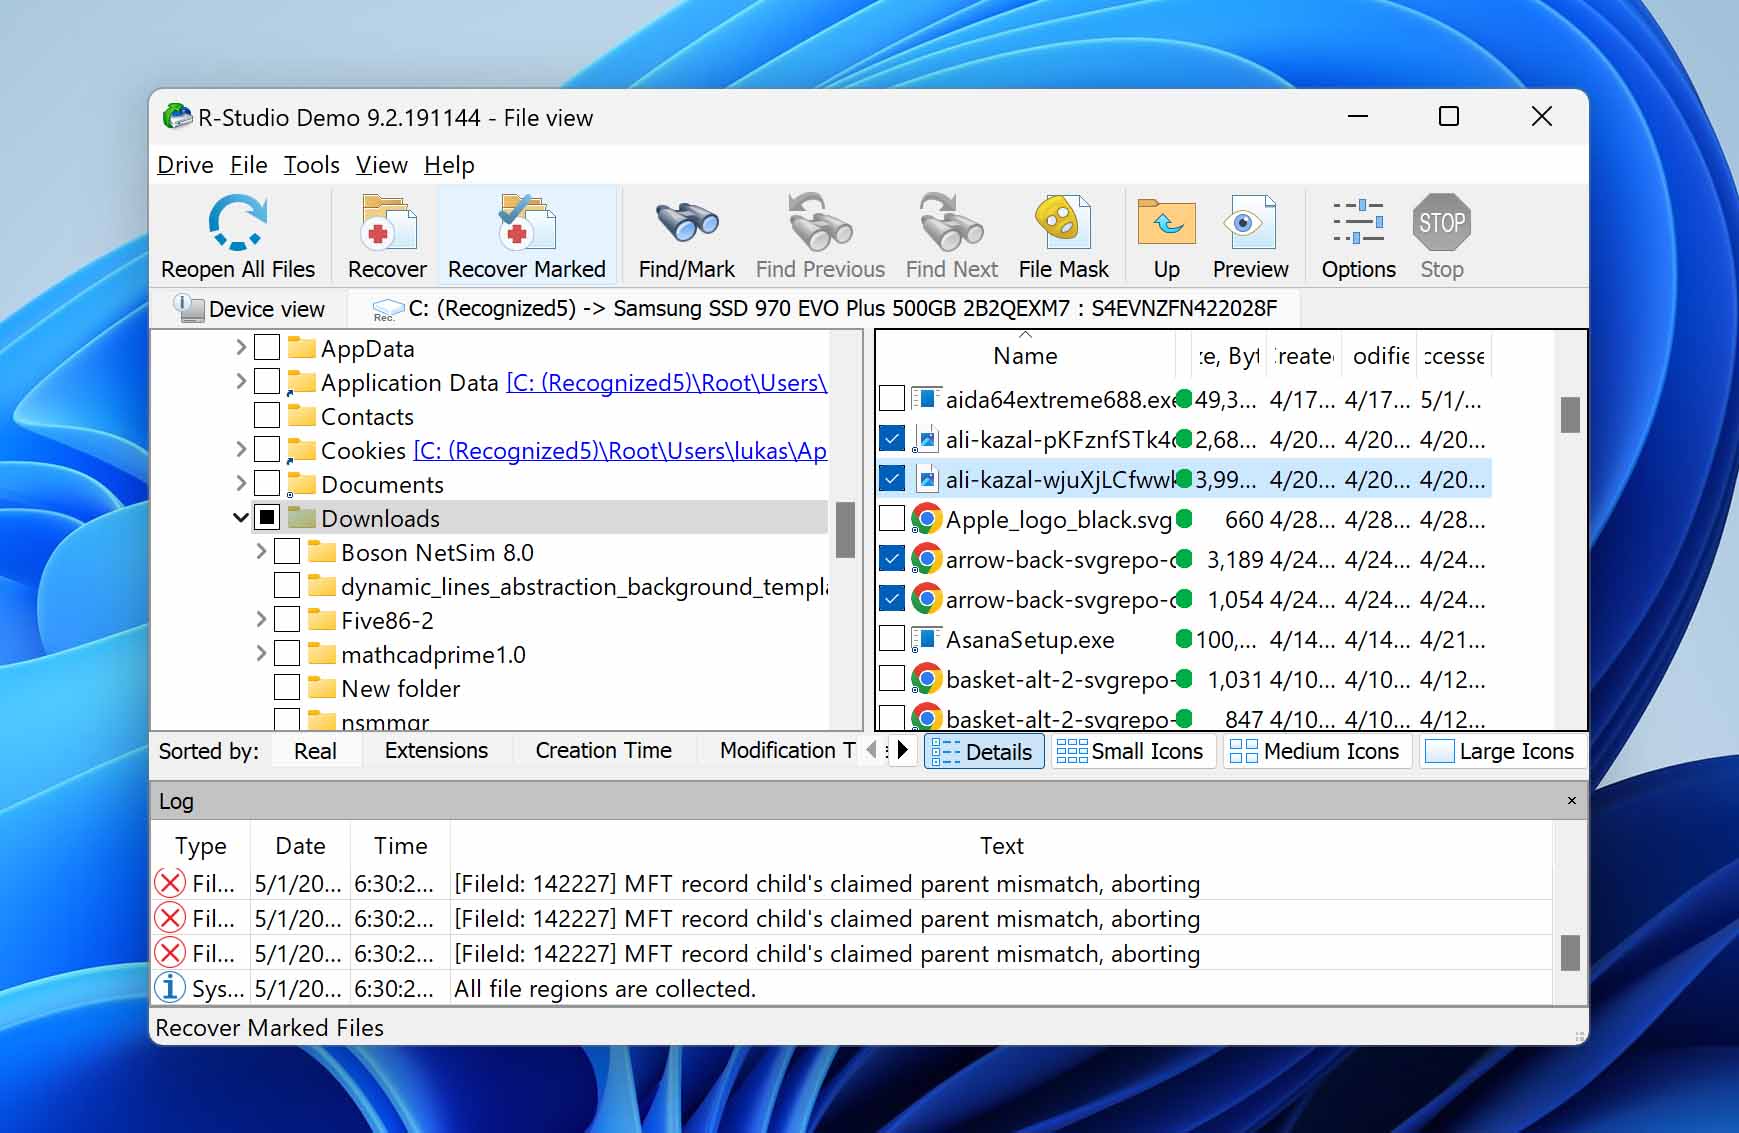
- Wait for R-Studio to finish scanning your NVMe drive. Then, select the recovered drive and click Show Files.

- On the left pane, you can expand folders and browse their contents. On the right pane, you can double-click files to display its preview in a new window.
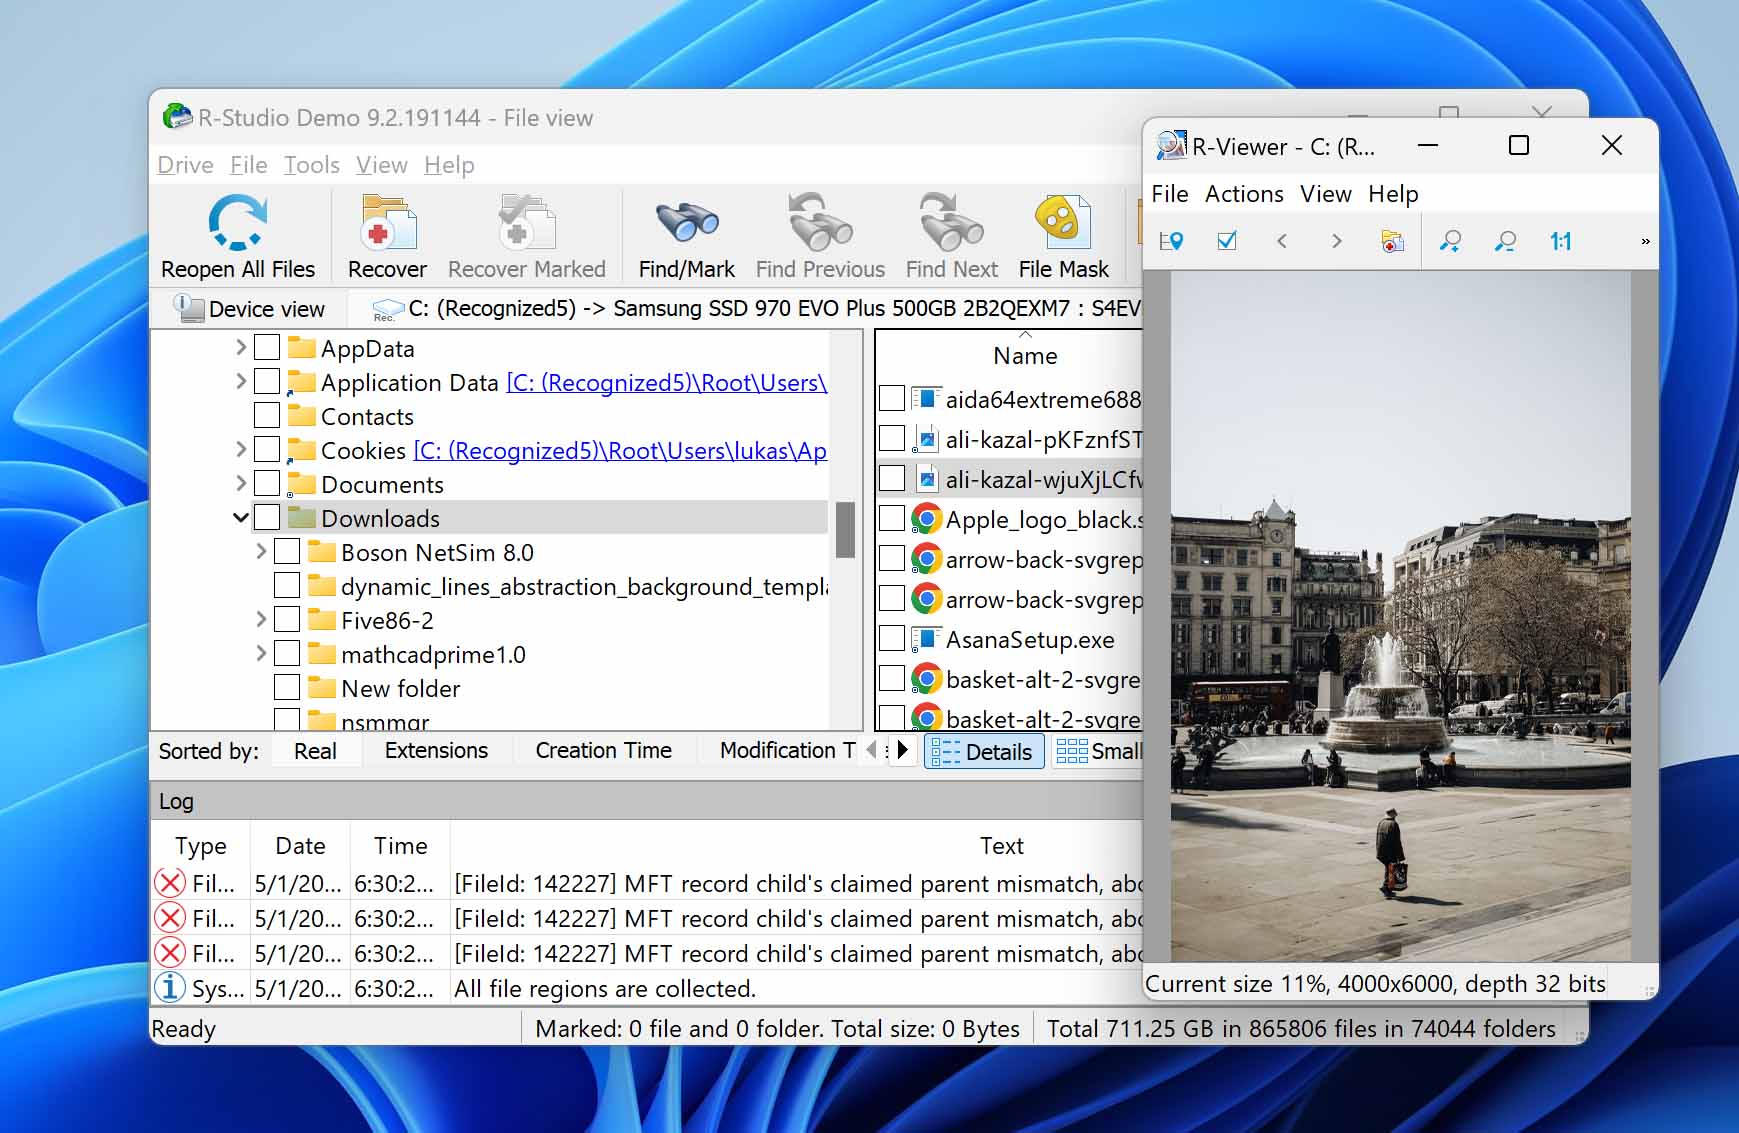
- Use the boxes beside the files and folders to select the data you want to restore. Then, click Recover Marked. Alternatively, you can click Recover to restore all the data R-Studio found.
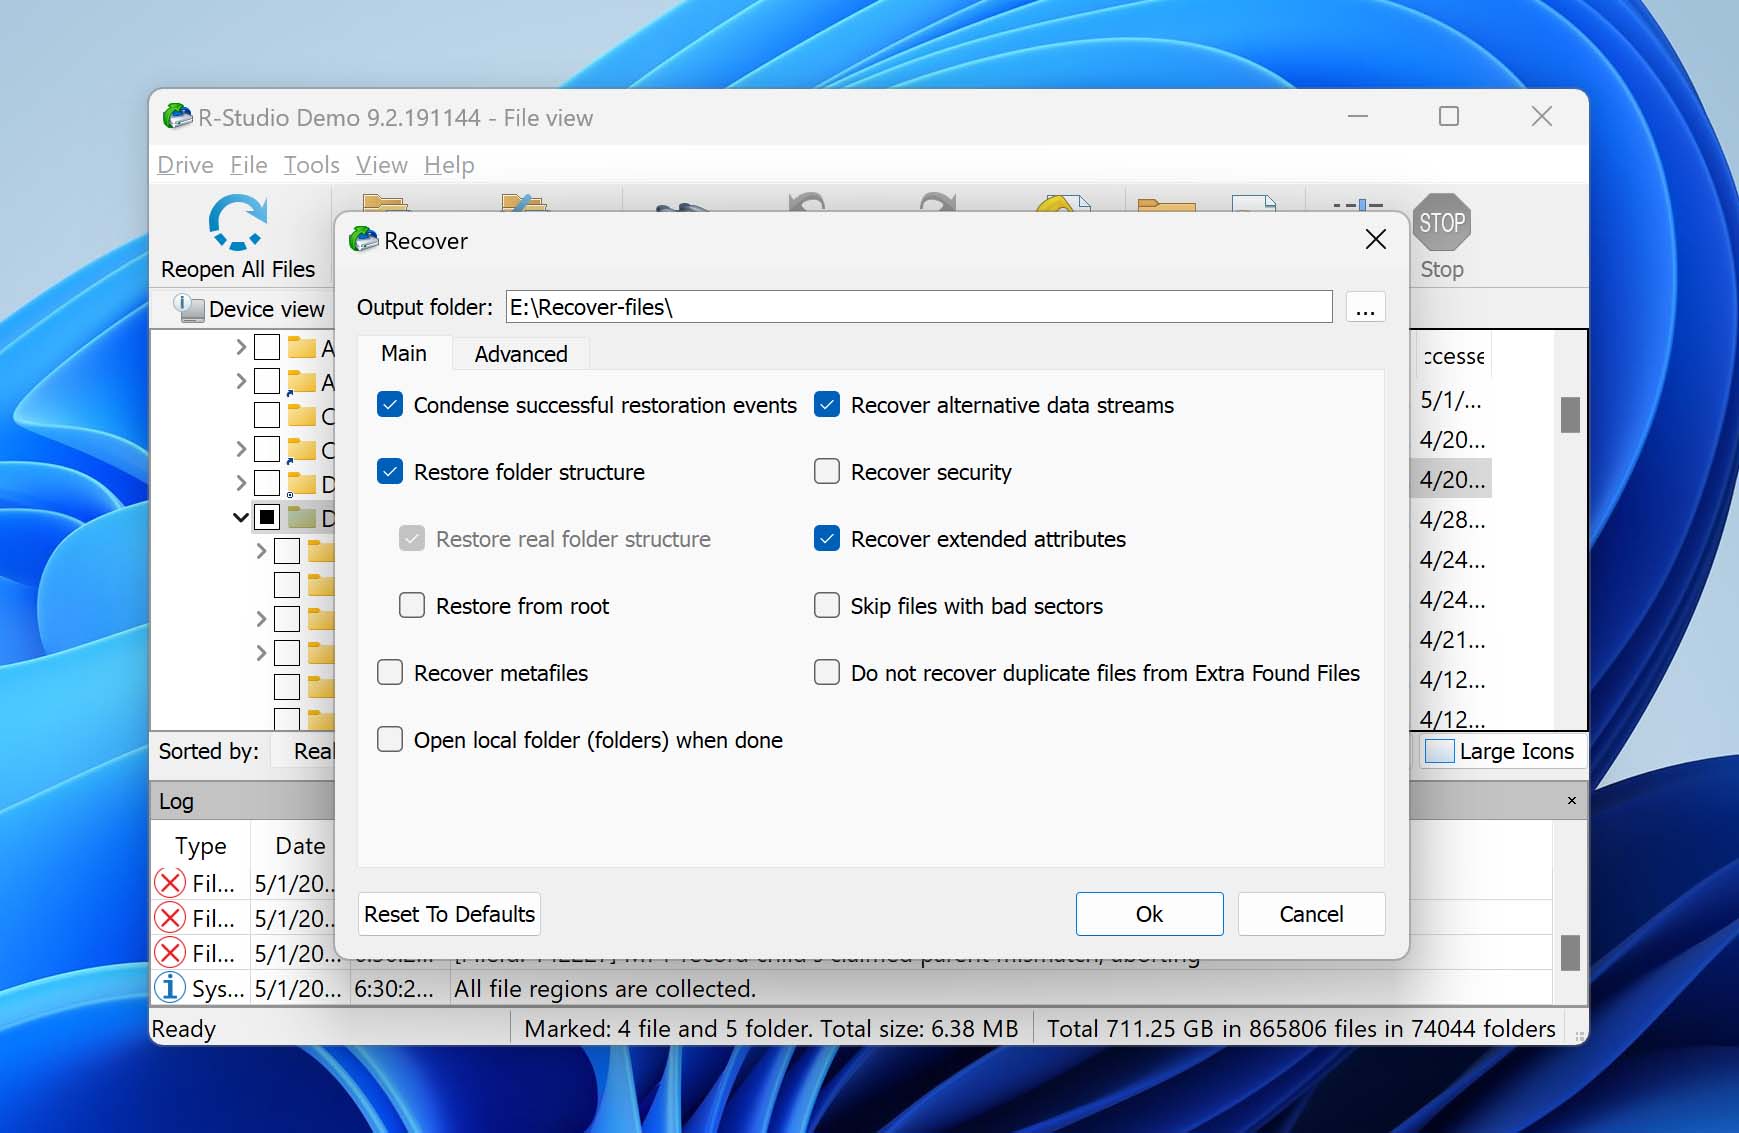
- Click the 3 dots beside the Output folder field to select a location where you want R-Studio to store the recovered files. Make sure to select a destination that is not located on your SSD. Then, click Ok.
Method 3: Restore Files From Backups
If you created backups of your data, you can typically use the same tool or service to restore it. We’ll quickly go through the different types of backup methods available for Mac and Windows.
- Time Machine (Mac) – If you connected a new external drive to your Mac, Time Machine may have prompted you to use it as a backup drive. You can access your Time Machine backups by clicking the Time Machine button on your menu bar.
- File History (Windows) – Like Time Machine, Windows File History prompts you to use new external drives for backups. You can restore your data using File History in Control Panel > System and Security.
- Cloud Backups – If you installed a cloud storage service like Google Drive and iCloud on your computer and you saved your data in its backup folder (locally), there may be copies of your files on the cloud. You can access your cloud storage through any browser.
- Alternative Backup Sources – If you downloaded your files from your email or from a file-sharing service like Mega.nz, their original copies should still be at the source.
Can You Recover Data from a Dead M.2 SSD? Using TestDisk
Yes! You can recover data from a dead M.2 SSD – but only if it failed due to logical damage or “non-mechanical failure.” Some examples of this scenario are:
- Corruption – Your SSD may have been corrupted due to viruses, read and write interruptions (for ex. power outages), software errors, and more.
- Bad Sectors – Bad sectors may be caused by viruses, read and write interruptions, software errors, and corruption. It affects the whole drive, but data recovery software can still pull data from the good sectors.
- Firmware Failure – Your drive’s firmware is responsible for controlling device function and communicating with other components on your computer. It can get corrupted, which can affect your data or prevent you from accessing your files.
In such cases, data recovery software like Disk Drill and R-Studio can usually detect and scan your SSD. However, they need to appear in Disk Management with the right size for these tools to work.
Frequently Asked Questions
Can data be recovered from NVMe SSD?
Yes, data can be recovered from an NVMe SSD! However, we only recommend DIY recovery if you accidentally deleted or formatted your data, or if the data loss was caused by non-mechanical failure. In case your drive is broken or has suffered other types of physical damage, send your SSD to a data recovery service instead.
What is the best NVMe data recovery software?
Our top 2 picks for the best NVMe data recovery software are:
- Disk Drill – Full NVMe support, advanced recovery algorithms, simple and easy-to-use interface, 500 MB free data recovery (for Windows PCs).
- R-Studio – Full NVMe support, advanced recovery algorithms, free unlimited data recovery for files that are under 256 KB (individually).
How to transfer data from M.2 SSD?
There are a couple of ways to transfer data from your M.2 SSD:
- Enclosure – Store your M.2 SSD in a compatible enclosure and connect it directly to your computer. Copy and paste your files.
- USB adapter – Connect your M.2 SSD chip to a USB adapter. Copy and paste your files.
- Image backup software – Create an image backup of your M.2 SSD using backup software.
- Cloud storage – Connect your M.2 SSD (via USB or enclosure) to your computer and upload your files to a cloud storage service like iCloud or Google Drive.
How to repair NVMe M.2 SSD?
Try the following NVMe repair methods:
- Make sure your NVMe M.2 SSD is properly seated on your motherboard or securely connected via a high-quality enclosure or adapter.
- Clean out dirty ports or try other ports on your computer.
- Check the manufacturer’s website for firmware updates.
- Format your NVMe SSD (if you have important data stored on it, use data recovery software first.
How do I recover data from a corrupted NVMe SSD?
To recover data from a corrupted NVMe SSD, use data recovery software. We personally recommend Disk Drill because it also provides an image backup tool called Byte-to-byte backup.
You can use Byte-to-byte backup to create an image backup of your SSD, which Disk Drill can scan as a mounted disk. This prevents further damage to the SSD itself.
How to retrieve data from an NVMe SSD?
To retrieve data from an NVMe SSD:
- Download, install, and launch Disk Drill.
- Select your NVMe SSD and click Search for lost data.
- Click Review found items.
- Tick the boxes beside the data you want to restore and click Recover.
- Save your files in a safe location (not on your NVMe SSD).
How to check NVMe SSD health on Windows 10?
Use third-party software that provides a S.M.A.R.T. (Self Monitoring, Analysis, and Reporting Technology) tool. We suggest CrystalDiskInfo, which is free and open-source. You can also check your SSD’s manufacturer’s website if they have native monitoring or diagnostics tools. Here’s an example from Samsung.

- 22 publishings
Alejandro is a veteran writer with a rich background in technology. He worked part-time in his uncle’s repair and recovery shop as a young boy, and now uses his experience and writing skills to produce content for multiple tech websites – specifically on the topic of data recovery. As an author for Pandora Recovery, he is constantly testing and experimenting with new tools and technology to help his readers find the best software for their needs.
- Frisco, Texas, United States
Yevgeniy Tolkunov is Hardware Engineer at ACE Data Recovery. Yevgeniy has a Master's Degree in Physics, Information Technology; 15+ years of experience.