
How to Recover Deleted Files From a Flash Drive
Even flash drives from reputable manufacturers such as SanDisk and Lexar are not immune to data loss. The good news is that there are several methods you can use to recover deleted files from USB.
Below, we introduce all the popular methods for USB data recovery using flash drive recovery software, along with other built-in tools you can use.
What You Should Do Before Recovering Files from USB
To achieve the best recovery results when using data recovery software tools to recover accidentally deleted files, some preliminary steps should be taken. These are meant to protect the device from further data loss and give you the best chance of recovering your deleted files.
Step 1: Stop using the USD drive
It is vitally important that you stop using the flash drive as soon as you suspect it has experienced data loss. Failure to follow this advice can expose the drive to further data corruption and increase the possibility of overwriting lost files before they can be recovered. Once lost files are overwritten, they are gone for good.
Step 2: Disconnect the flash drive
To ensure that you don’t inadvertently write any additional files to the USB drive, you should disconnect it from your computer until you’re ready to recover deleted files from pen drive. You can also put it into read-only mode (for example, by using Disk Drill) to eliminate the chance that the deleted data will be overwritten by you or your operating system and ensure that the deleted files are still there when you use the app to restore them. Here’s how:
To put your USB drive into read-only mode, you need to select it on the main screen, click the three vertical dots to the right of the flash drive’s name, and select the “Make read-only” option.

How to Recover Permanently Deleted Files From a Flash Drive
With the right USB drive recovery tool, you should be able to recover data from flash drive in no time and with minimal effort required. For the purposes of our demonstration, we’re using the tool recommended earlier in this article, Disk Drill.
- Download Disk Drill from its official website and launch the downloaded installer to install the flash drive recovery tool on your computer. The installer will guide you through the entire installation process step by step.
- Double-click the newly created Disk Drill icon on your desktop. You will be asked to give the tool administrator privileged, so please do so otherwise you won’t be able to continue (they are required for deep access to your flash drive).
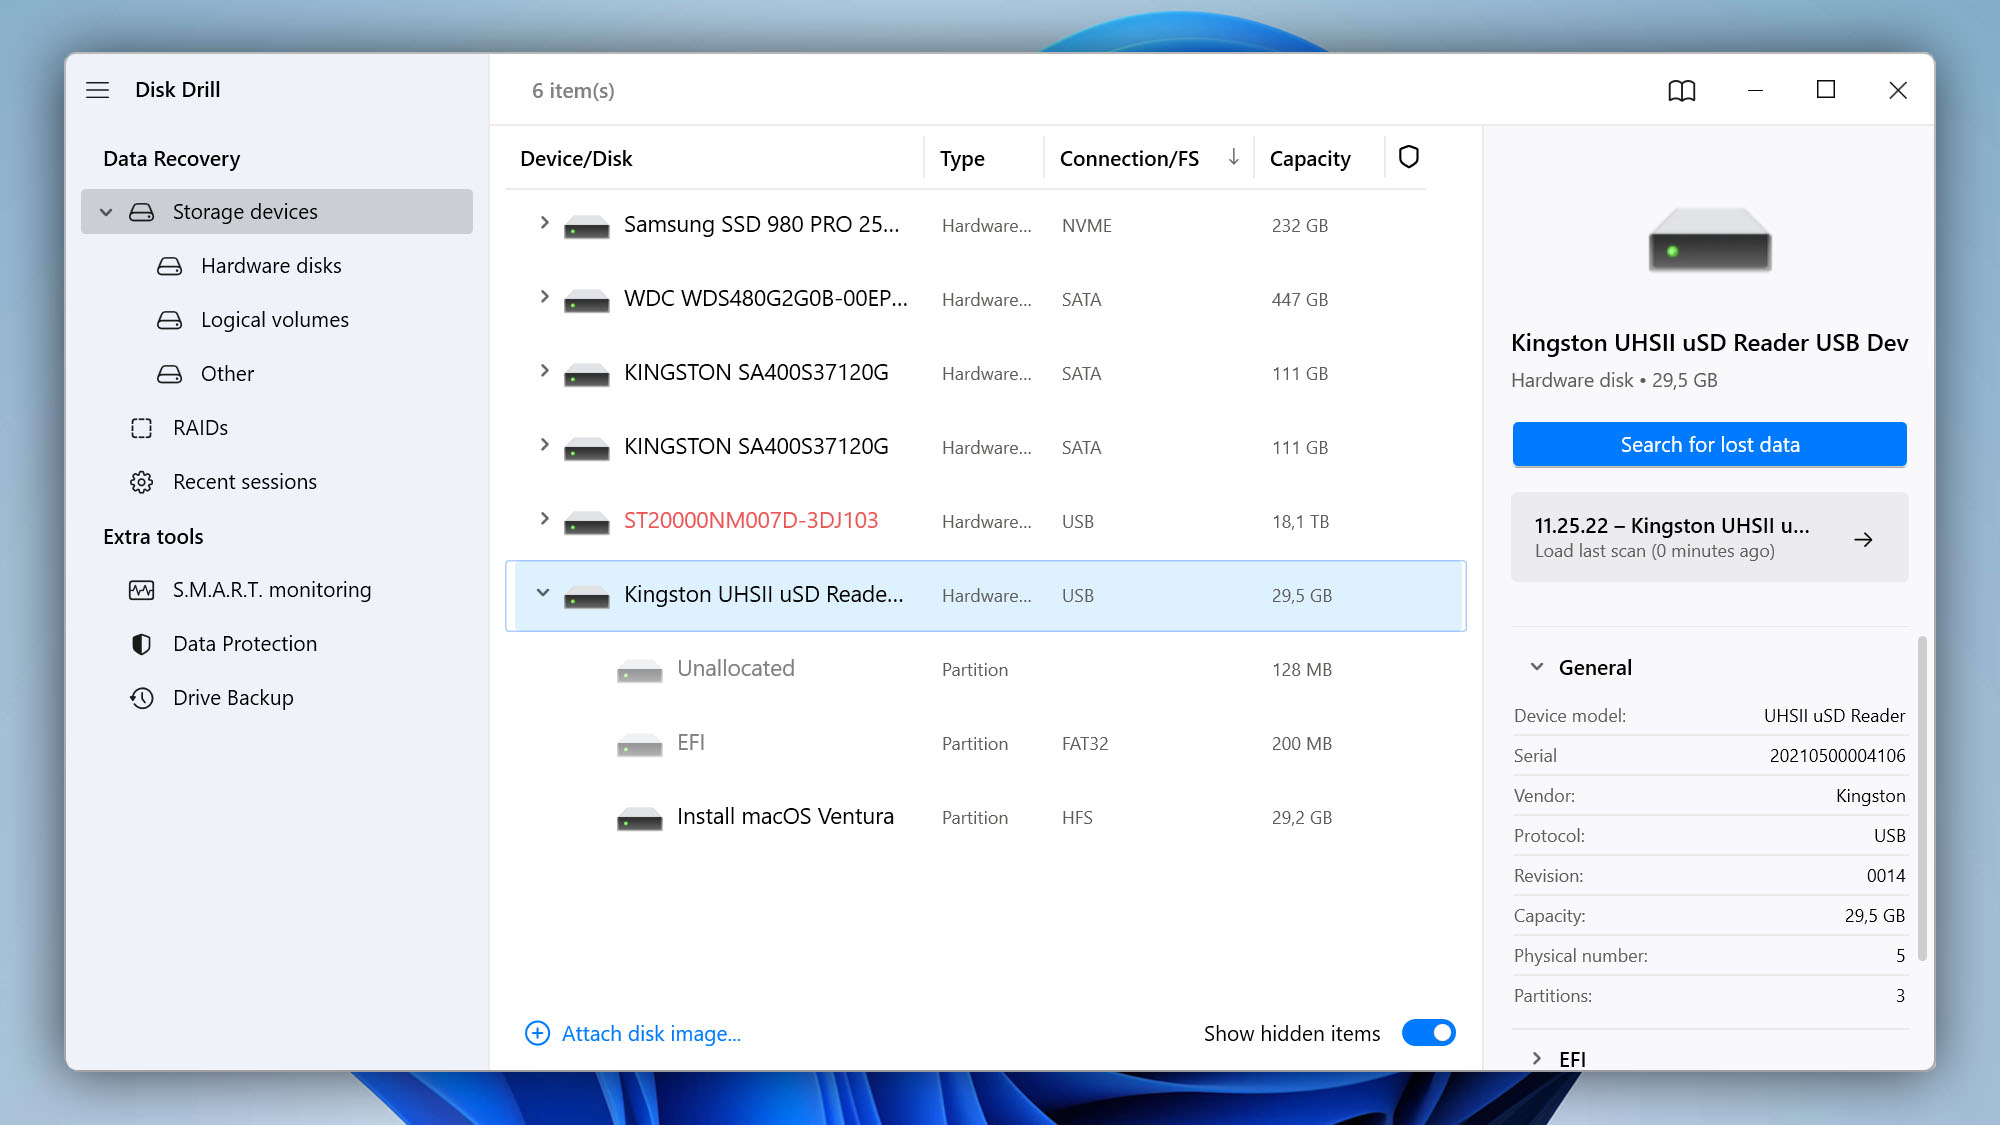
- Select the flash drive you want to recover from the list of available storage devices and click Search for lost data. You can wait for Disk Drill to finish scanning, or you can preview recoverable data during the scan.
- Add all deleted files to the recovery queue by clicking the checkboxes next to them. If you know the names of the deleted files, then you can use the search bar in the top-right corner of the Disk Drill window to find them. If not, then you can narrow down the scan results using filters.
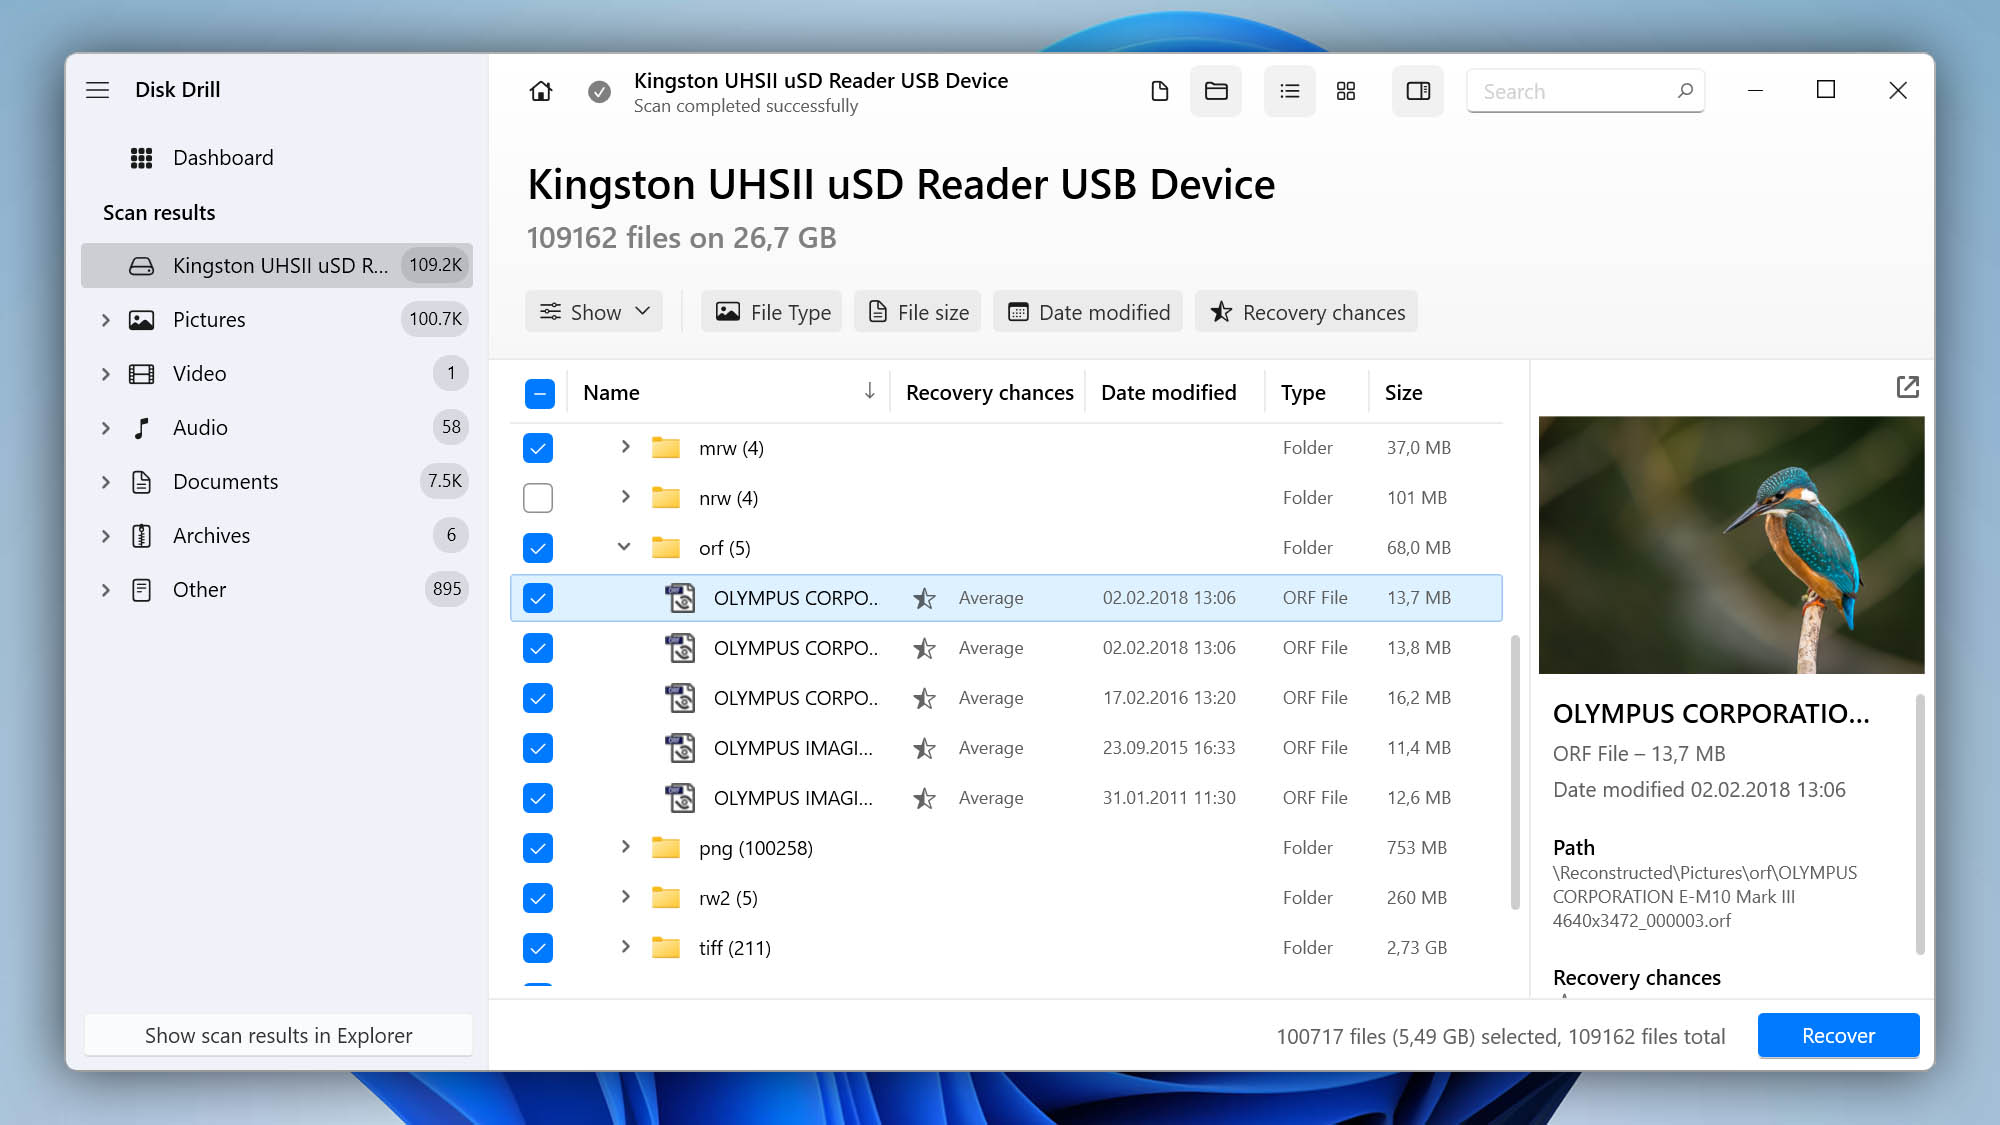
- Click the Recover button once you’ve added all deleted files. You will be asked to select a safe recovery destination. Any location other than the flash drive from which you’re recovering deleted files is acceptable as long as it has enough free storage space.
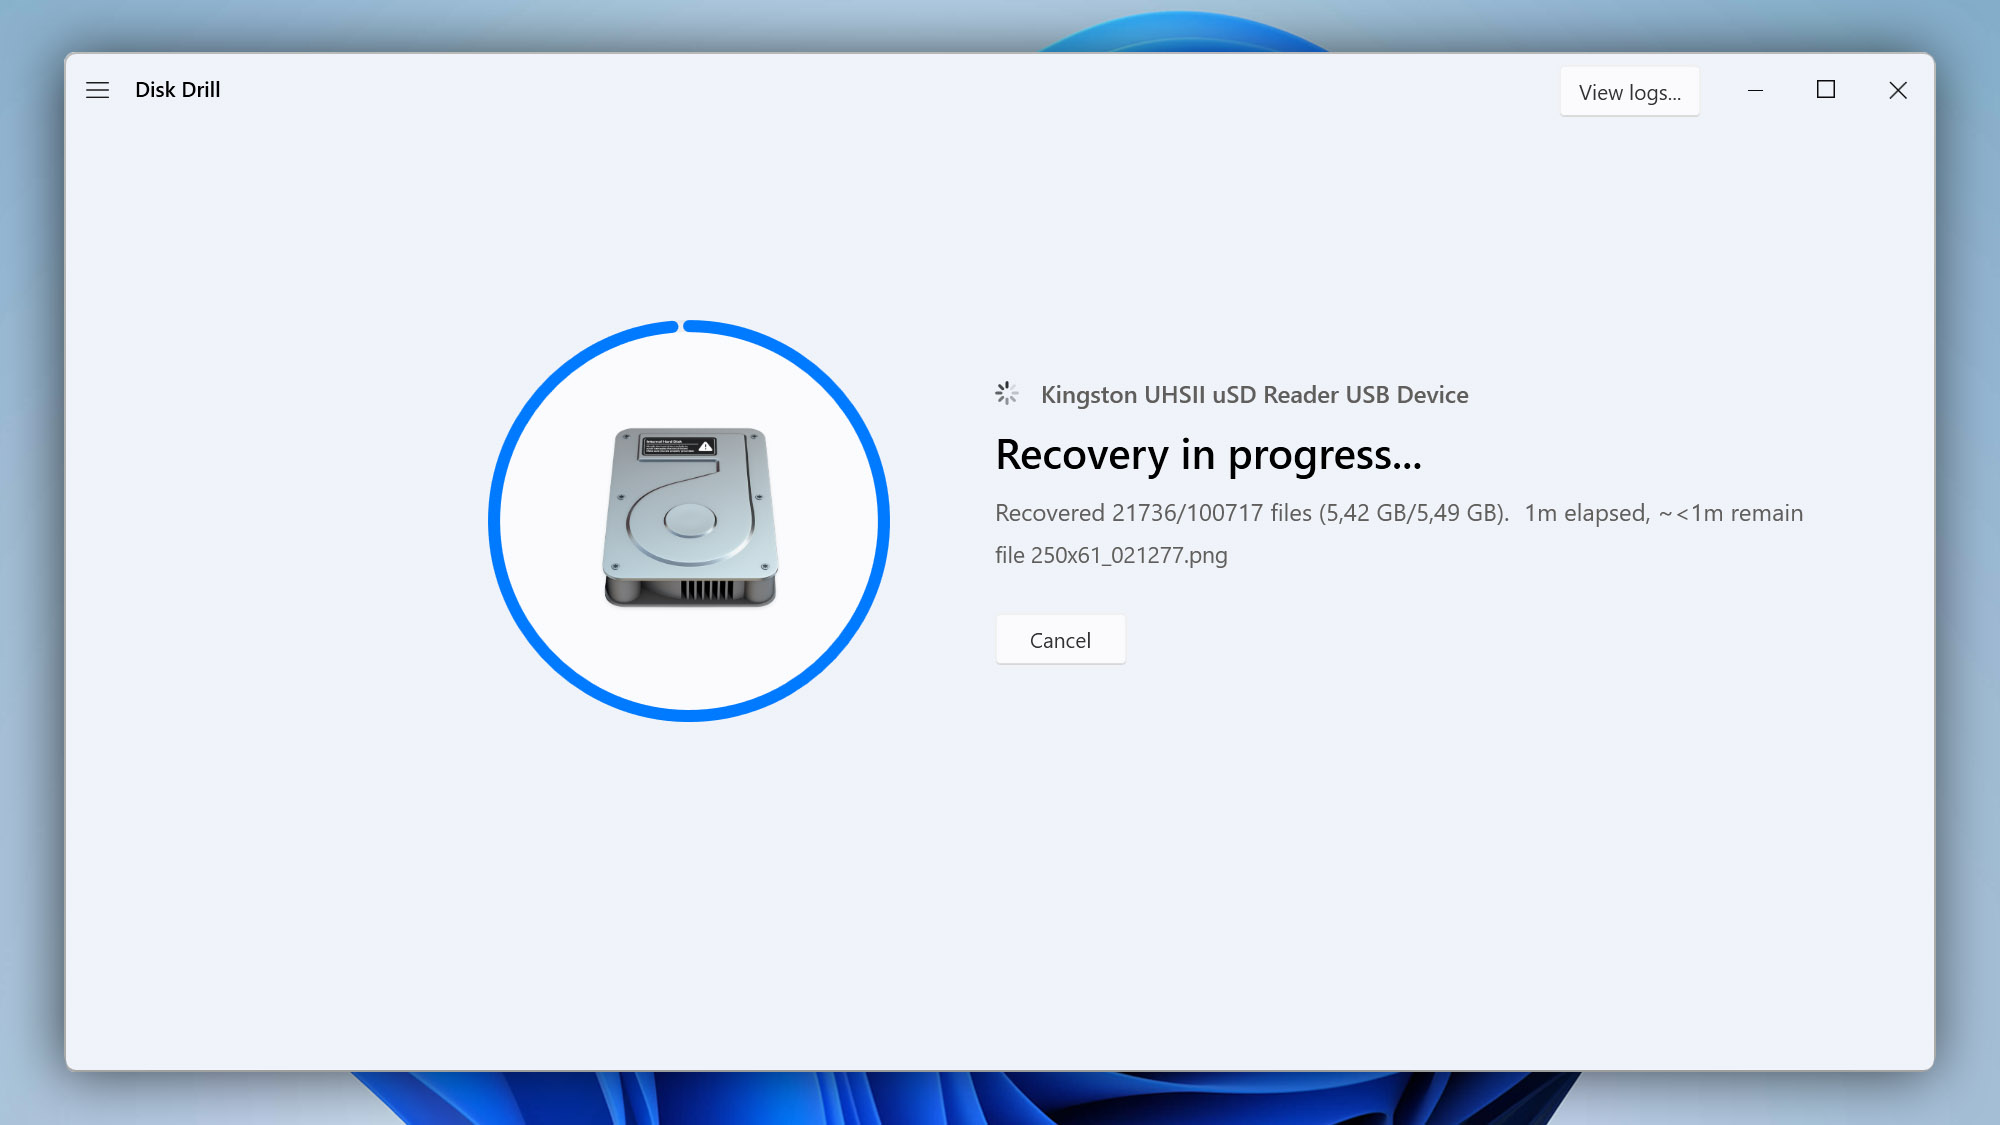
That’s how you recover data from any flash drive using Disk Drill.
Why Disk Drill Should Be Your Primary Flash Drive Recovery Tool
When faced with a lost file, you want to reach for a recovery tool that has a proven track record of success. Disk Drill has been used by countless users to recover lost files from USB flash drives both on Windows and Mac computers. Here are some reasons why Disk Drill is the best app to retrieve deleted files from the USB drive, and why it should be your data recovery tool of choice.
- 🚀 Speed. Disk Drill offers different scanning modes that enable you to recover recently deleted files just as quickly and efficiently as files that have been permanently deleted for some time. The tool’s deep scan feature scavenges your flash drive on a sector-by-sector basis to reconstruct and salvage data not easily identifiable with a quick scan.
- 🔒 Security. This recovery application for Windows and Mac securely recovers your lost data with no risk to your computer. It scans in read-only mode and will not make any changes to your system. The free data protection tools that come with Disk Drill help you protect the most important information on your flash drive without additional software.
- 💾 Flexibility. In addition to providing the best flash drive recovery possible, Disk Drill can be used to restore lost files from any other storage device. From your computer’s internal drive (both SSD and HDD) to memory cards (SD, SDHC, SDXC, microSD, MMC, etc.), the tool will reliably recover your data with just a few simple clicks.
What’s the Difference Between the Free and Pro Version of Disk Drill?
Disk Drill is a free file recovery application for Windows and Mac, but there’s also a Pro version that you can upgrade to by purchasing a license. The table below summarizes the differences between the two versions, and the next two tables give more information about Disk Drill and its file recovery capabilities.
Free Version
- Free
- 500 MB recovery (Windows version only)
- Preview all recovery features
- Data protection tools are included
Pro version
- $89
- Unlimited recovery
- Full access to all features
- 1 user 3 activations
More on Disk Drill
Technical Specifications
- 💽 Supported Devices: USB, USB 3.0, pen drive, thumb drive, flash drive, USB external hard drive
- 🗂️ Supported File Systems: FAT (FAT12, FAT16, FAT32), exFAT, NTFS, NTFS5, ext2/ext3/ext4, HFS+, APFS
- ⚙️ Supported OS: macOS 10.15.7–16.x (Use Disk Drill 1/2.x/3.x/4.x for OS X 10.5+), Windows 10 64-bit/11 64-bit (Use Disk Drill 2.x/4.x for Windows XP+)
- 🔤 Supported Languages: English, Arabic, German, Spanish, French, Turkish, Italian, Japanese, Korean, Malay, Dutch, Polish, Brazilian Portuguese, European Portuguese, Russian, Swedish, Chinese, Hindi, Ukrainian
Supported File Types
- 🖼️ Images: JPG, PNG, BMP, TIFF, AI, CR2, DNG, ICO, GIF, PSD, WEBP, and more
- 📽️ Videos: AVI, MP4, MOV, MPG, 3GP, MKV, MLV, RM, TS, WEBM, WMV, and more
- 🔉 Audio: MP3, OGG, FLAC, AAC, M4A, RA, WAV, WMA, MID, AIF, AIFC, AIFF, and more
- 📄 Documents: Excel (XLS, XLSX), Word (DOC, DOCX), PowerPoint (PPT, PPTX), RTF, ODT, TXT
- 🗜️ Archives: 7Z, ARJ, CAB, DMG, ISO, JAR, MBX, PST, RAR, RDB, TAR.XZ, ZIP
- 🏷️ Other: ACCDB, DB, SQL, MYO, OTF, RAW, VMDK, ISO
Pandora Recovery believes in providing you with a data recovery solution that closely caters to your data recovery issues. This is why we continue testing different data recovery tools for Mac and Windows: to recommend only the best tools that can retrieve your data.
See how each of the data recovery apps we have reviewed so far compares with each other in our comprehensive software comparisons for Mac and Windows.
If you have specific data recovery needs, you can also use our software picker as a guide to the data recovery software that is best suited for you.
How to Recover Deleted Files from a USB Drive Without Software
Below are some methods that you can try to get back your lost files from your USB drive.
Method 1: Check the Recycle Bin for Deleted Files
The first place you should look for files deleted from your flash drive is the Recycle Bin. Your files might still be there, and recovering from the Recycle Bin will save you a bunch of time over any alternative method that relies on a third-party app. Here’s what to do:
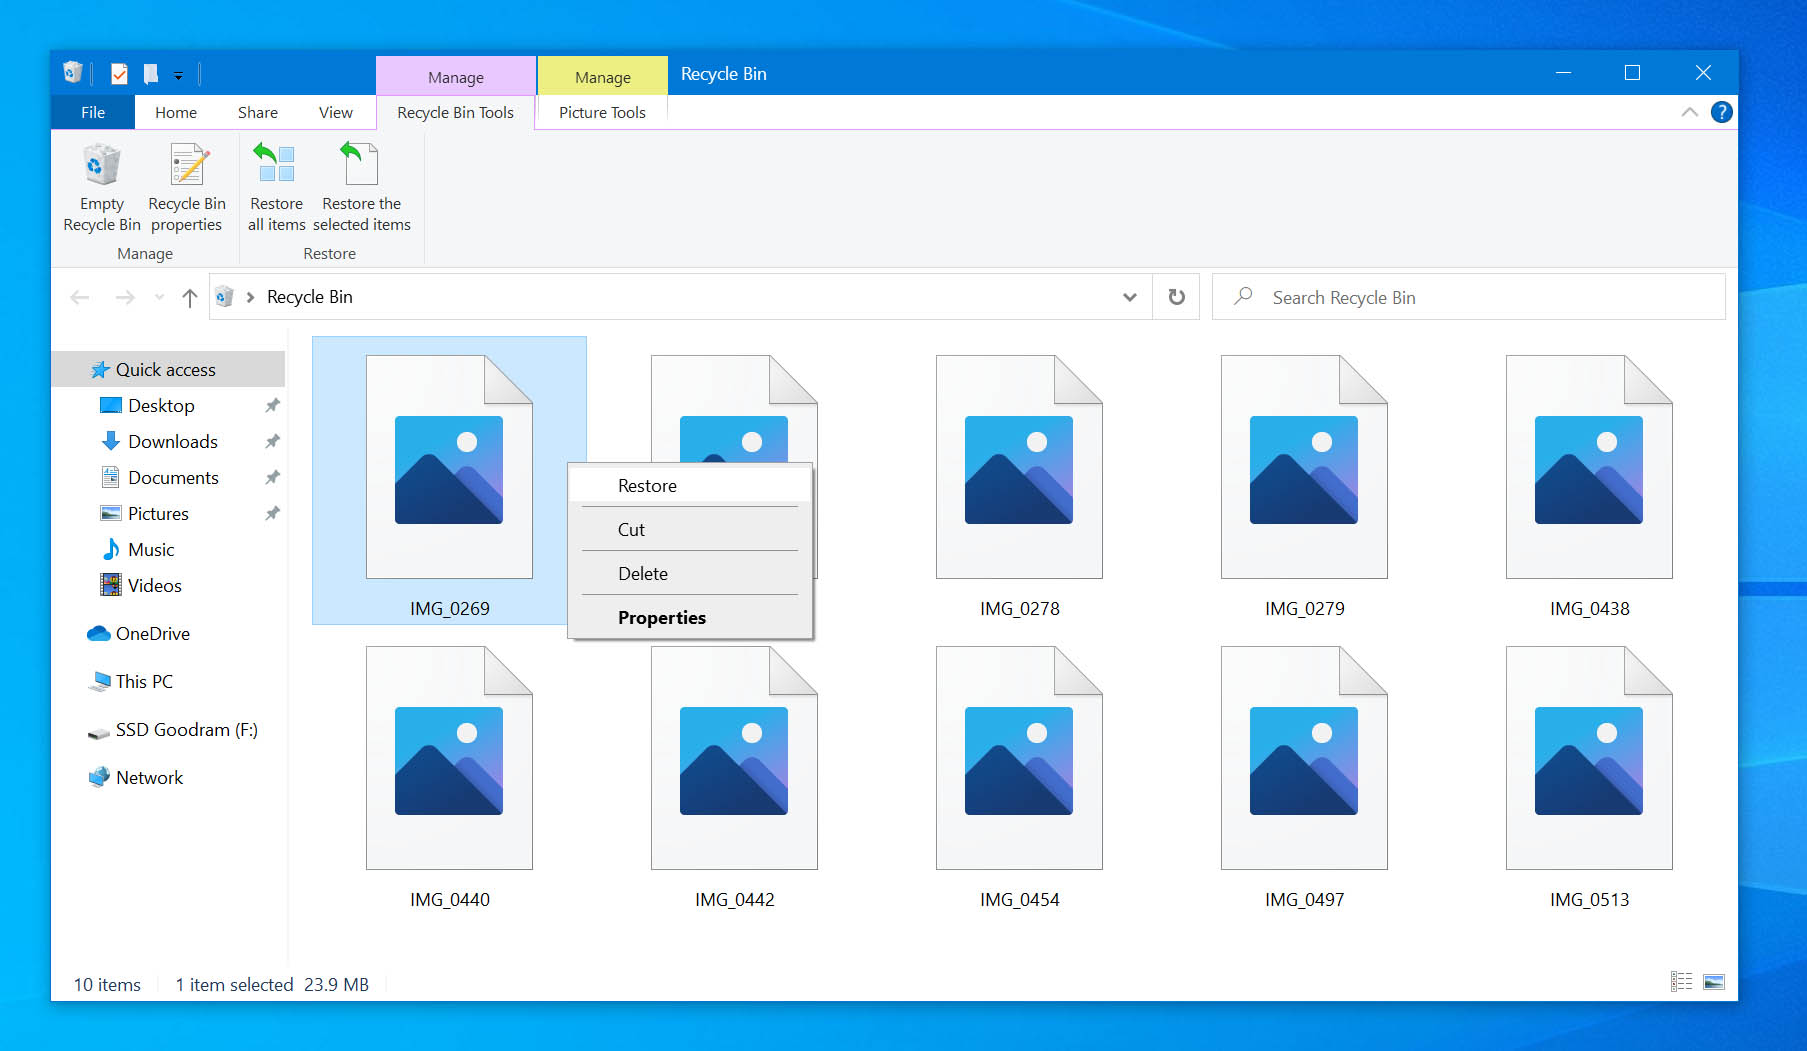
- Open the Recycle Bin by double-clicking on it, or by right-clicking and selecting Open.
- Search for the file or folders that you wish to recover.
- Right-click on your selections and choose Restore.
Files deleted from a flash drive may not make it to the Recycle bin. If that’s the case, you can try the next method, which works on Windows 11, Windows 10, Windows 8, and Windows 7.
Method 2: Try Restoring Previous Versions of Your Files and Folders
You might be able to recover deleted files from flash drive by restoring them from a previous version residing on your computer. To attempt this type of recovery, follow these steps:
- Open File Explorer.
- Navigate to the file or folder that you wish to recover.
- Right-click and select Restore previous versions from the menu.
- Select the version you wish to recover from the list displayed.
- Click the Restore button to recover your file or folder.
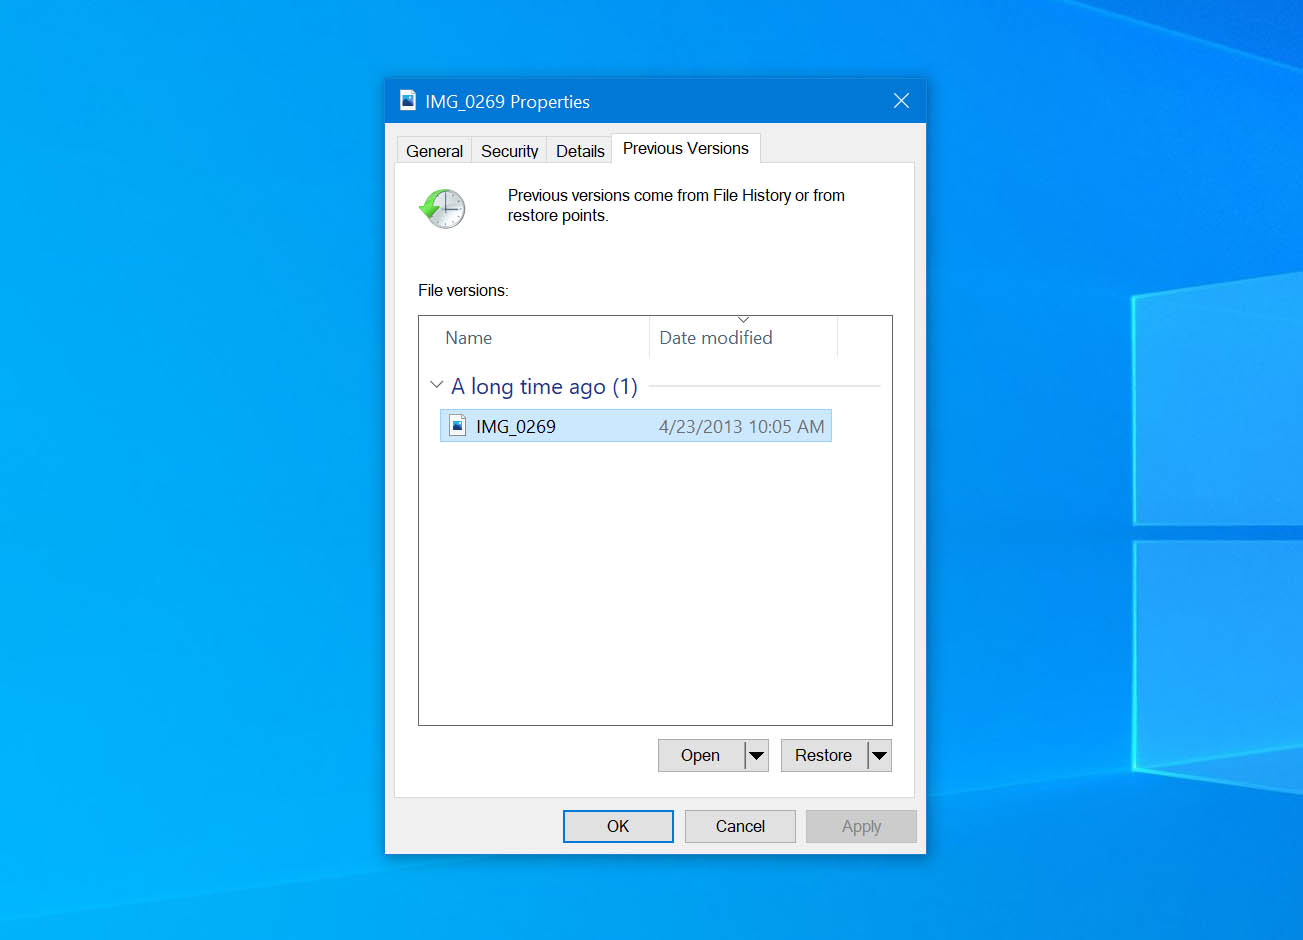
In order for this method to work, Windows needs to have created a restore point that contains a previous version of the file or folders you want to recover.
Method 3: Try Restoring Lost Flash Drive Data Using CMD
You can also try to recover hidden files from a USB drive using the CMD ‘attrib’ command and fix file system errors using the ‘chkdsk’ command on Windows. These command-line utilities can help unhide files and repair file system errors on corrupted USB flash drives, but they are not designed for comprehensive data recovery.
Here’s what you need to do to restore your lost data using CMD:
- Press the Windows key + R and type CMD in the search box.
- In the CMD window type chkdsk “drive letter” /f and click Enter.
- Press the Y key until the command line restarts.
- Type the drive letter again and press Enter to go back to the start.
- Type this command – ATTRIB -H -R -S /S /D “drive letter”:*.*

When the recovery process is complete, all recovered files will be in a newly created folder. The files may be in the CHK format and need to be renamed in order to be used by your applications.
Common Reasons for Flash Drive Data Loss
Data loss can occur for many reasons. Here are some of the most common ones.
Firmware faults
Faulty firmware can result in all sorts of problems, including lost data from flash drives, file corruption, and other system errors that can make your USB drive inaccessible. Keeping all system and device firmware updated is considered to be one of the best practices that should be followed if you value your files.
Physical malfunction
Flash drives can suddenly experience a complete crash and failure due to accumulated wear and tear or by being improperly disconnected from the system. If you are using the pen drive and start to detect degraded performance, it’s a good idea to consider transferring your data to a new USB flash drive as soon as possible.
Malware and viruses
The ease at which flash drives can be shared among multiple users or computers makes them susceptible to infection with malware or viruses. To minimize this risk, keep your system’s antivirus software updated and restrict the use of your flash drive to verifiable virus-free machines.
Human error
One of the most common causes of deleted data is human error. This problem is exacerbated by sharing a false USB drive with friends or colleagues. Someone might be trying to copy an image and end up with an accidentally deleted file.
Accidental formatting
Instead of manually erasing files from USB flash drives, many users prefer to simply format the entire pen drive instead. This is especially true when using multiple flash drives at the same time, since it’s easy to accidentally format the wrong one and instantly lose access to all data that was stored on it. Luckily, recovering formatted flash drives can be a matter of a few simple clicks, as long as you choose the best program available to perform the recovery.
Frequently Asked Questions
Can you recover deleted files from a flash drive?
Yes, you can recover deleted files from a flash drive using data recovery software. When files get deleted from a USB drive, they are not permanently erased yet. The system instead marks the space they occupy as “available” for any incoming data. This is why data recovery tools can still detect and recover files from your flash drive as long as they haven’t been overwritten yet.
How to recover deleted files from USB for free?
To recover deleted files from USB for free, you can use totally free data recovery software like PhotoRec or Recuva. These apps allow you to scan and recover unlimited amounts of data without having to pay for a premium version. However, they may not offer the same flexibility that premium data recovery software has.
What happens to files when deleted from a flash drive?
Deleted files from a flash drive are only hidden from the user’s view. The system also makes the space these files used to occupy available for new data. This means that until your data is overwritten, it will remain intact and recoverable using flash drive recovery tools.
Is it possible to recover files from a USB flash drive using an online app?
No, you can’t recover files from a USB flash drive using an online app because the app wouldn’t have the necessary permissions to analyze the flash drive sector by sector. If you’ve come across an online app that promises to get back your lost data, then it’s most likely scam, and we highly recommend you avoid it.
Final Words
If you stop using your flash drive at the first signs of data loss, then you should be able to recover all lost files using Disk Drill and avoid the stress that accompanies the loss of irreplaceable images or other important data. Disk Drill’s intuitive interface and advanced scanning technology make it the perfect tool for users with any level of computer experience. Data recovery professionals and new users alike, will find that Disk Drill provides a streamlined and reliable data recovery experience for Windows and Mac, making it an easy choice when faced with a data loss scenario.

Robert is a freelance writer and technology enthusiast who graduated from Pace University in New York with a degree in Computer Science in 1992. He is a former computer specialist at IBM. During his long career in IT, he has worked for a number of major service providers in various roles related to data storage, management, and protection.

- 2 publishings
Emma Collins, a seasoned content writer with a unique background as a language teacher in Japan, has spent over 5 years crafting tech tutorials and how-to guides on various topics. With a diverse writing portfolio that spans from Windows and Android to iOS, macOS, and social media, Emma is now specializing in data recovery. Besides her professional dedication, she enjoys gaming and anime in her spare time, underlining her broad interests and adaptable personality.
- Houston, Texas, United States
Nikolay Lankevich has over 15 years of strong experience in various fields and platform includes Disaster Recovery, Windows XP/7. System analysis, design, application (Inter/Intranet) development, and testing. Provided technical supports on desktop and laptops on Win-XP and Macintosh for about 2000 employees.