How to Recover Data from SD Cards on Linux
You’ve tried to access your SD card as usual. This time, though, is different. Your SD card’s inaccessible, its filesystem corrupted, or some files are gone. On top of that, you’re on Linux, and most information scattered online is about Windows or macOS.
Despite not looking as fancy as similar solutions on other platforms, there are tools on Linux that can more than help out. Let’s see some of the best.
How Can an SD Card Fail?
There are many possible ways an SD card might fail. Thankfully, the problem’s usually easy to fix.
- The SD card’s file system can get corrupted if a save procedure is interrupted.
- An absent-minded click could lead to deleted files or partitions.
- Using it in a new device could “initialize the SD card” (AKA: “format“) to the device’s specifications.
Still, SD cards are not immune to wear and can also fail physically. Their memory chips can fail after repeated writes, their plastic body can chip, or their thin metal connectors may bend. In such cases, unfortunately, replacing the SD card is the only option.
How to Recover Your Files from an SD Card on Linux
An inaccessible SD card can be a major downer. However, it’s best not to panic, for a wrong move may decrease your chances of getting your data back. Instead, devise a rational plan on how to best deal with the problem at hand.
- Check that your SD card is accessible.
- Back up your SD card’s contents.
- (Try to) recover your data from your SD card (with multiple tools).
- Reformat your SD card to keep using it.
Step 1. Check If Your SD Card Is Mounted
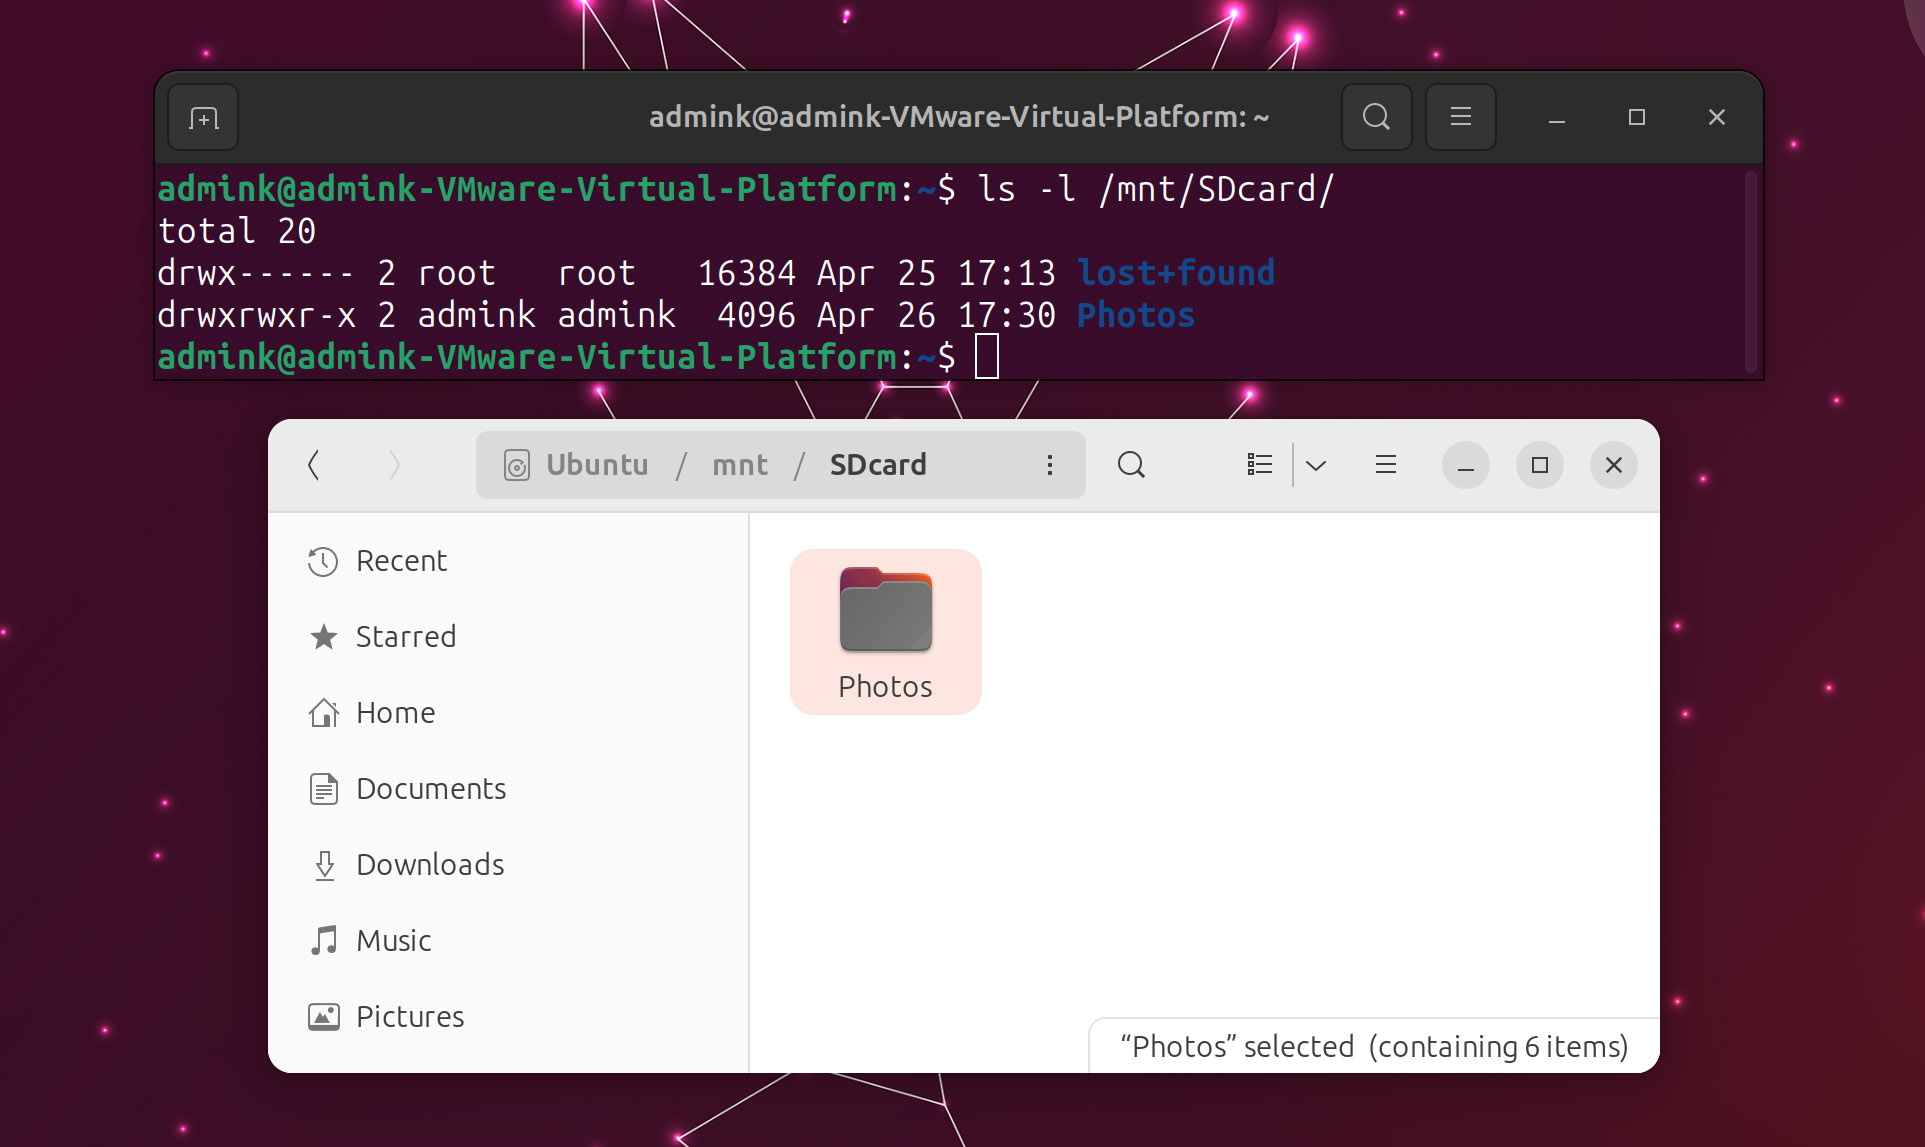
Most modern Linux distributions are configured to mount removable devices automatically. However, that’s not a given, and an unmounted device is an inaccessible one. Thus, you should first ensure that your PC detected and mounted your SD card.
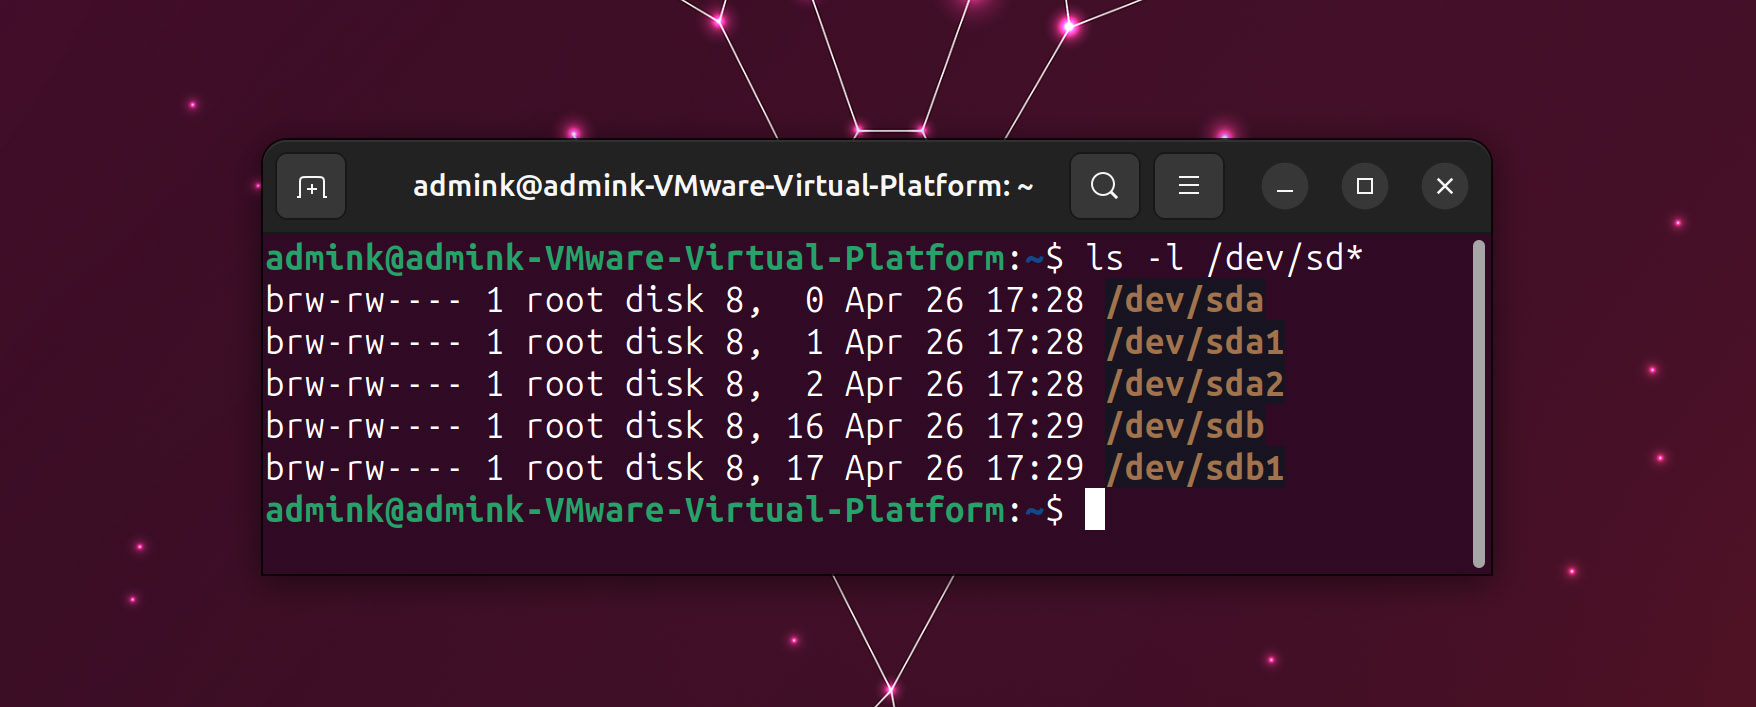
Start by launching the terminal with CTRL + Alt + T. On modern Linux distributions, SD cards are treated the same as SATA storage devices. You will find them all listed as “sdX” devices inside the /dev/ subfolder. To see all the storage devices listed there, use:
ls -l /dev/sd*
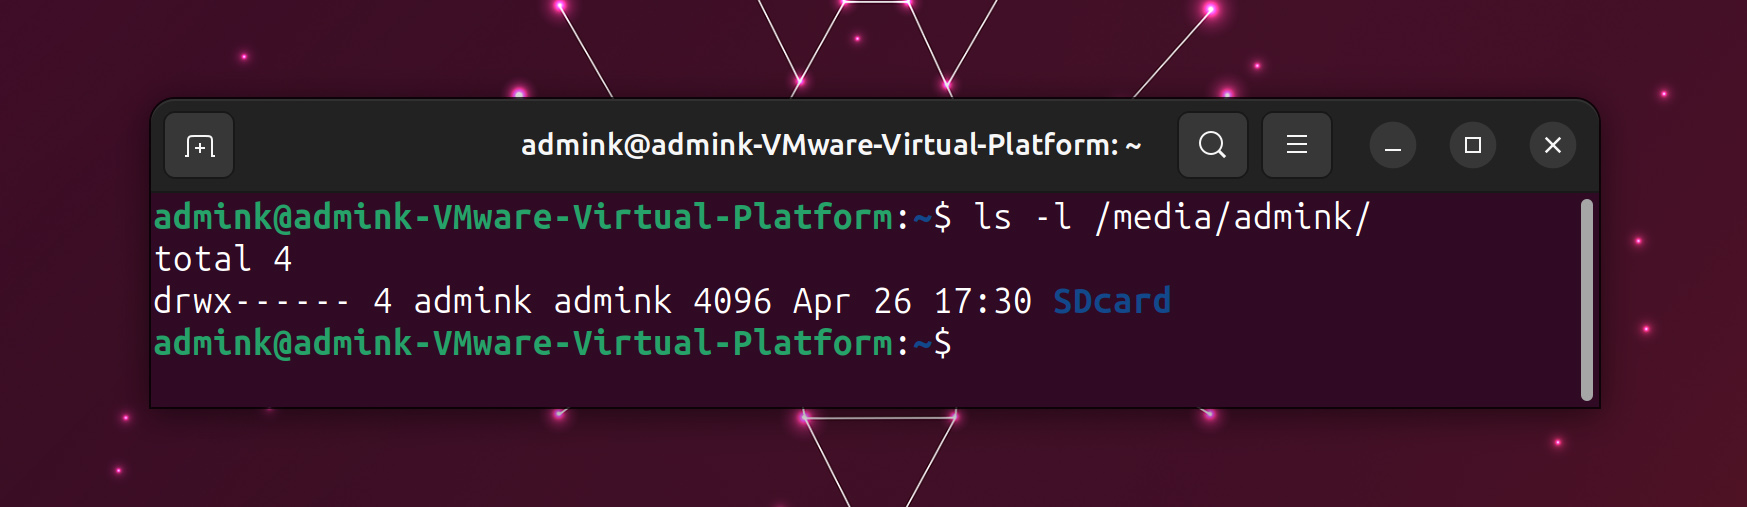
You can find all the external storage devices (like SD cards and USB flash drives) that are automatically mounted under the /media/USERNAME subfolder. Check them out with:
ls -l /media/USERNAME
Remember to replace “USERNAME” with your alias.
If your SD card is not there, it’s time to mount it manually. On Linux, you can do that by creating a folder under /mnt and then “linking it” to the device you want to access.
You can use a mkdir command to create a new folder for your SD card. However, since /mnt is a protected system folder, you will also have to use sudo, which temporarily grants you administrative rights.
- First, enter the /mnt folder using the cd (Change Dir) command:
cd /mnt - Then, make a new folder for your SD card with:
sudo mkdir NAMEOFSD_CARD - Finally, “attach” your SD card’s primary partition, as you saw it listed when you checked the /dev folder, with:
sudo mount /dev/SDCARDDEVICE /mnt/SDCARDFOLDER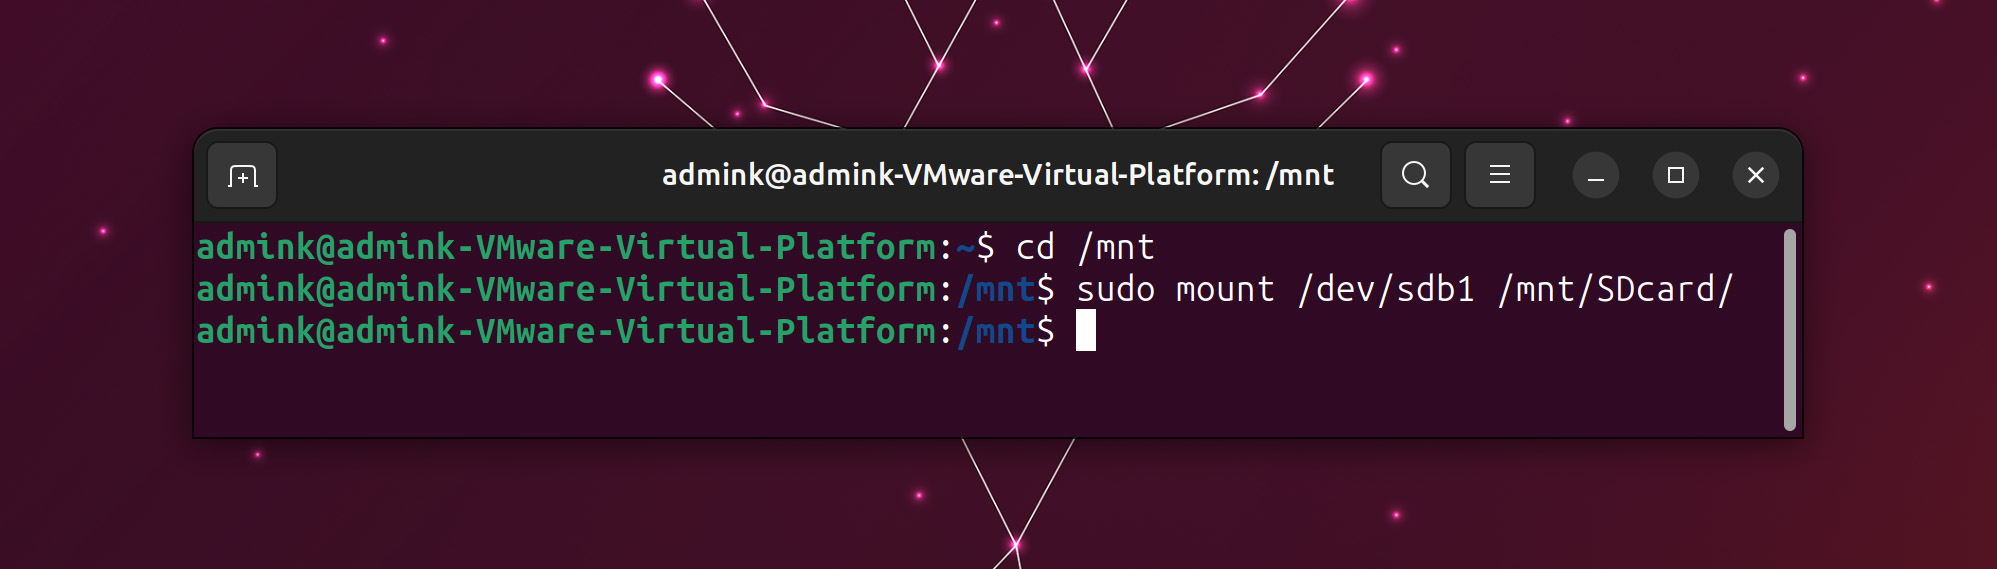
- You will now be able to access your SD card through its /mnt/SDCARDFOLDER mount point.
Step 2. Backup Your SD Card With Gddrescue
Gddrescue works like the most popular data dumping tool on Linux, dd. However, it’s better when (and offers options for) dealing with unreadable data. You can use it to back your SD card to an image file. After that, you can try to extract your precious data from that image file without having to worry if your SD card fails in the meantime.
- Install gddrescue with:
sudo apt install gddrescue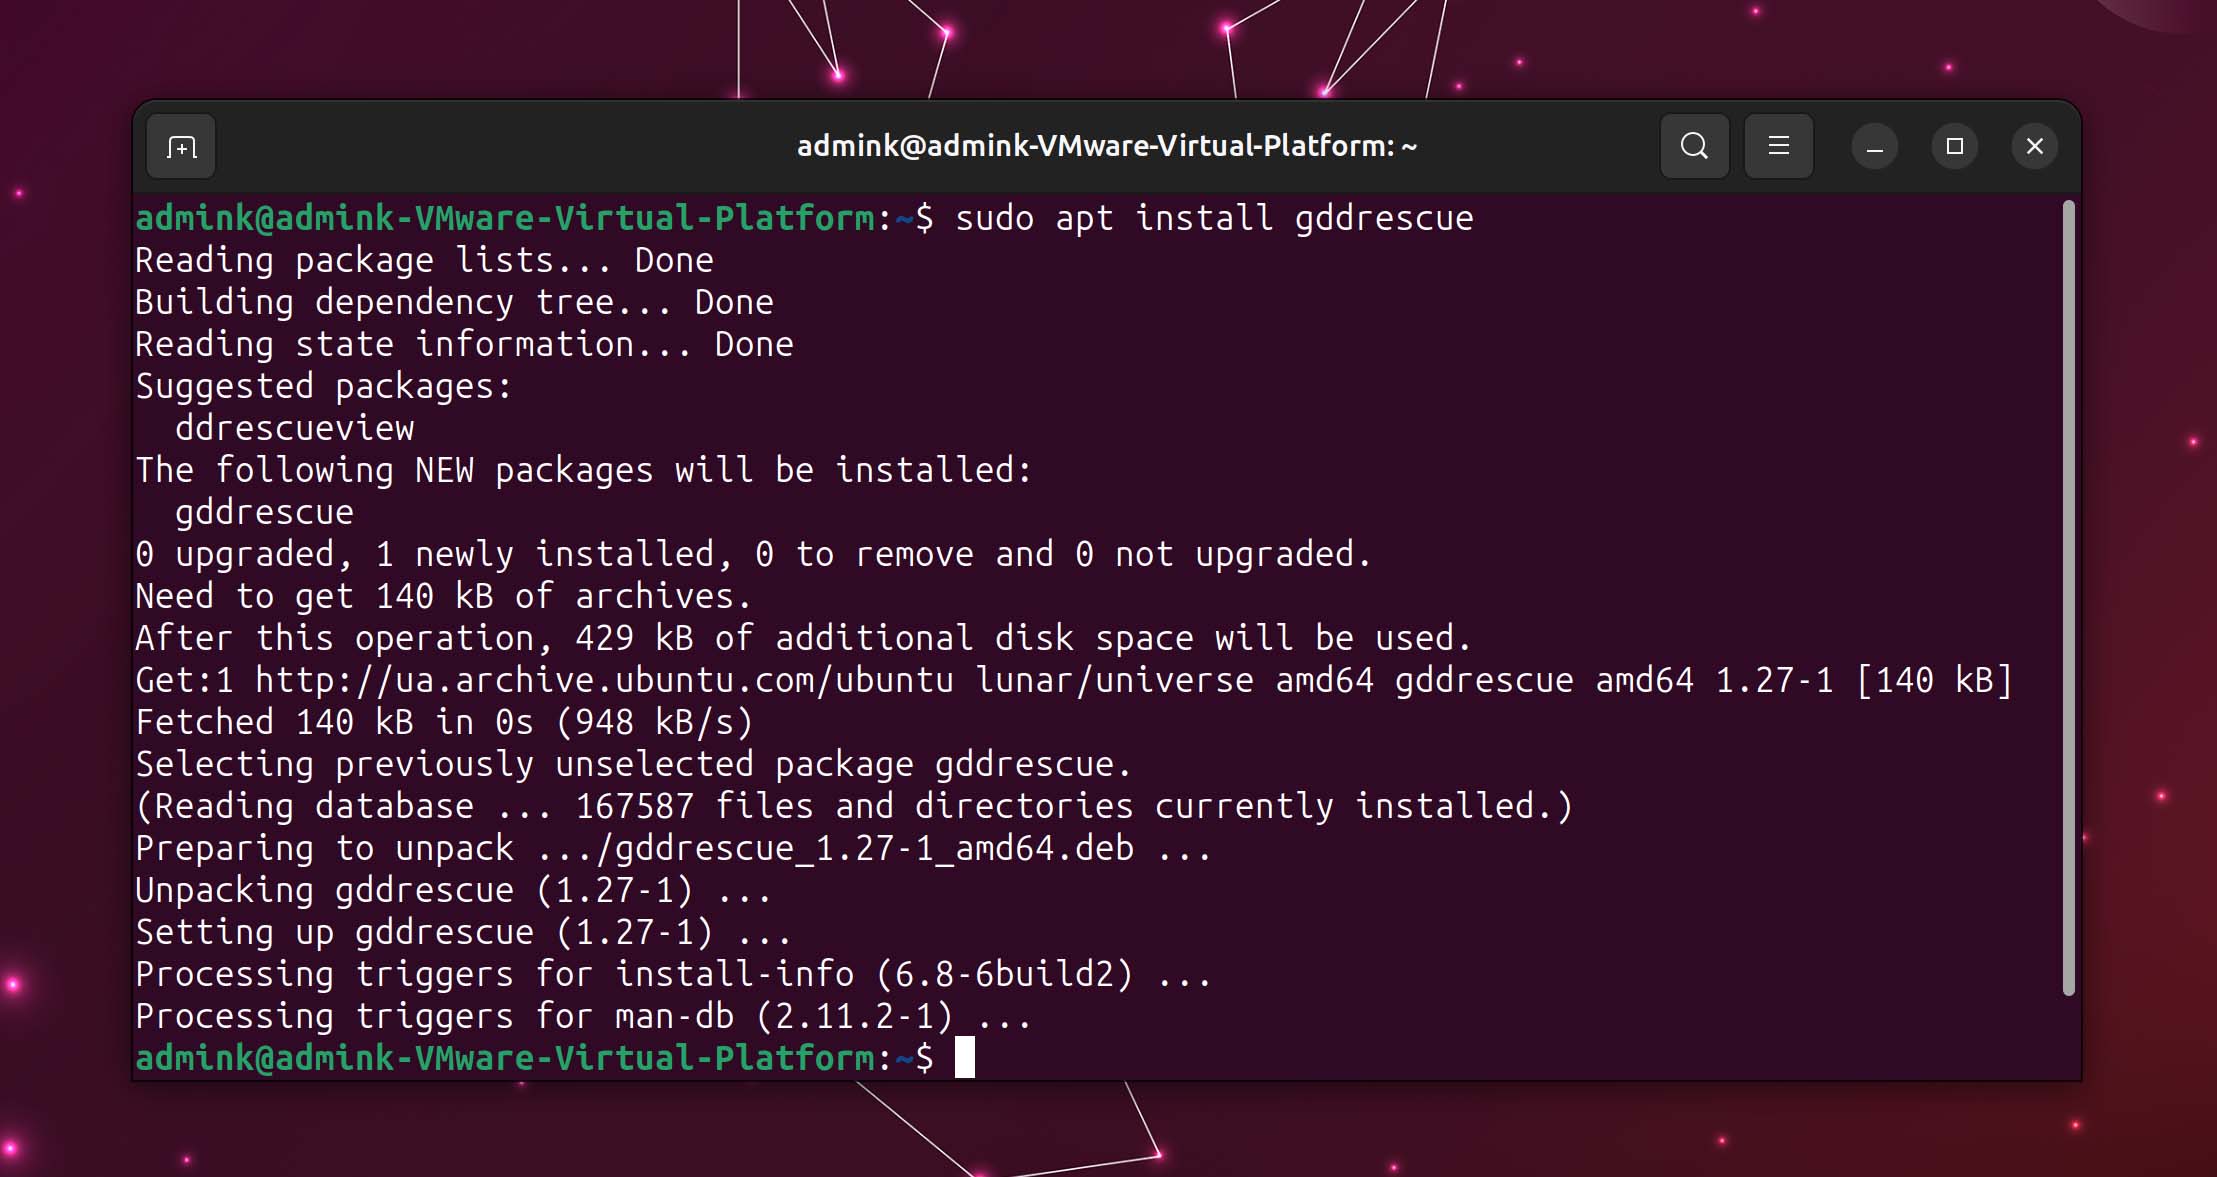
- Use either (or both) of the following commands to check your storage devices and find your SD card mong them:
lsblkls -l /dev/sd* 💡 Note that although the tool’s name is gddrescue, the command to use it is ddrescue. Also, note that you will have to use sudo for this process, too.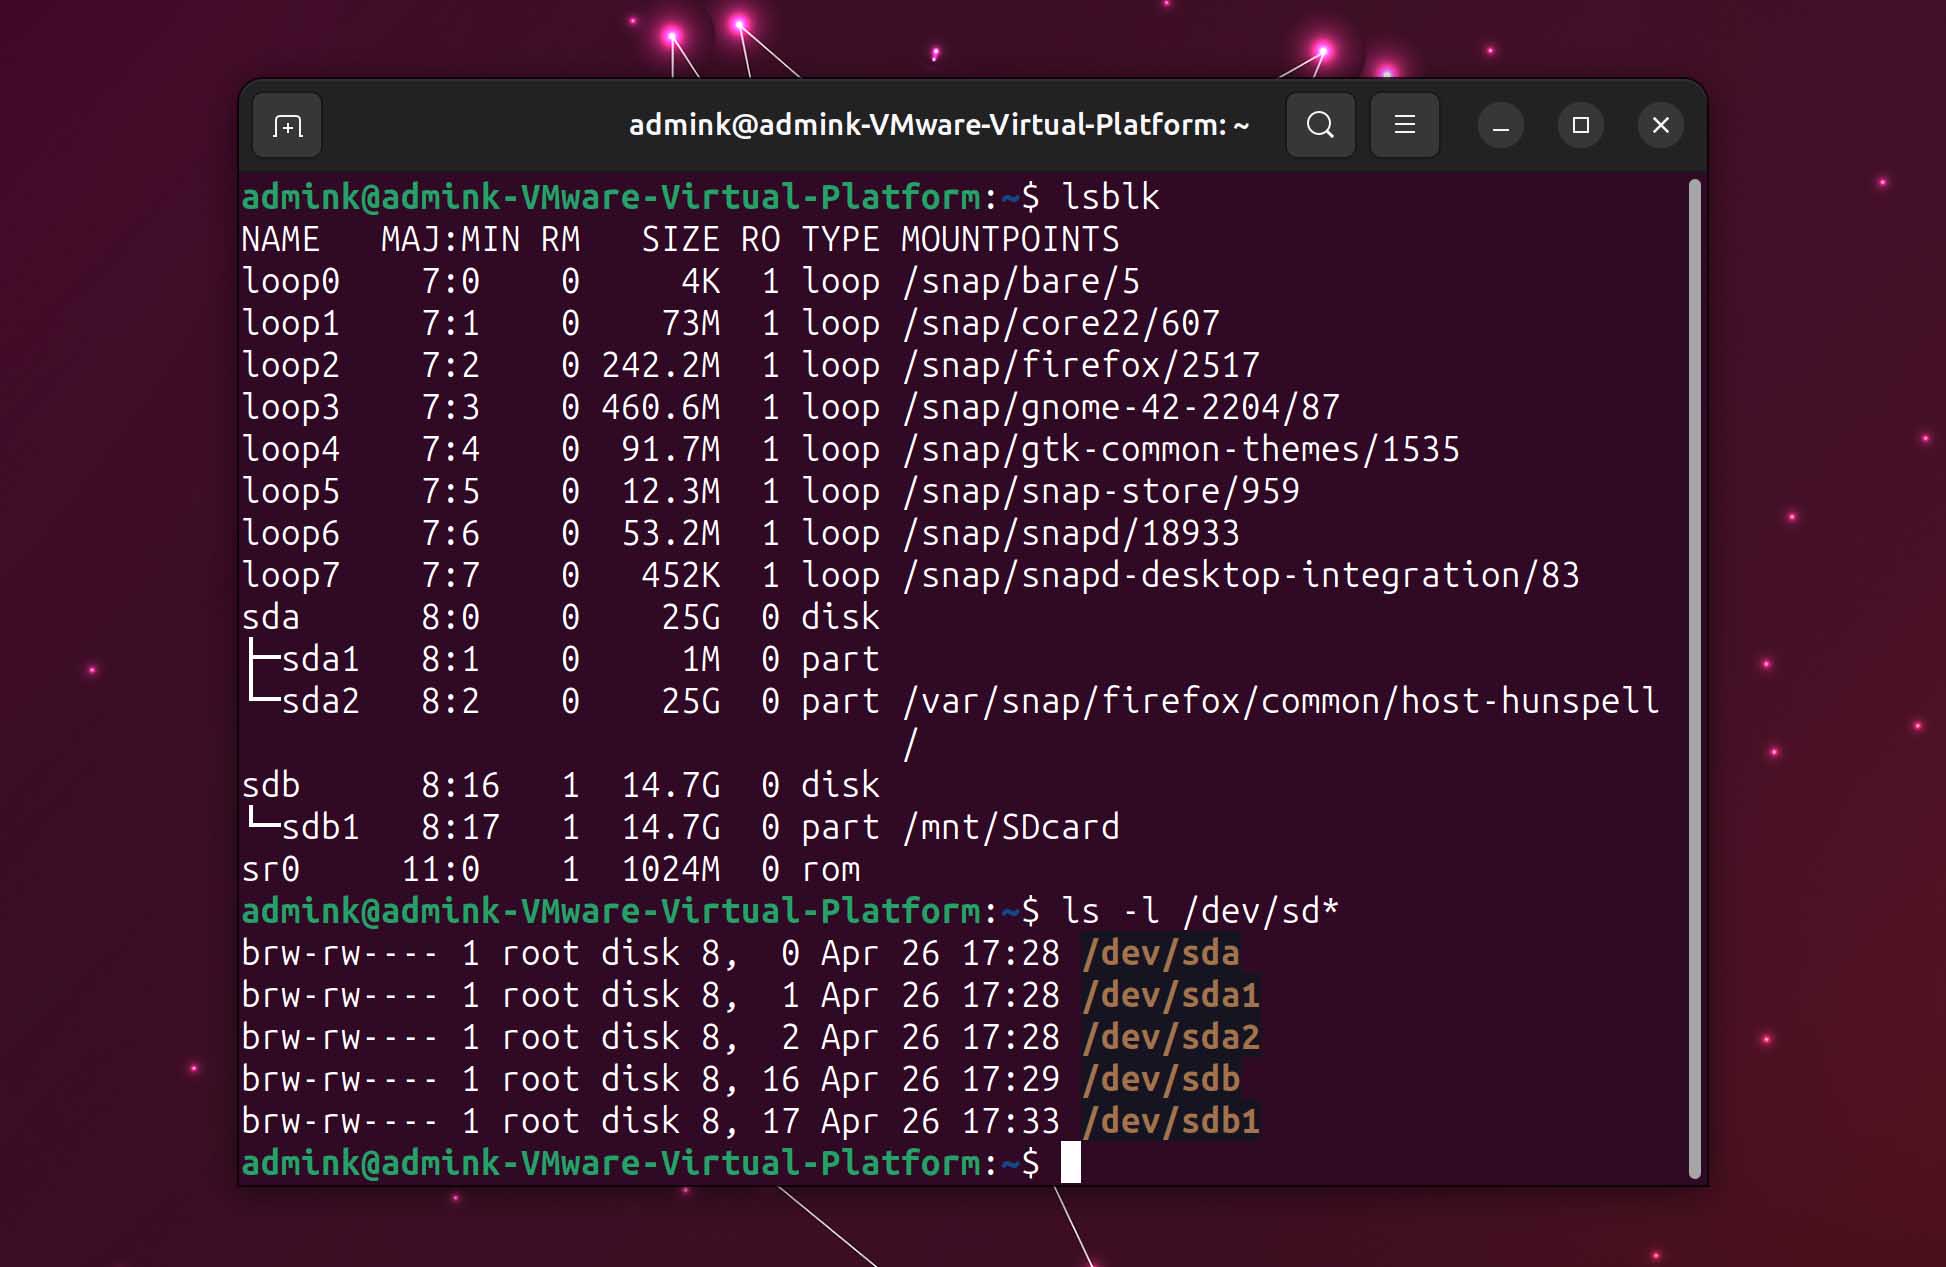
- To backup your SD card to an image file and also create a map file (a log) for future reference, use:
sudo ddrescue -d /dev/SDCARDDEVICE /PATH/TO/IMAGE/FILE/IMAGEFILENAME /PATH/TO/LOG/FILE/MAPFILENAME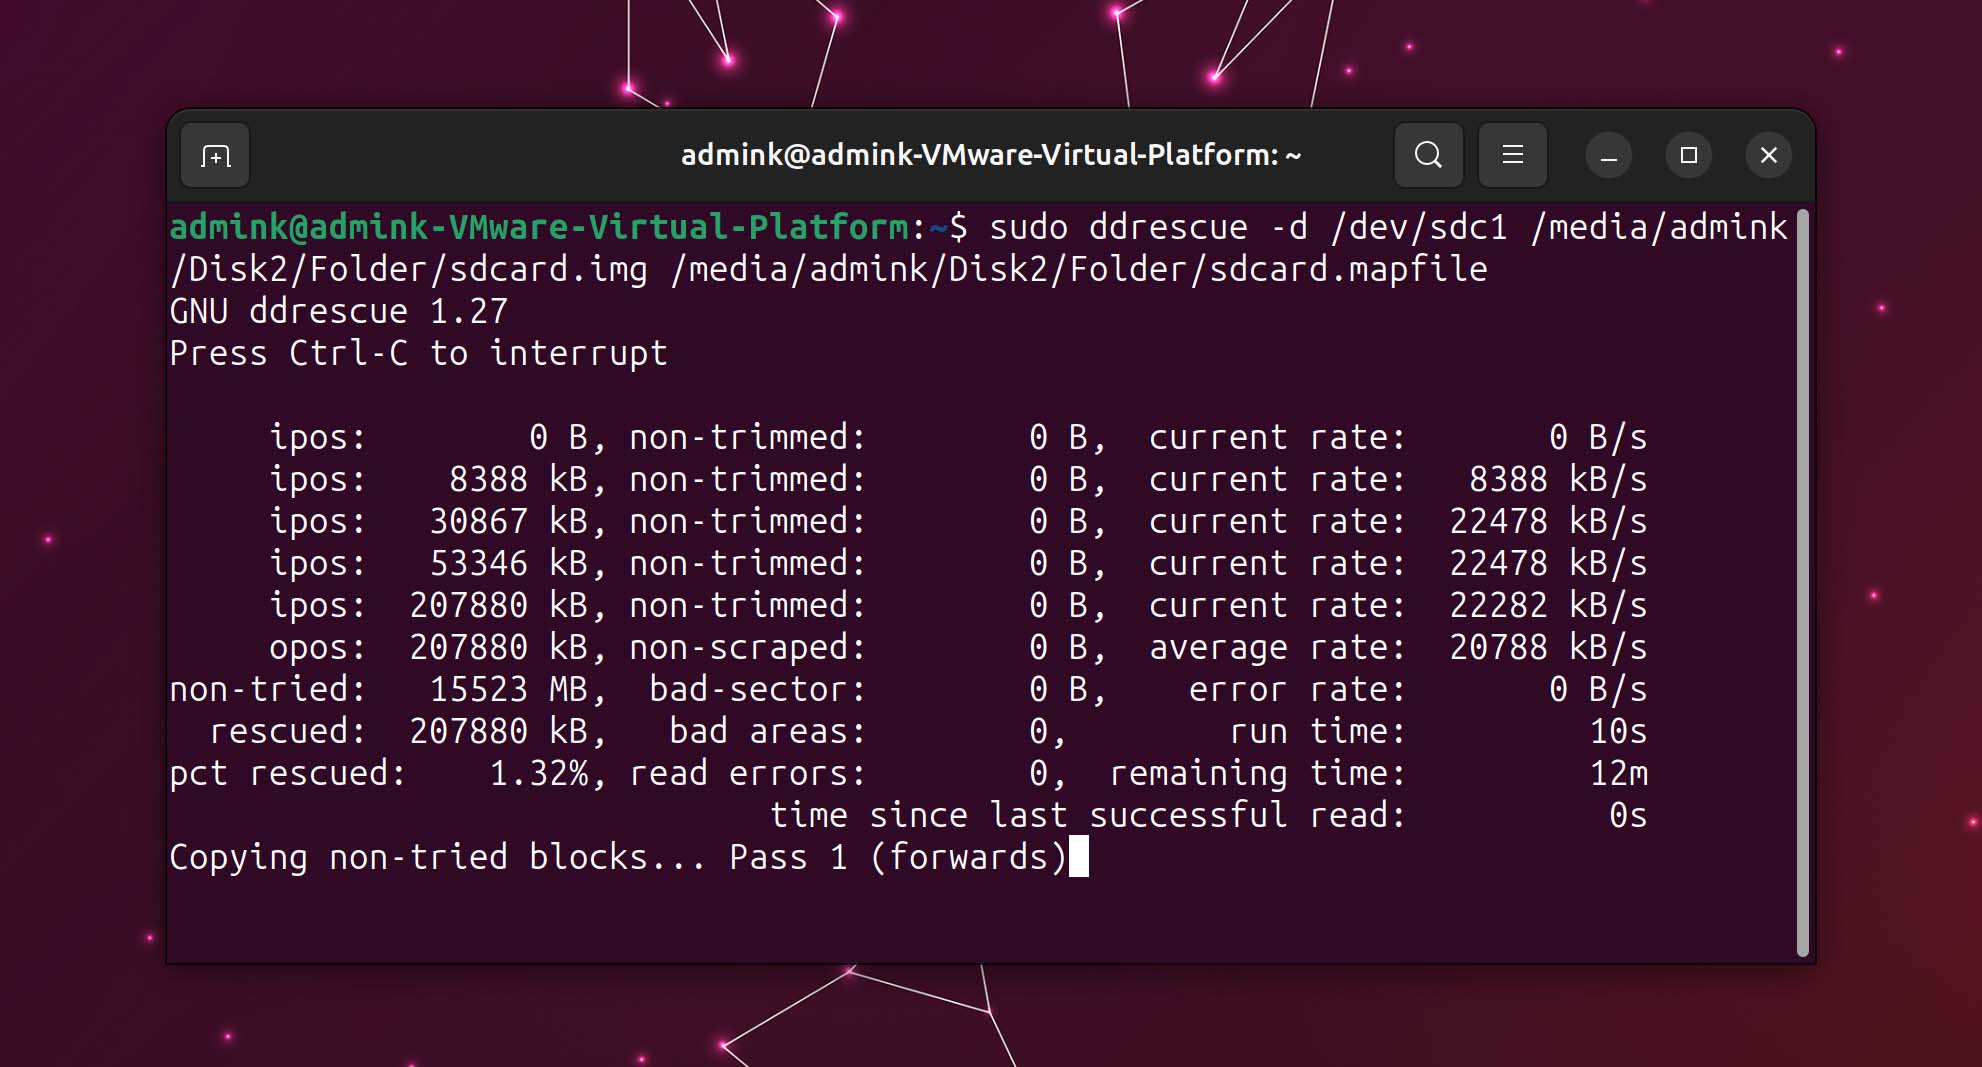
- After you have this first, quick backup, you can try a more extensive one to save as much data as possible. For that, use the rX flag to tell gddrescue how many times to retry to overcome errors. Higher numbers increase the chances of recovery but also the duration of the scan. Set the number of retries as a number directly after the letter “r”:
sudo ddrescue -dr5 /dev/SDCARDDEVICE /PATH/TO/IMAGE/FILE/IMAGEFILENAME /PATH/TO/LOG/FILE/MAPFILENAME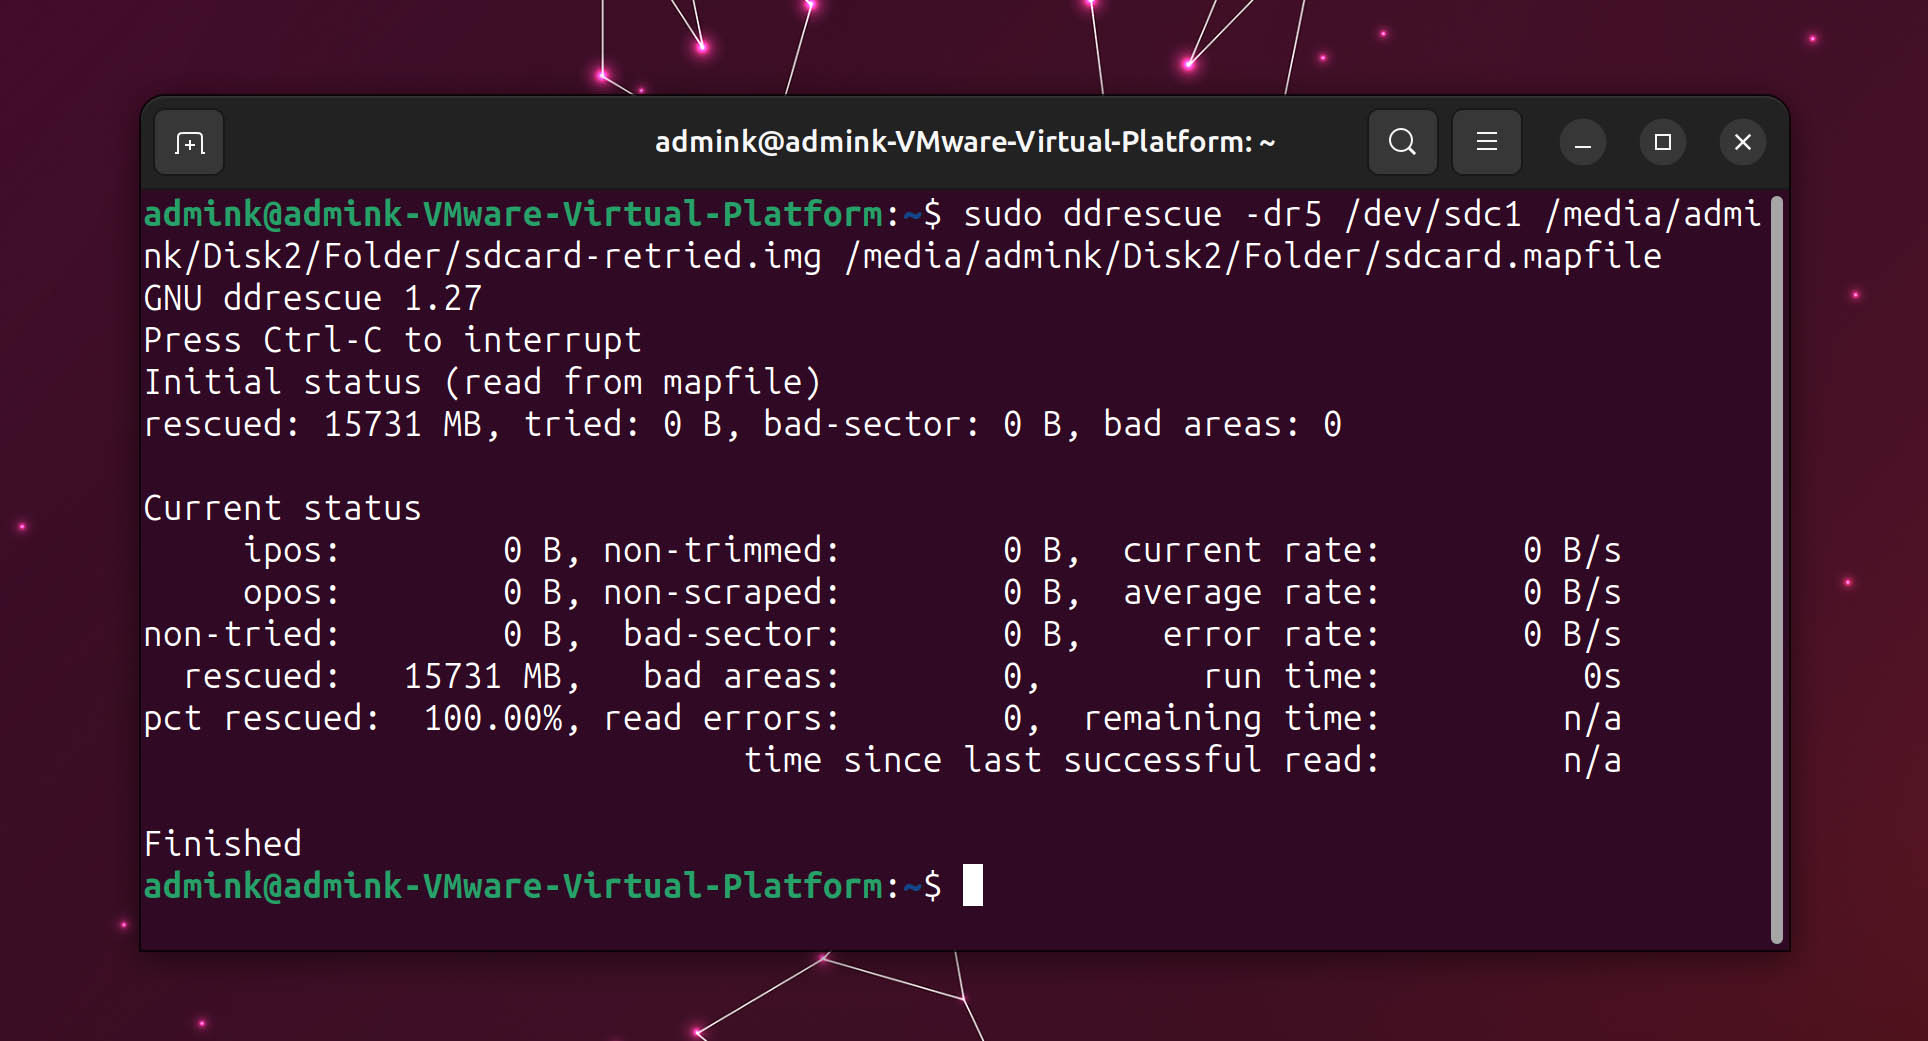
You can then mount the created image as a storage device to access its contents. Refer to our previous section for more information on how you can do that.
Step 3. Recover Your Data From a Failed SD Card With TestDisk
Testdisk and Photorec are two of the best Linux tools for fixing problems and salvaging data from storage devices.
- Applications come bundled, so, to install both of them, use:
sudo apt install testdisk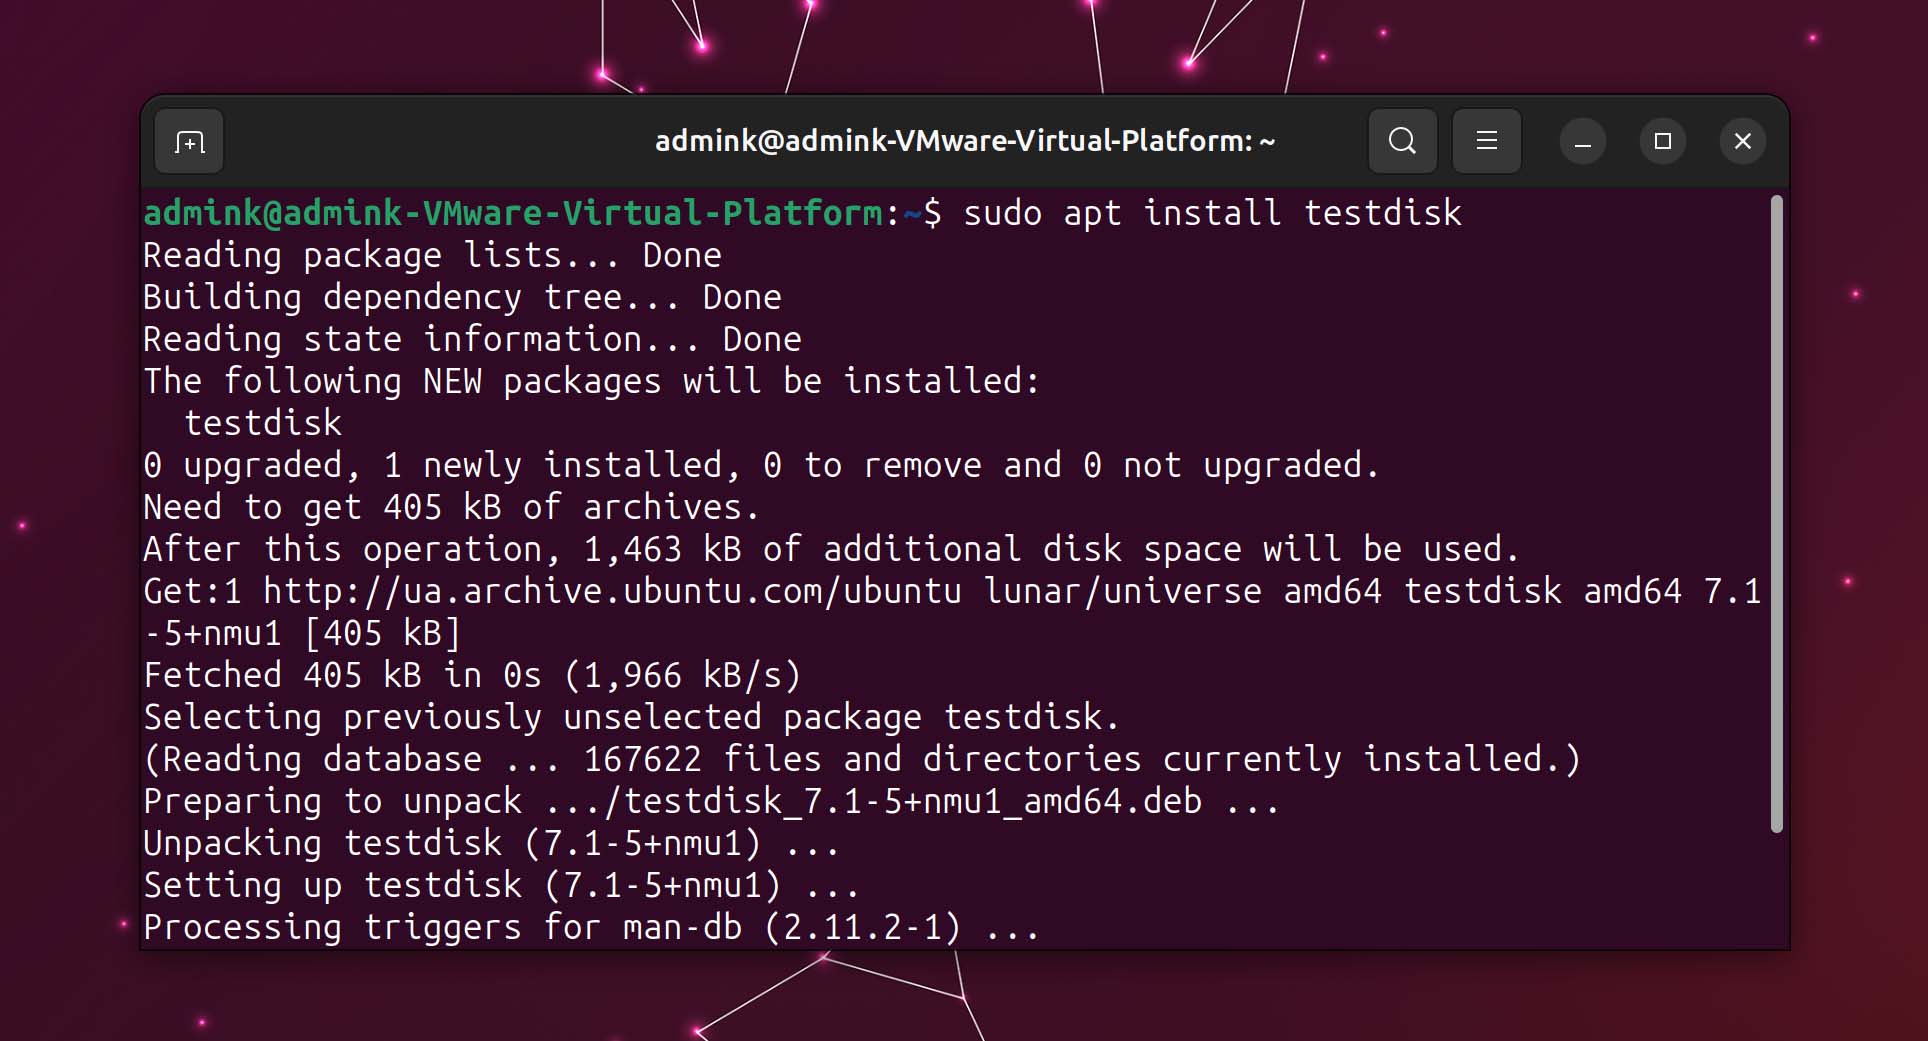
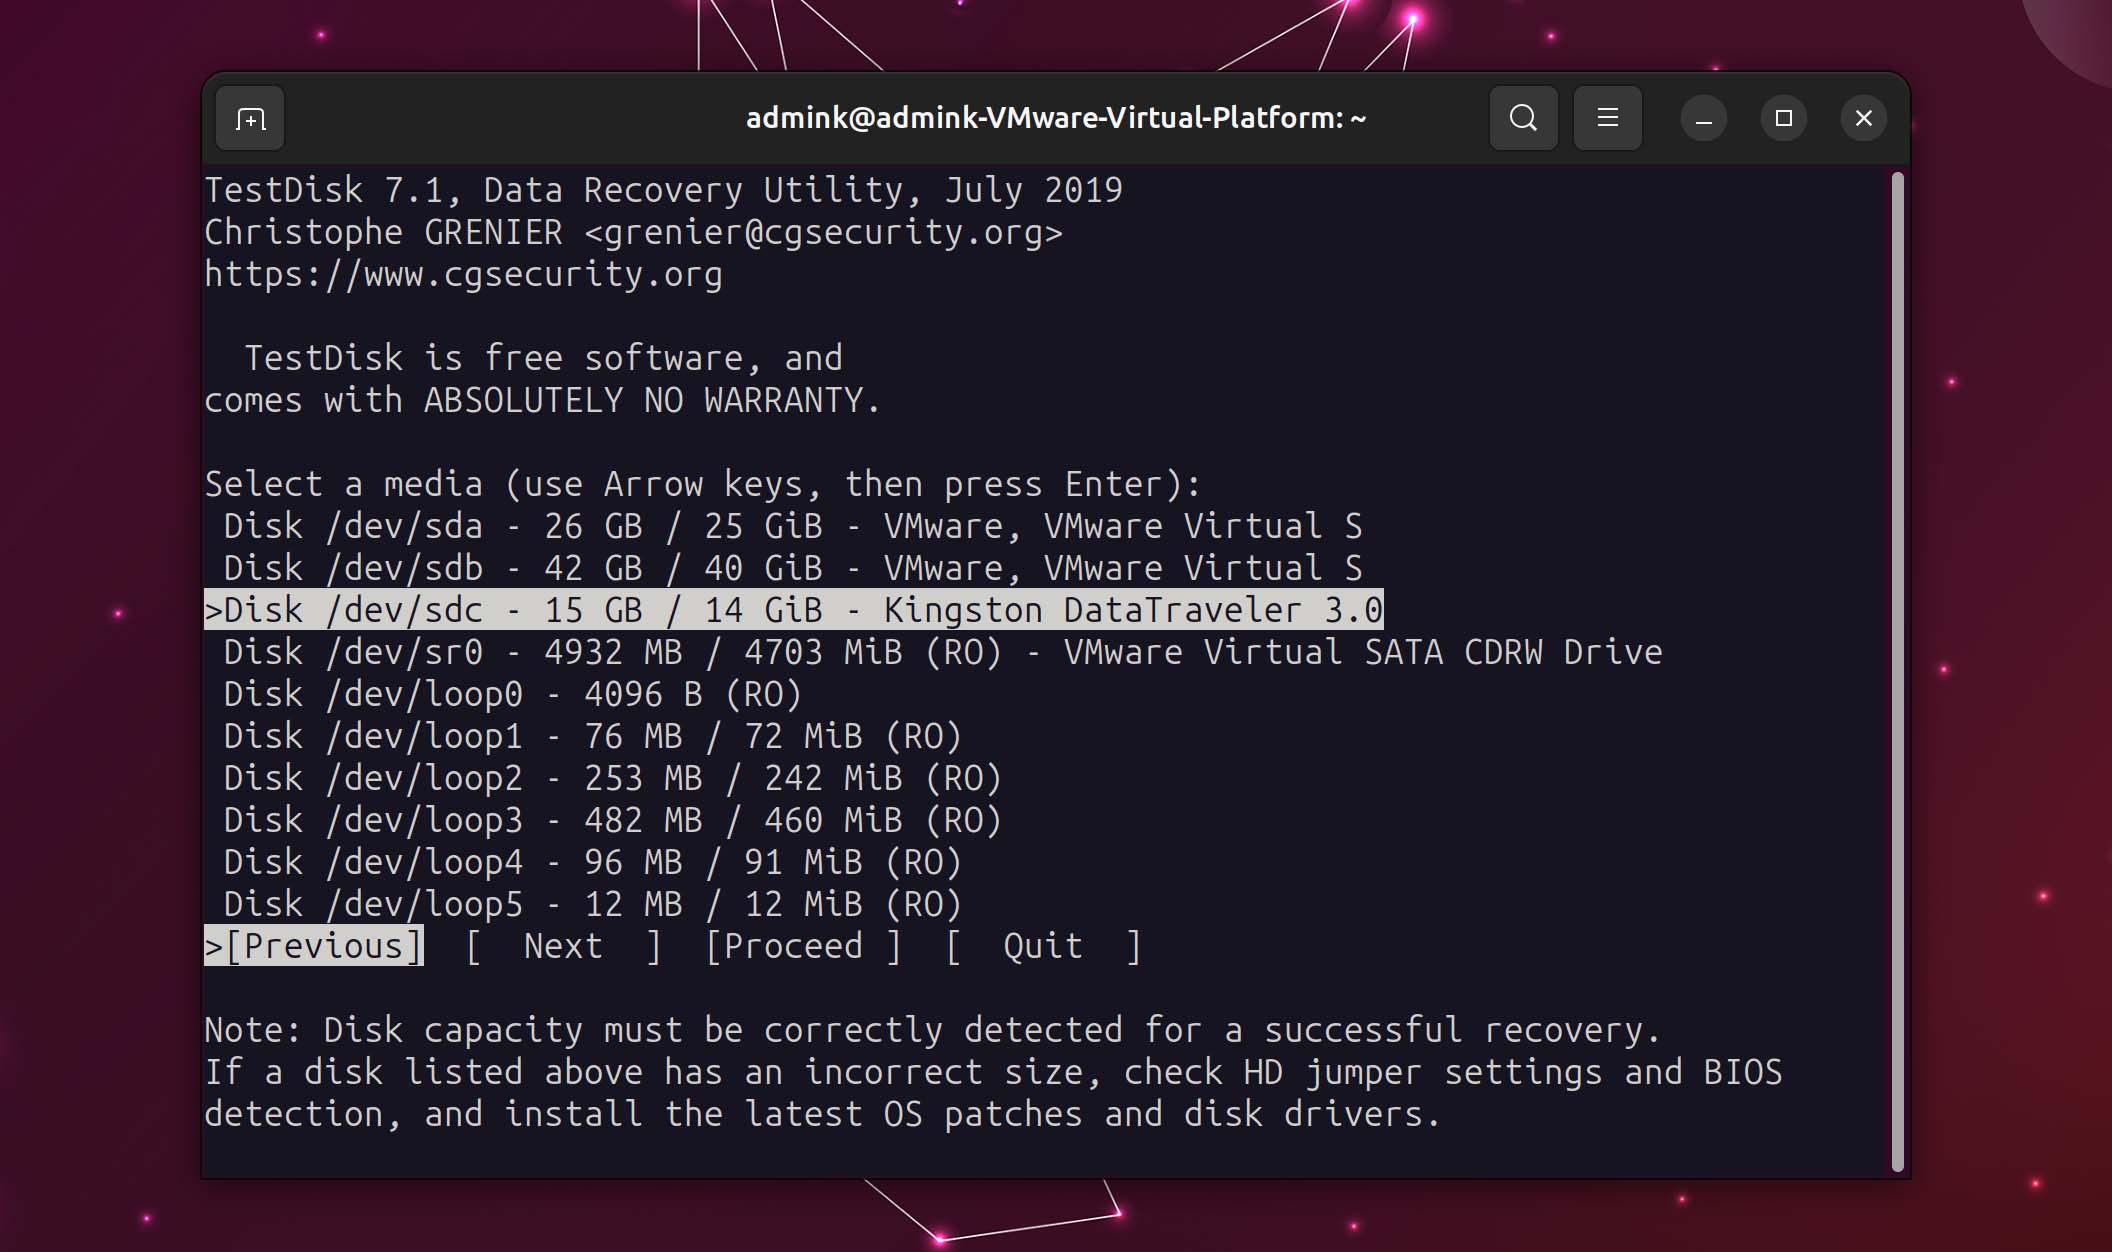
- Start by checking your SD card with TestDisk for potentially fixable problems. First, run the tool by typing testdisk in a terminal and pressing Enter. From its initial menu, choose Create to create a new log file.

- Use the up and down cursor keys to choose your SD Card from TestDisk’s list. Ensure Proceed is highlighted (if not, select it with the left and right cursor keys) and press Enter.
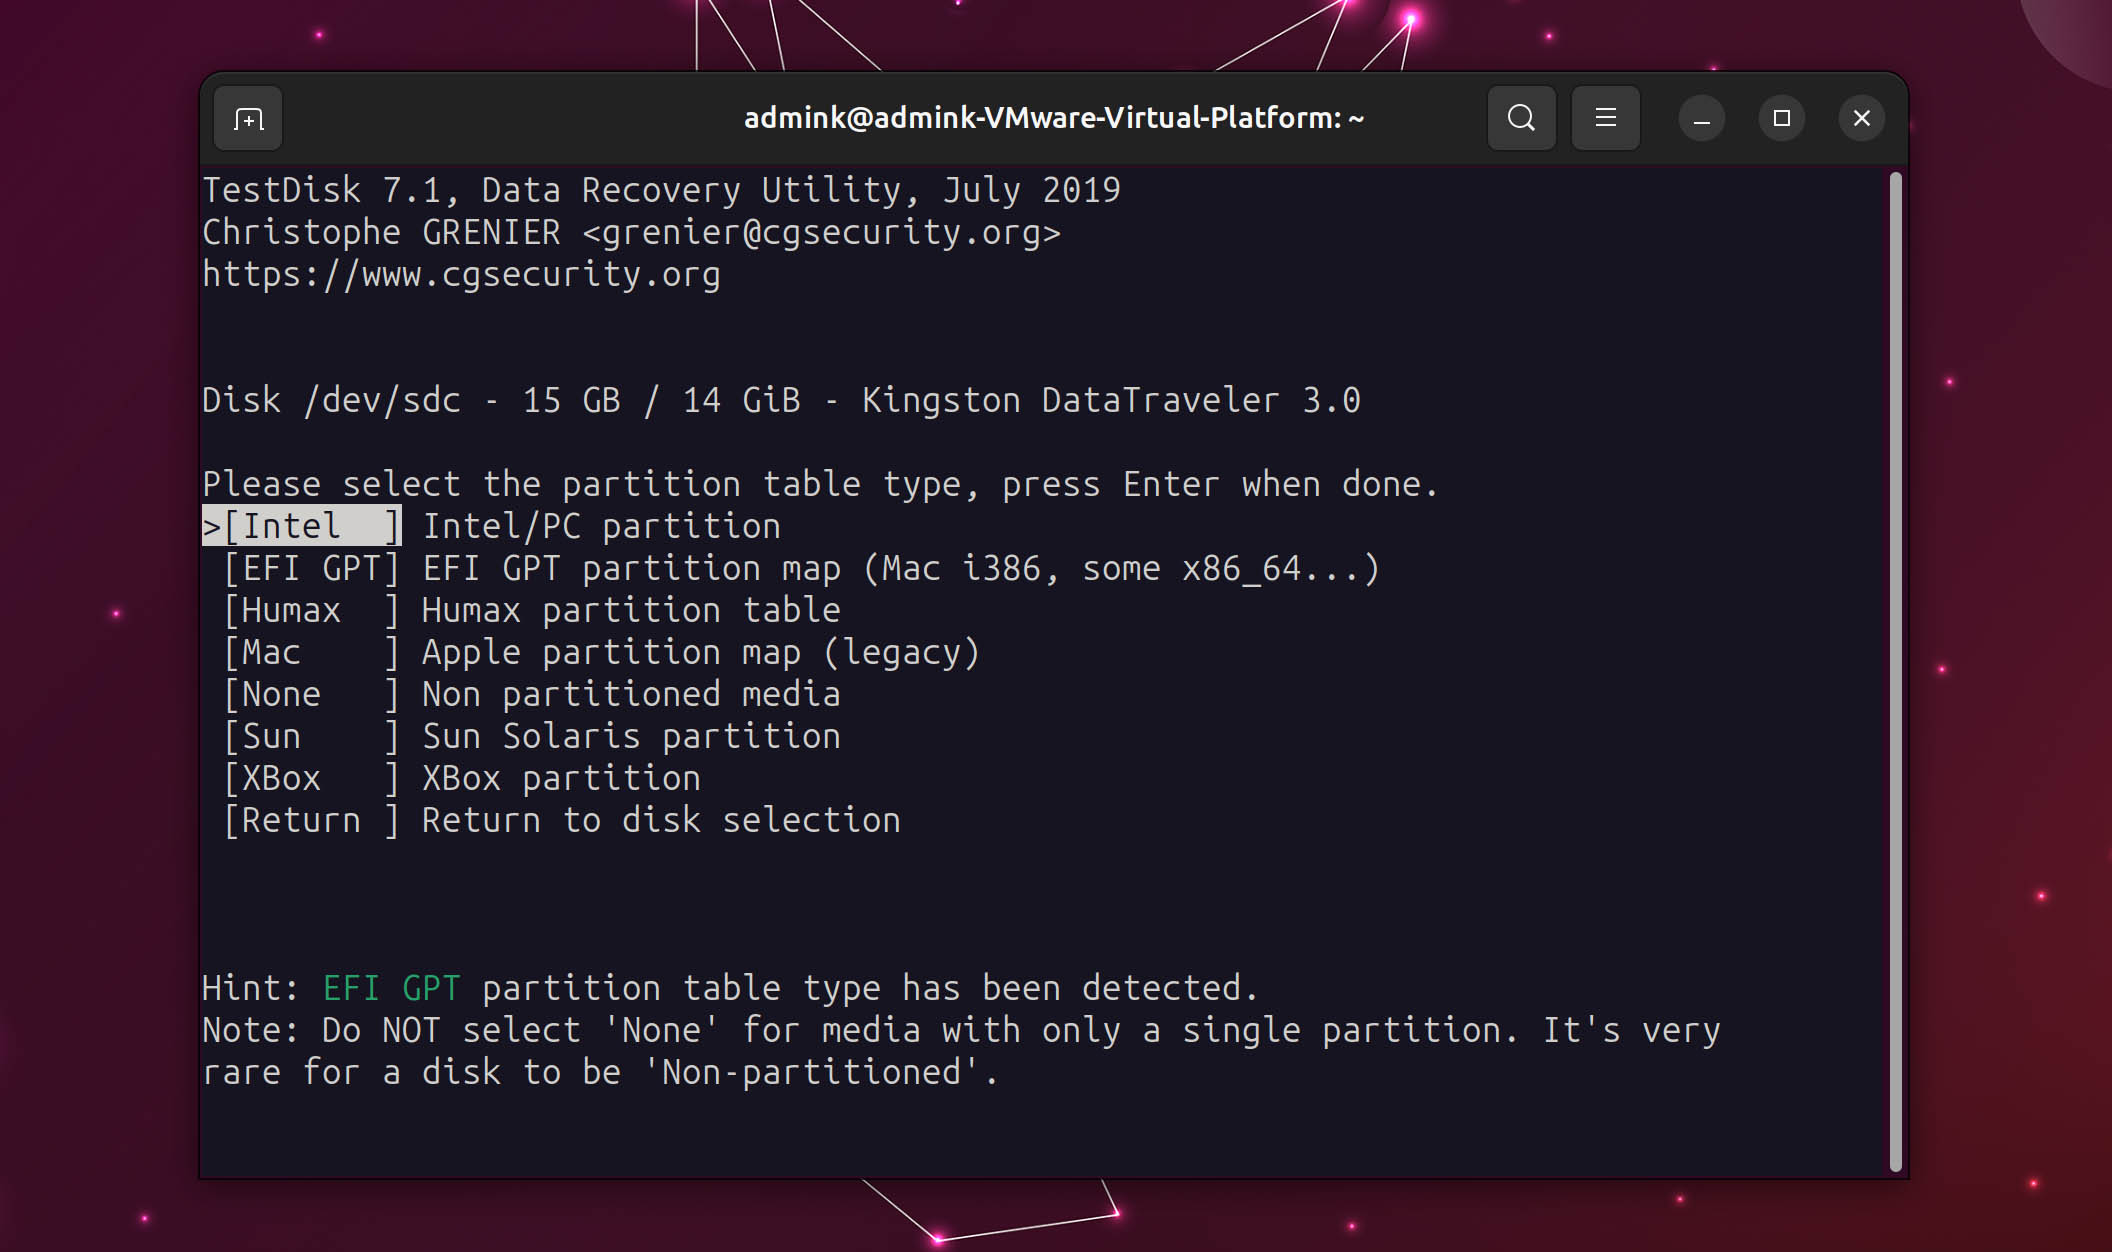
- In the next step, select the partition table type. TestDisk might recognize data remnants and offer a hint on what to choose. If you used your SD card for photo and file storage, with cameras, smartphones, and your PC, choose Intel.
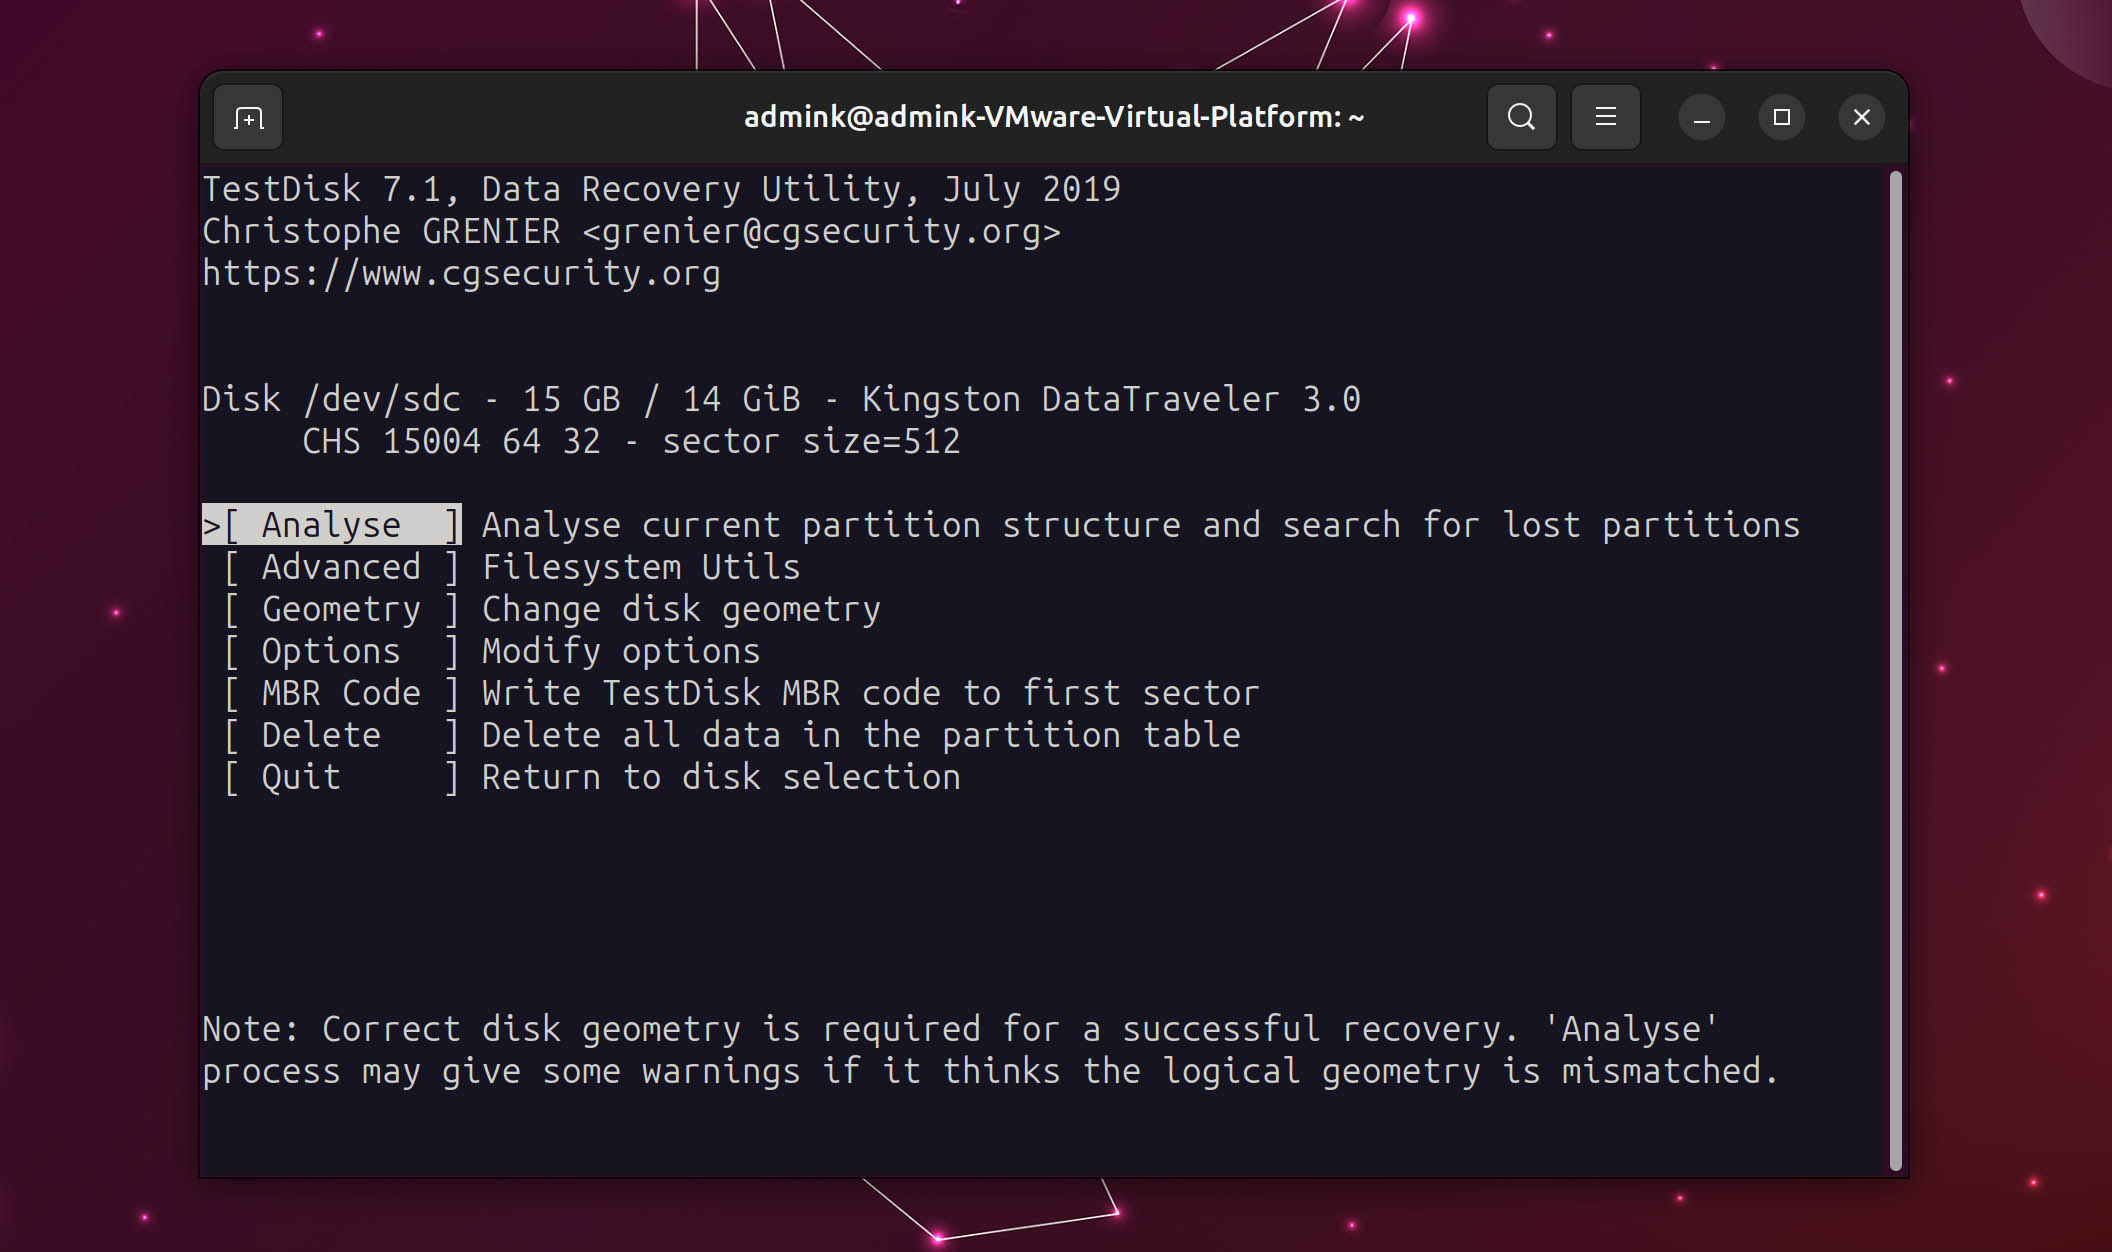
- Next, go for the first option, Analyse, to check your SD card’s structure for lost/corrupted partitions (and try to recover them).
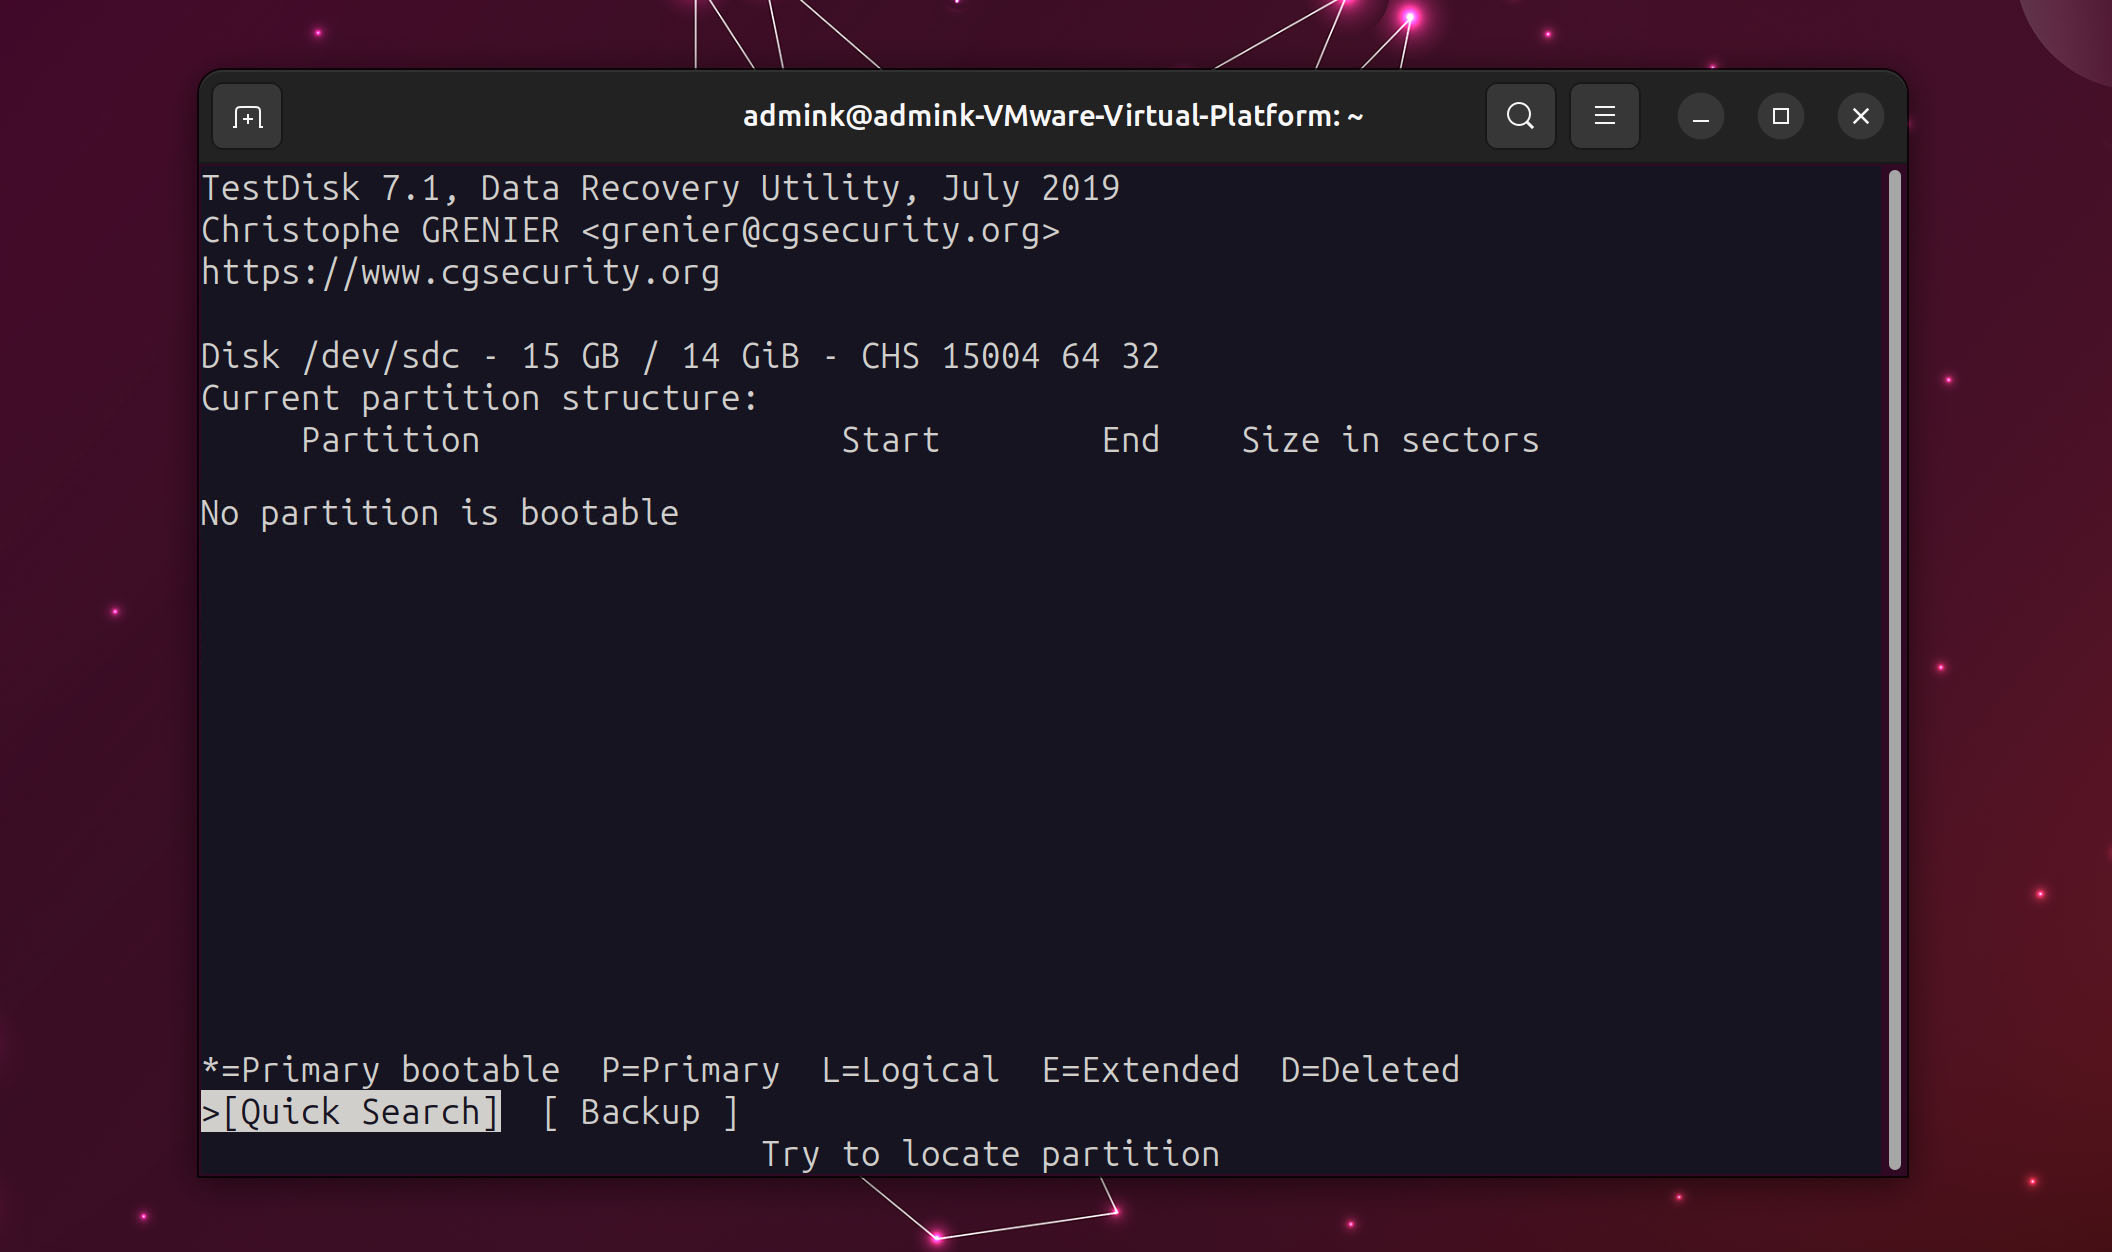
- If TestDisk doesn’t locate any partitions, it will suggest you perform a Quick Search for them. Usually, that’s enough to “undelete” a lost partition. Press Enter to proceed with this option.
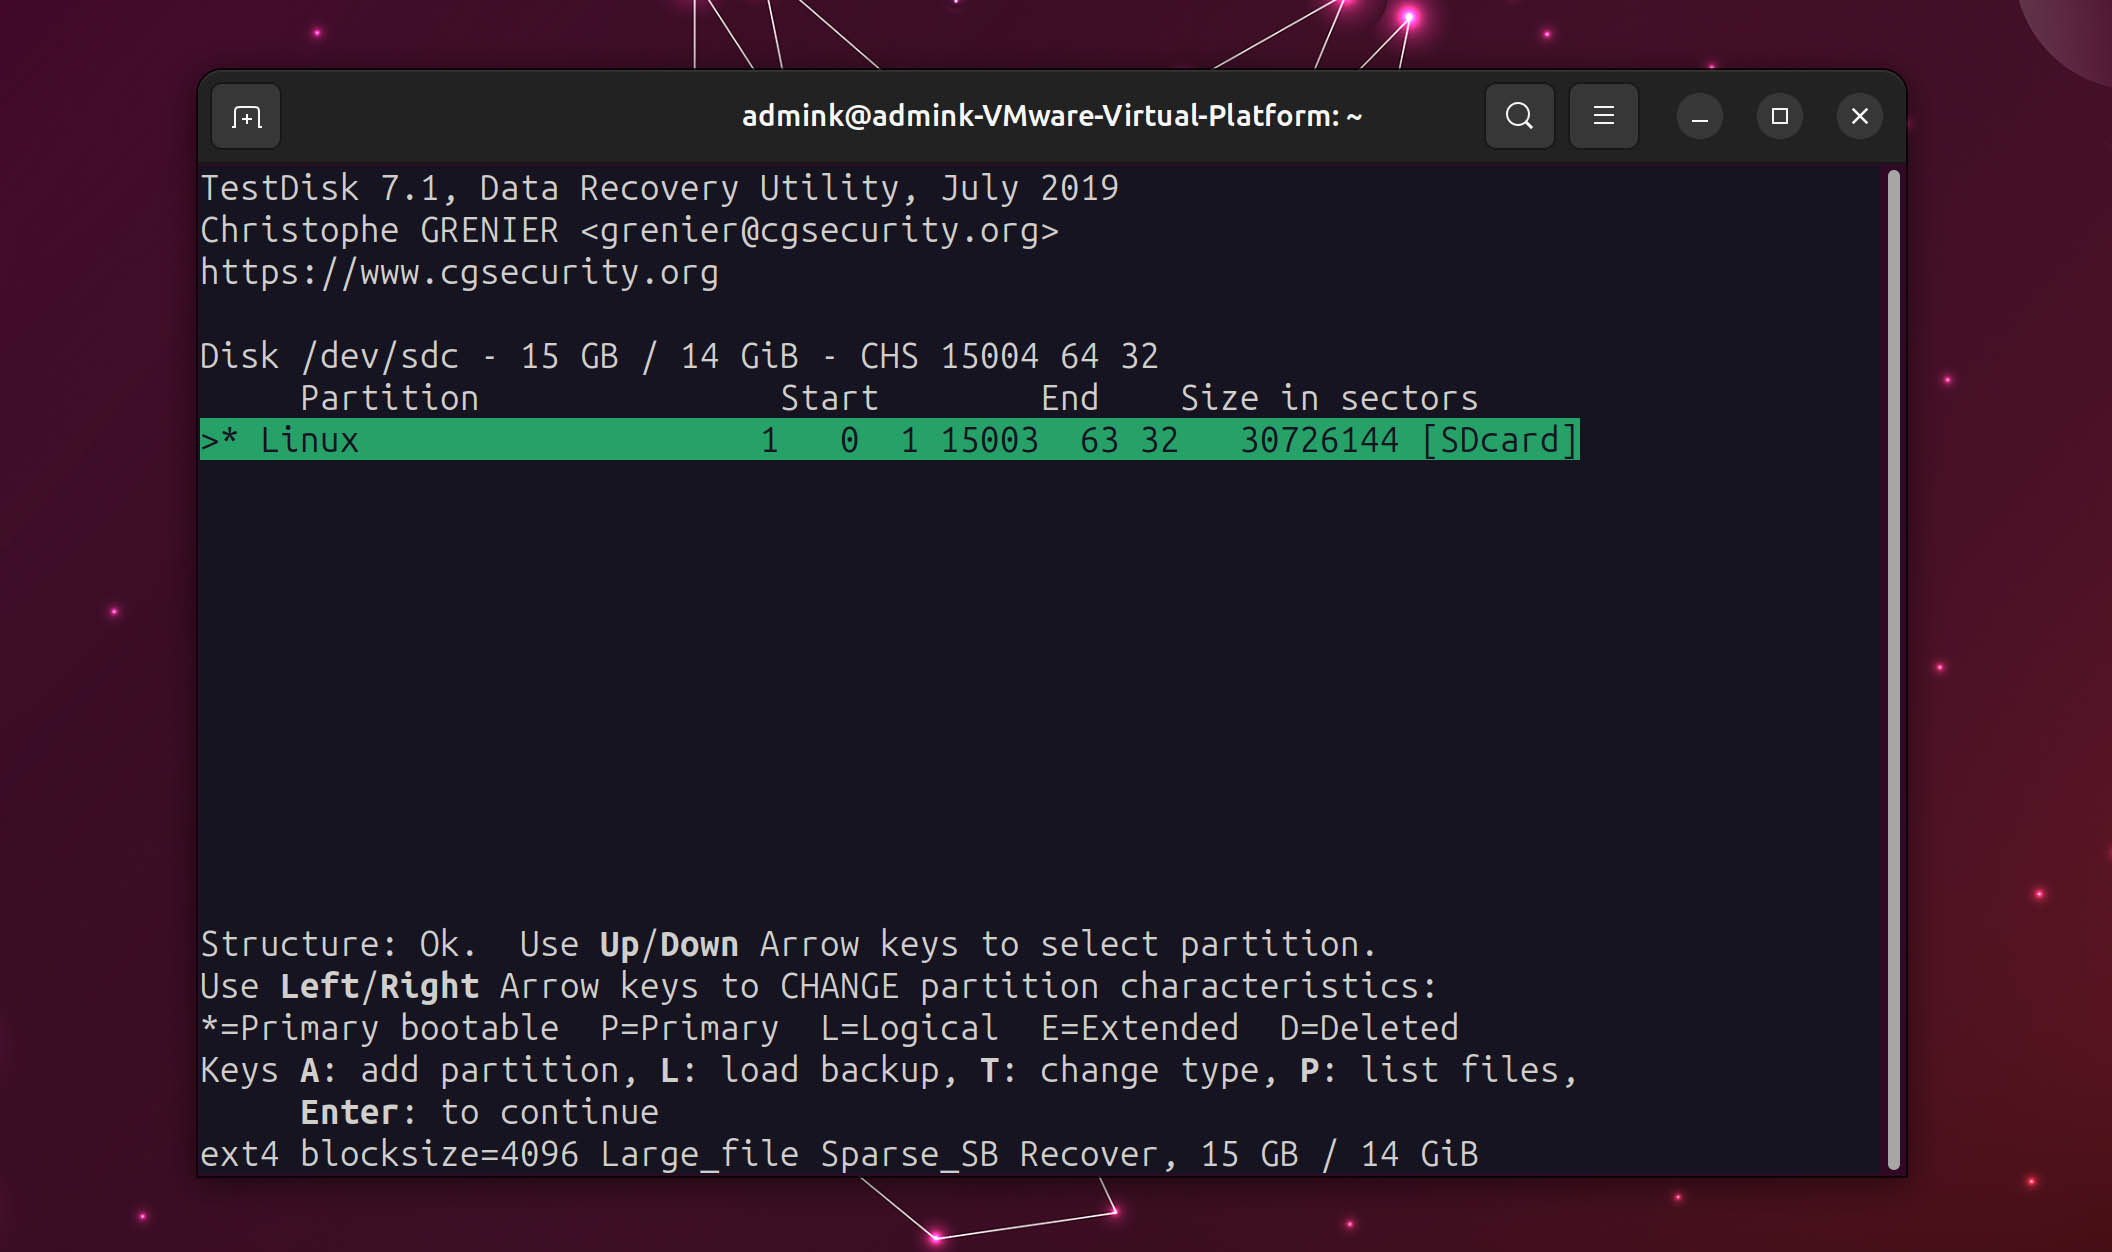
- TestDisk will display any partitions it located. With SD cards, you usually won’t have to deal with more than one. You can check the available options that allow you to change the partition’s type, make it bootable, etc. Press Enter to restore your lost partition.
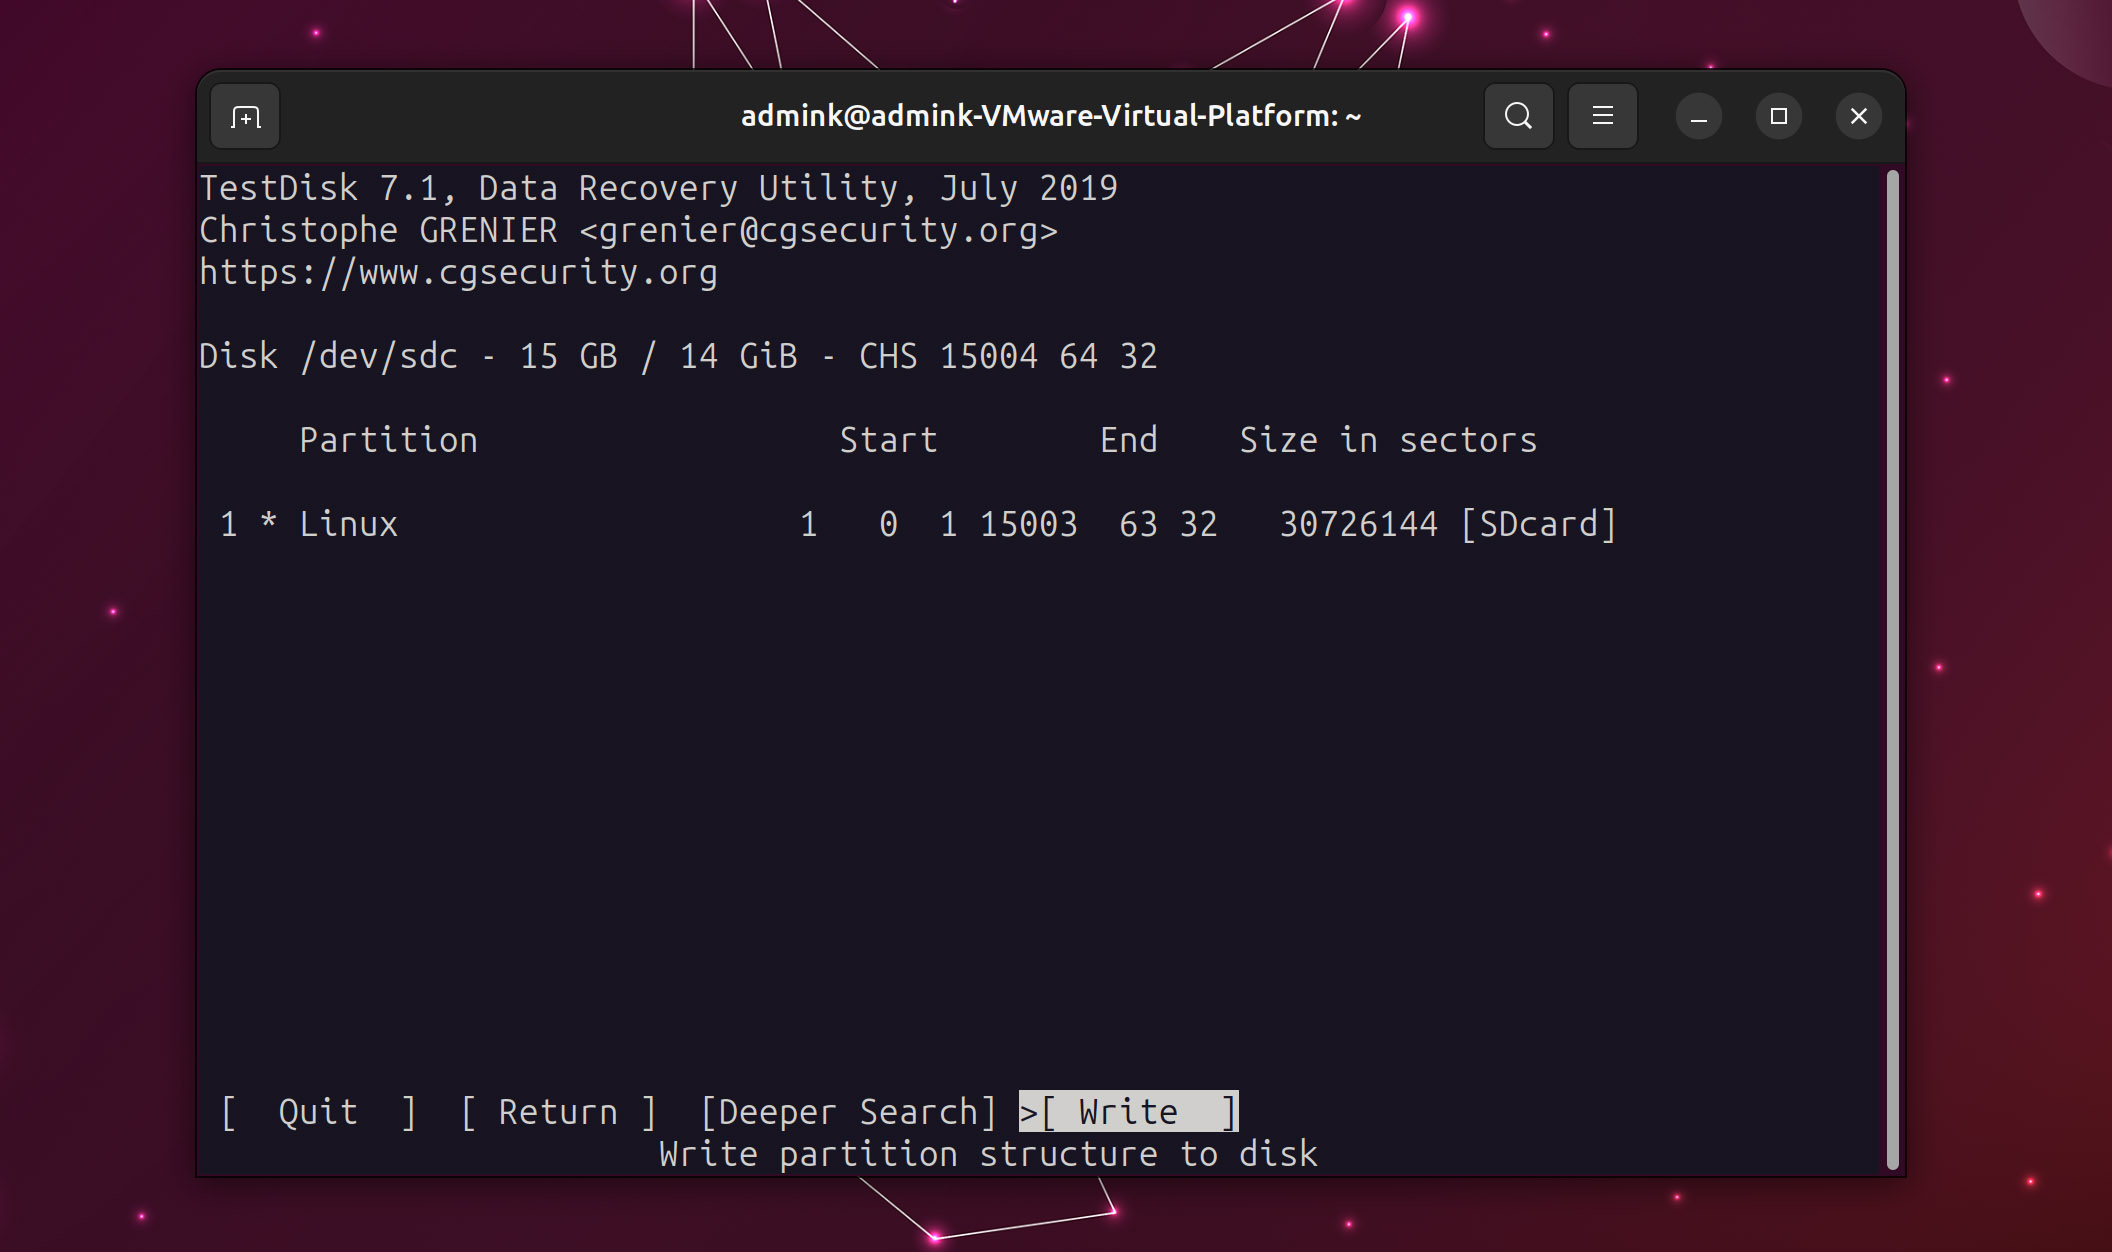
- If TestDisk didn’t find the correct partition, choose Deeper Search from the previous menu. When happy with TestDisk’s findings, choose Write. This will write the recreated partition table to the SD card and practically “undelete” your lost partition.
- TestDisk will suggest you reboot for the changes to take effect. Navigate its menus and exit the app.

- Then proceed with the suggested reboot.
Hopefully, after re-entering your desktop, your SD card will be accessible with (most of) your data intact.
Step 4. Get Your Photos Back From Your SD Card With PhotoRec
PhotoRec is the second app in testdisk’s bundle, and you already have it if you installed testdisk as we saw above. Unlike TestDisk , PhotoRec isn’t designed to fix storage devices but to salvage files.
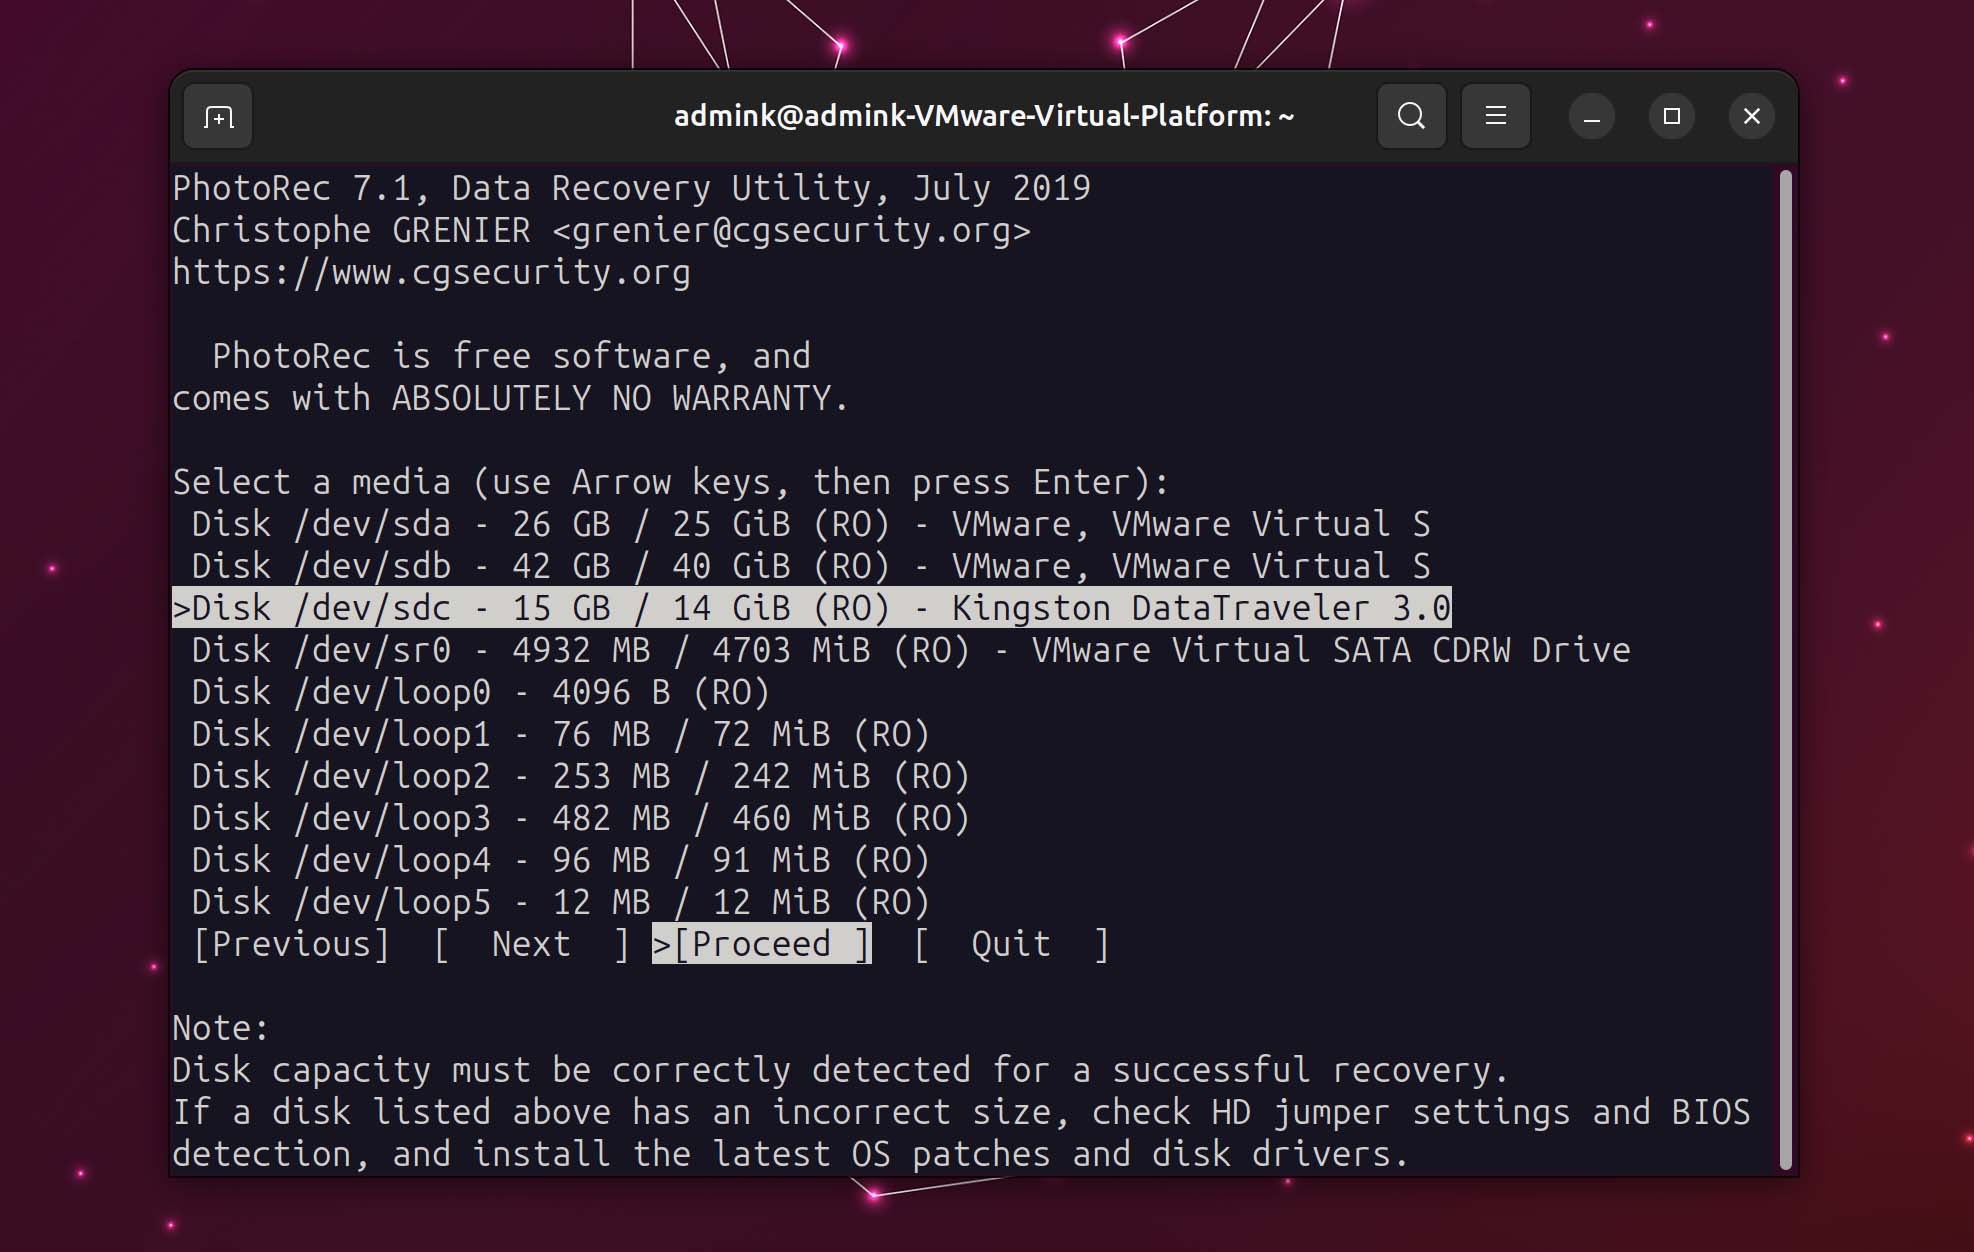
- To use it, type its name in a terminal, photorec, and press Enter.
- Like with testdisk, first, you’ll have to choose your SD card from PhotoRec’s device list.
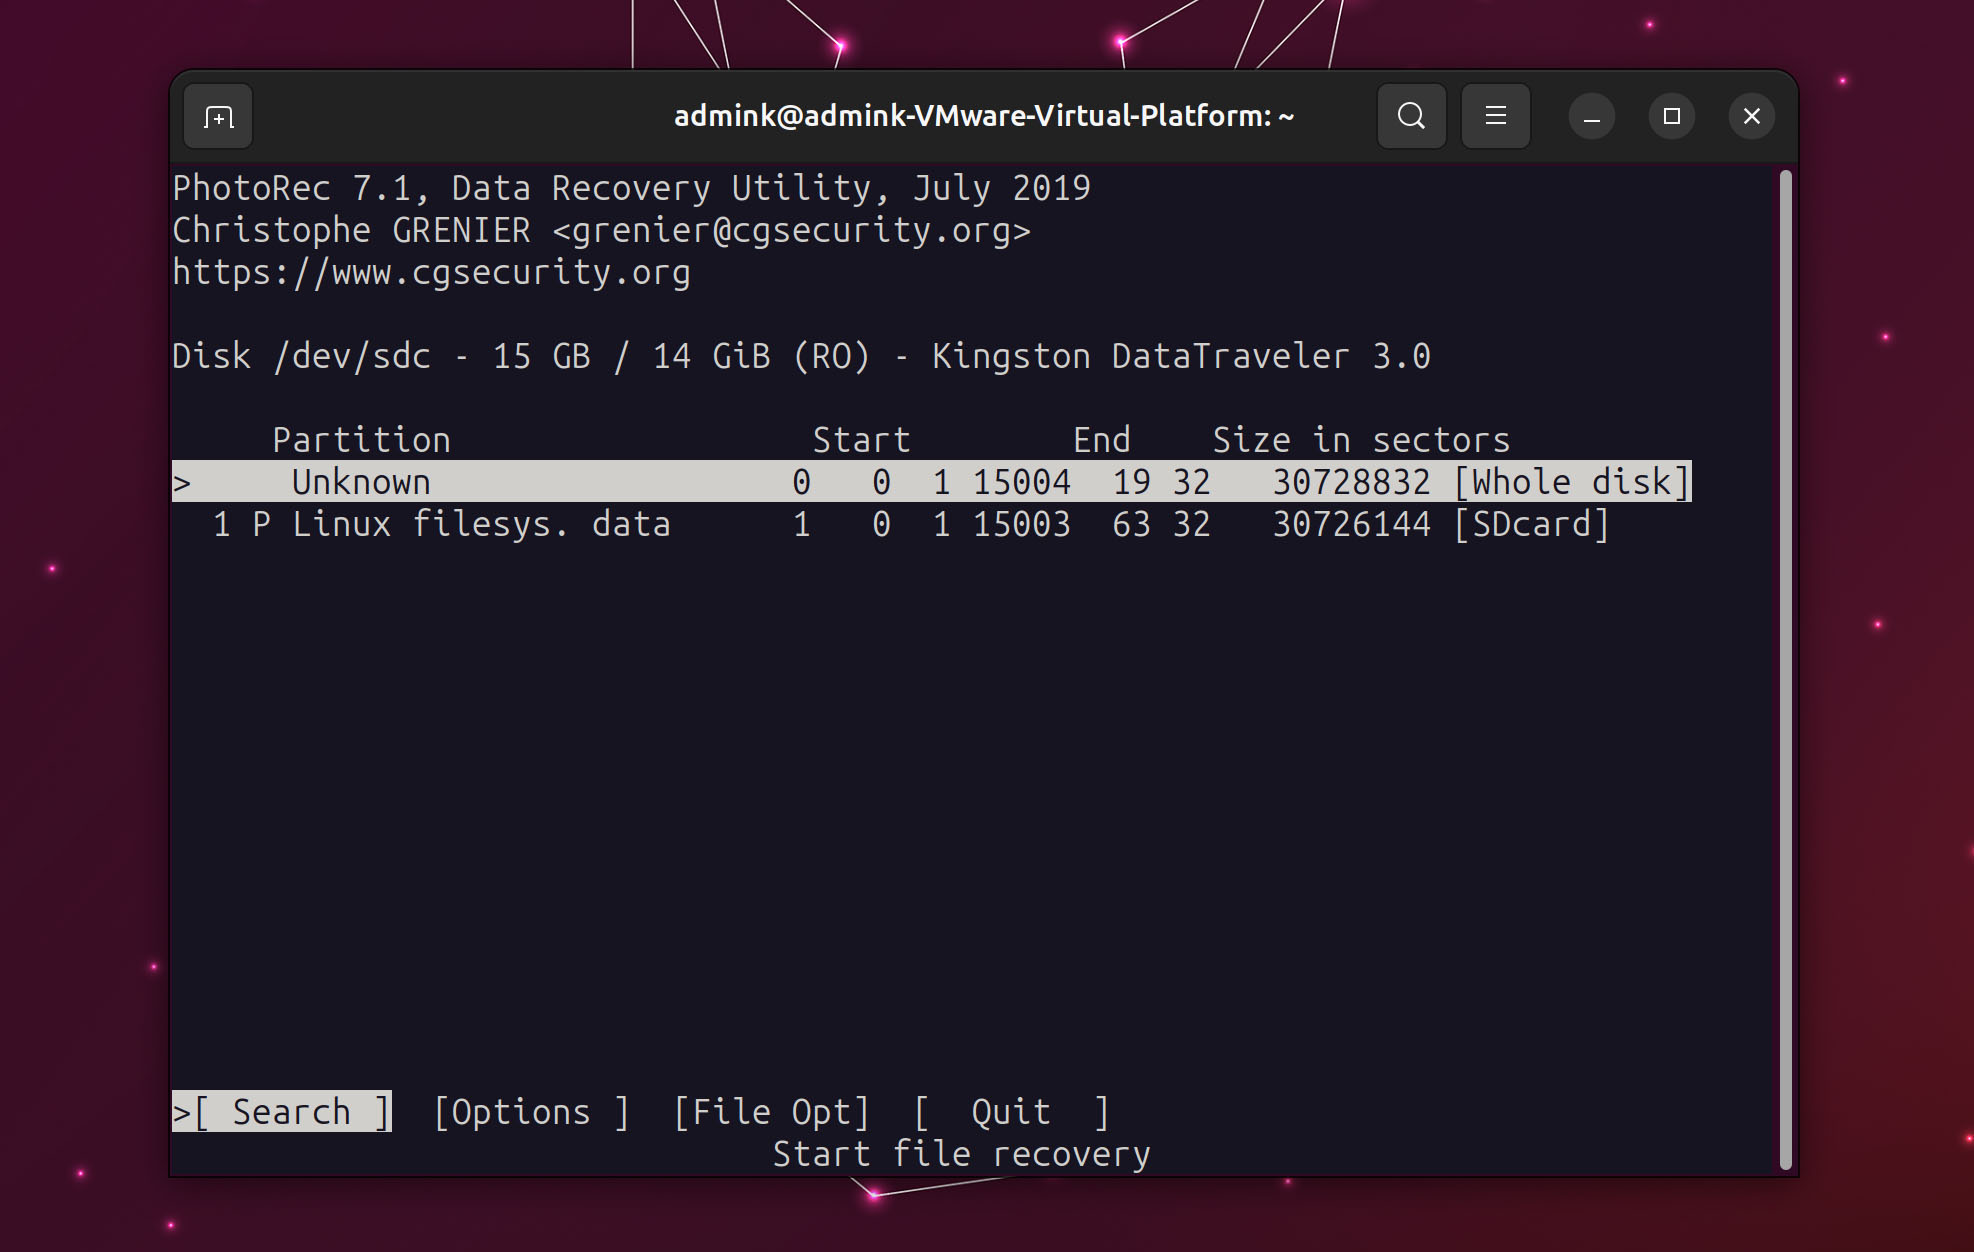
- Even if PhotoRec, as in our case, detects a partition, choosing No partition to scan the whole disk can reap better results.
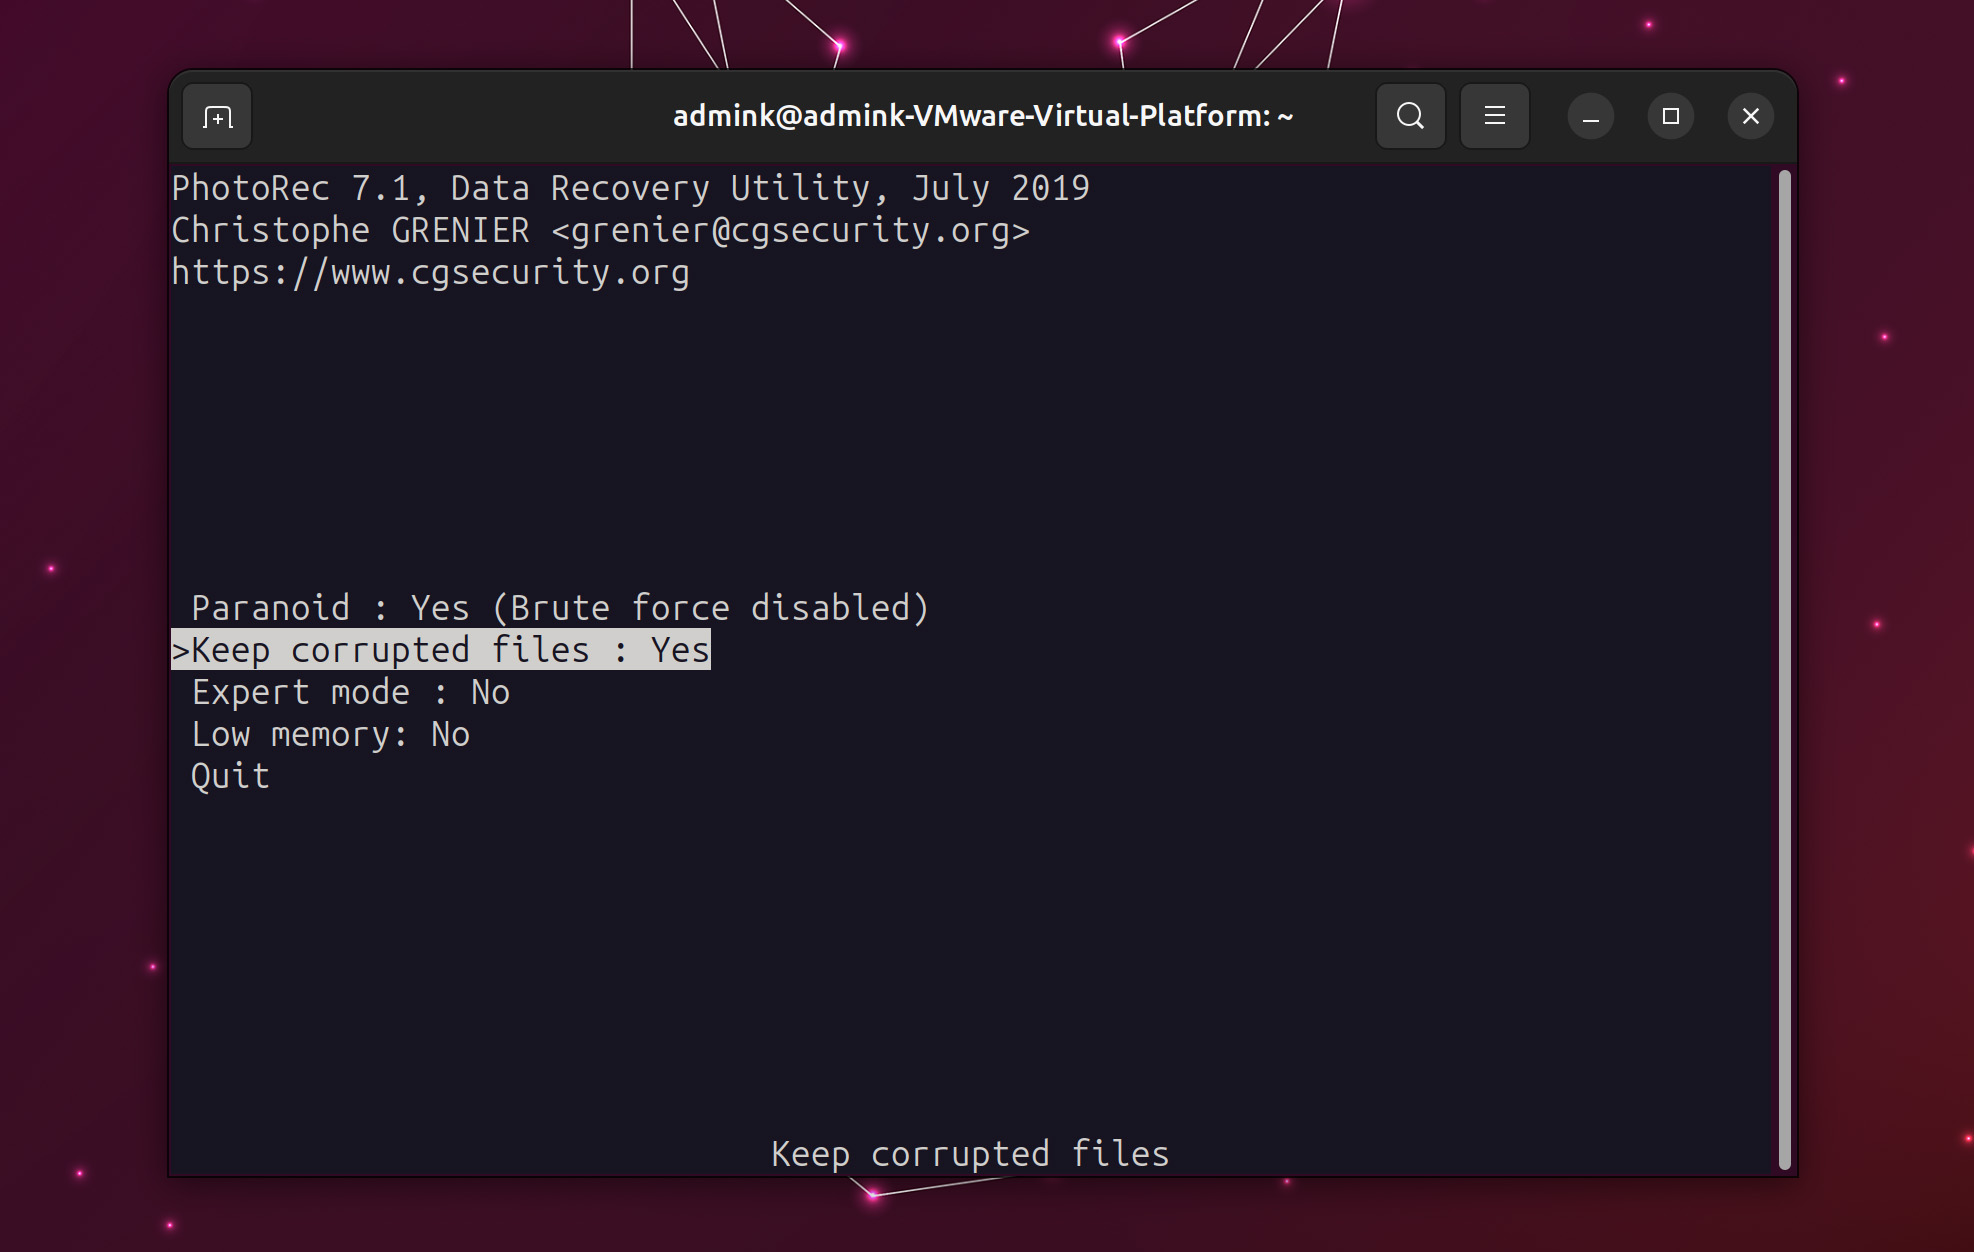
- If you visit PhotoRec’s Options, you can also choose to keep corrupted files. They’ll probably be unusable, but maybe you’ll be able to save fragments of image or text files. From here, you can also enable a low memory mode.
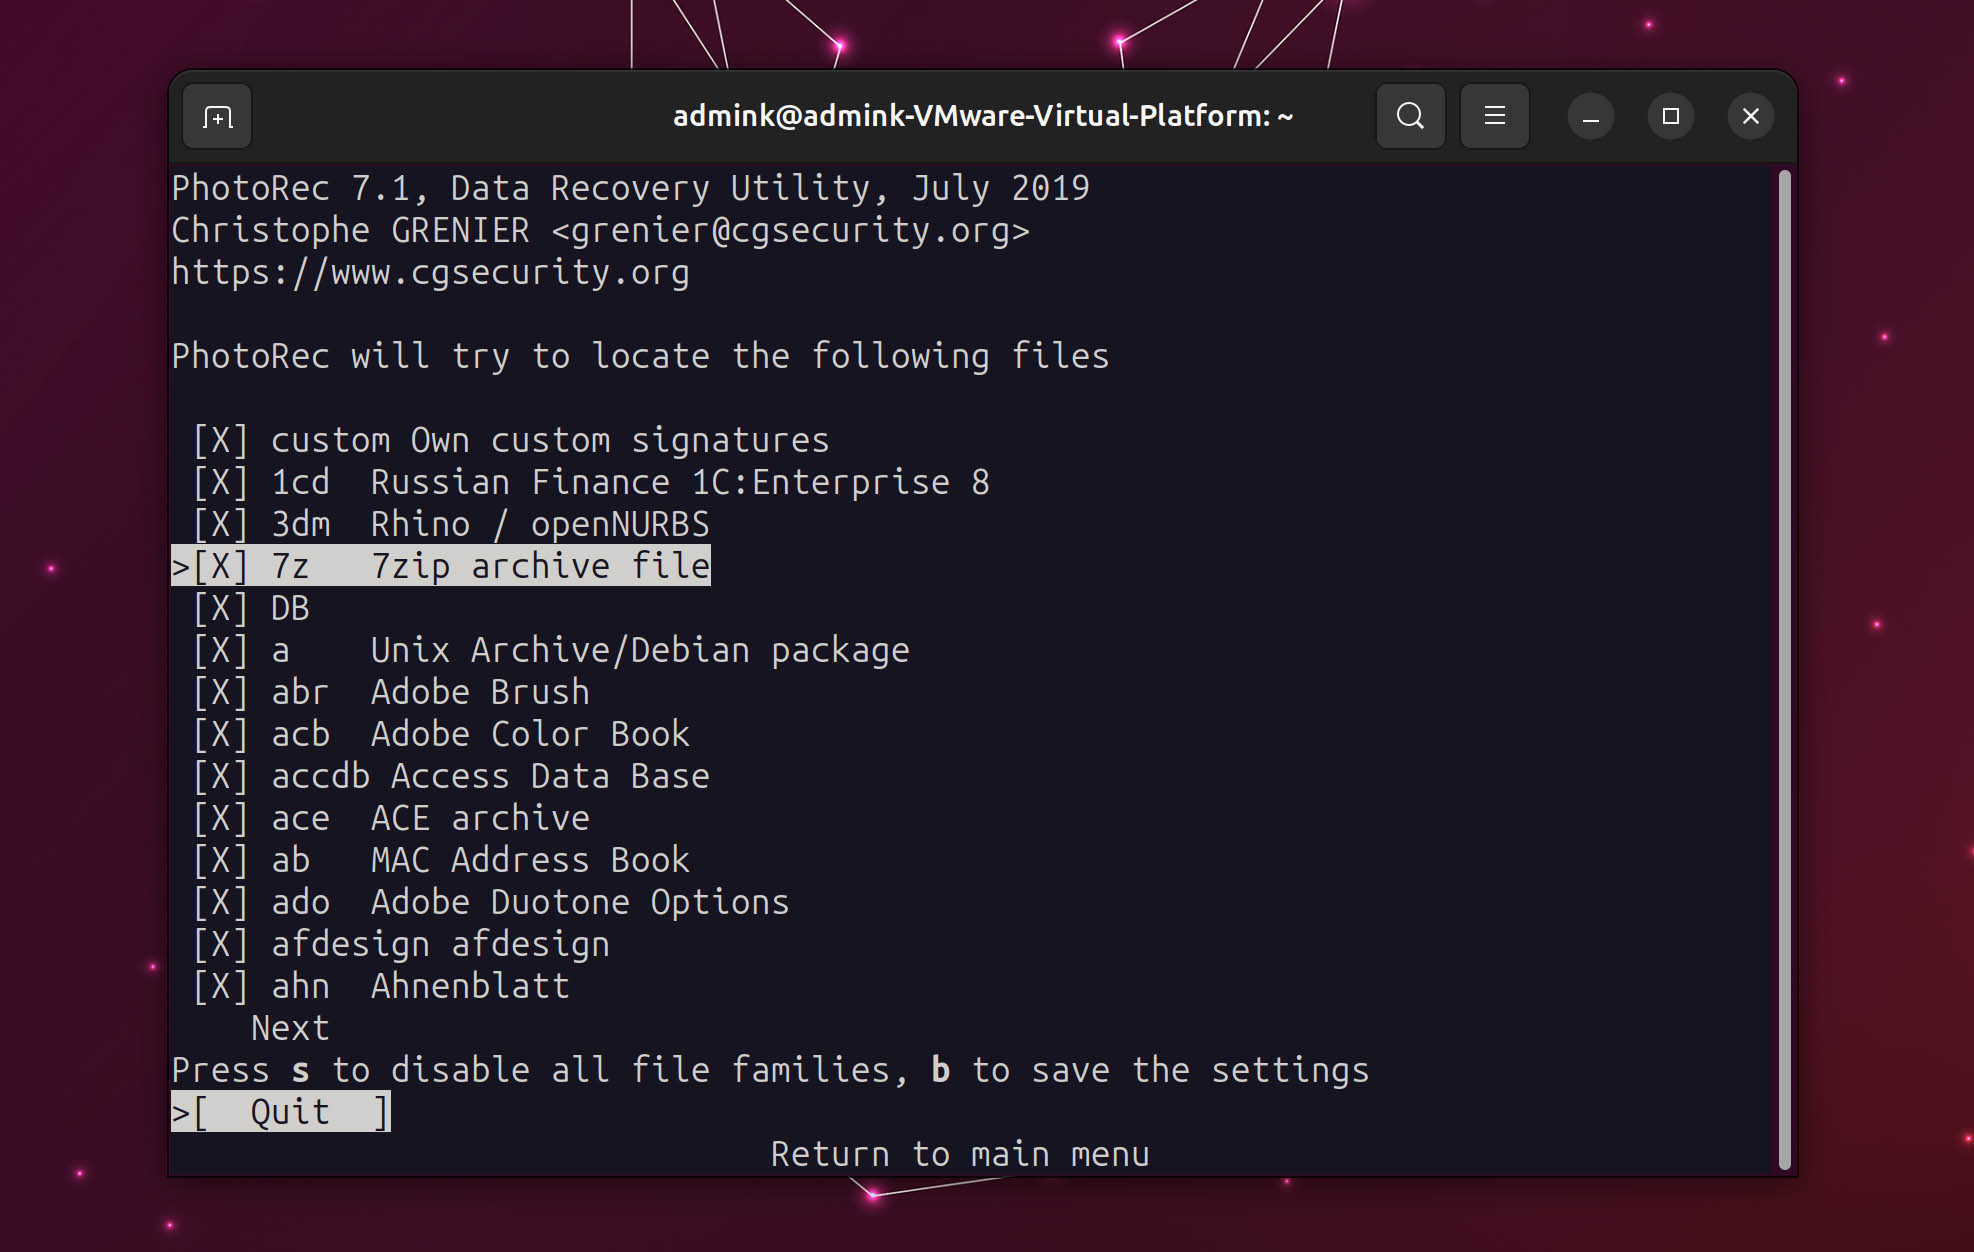
- Back in PhotoRec’s main menu, from File Opt, you can choose what types of files PhotoRec will try to recover. Despite PhotoRec’s name, it’s not restricted to image files. You don’t have to change anything, but disabling the types of files you don’t care about may boost PhotoRec’s scanning speed.
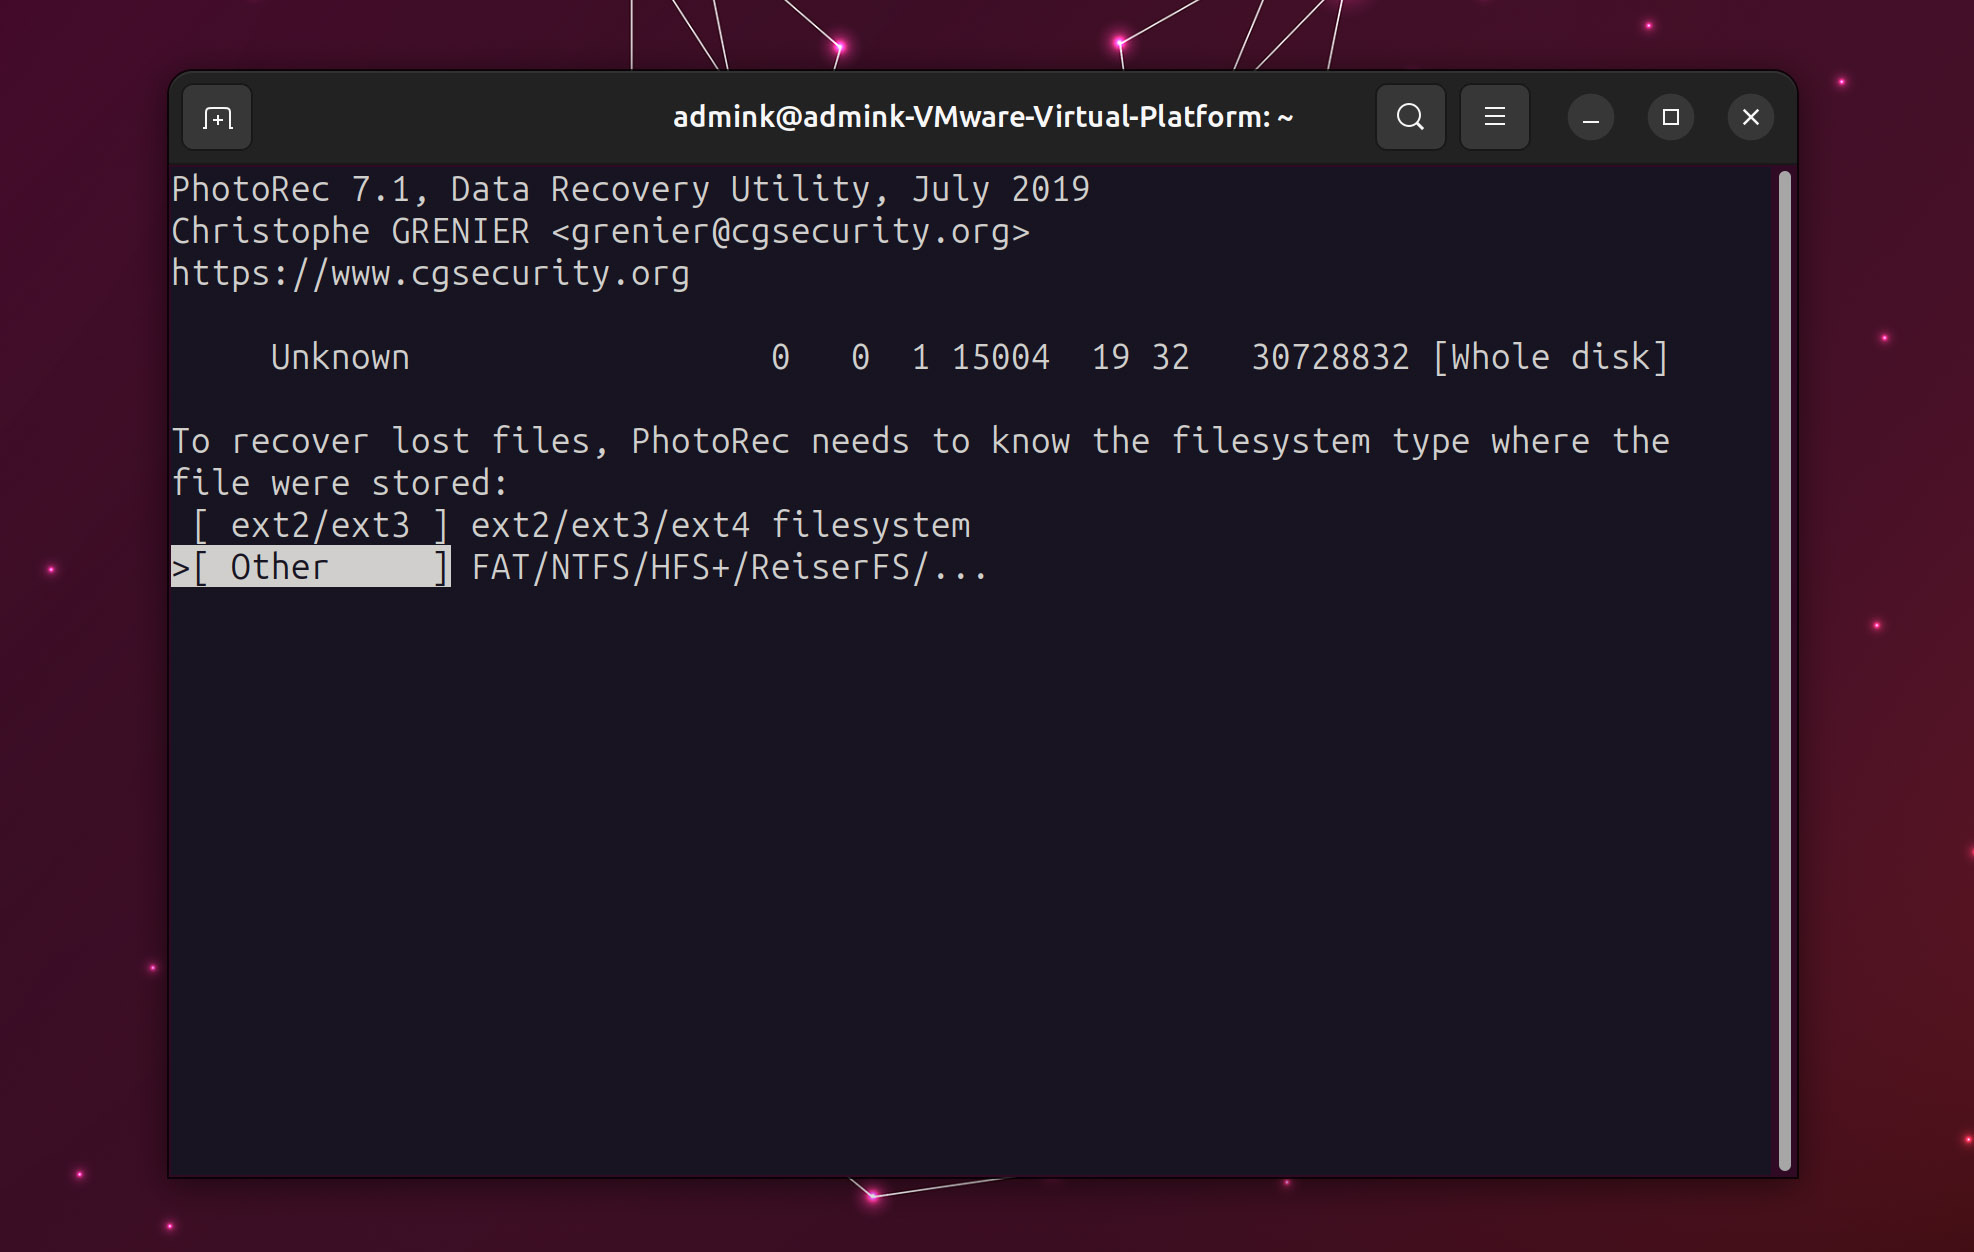
- After selecting what – and how – to scan, PhotoRec will ask you to choose the filesystem of your SD card. In most cases, you’ll want to go for Other.
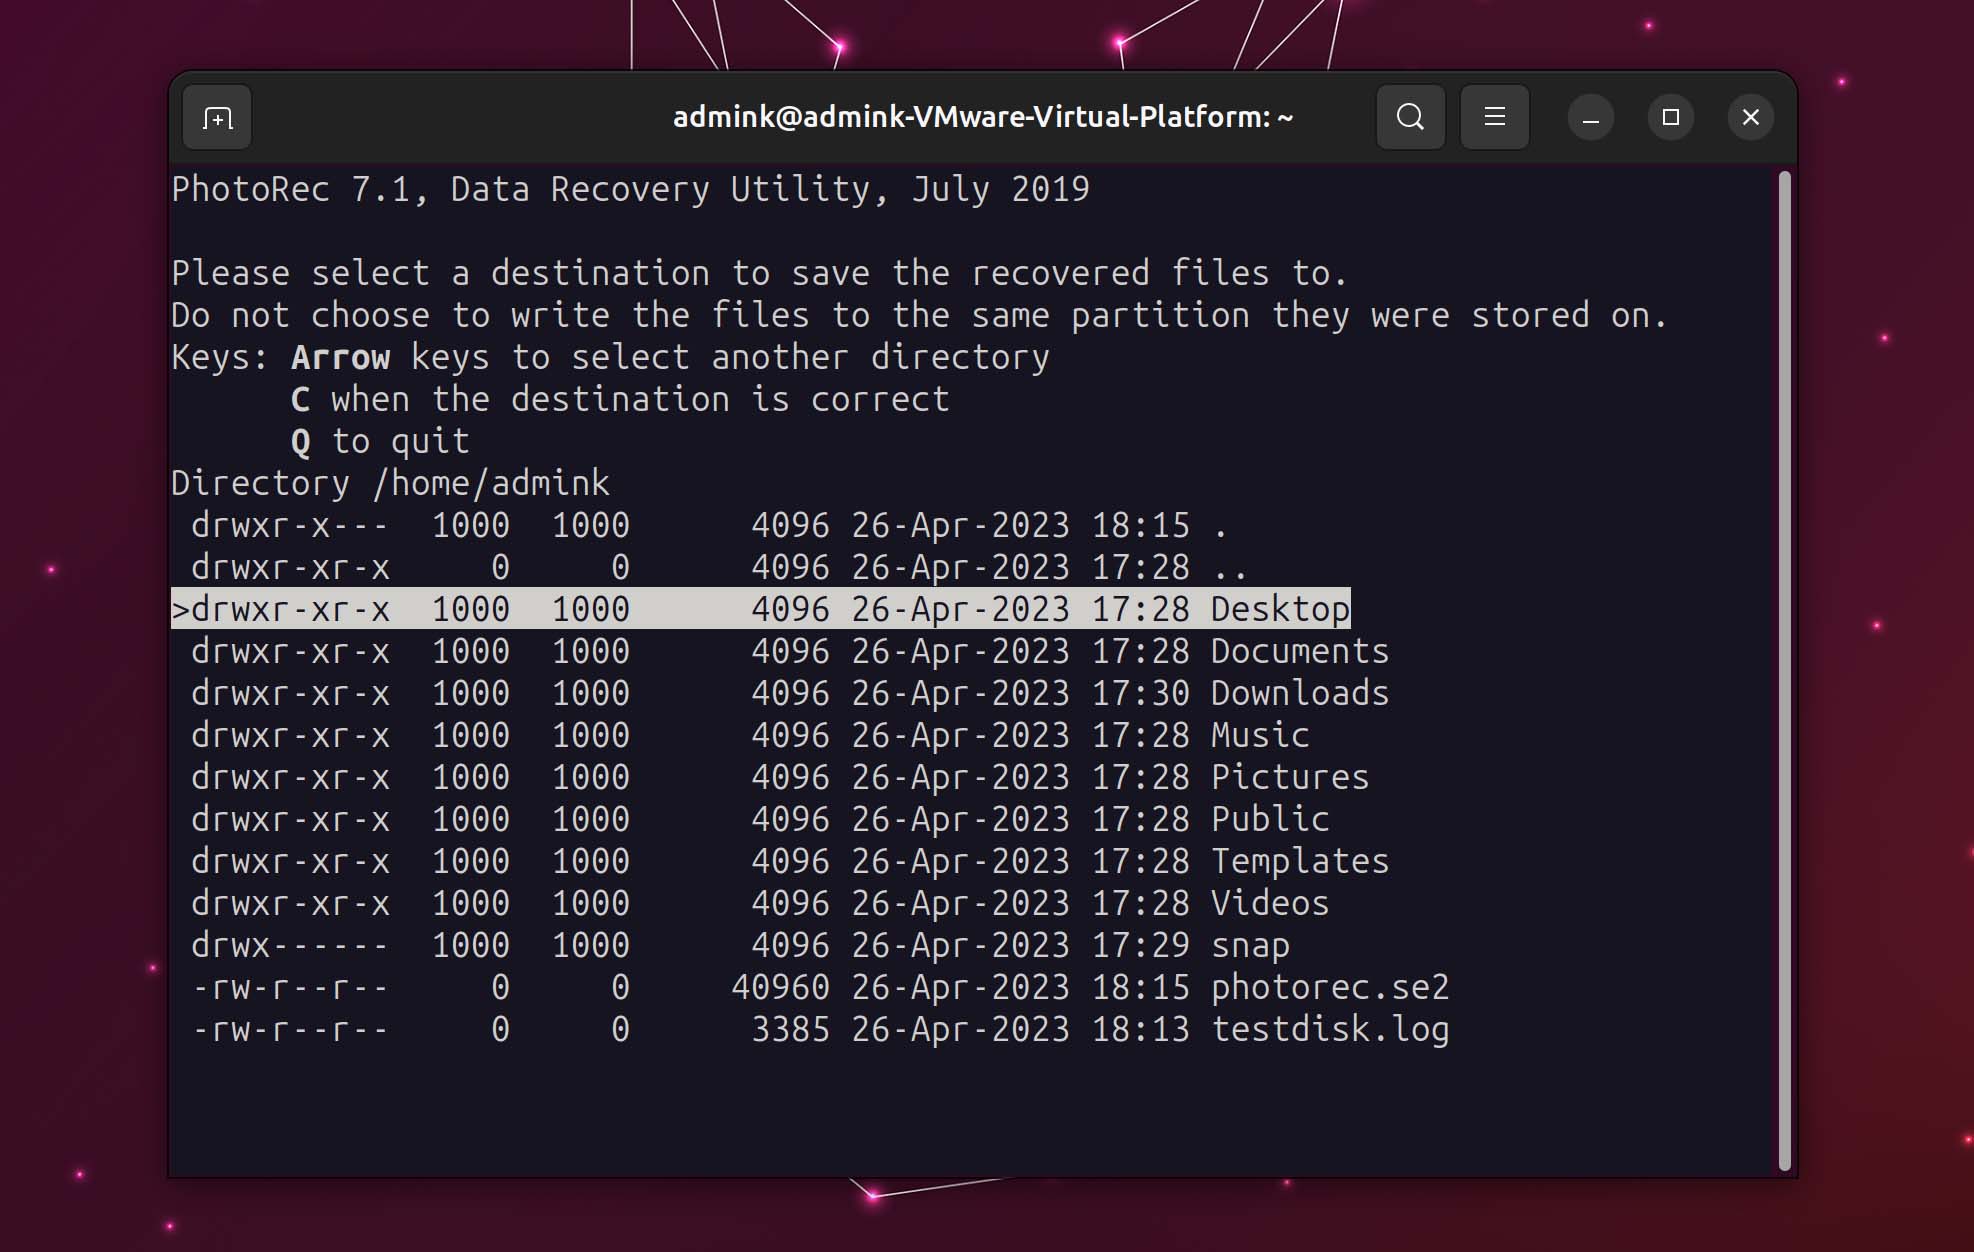
- Next, choose a destination folder where you want PhotoRec to store the recovered files.
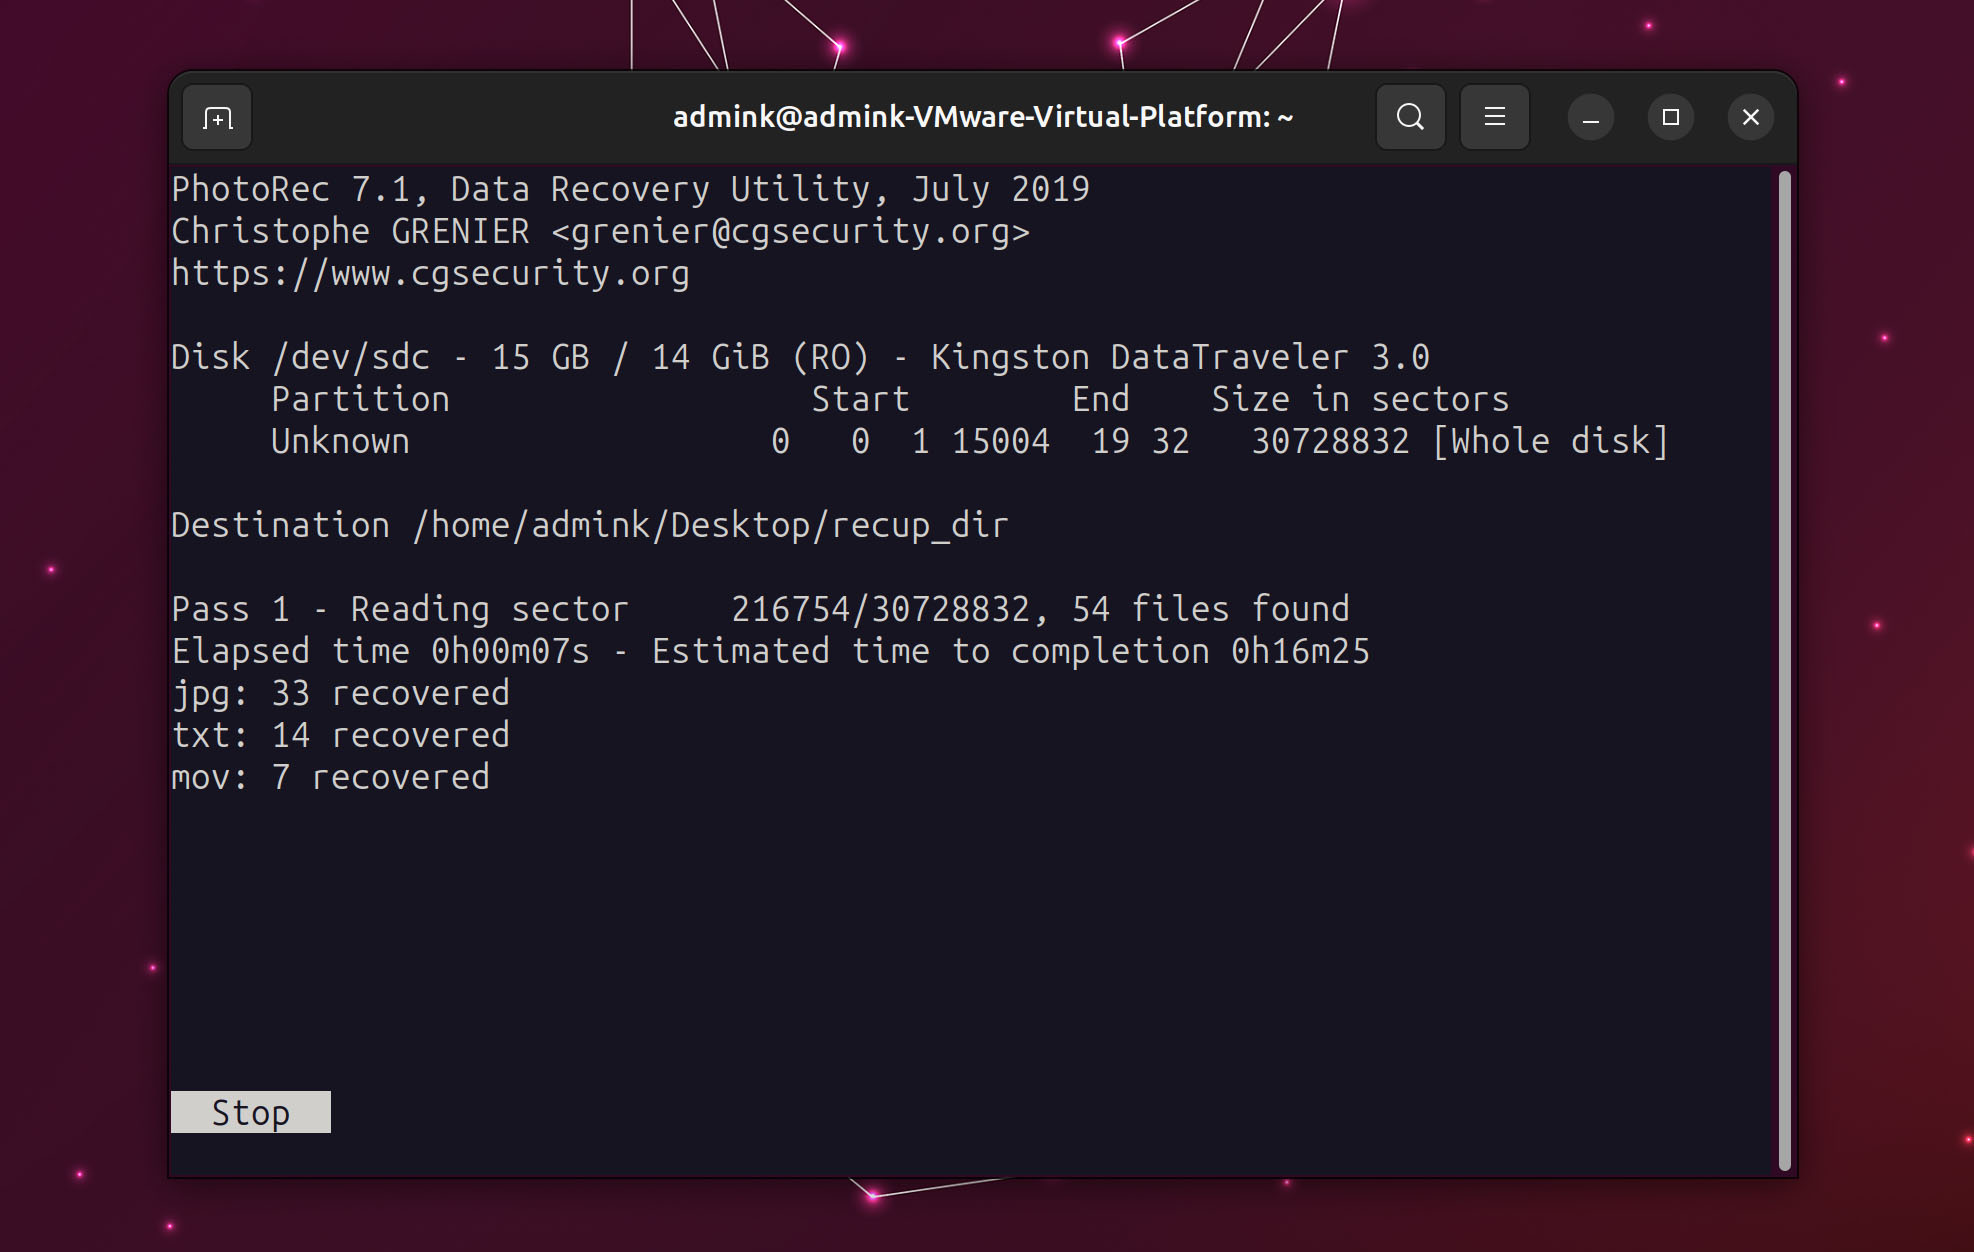
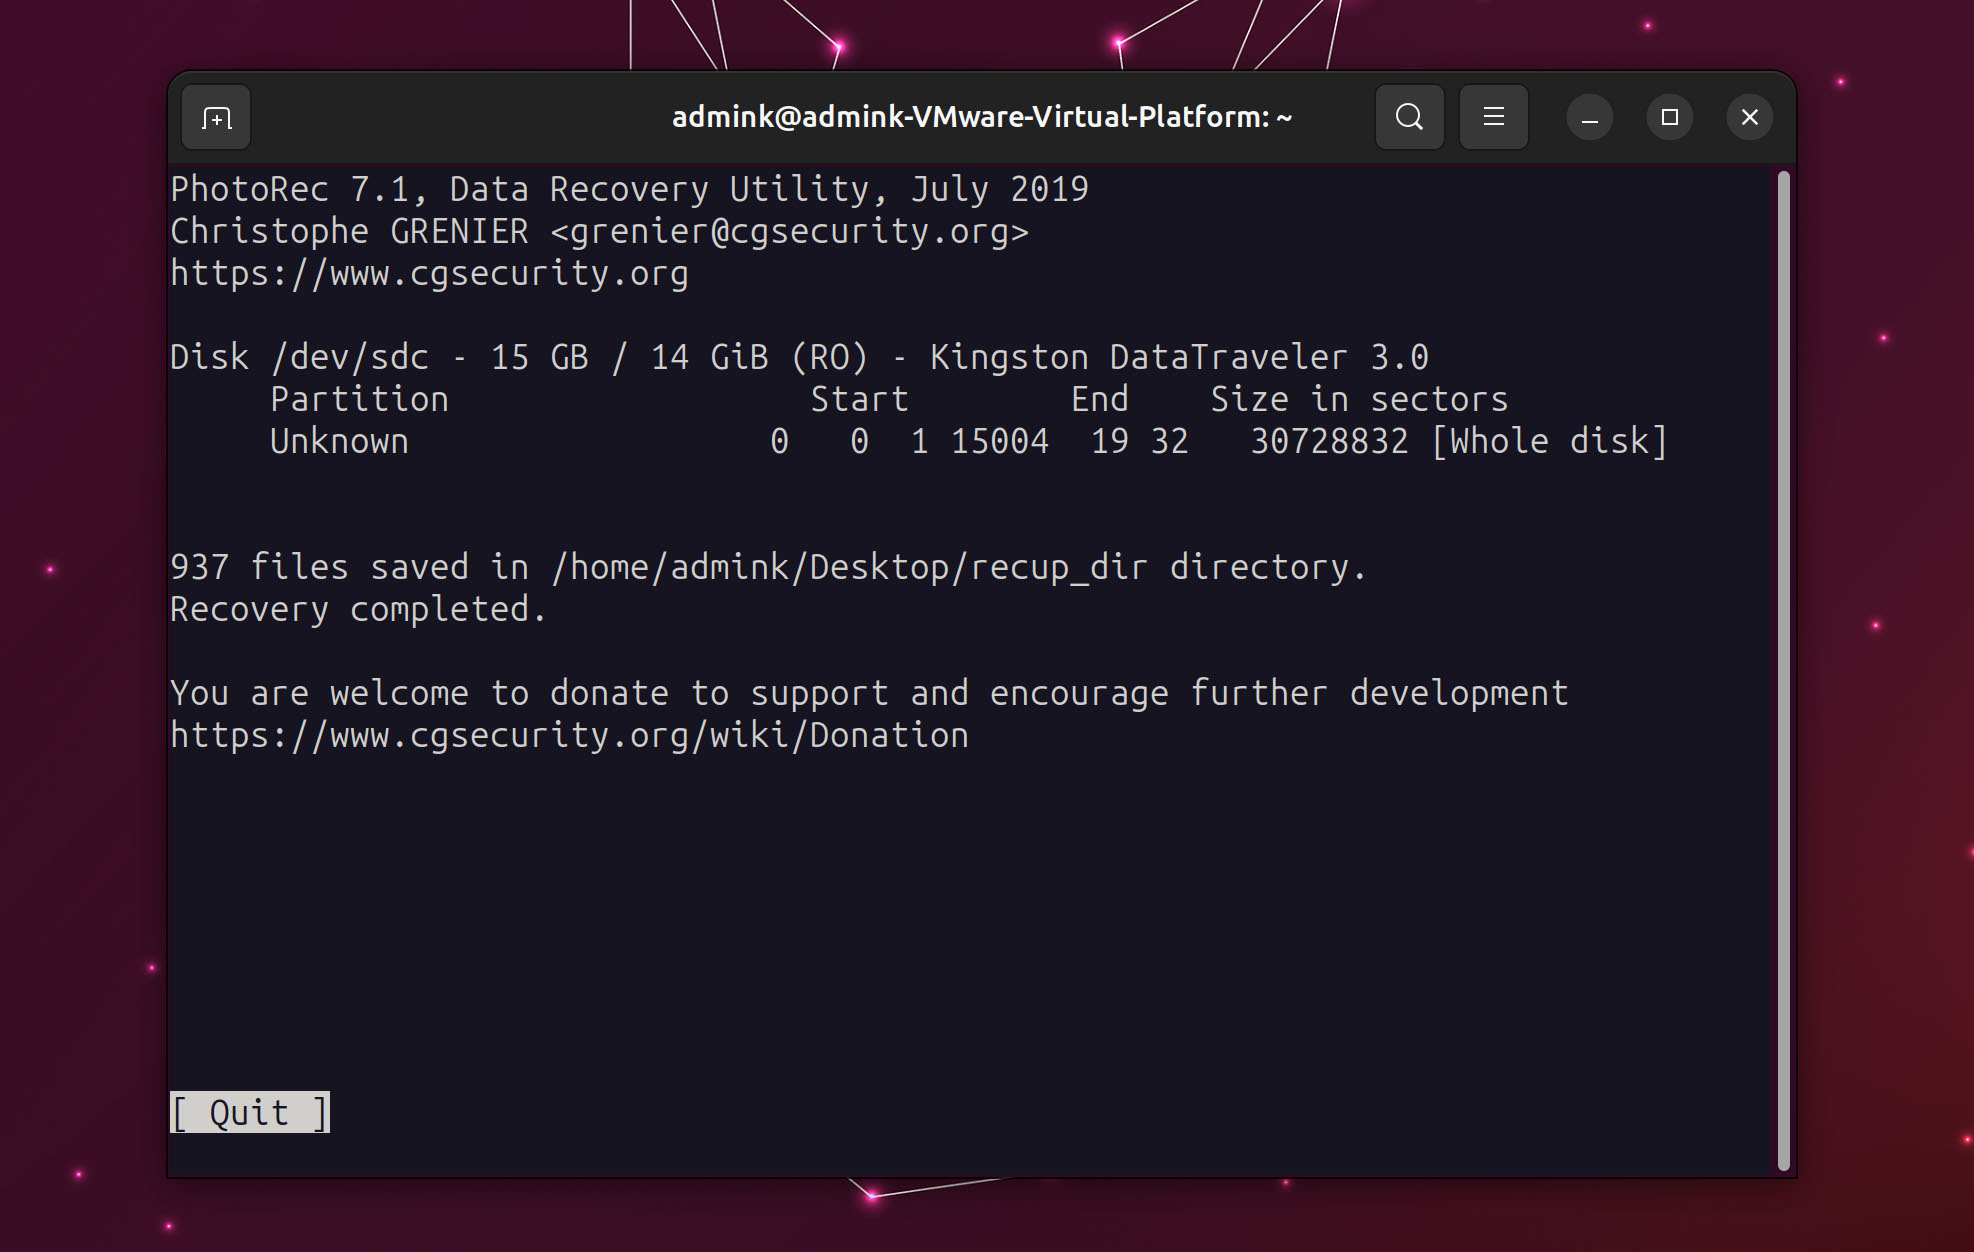
- PhotoRec will start scanning your SD card and report in real-time how many of each type of file it managed to locate. You can stop the process at any time. However, so we suggest you let it entirely run its course for optimal results.
- When PhotoRec’s scan ends, it will report how many files it managed to save and remind you they’re in the folder you chose. Choose the only option, Quit, to exit the app.
Step 5. Try Other Tools That Can Help
If there’s something Linux is famous for, that’s freedom of choice. If for whatever reason you don’t want to use one of the tools we saw, there are alternatives worth checking out. Some of the best are:
- ext4magic: Specializing in the most popular Linux file systems, ext4magic is a command-line tool you can use to bring back deleted files on EXT3 and EXT4 volumes.
- Scalpel: A file carving and indexing application, scalpel can analyze a data dump and recognize and extract individual files from it.
- SystemRescue: System Rescue is a bootable image you can write on an optical disk or a USB flash drive. When catastrophe strikes, you can boot from it to access a toolkit with which you can administer or repair your operating system or access and recover your data.
How to Format a Corrupted SD Card on Linux
After recovering your data, you may be able to format your SD card to keep using it. Let’s see how you can do this painlessly.
Method 1: Format SD Card in the Terminal
Fdisk is one of the classic ways of formatting storage devices through the Linux terminal.
- To format your SD card with fdisk, press CTRL + Alt + T to have the terminal pop up. Then, unleash fdisk on your SD card with:
sudo fdisk /dev/SDCARD 💡 Remember to replace “SDCARD” with the ID of your SD card.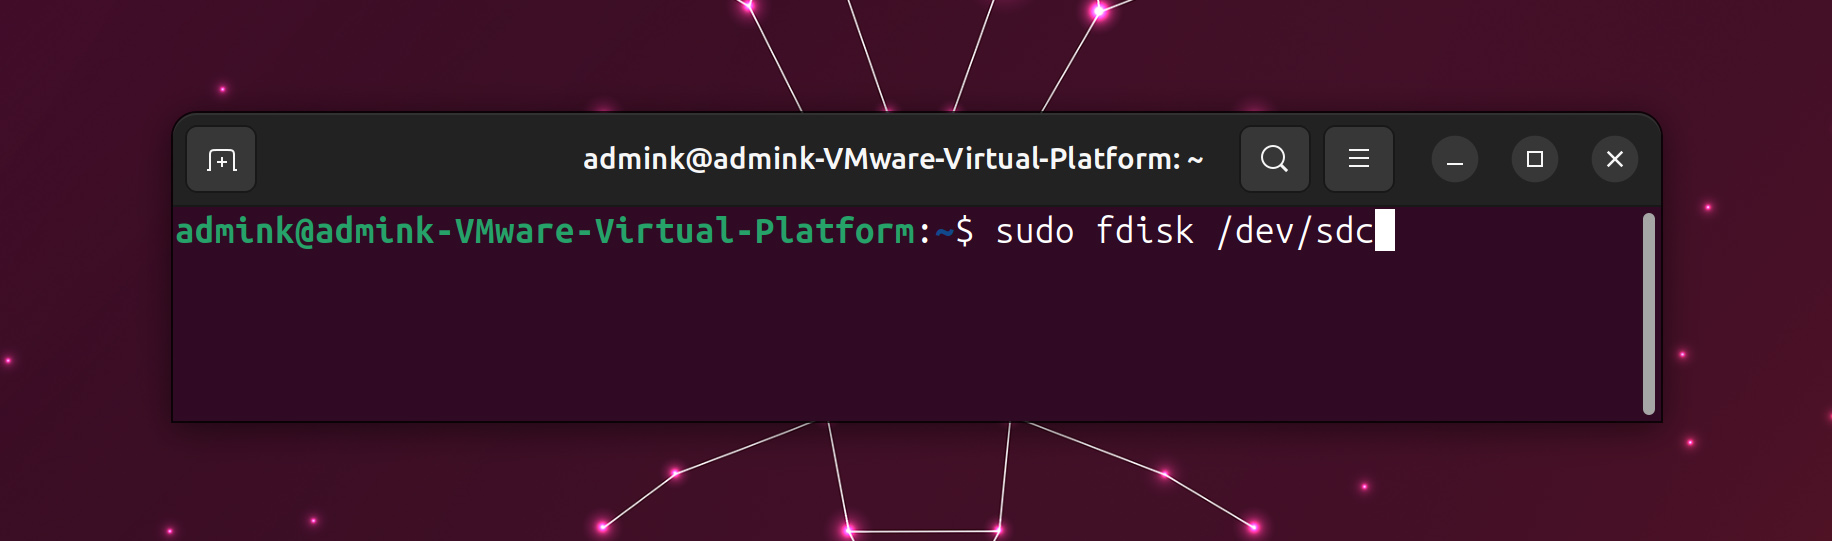
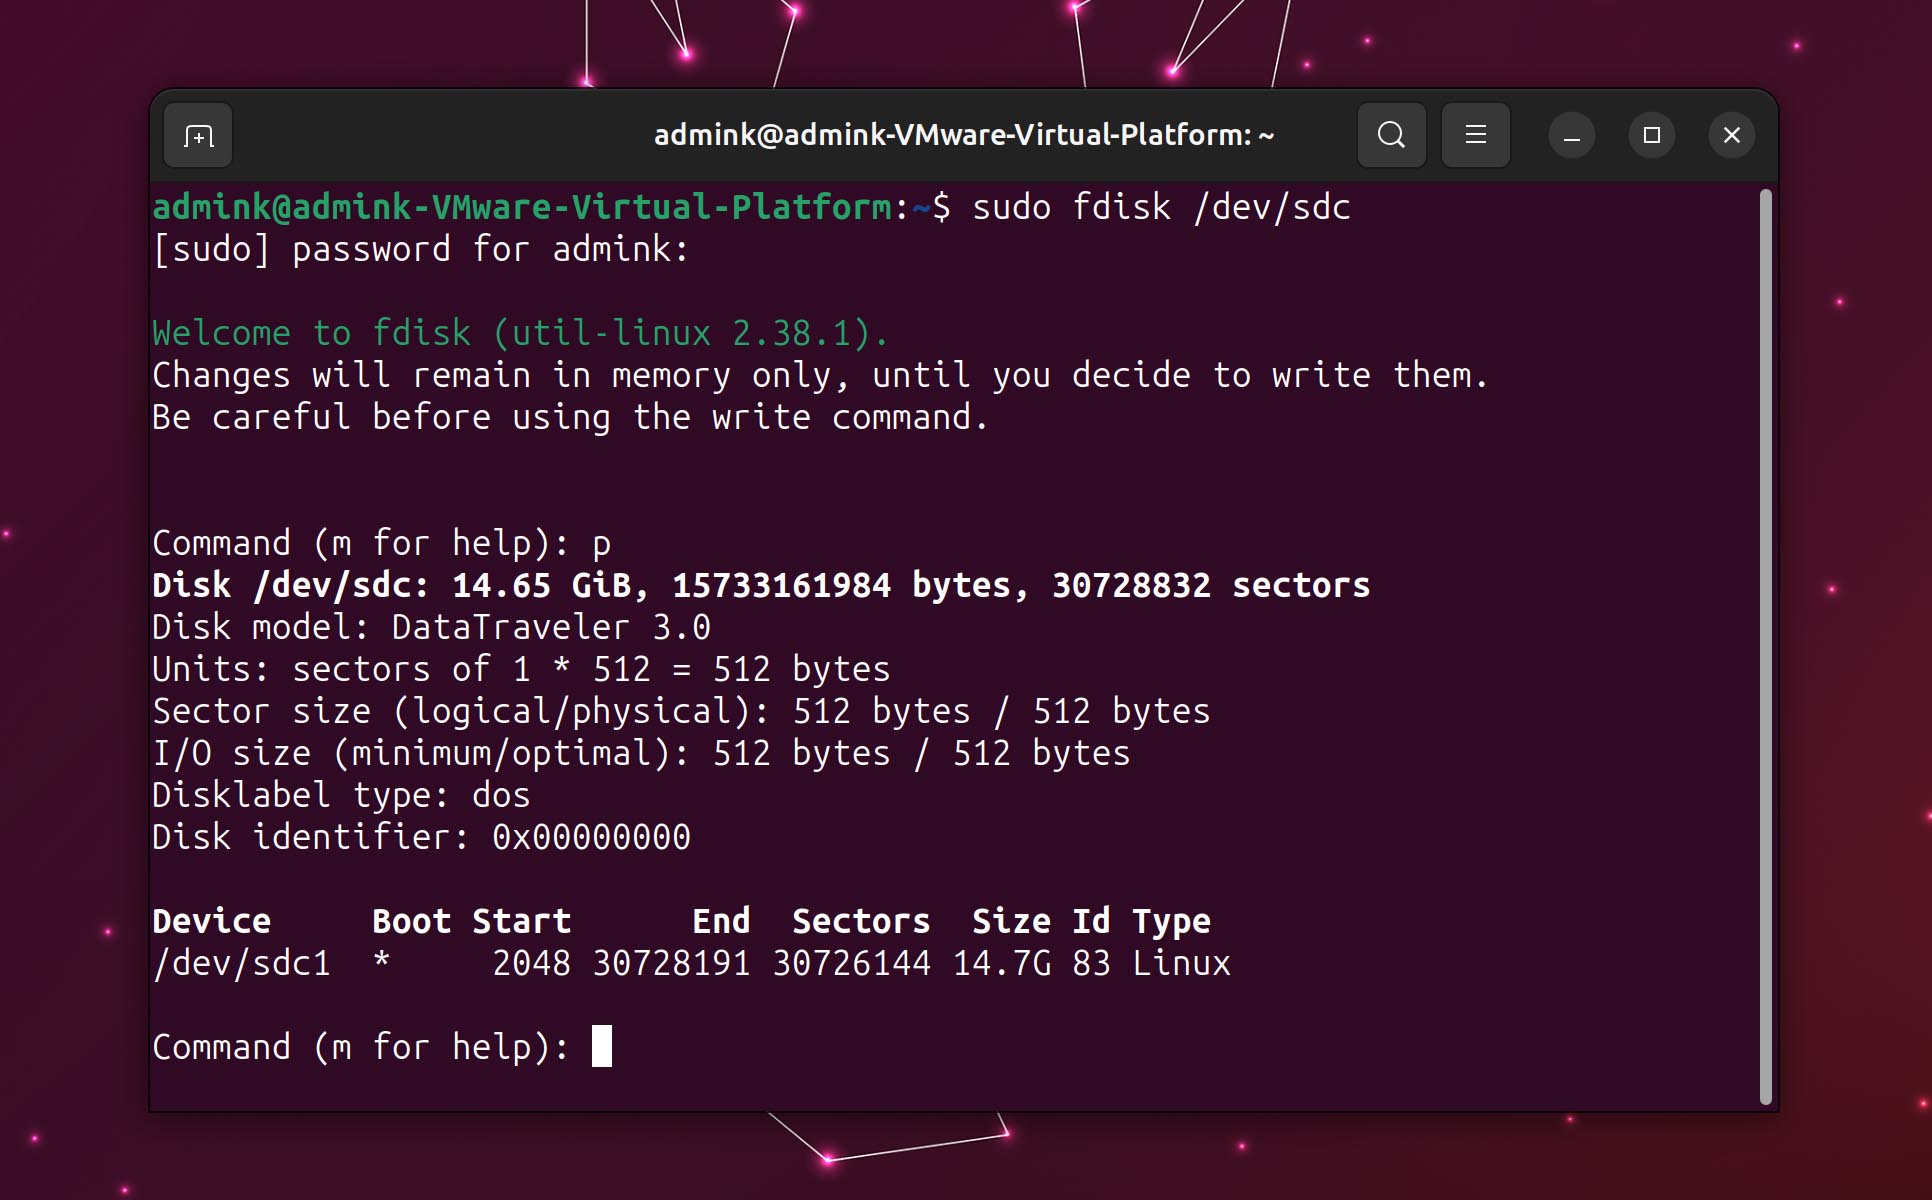
- Type p and press Enter to have testdisk show you the chosen device’s partition table.
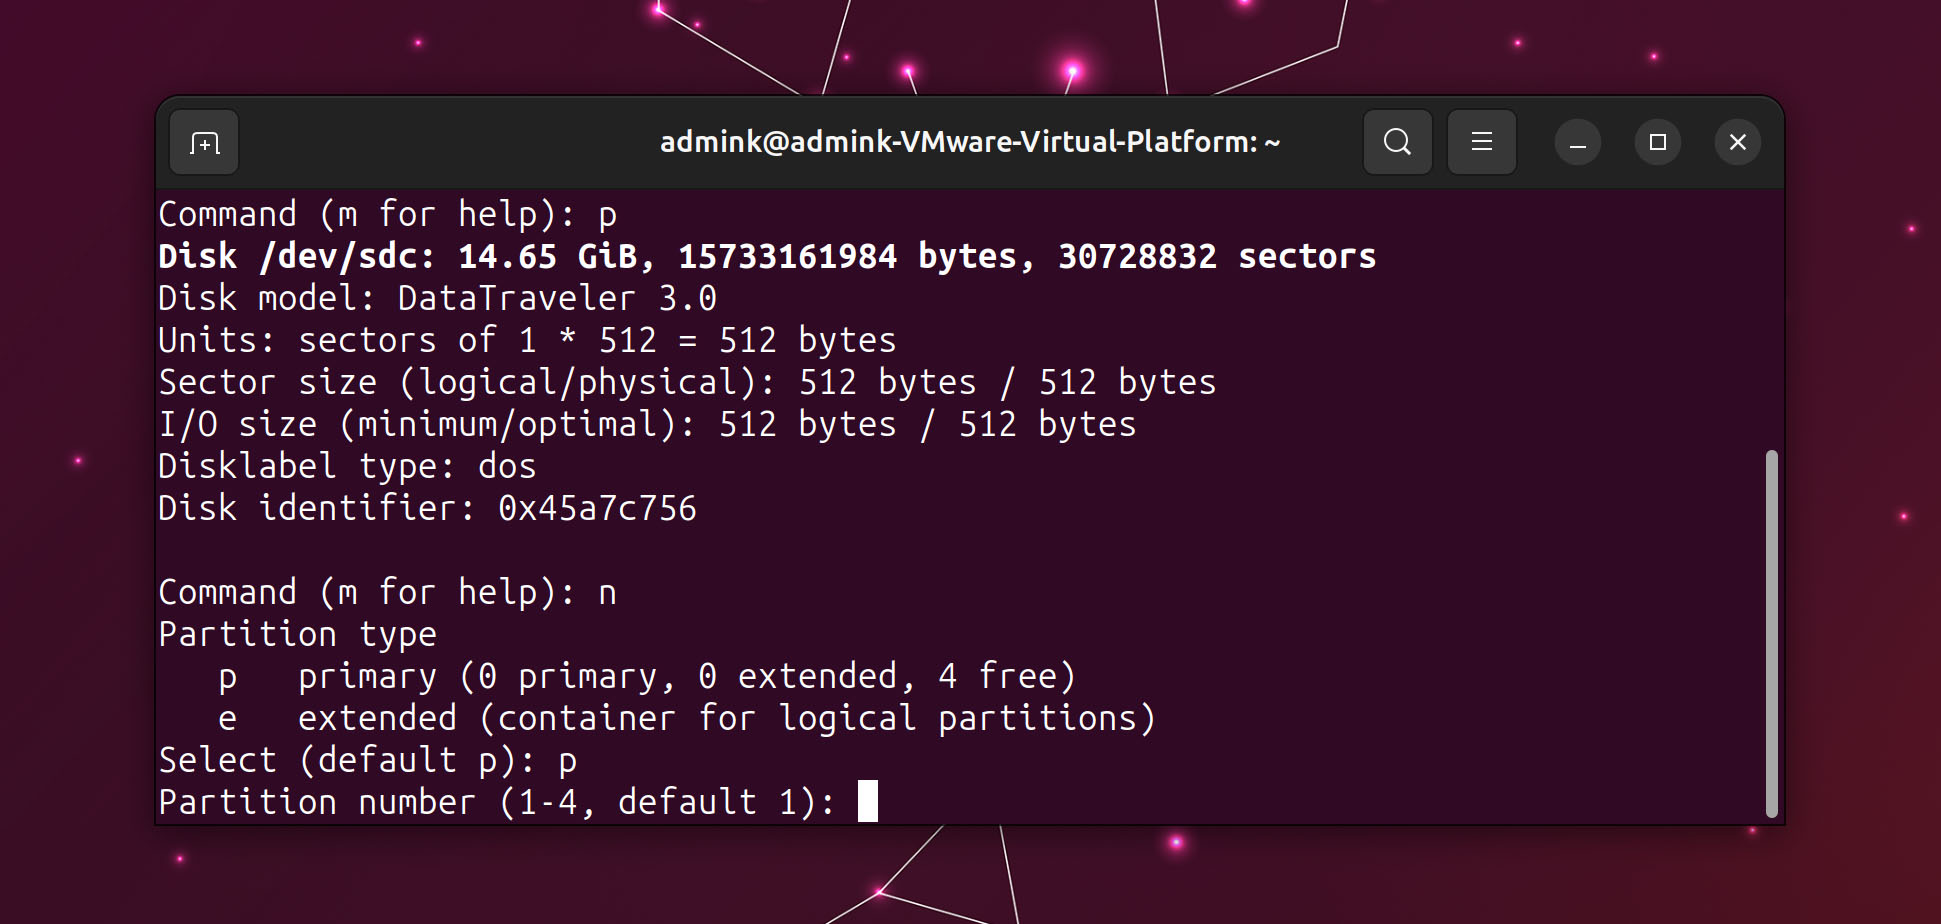
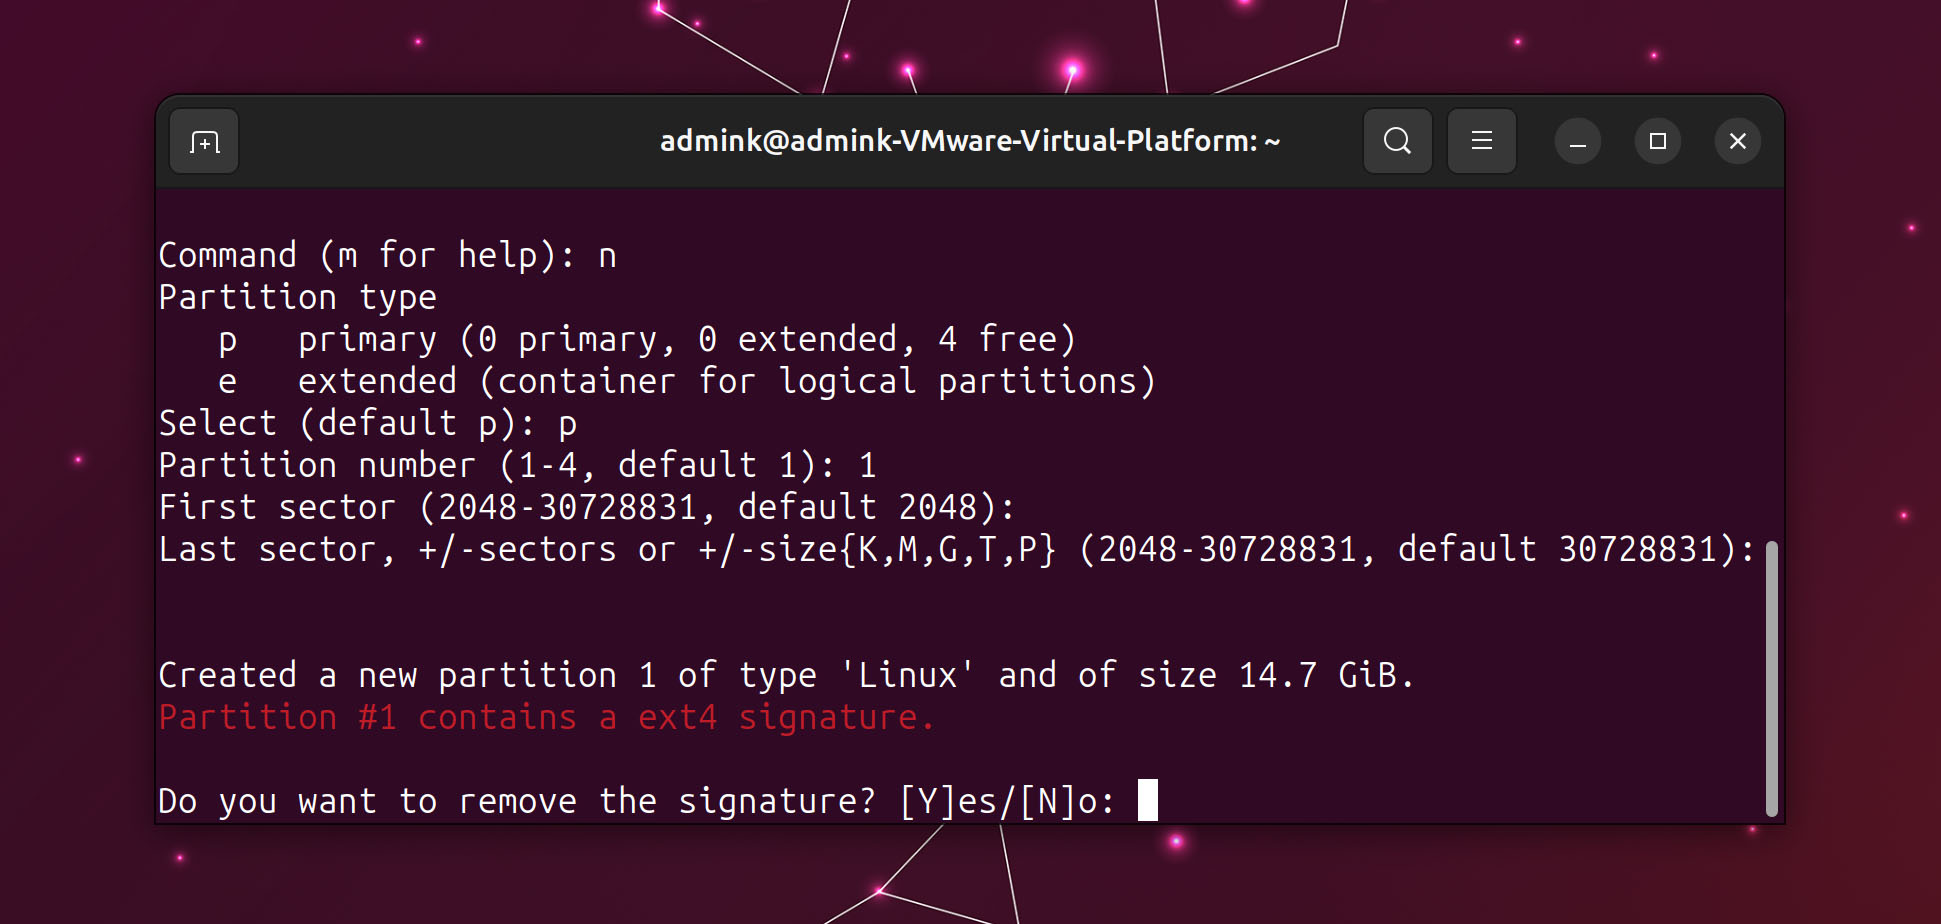
- Type n to make a new partition. Type p to make the partition primary, followed by 1 since you don’t need to create more (partitions).
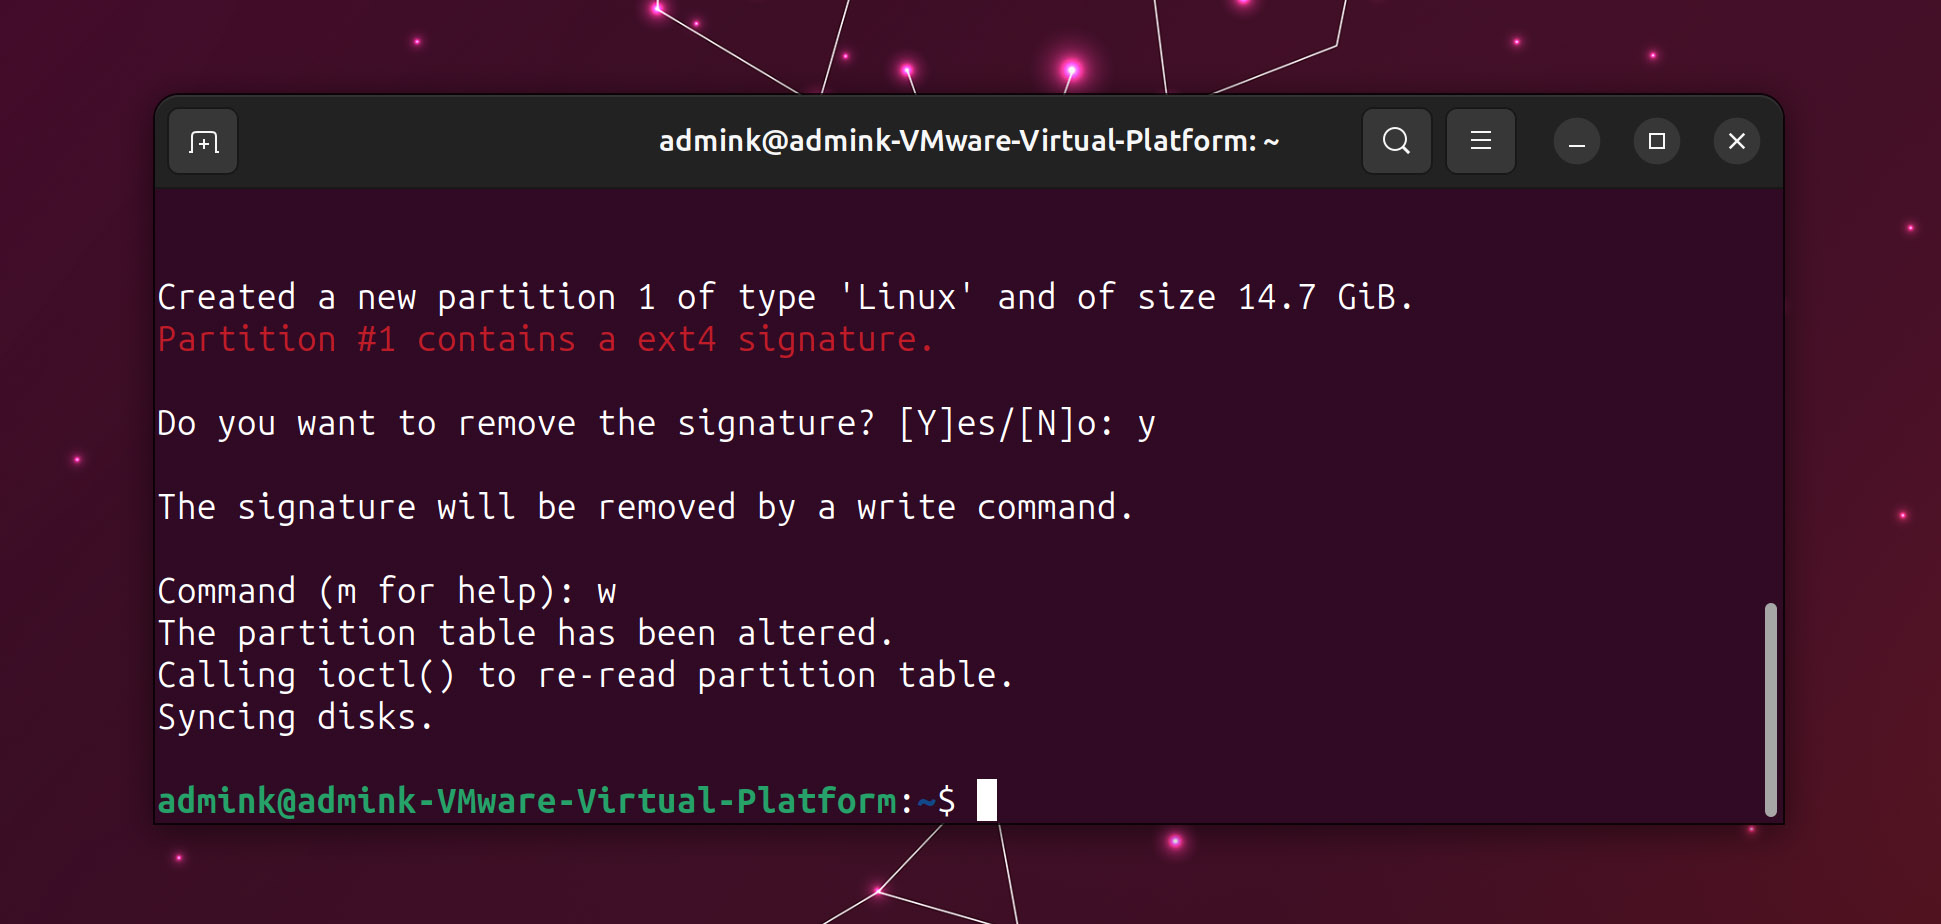
- Press Enter to accept the default values for your partition’s first and last sectors and use all available SD card space. If fdisk detects a previous filesystem signature, it will ask you to keep or remove it. Go for the second choice since you’re creating a new partition from scratch.
- Press w to write the new partition table to your SD card and quit (or q to exit without applying changes).
- Your new partition is in place, but you won’t be able to use it until you format it. We suggest you format your SD card as FAT32, the most popular format with computers and portable devices, with:
sudo mkfs.vfat -F32 -v /dev/sdc1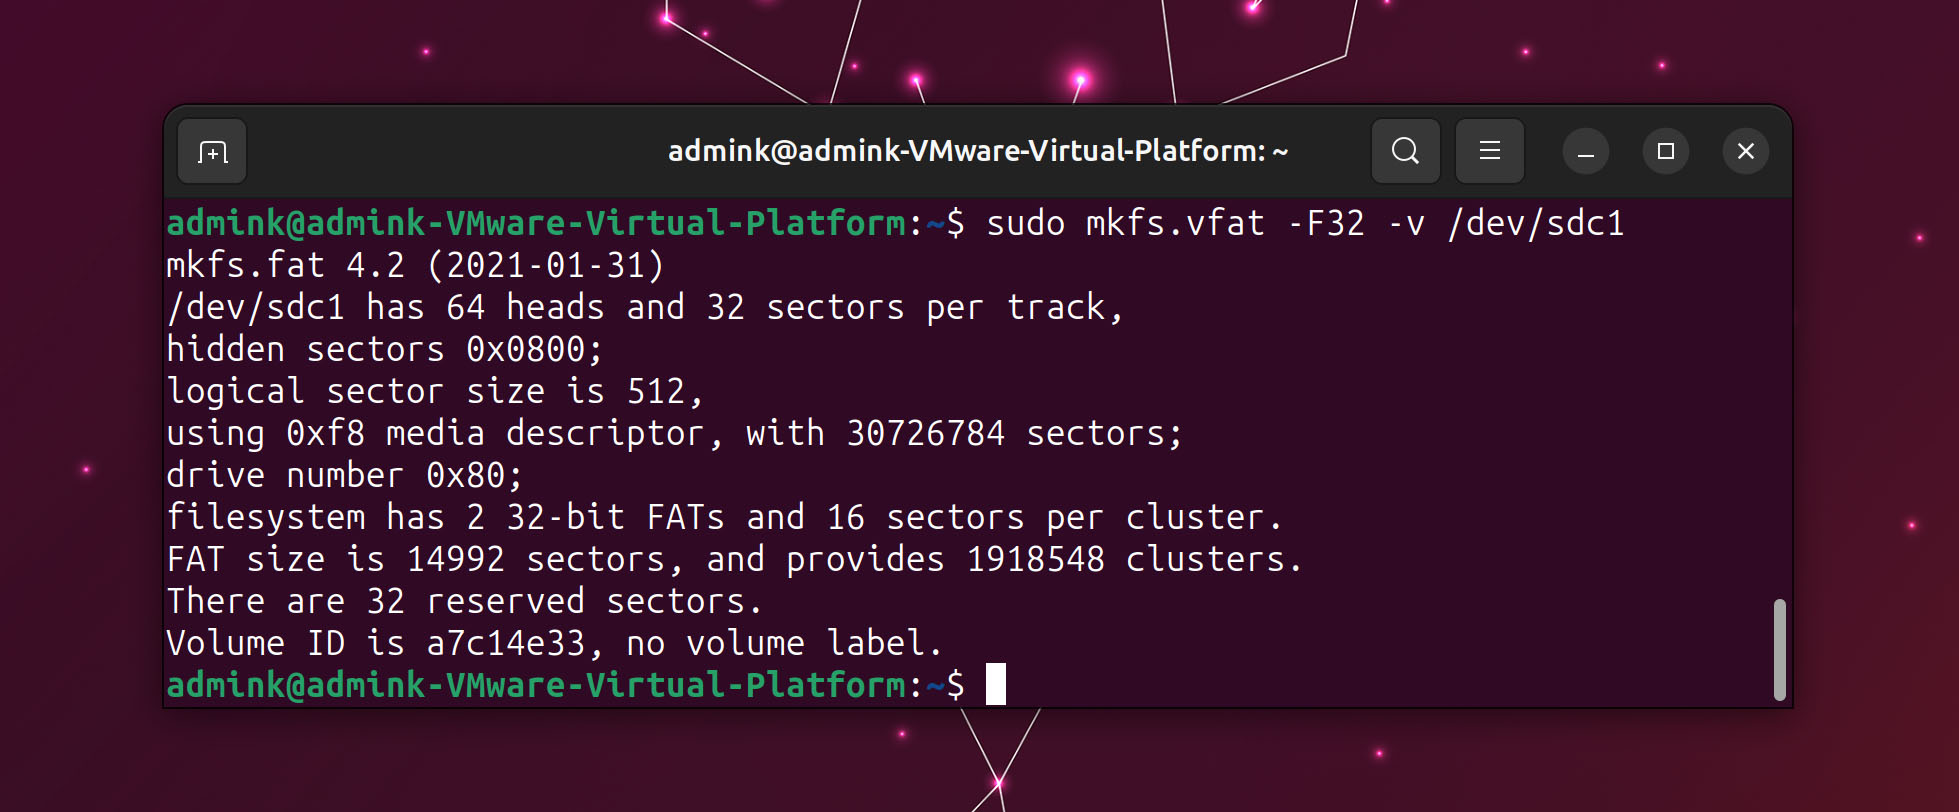
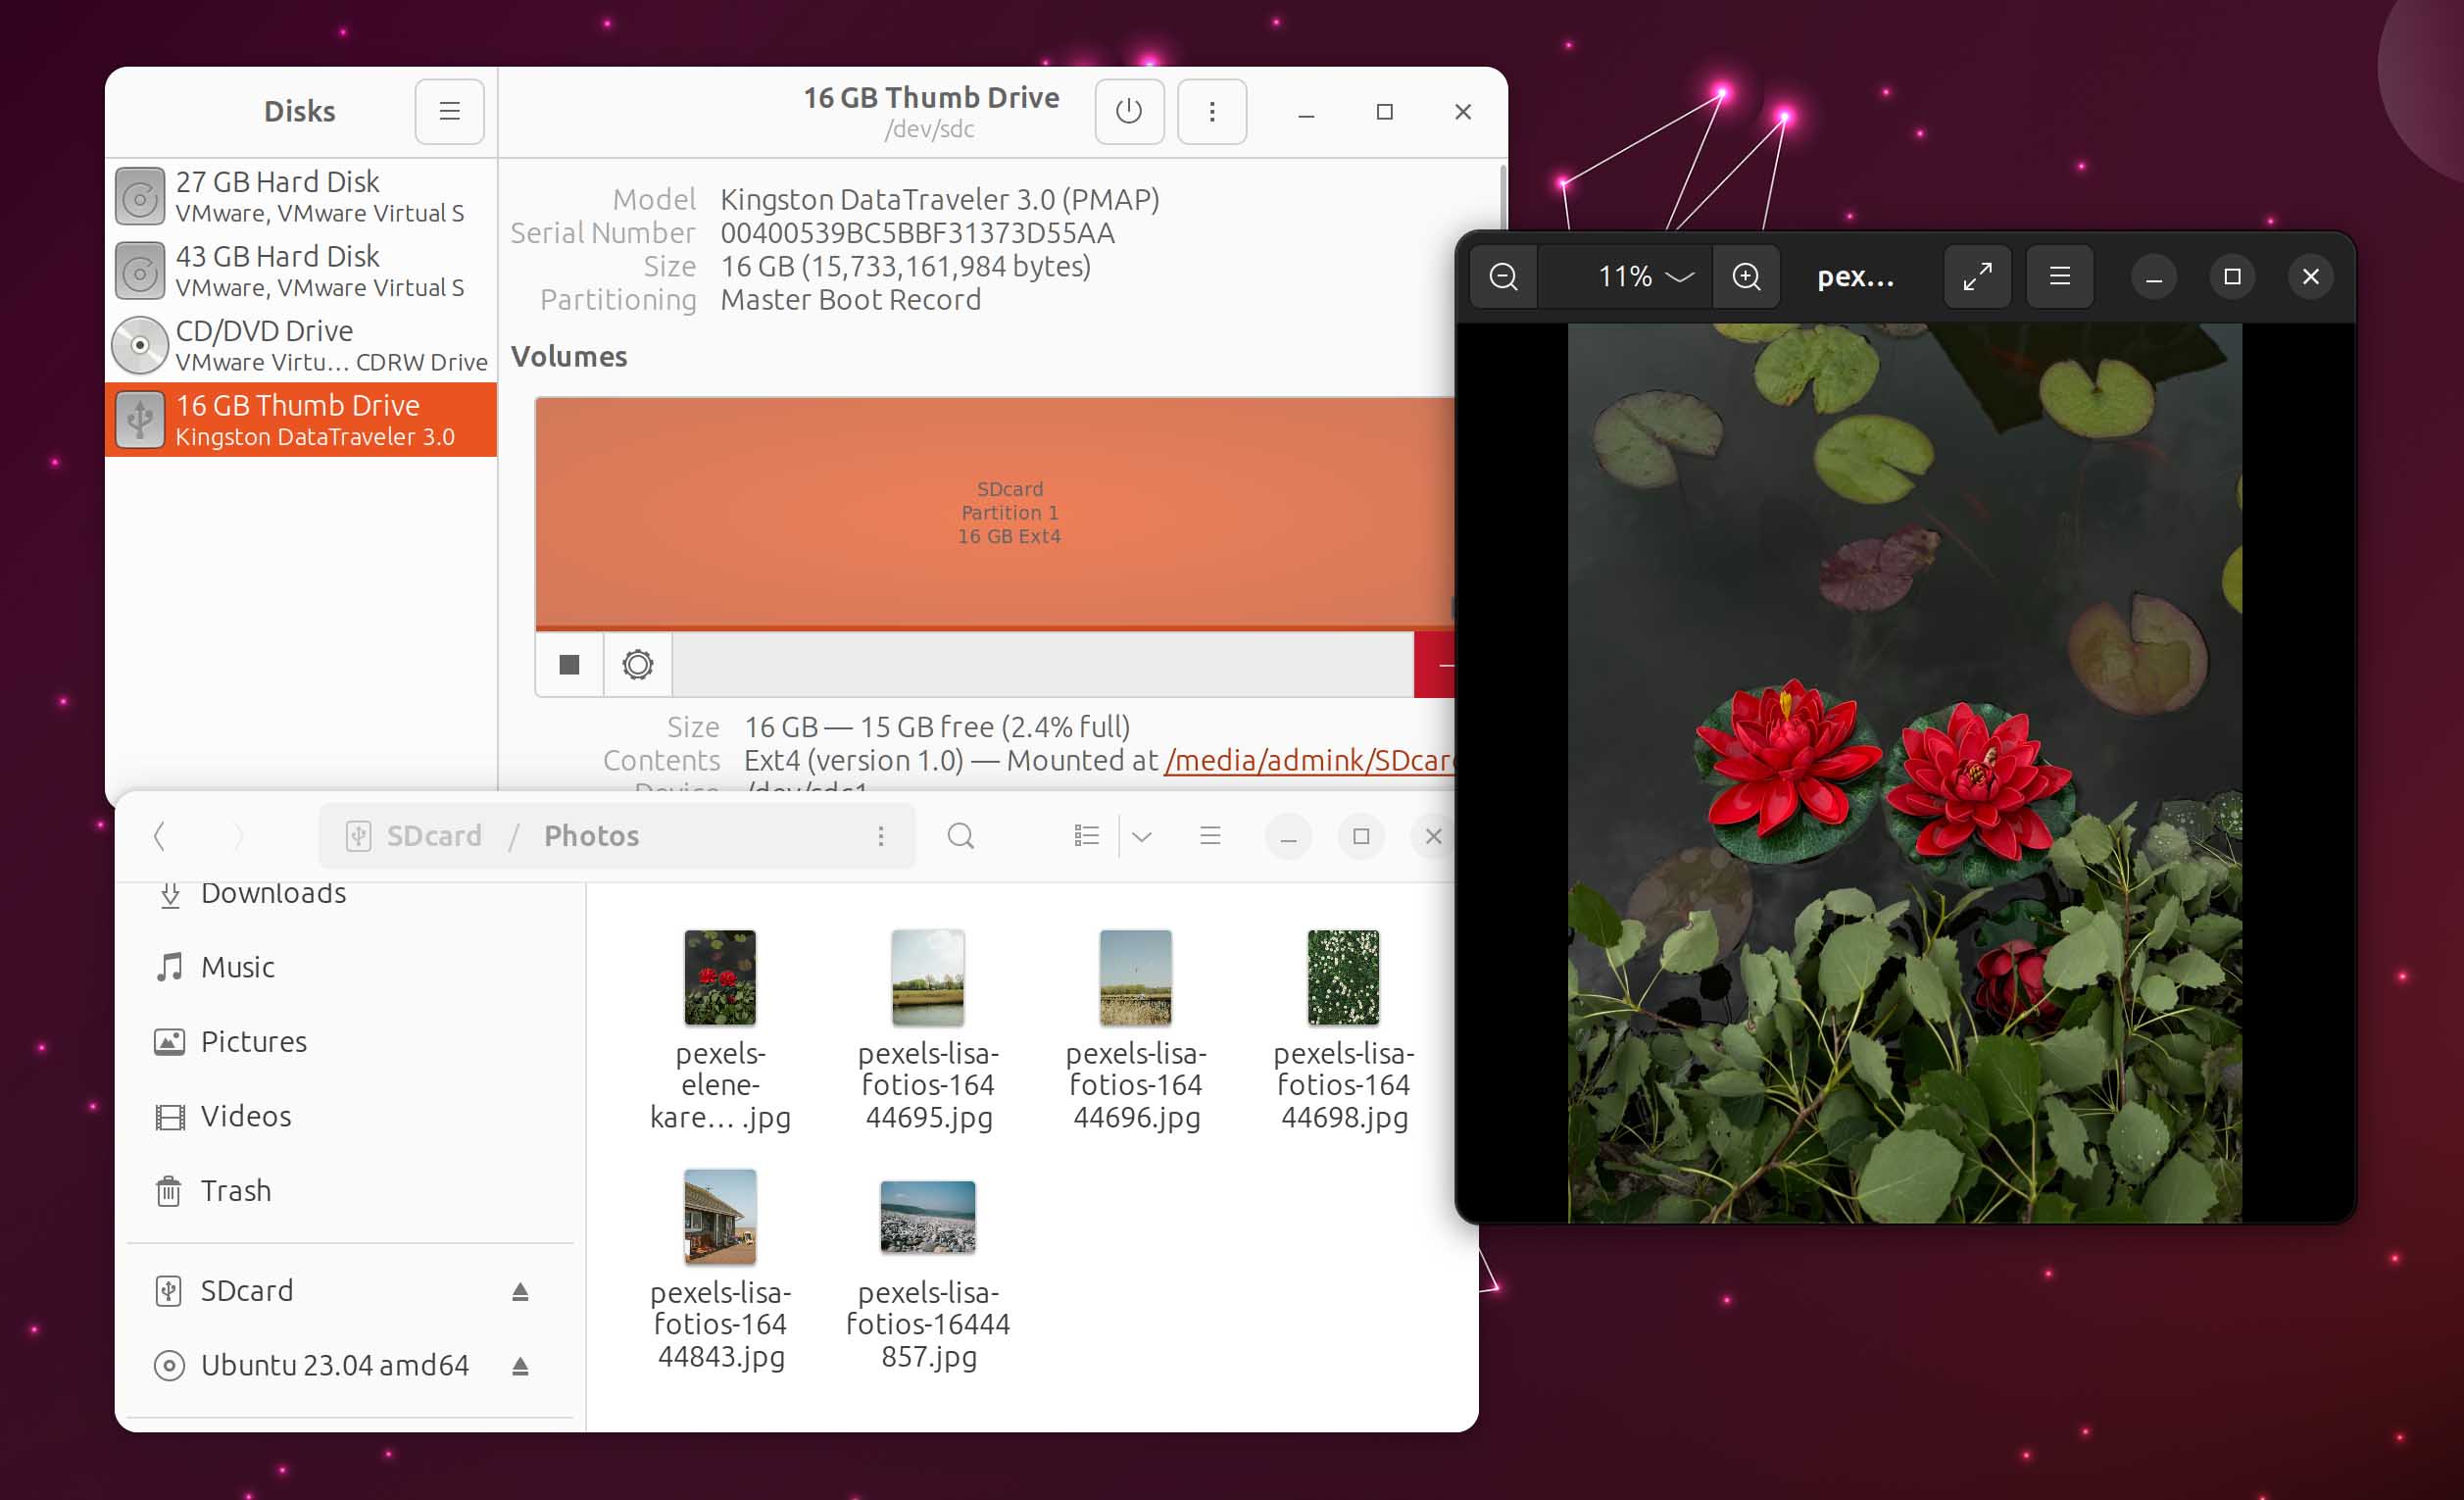
Method 2: Format SD Card With Disks
Disks allows you to manage your storage devices and is baked in distributions like Ubuntu and Linux Mint.
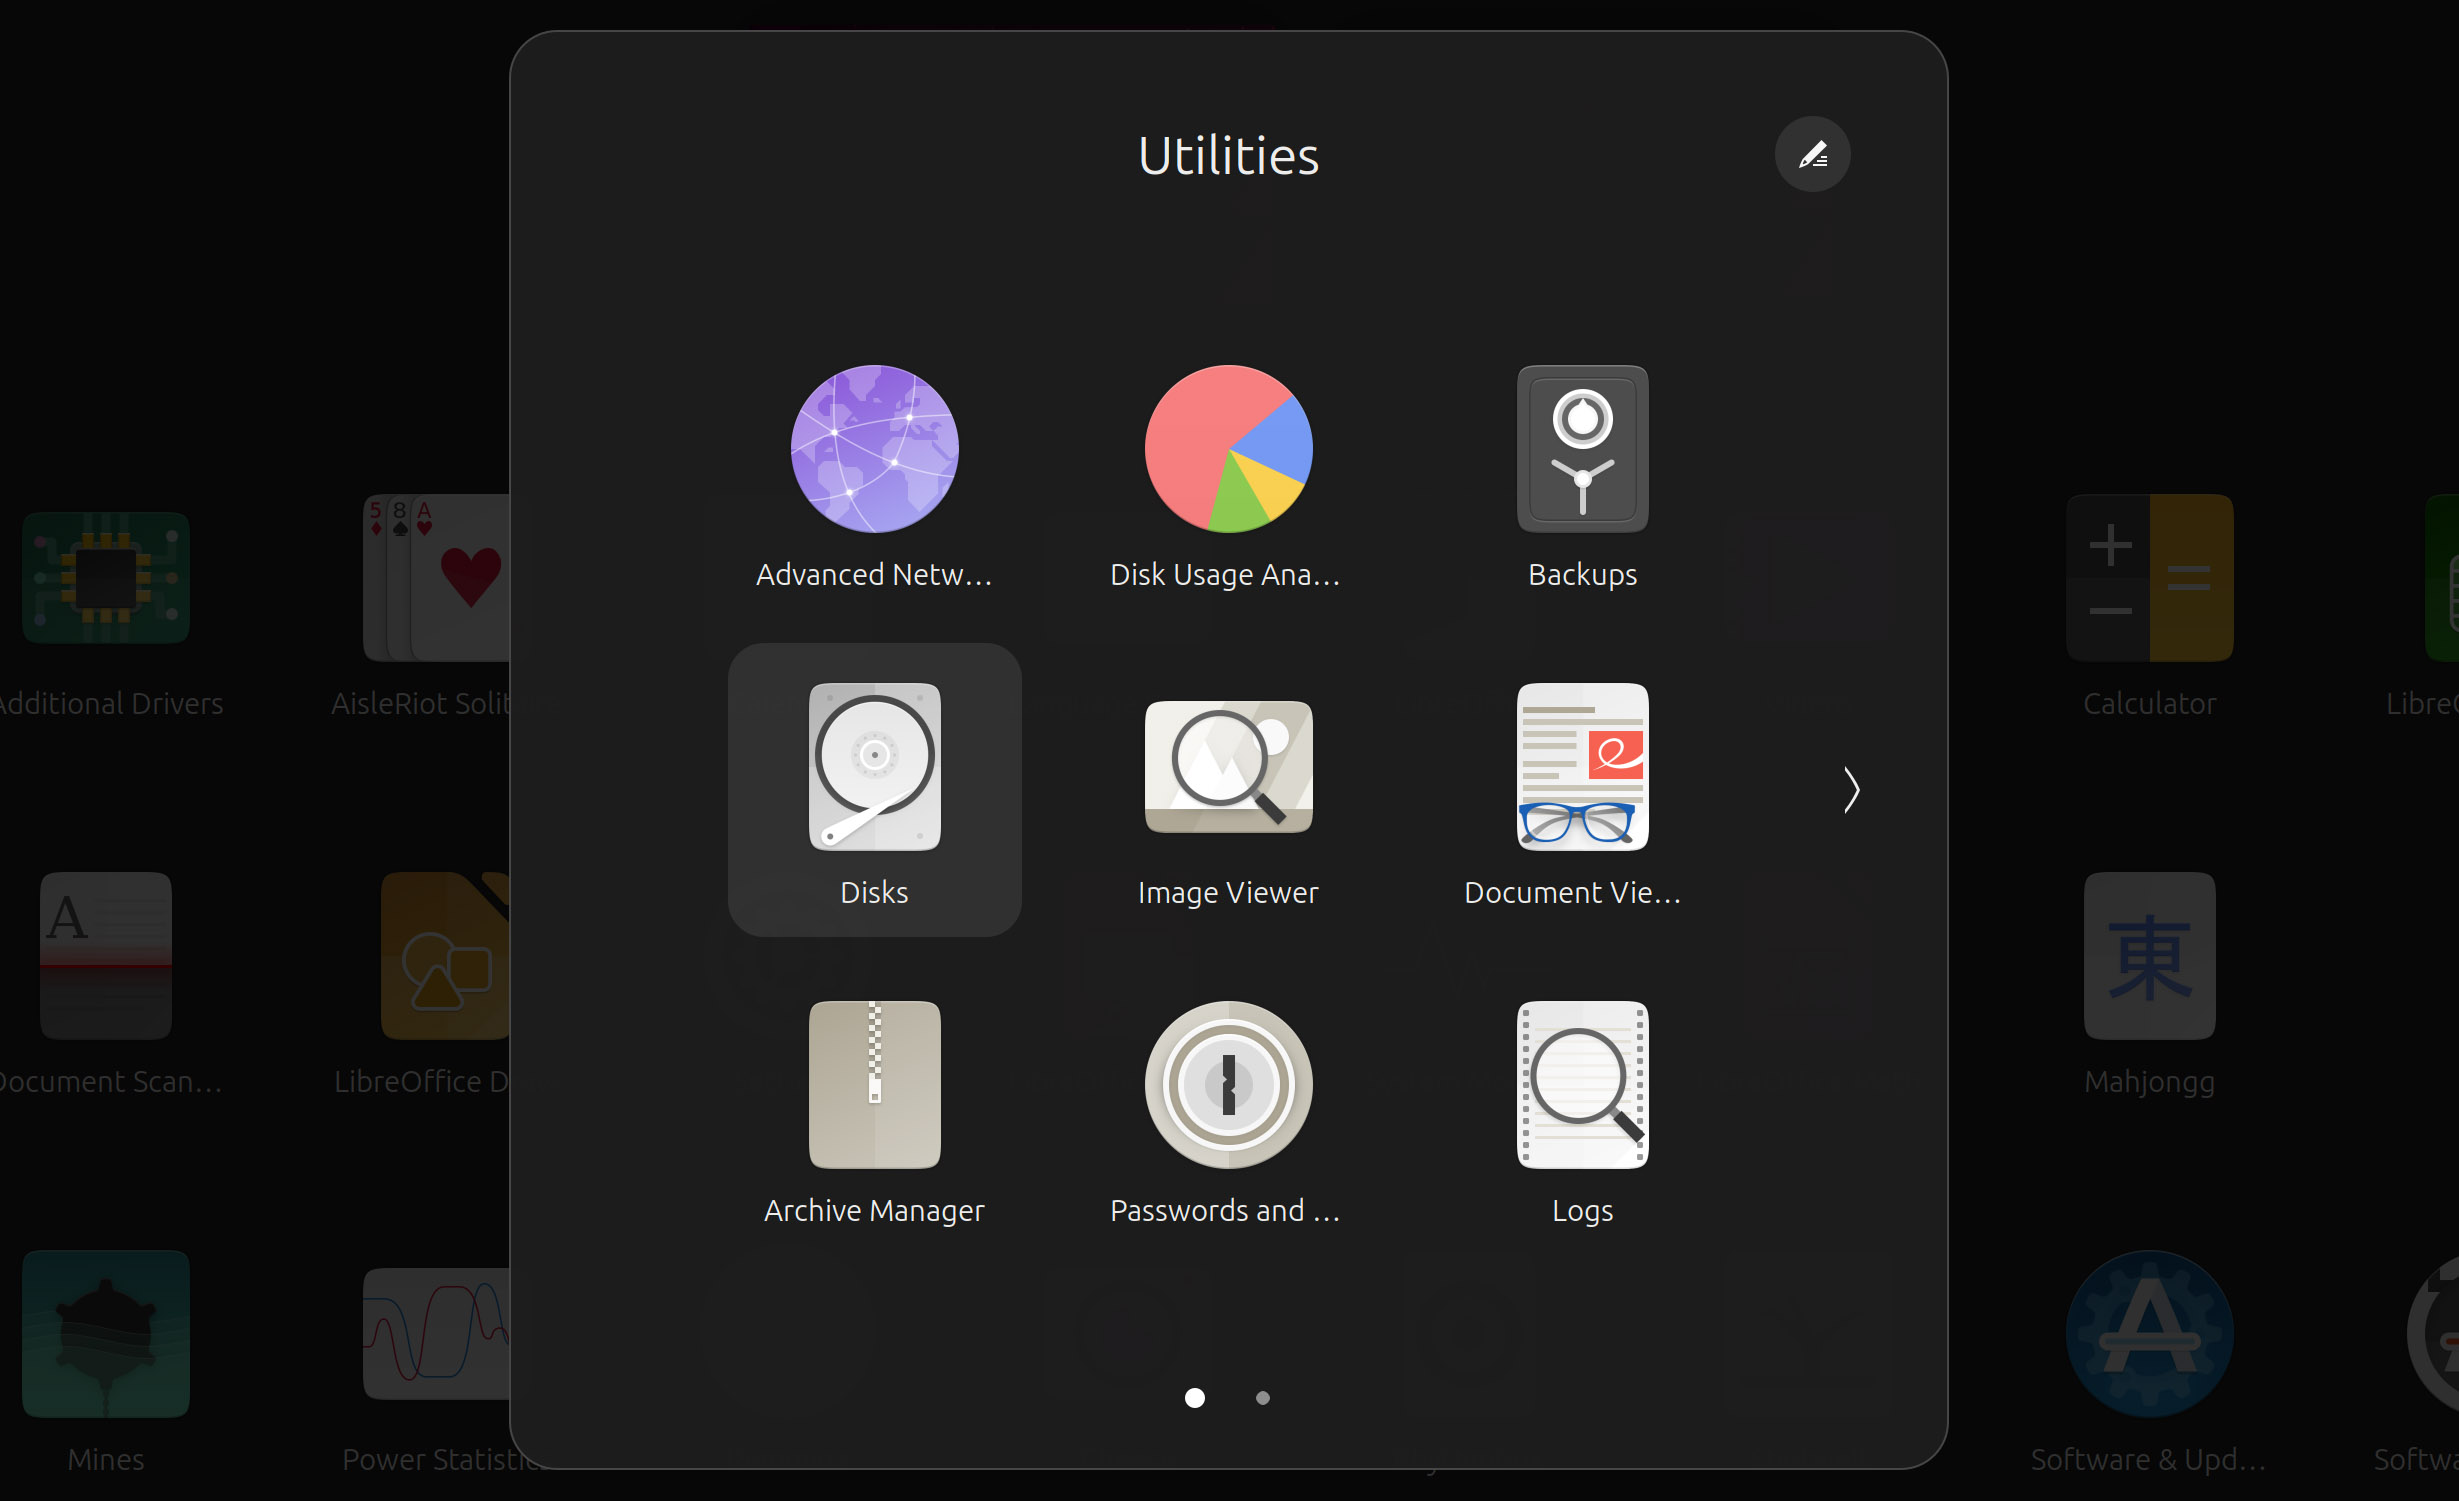
- To format your SD card with Disks, find the tool in your apps menu and run it.
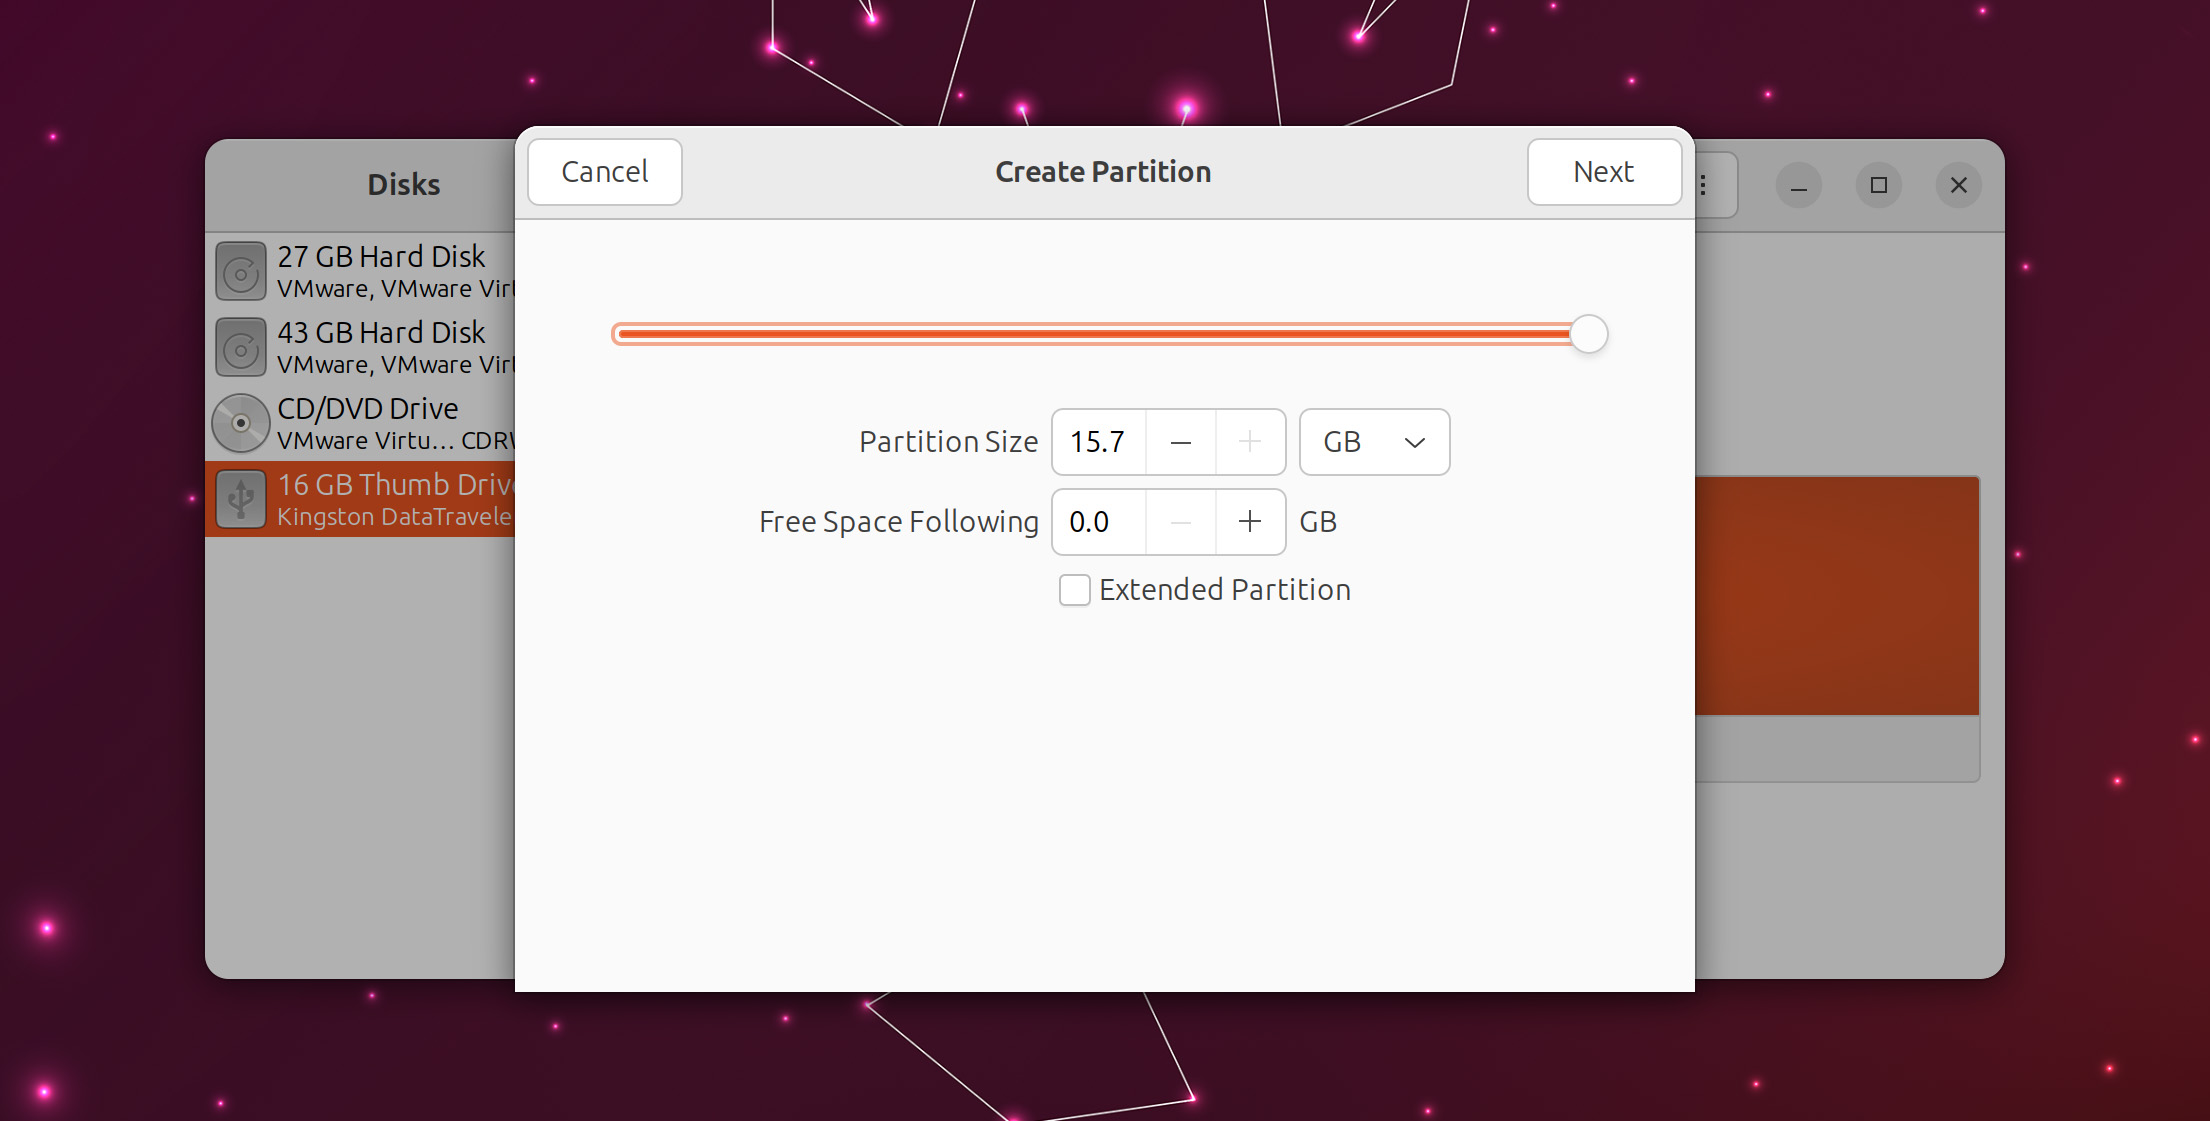
- Choose your SD card from the list on the left. Create a new partition by clicking on the button with the plus symbol.

- Leave the Partition Size and Free Space Following settings in the next step as they are to have your partition use all available space.
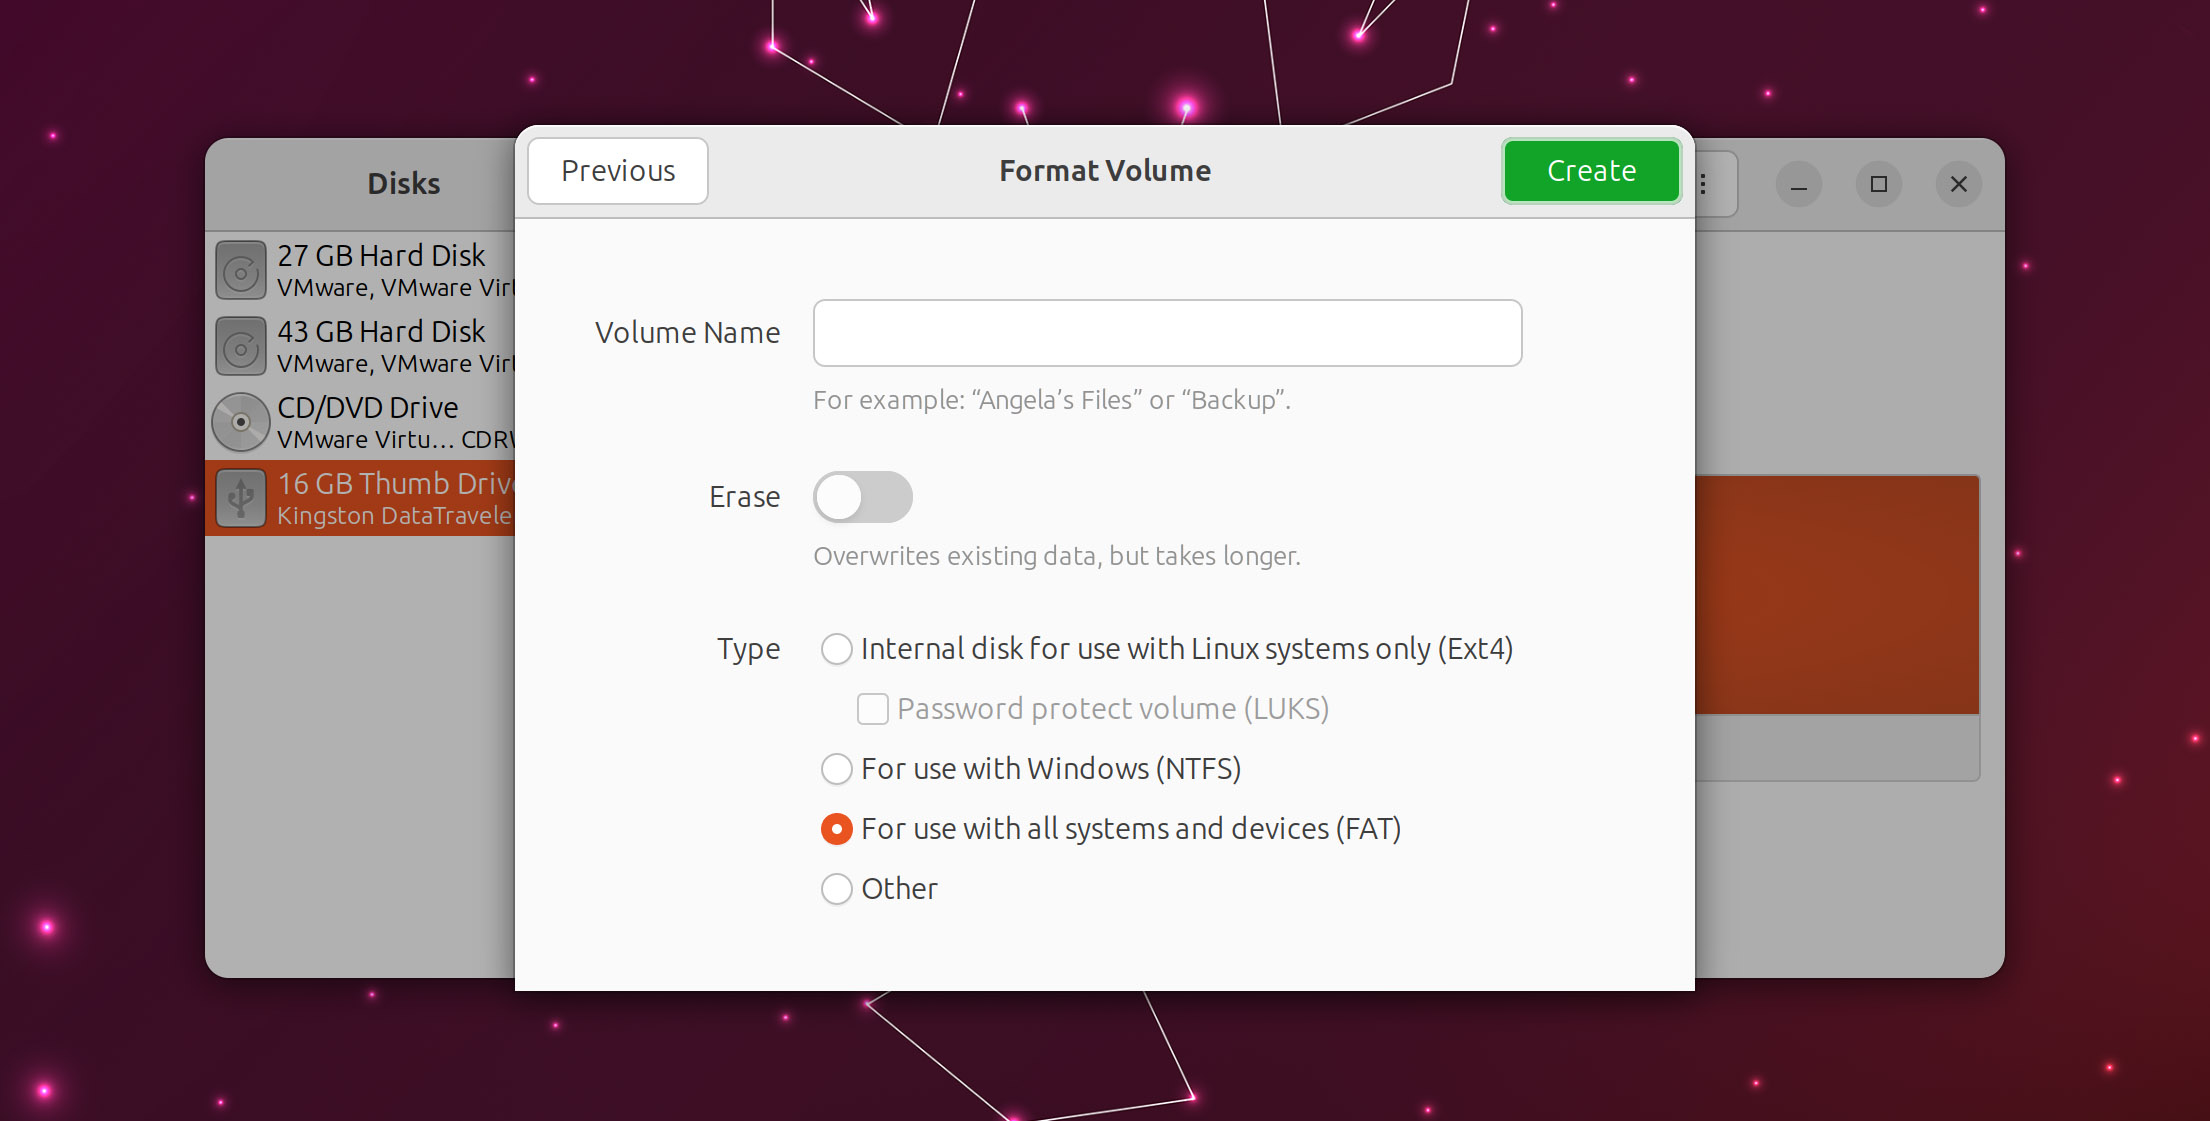
- If you wish, enter a name for your SD card in Volume Name in the next step. Enable Erase if you want to perform a full format, and choose the filesystem you prefer. For maximum compatibility, we suggest you go with FAT.
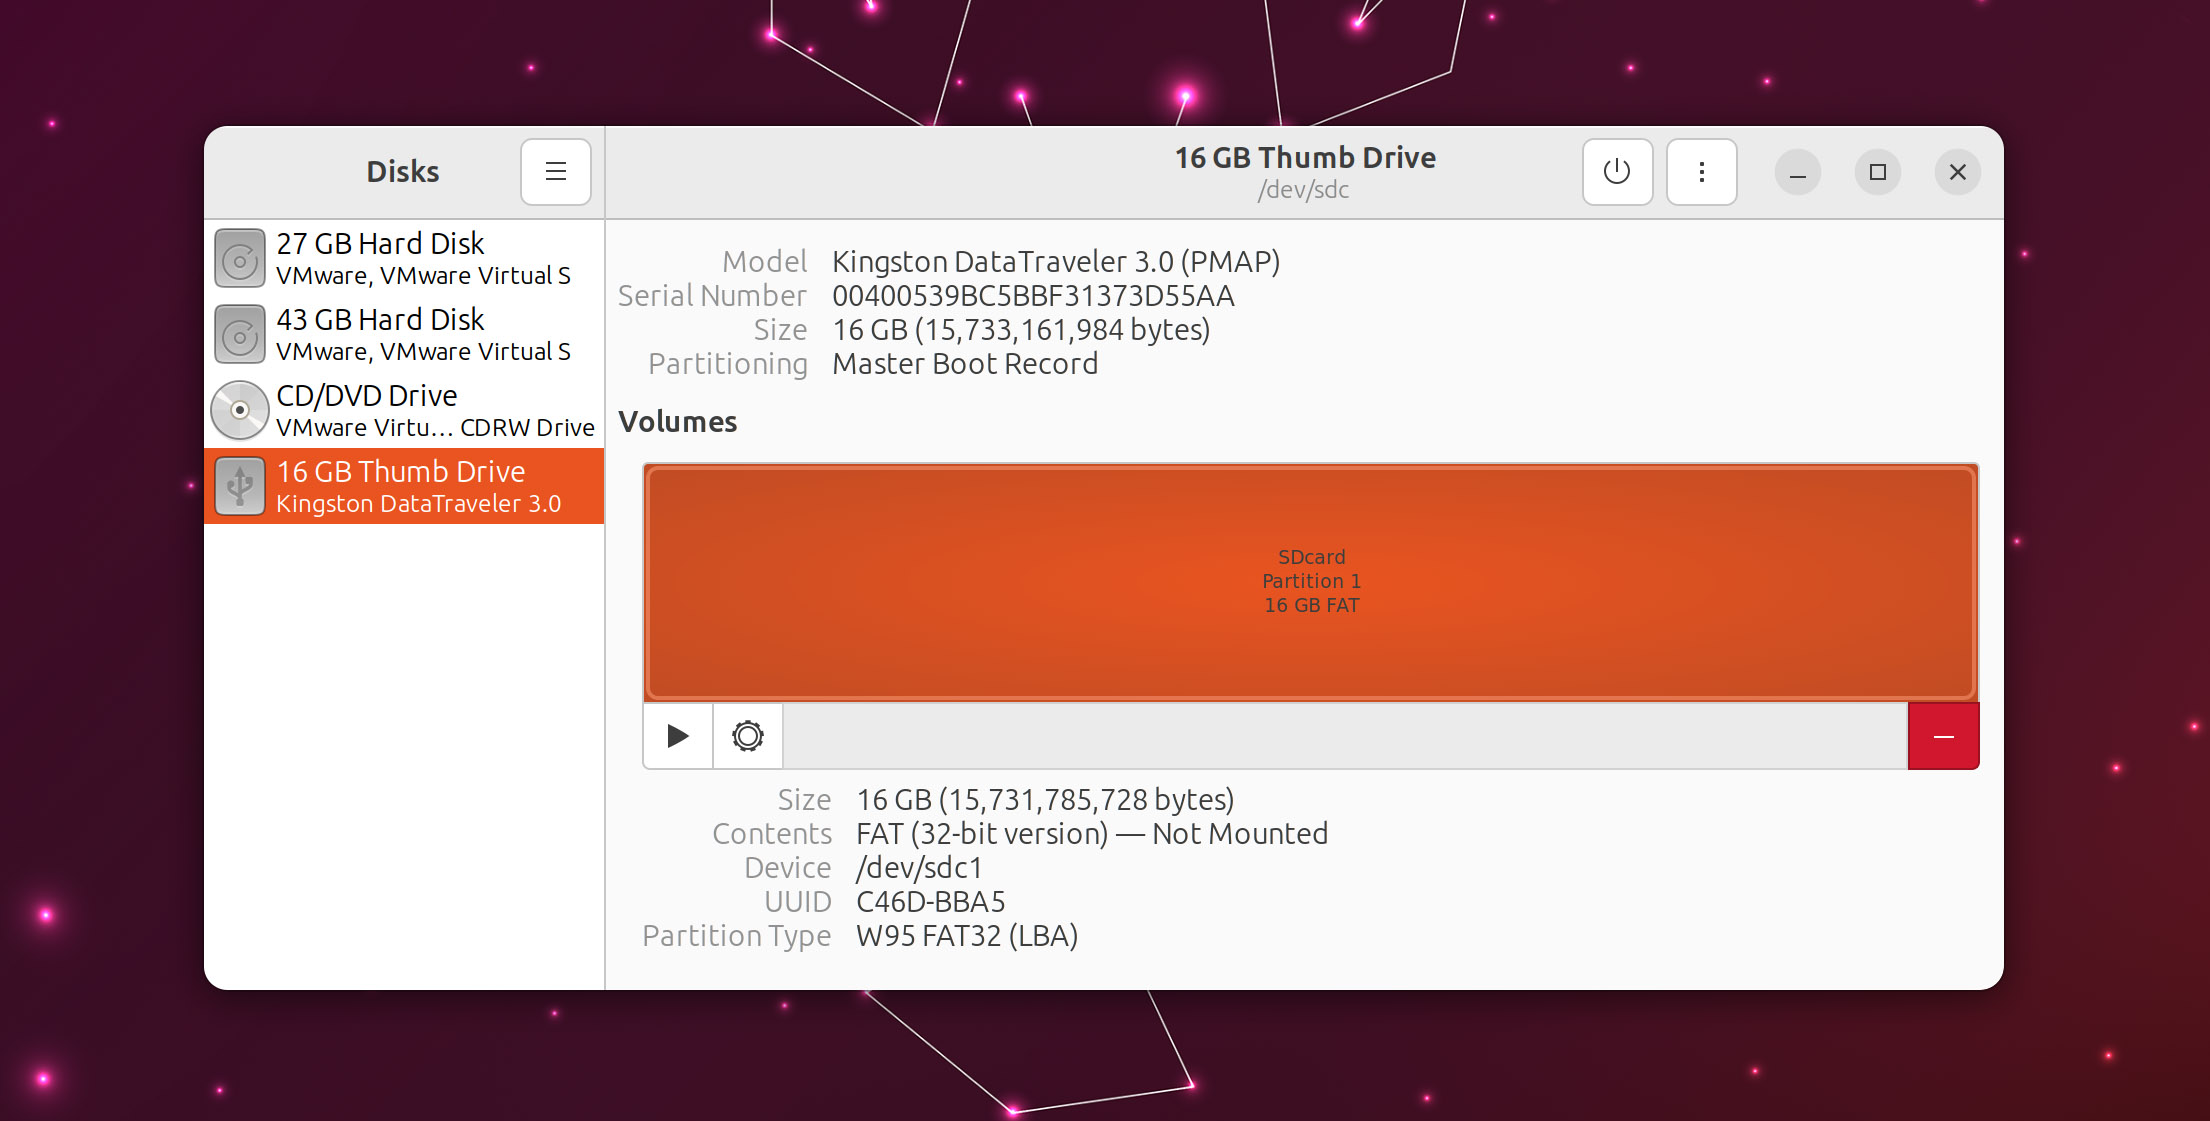
- After the format completes, you can mount your SD card directly through Disks by clicking on the play button underneath it.
Frequently Asked Questions
Is it possible to recover data from an SD Card on Linux?
Yes, there are many tools you can use to , depending on the particular case of data loss and your needs. Check our guide above for instructions on how to use some of the best of them.
Is recovering data from SD Cards on Linux the same as on Windows?
The process can be similar, but the tools are different. One significant way they diverge is that most data recovery solutions on Windows come with a GUI, whereas on Linux, they are terminal-based.
Why should I first backup my SD Card before attempting recovery?
The simplest way to put it is, when dealing with problematic storage devices, you should first get your data out of them while you still can. Being able to keep using the storage device afterward is the optimal outcome but of secondary importance.
Do I have to type (use the terminal) to recover my files on Linux?
There are GUI-based tools that can help, but the established tools are terminal-based.
How can I recover more files from failing SD card after a partially successful recovery job?
Data recovery services combine know-how with specialized equipment for salvaging data. Thanks to this, they can potentially save more data than what’s possible with “consumer-grade gear”.
Prioritize Your Data, Not Your SD Card
As we saw, and as is usually the case with Linux, what initially looks like an arcane and complex process ends up as a simple series of steps. Recovering your files and fixing your SD Card on Linux can be a relatively straightforward affair. Plus, there are many free tools from which you can choose the best for you.
Still, if your SD card is physically failing, even if you manage to recover all your data and “fix it”, it would be better if you replace it. With SD cards being affordable today, as the saying goes, it’s better safe than sorry.

Odysseas is a geek with over three decades of experience in tech who occasionally lost vast amounts of data. “Data” he managed to recover most of the time using various recovery solutions.
Eventually, he joined our team to write about such data loss and recovery scenarios and all related software and methods.
Despite having written thousands of articles and tutorials for various popular outlets, he considers his data-recovery adventures an ongoing learning experience.
- Frisco, Texas, United States
Yevgeniy Tolkunov is Hardware Engineer at ACE Data Recovery. Yevgeniy has a Master's Degree in Physics, Information Technology; 15+ years of experience.