
How to Recover Files Lost During Cut and Paste
You never expected you’d have to recover after a mere cut and paste files you considered a given. Pressing a shortcut to cut data from point A and paste and move it to point B is so effortless it also feels foolproof. And yet, sometimes, the process might fail, leaving your data in limbo.
Thankfully, we can offer various suggestions on how you can recover after a cut and paste any files on Windows 10 or 11.
Make Sure Your Files Are Actually Lost During Cut and Paste
If you pasted and re-pasted your copied files into your chosen target folder, but they’re missing, maybe they aren’t really lost.
Check Previous File Location
It’s possible to press a different key combination absent-mindedly, like CTRL + Z instead of CTRL + X, while attempting to cut and paste some data. Or you might have cut some files and folders to then paste elsewhere but never got to the “pasting” part. You could have forgotten about it, performed another cut and paste, rebooted your PC, etc.
In such a case, you don’t have to undo the cut files process because it never happened! Thus, you don’t have to recover files cut but not pasted: your missing files are probably where you left them.
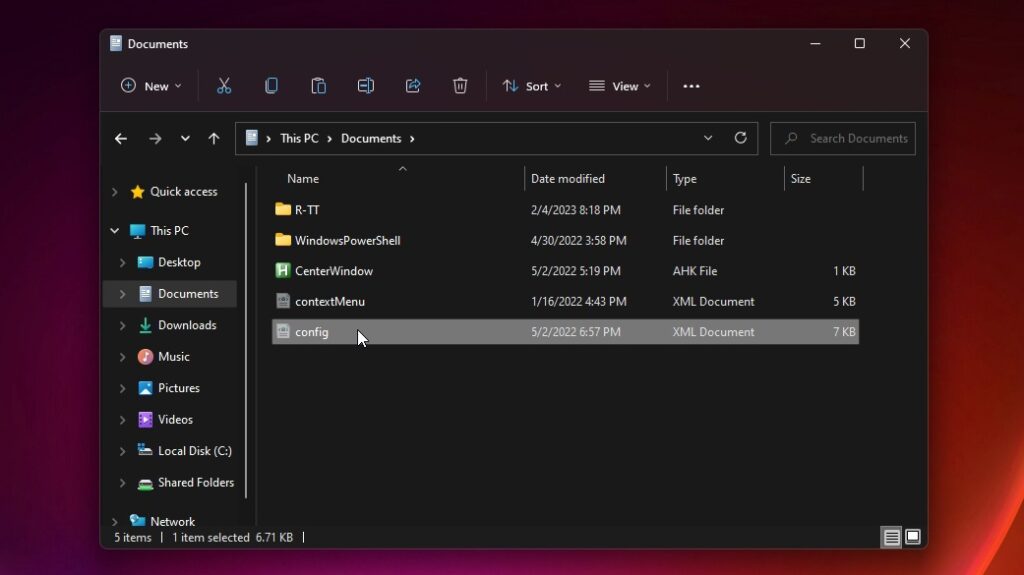
Locate Files Using Search
You can’t find the files that seem to have disappeared while copying with a cut and paste, no matter where you’ve looked? Windows Search may help.
Click on Start or Search on the Windows taskbar. Start typing part of the name of the file you’re seeking – for example, “January” or “report”. Windows Search will present any files matching the pattern you typed.
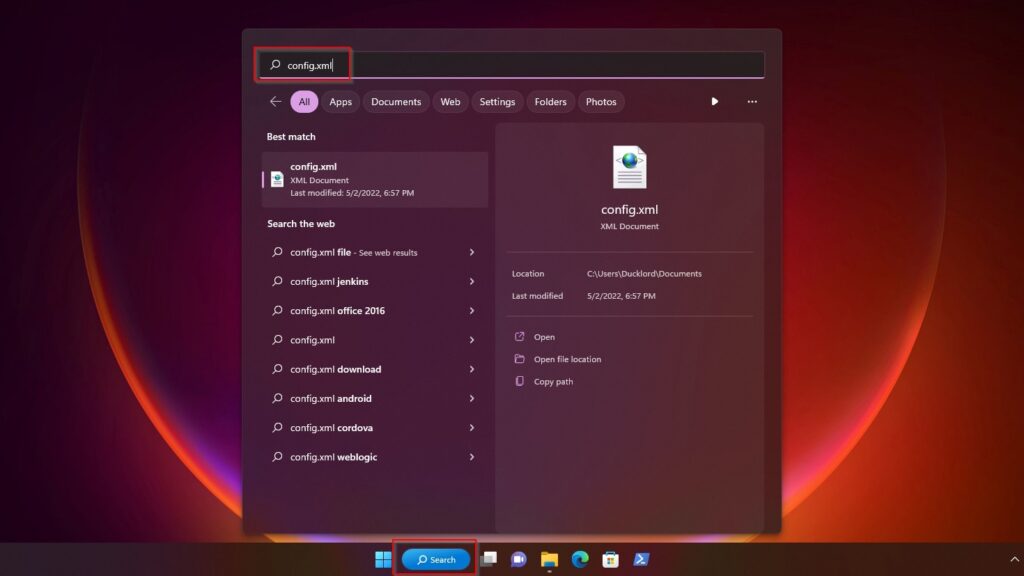
To restore any file you lost during a transfer that Windows Search located, right-click on it and choose Open file location. Then, move the file back to its original location with your file manager.
How to Recover Files Lost After Cut And Paste
The best way to restore data after a failed cut and paste and get back files that disappeared on Windows 10/11 is by using a specialized app.
Fortunately, we have thoroughly tested almost all popular data recovery solutions. We’ve analyzed them to their bits and bytes, compared their features, and pinpointed all their pros and cons.
That’s why, for this article, we’ll use Disk Drill and Recuva – which we’ve pitted against each other in the past.
Still, those are only two of your options. For more, check our in-depth look at the best recovery apps. And if those are not enough, we also have an alternative list with the best data recovery apps specifically for hard disk drives. Even if you didn’t see your favorite app among our choices:
- You’ll probably find it among our extensive index of data recovery software reviews.
- Check our comparison tool to see how the app you prefer fares against others.
However, the optimal way to locate the best data recovery solution for you is by using our Ultimate Data Recovery Software Picker. It’s a straightforward interactive tool through which you can narrow down your choices based on your preferences and priorities.
Option A: Disk Drill
![]() Of all the recovery apps we’ve tested, Disk Drill is the one we always return to. The app hides a powerful recovery engine behind its straightforward interface, able to successfully salvage files even from corrupted or RAW storage devices.
Of all the recovery apps we’ve tested, Disk Drill is the one we always return to. The app hides a powerful recovery engine behind its straightforward interface, able to successfully salvage files even from corrupted or RAW storage devices.
This article isn’t about all of the app’s pros, though – for those and more, make sure to check our comprehensive Disk Drill review.
To recover files lost during cut and paste with Disk Drill:
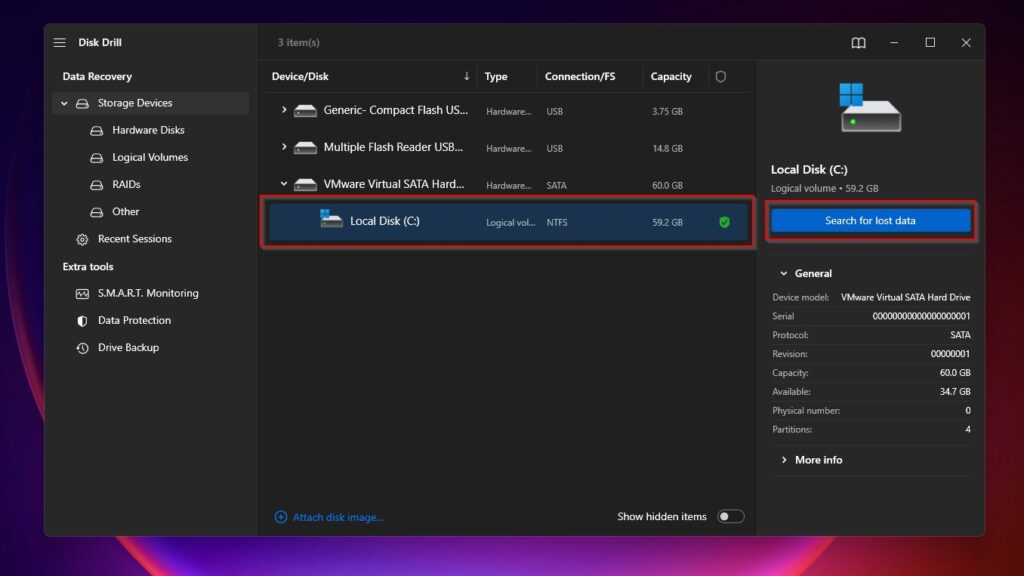
- Download Disk Drill from its official site, install, and run it. Select from Disk Drill’s Device/Disk list the source or destination drive from where files disappeared while copying with cut and paste. Then, click Search for lost data.
- Let Disk Drill finish its scan. When it completes, click on Review found items to see all the files it found. If you only scanned a partition, Disk Drill will also suggest to scan the entire disk to potentially locate more files.
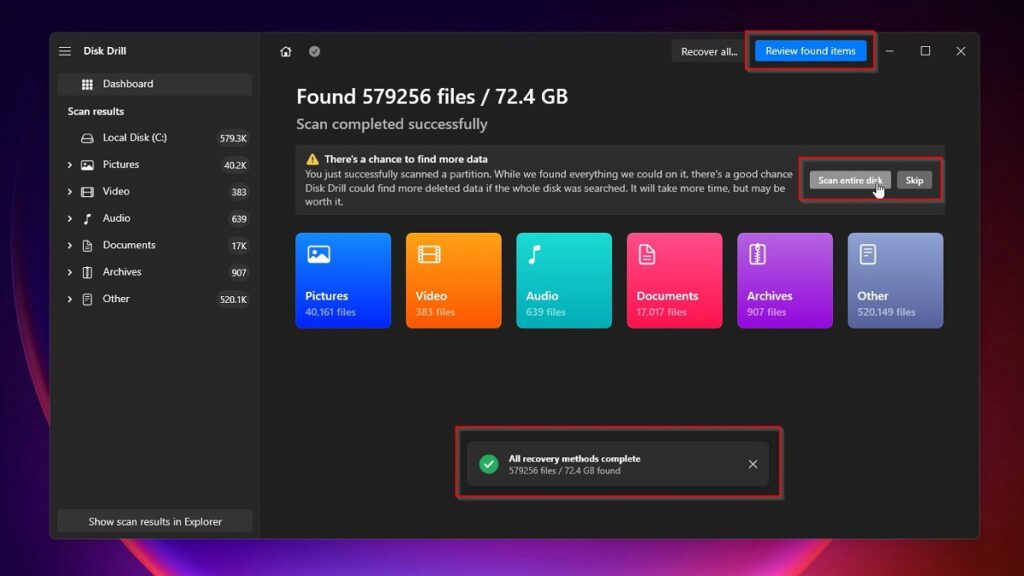
- Disk Drill might present thousands of files, depending on the size of the drive you scanned. To make sense of them, distill them to what you seek using the categories on the left.
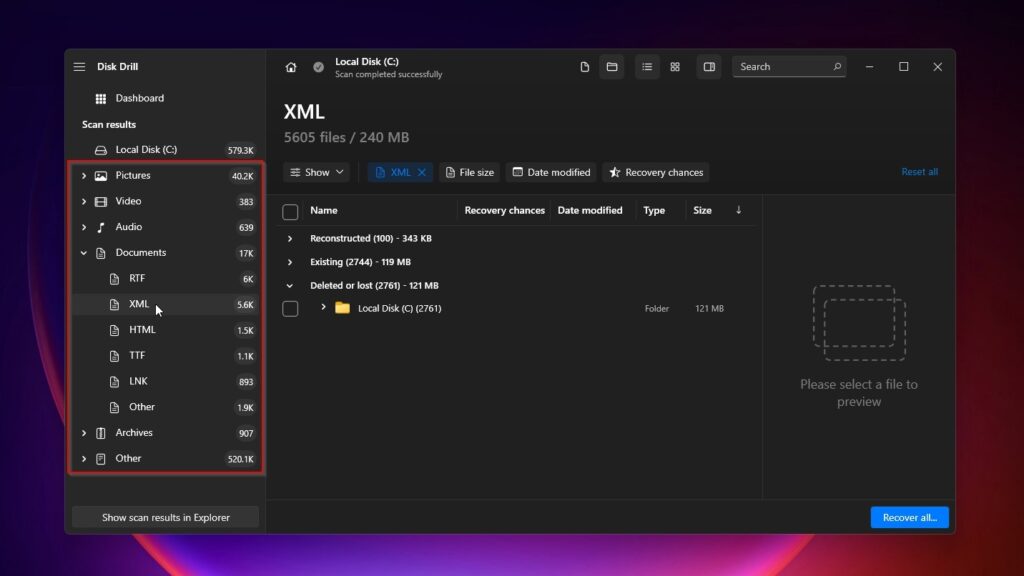
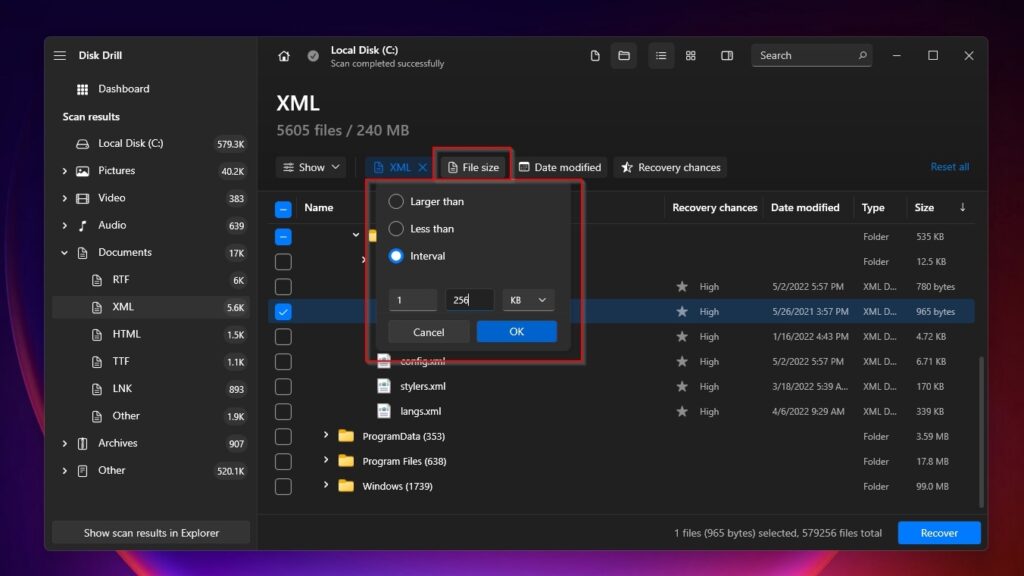
- Using the filters above the results list, you can do the same. Those allow you to trim the list to only show files within a specific date range, size, etc.
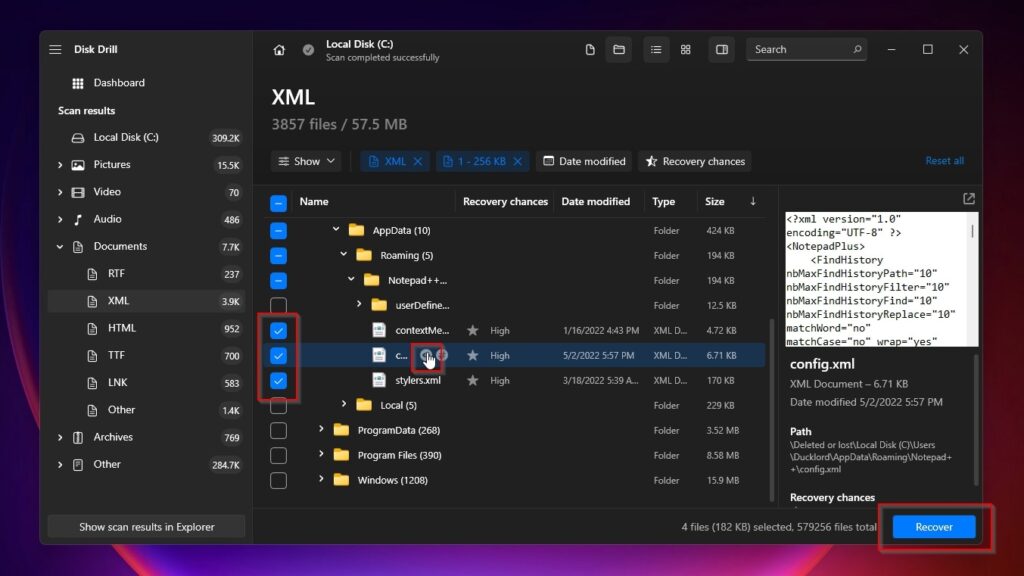
- Disk Drill lets you check the contents of files like images and text documents by clicking on the little hovering eye icon next to their name. You can do the same by right-clicking on them and choosing Preview. Place a checkmark on their left, and click on Recover to have Disk Drill restore the files you lost during cut and paste.
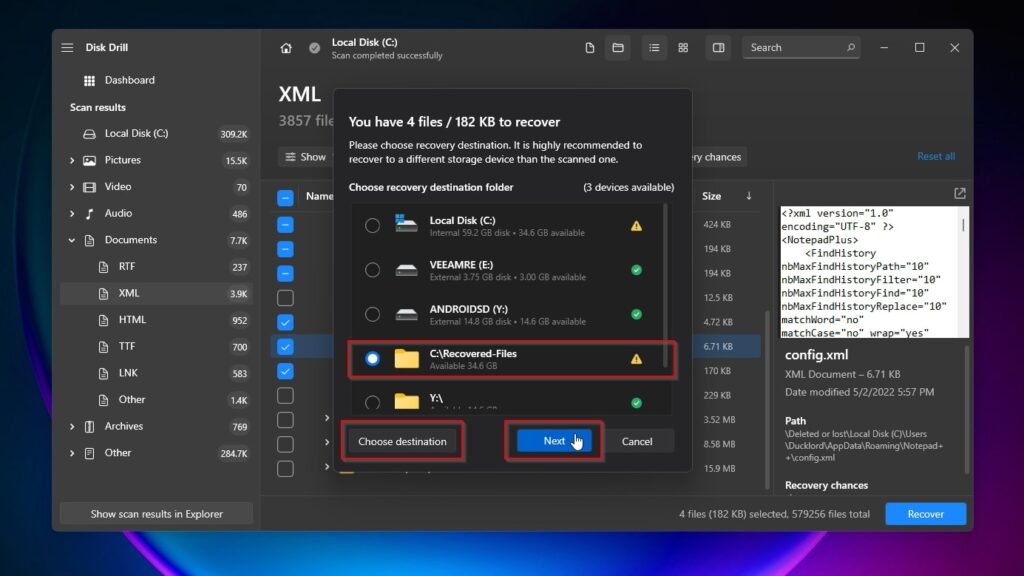
- Next, choose where Disk Drill will retrieve your deleted copy and paste files. To ensure the files you’re trying to recover won’t be overwritten, click Choose destination and select a different storage device than the one from which Disk Drill will recover your botched cut and paste files.
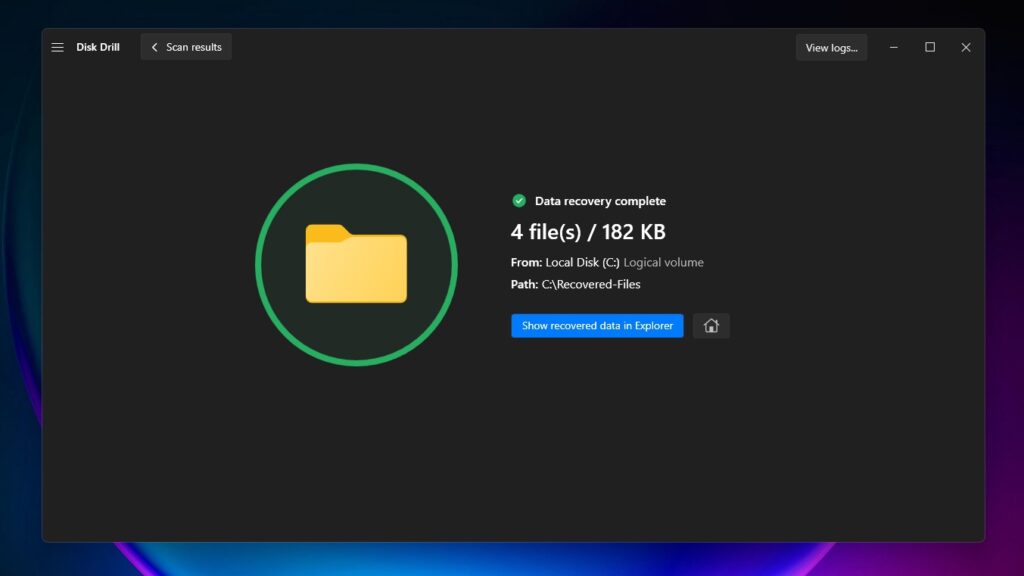
- When done, Disk Drill will show a brief report. Click Show recovered data in Explorer to see your recovered cut and paste files on Windows 10/11’s default file manager.
Option B: Recuva
![]() Recuva is another popular data recovery app that you can use to restore failed cut and paste files that disappeared on Windows 10 and Windows 11, despite the app not officially supporting the latest version of Microsoft’s OS.
Recuva is another popular data recovery app that you can use to restore failed cut and paste files that disappeared on Windows 10 and Windows 11, despite the app not officially supporting the latest version of Microsoft’s OS.
It’s worth noting that this is but one of its limitations. Hence, checking our thorough review of Recuva is advised before unleashing it on your storage devices.
Still, you might prefer how you can use Recuva for free without any limitations, compared to more full-featured and performant but costly solutions.
To recover the files you lost during a cut and paste transfer with Recuva:
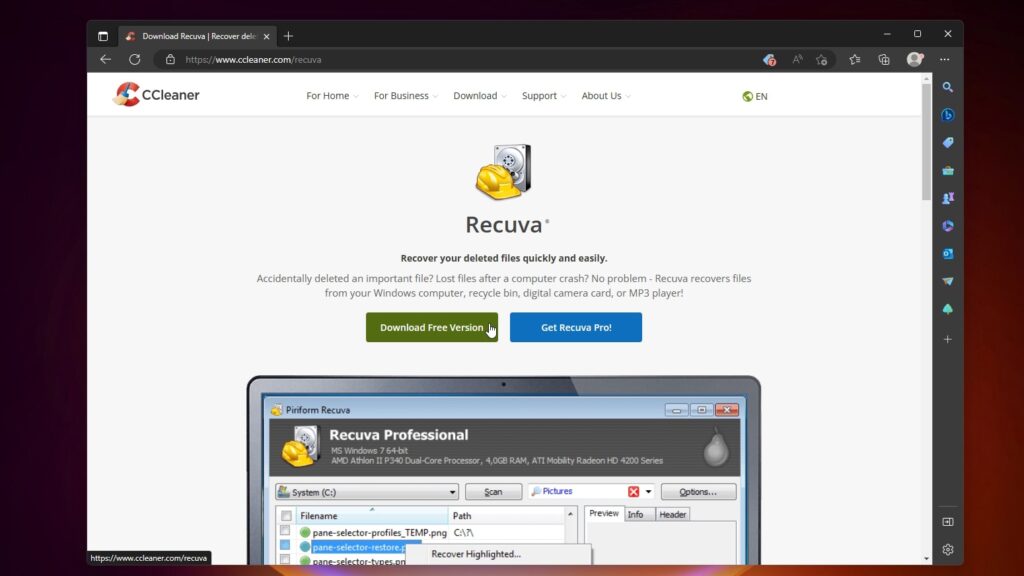
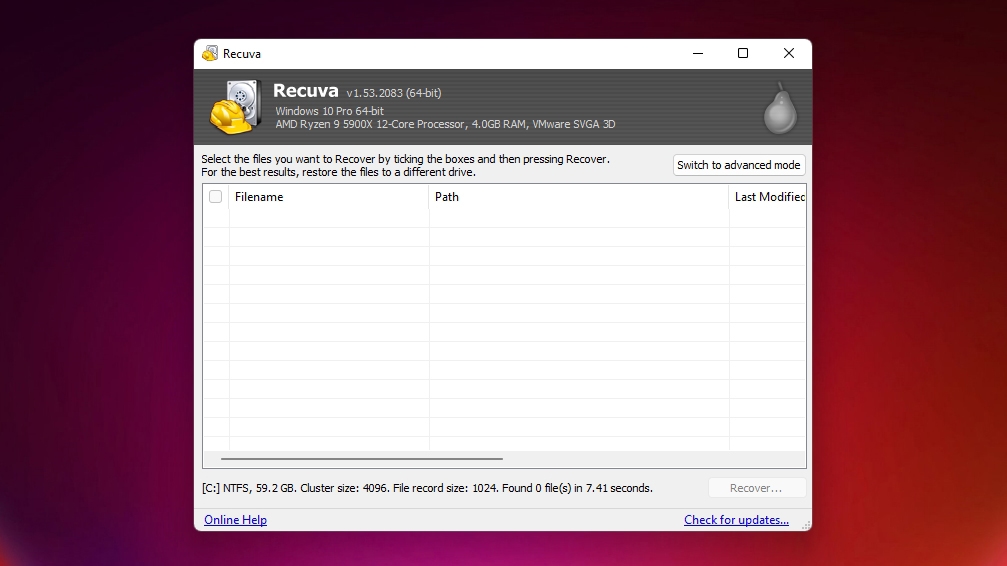
- Download Recuva from its official site, install, and run it.
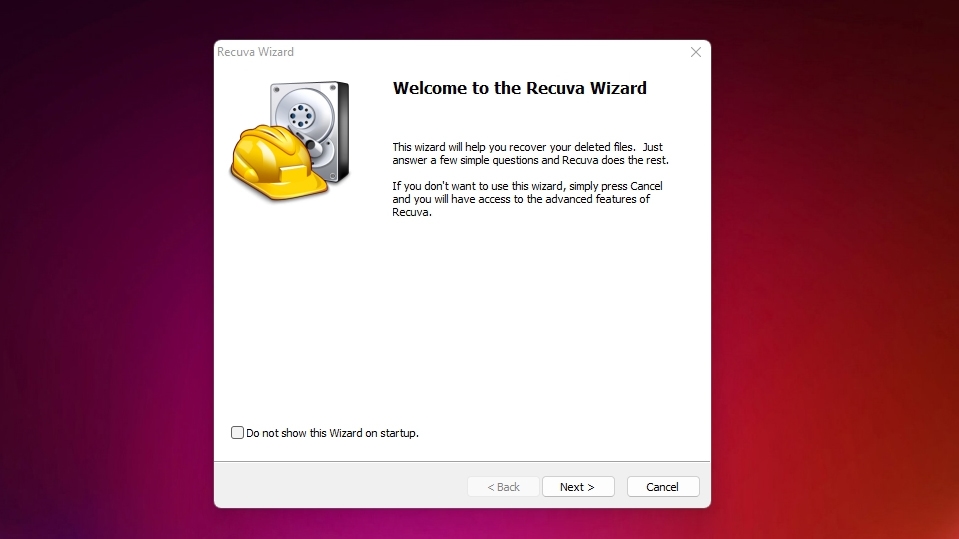
- Recuva will start in its easy-to-use Wizard mode. Click Next to continue.
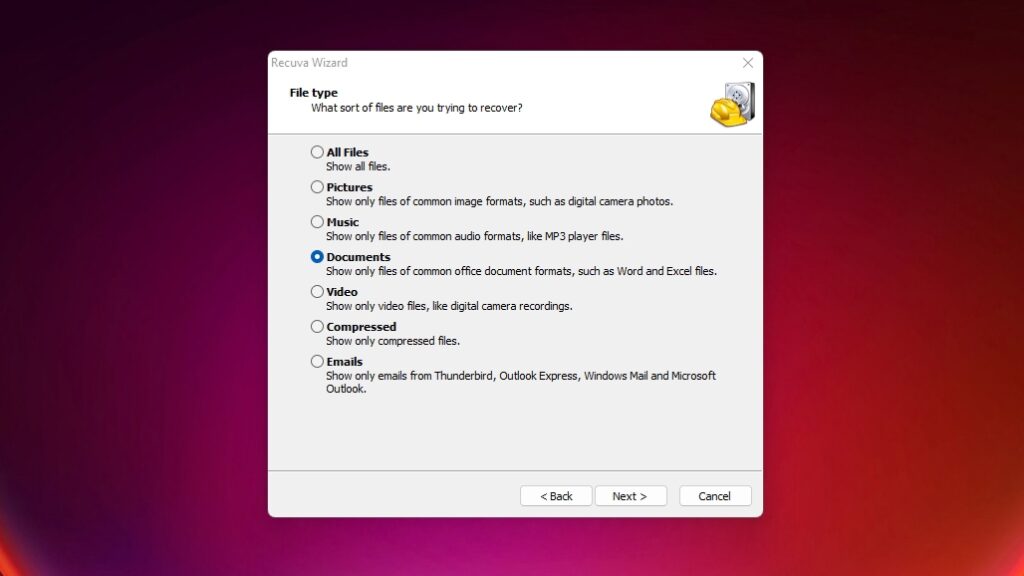
- Select the type of files you’re seeking from Recuva’s File type list, then click Next.
- Set the storage device from where you want to restore files you lost during the failed cut and paste process as Recuva’s File location.

- Click Start to begin scanning your drive.
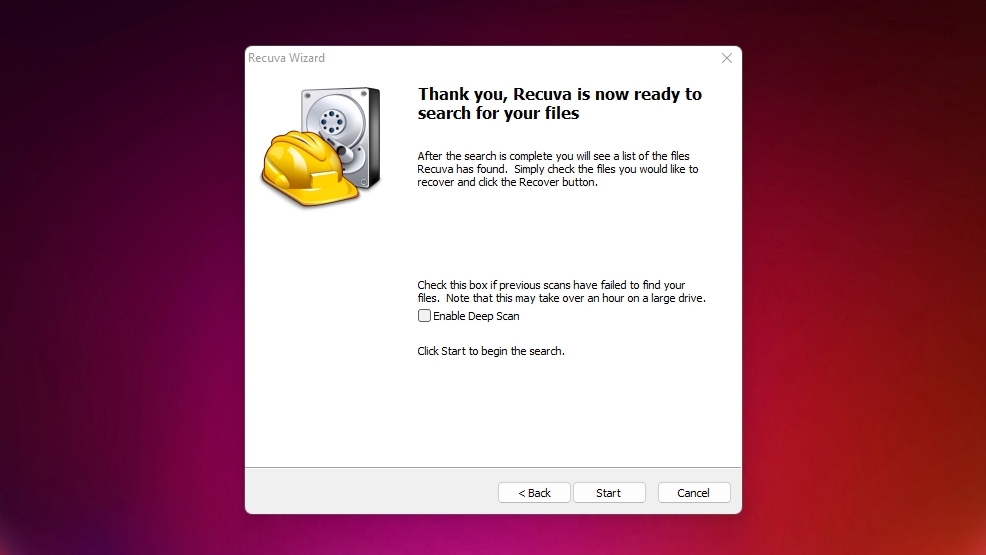
- Give Recuva time to finish scanning your drive for lost data.

- If Recuva didn’t find any files, you can go through its wizard again, but this time Enable Deep Scan. However, it’s probably quicker to click Switch to advanced mode and proceed to the following step.
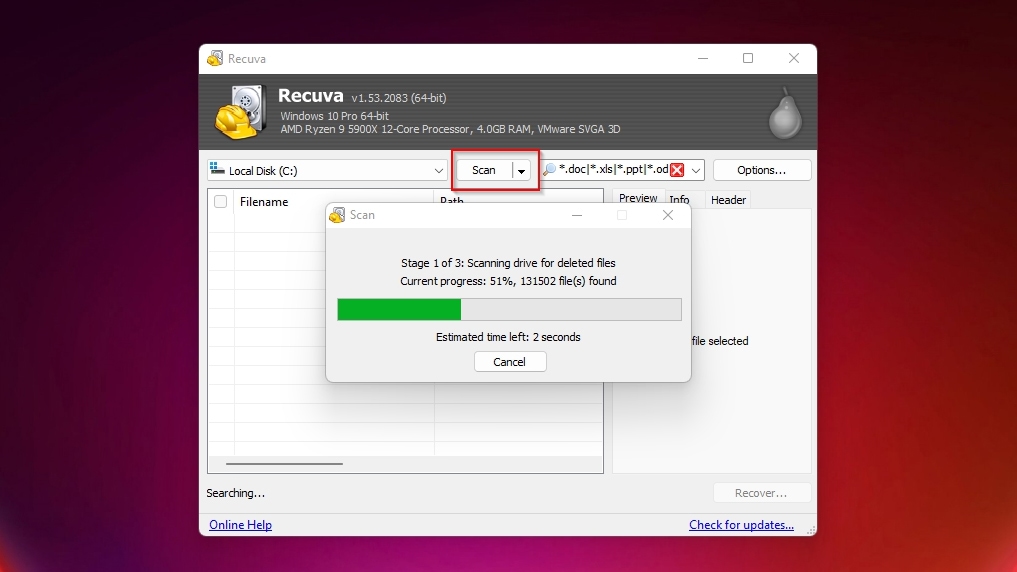
- From the top of Recuva’s “advanced” window, a) choose the drive you want to scan, b) set the types of files you want to locate from its search field, and c) click Scan.
- If Recuva doesn’t locate your files again, you can widen your search by not defining a file type. When Recuva finds the files you want to retrieve that were deleted during copy and paste, place a checkmark on their left, click Recover, and choose where to save them.

How to Recover Cut and Paste Files From Computer Without Any Software
If you’d prefer to avoid installing and using third-party apps on your Windows installation, you can recover failed cut and paste files without software.
Method 1: Restore Cut and Paste Files From Previous Versions
The latest versions of Windows come with a built-in feature that allows them to keep track of previous versions of your files.
To restore the files you lost during cut and paste with the appropriately-named Previous Versions Windows feature:
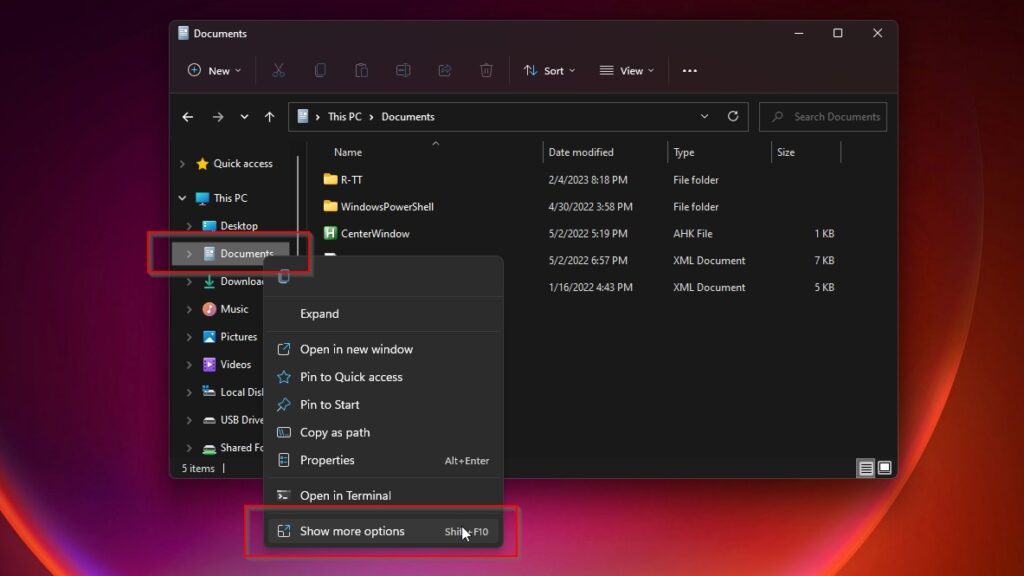
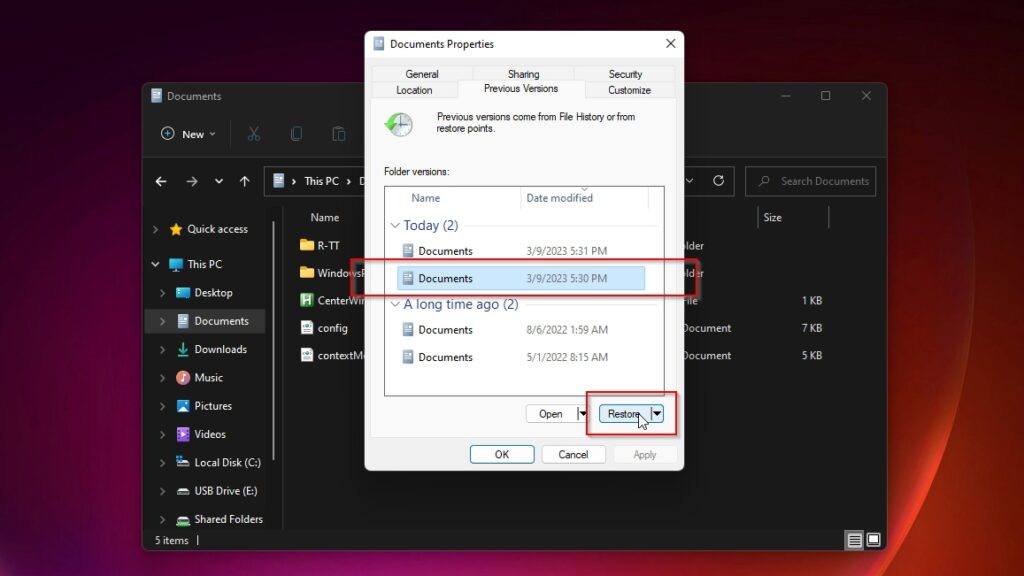
- Right-click on the folder where you last saw your lost files. On Windows 10, move directly to the next step. If on Windows 11, select Show more options.
- Choose Restore previous versions.
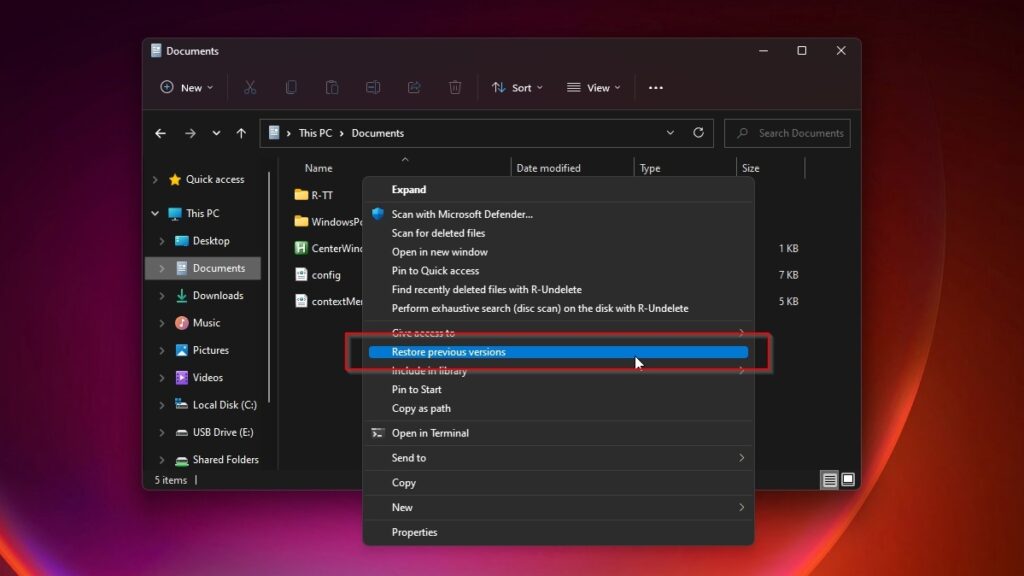
- Select a Previous Versions backup with a date before your files disappeared while copying them. Click on Restore to revert the folder and its contents to that date’s instance to restore the files you lost during cut and paste. Note that this will overwrite the current files in that location. To preserve them and restore your older files as a copy, you can click on the downward arrow on the right of Restore and select Restore to instead. Then, choose where to recover your files.
Method 2: Get Back Cut and Paste Files Using File History
File History is another built-in Windows tool that may help you retrieve deleted copy and paste files that vanished. However, that implies File History is active, keeping backups of your files and folders.
To enable File History if it isn’t already active:
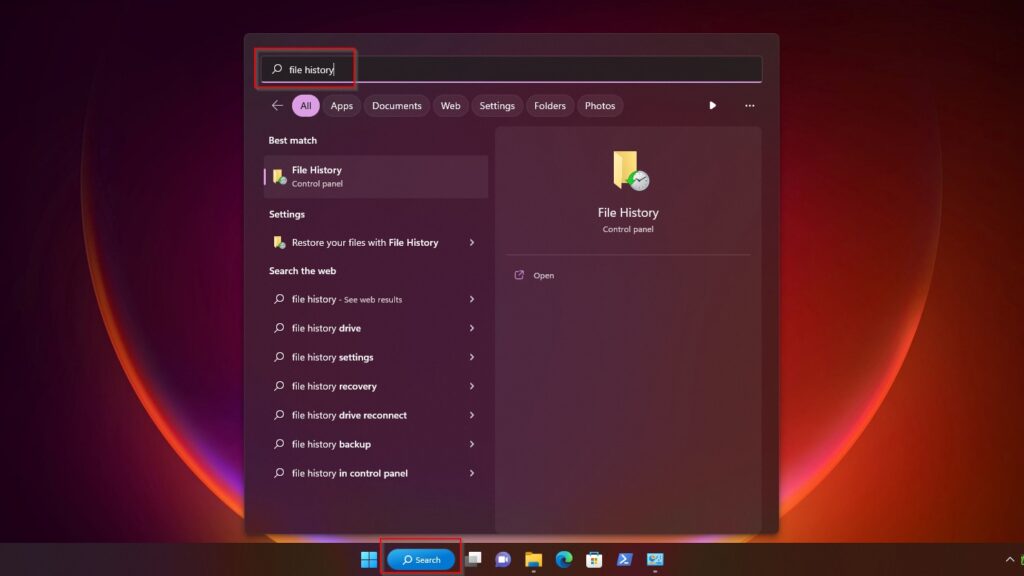
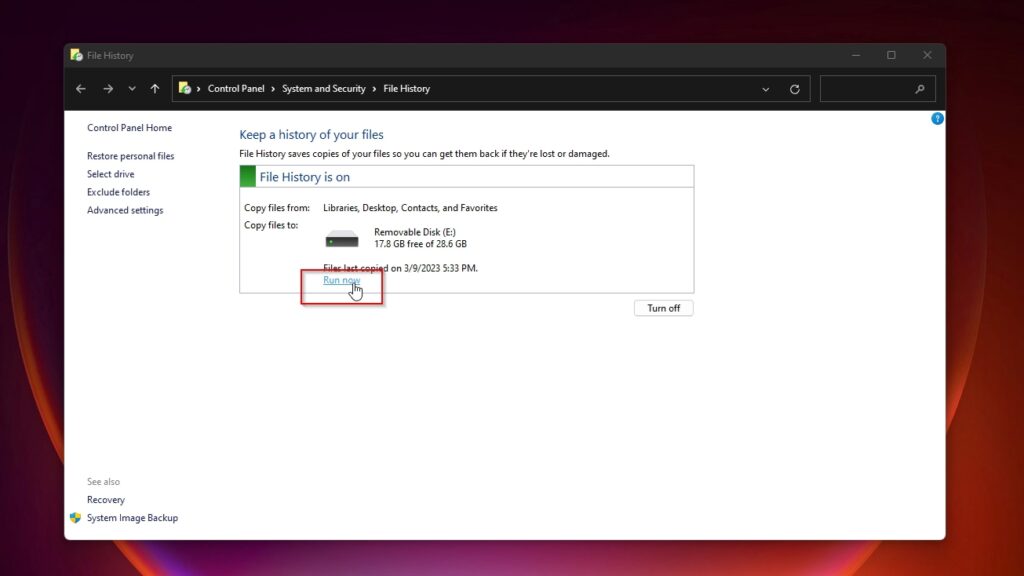
- Search for “file history” using Windows’ Start or Search, then open it.
- Select an external drive where you want to keep File History’s backups and click Turn on to enable it.
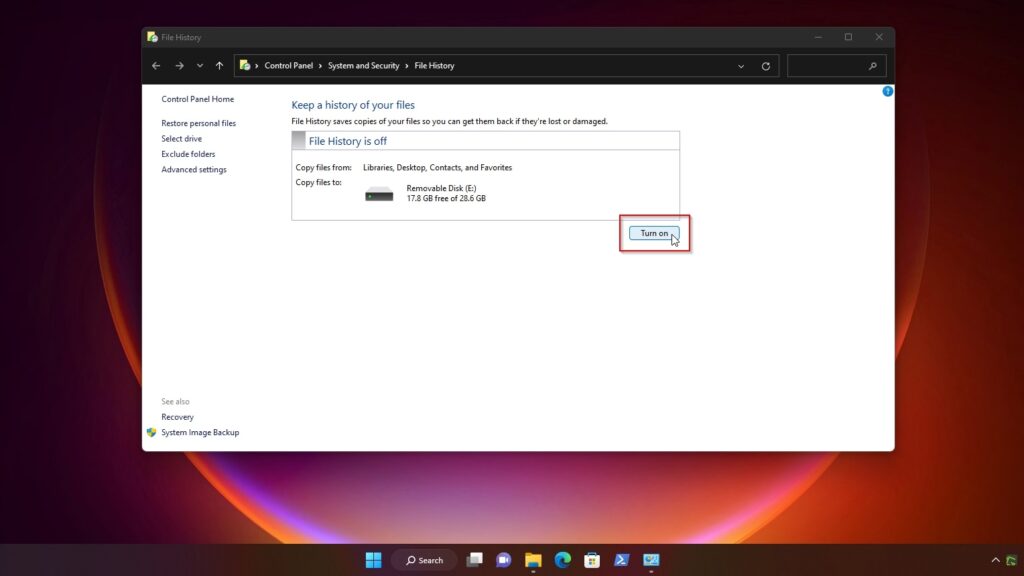
- File History might take a while until it grabs its first backup. Click Run now under your selected drive to “jumpstart” the process and immediately start backing up your files.
With File History up and running and some backups available, you can fish out your files from them by choosing Restore personal files on File History’s window.
Still, this may feel somewhat complicated, so here’s a more accessible shortcut to recover your lost cut and paste files through Previous versions:
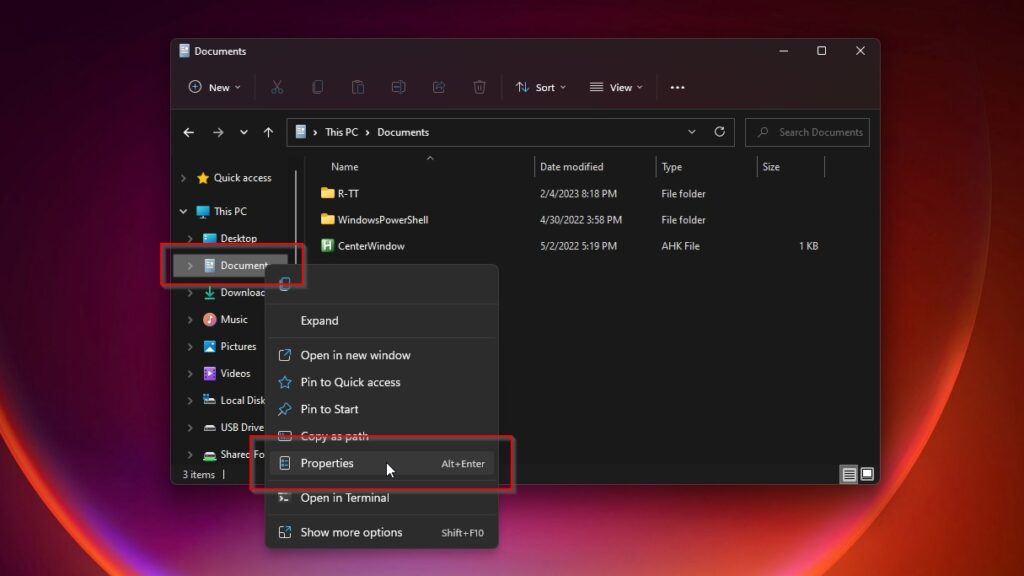
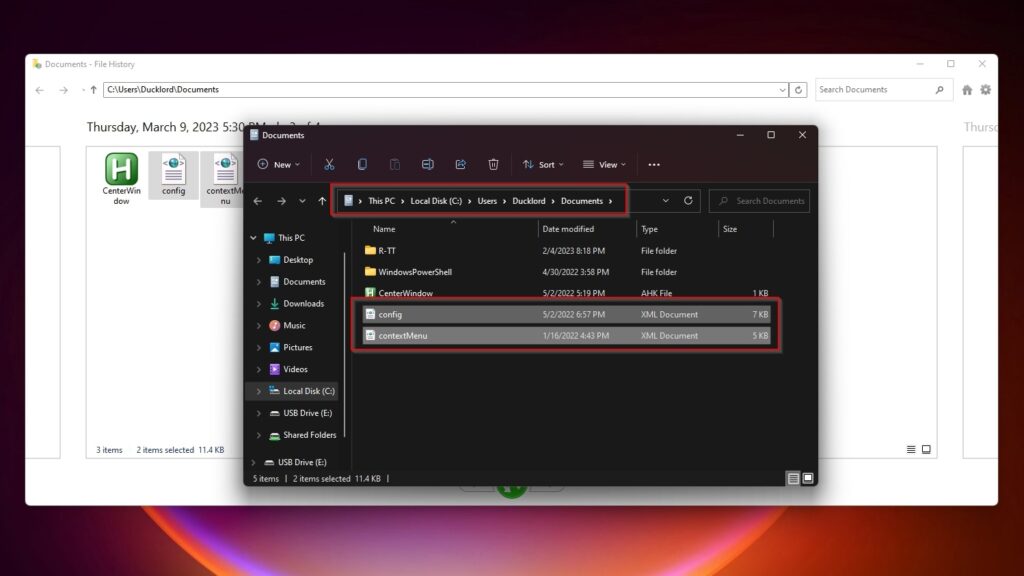
- Right-click on the folder from where you want to retrieve deleted copy and paste data, and choose Properties.
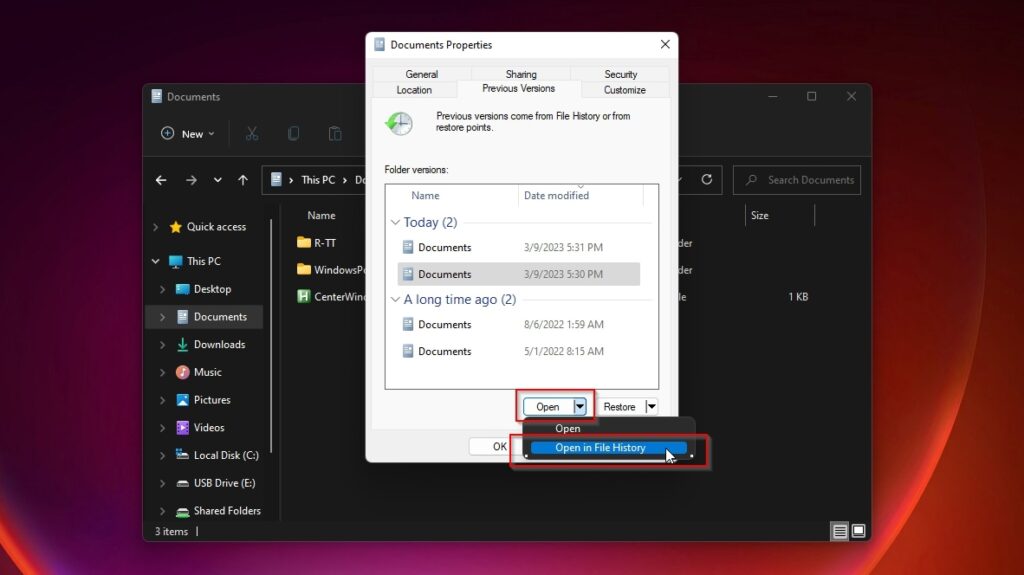
- Move to the Previous Versions tab. Click the little downward arrow on the right of the Open button, and choose Open in File History.
- Choose the files you want to recover from your selected backup. Then, click the large green circular button at the bottom of File History’s window.
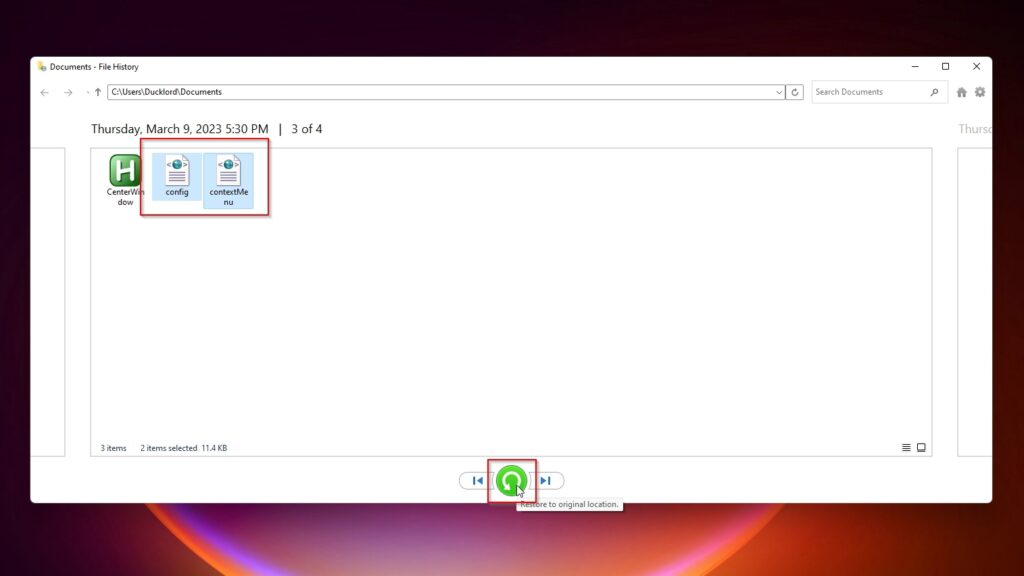
- You’ll find your files back at their original location.
Method 3: Retrieve Deleted Copy and Paste Files From OneDrive
Did you keep the files that disappeared while copying in a local folder synced with a service like OneDrive or Dropbox? Then, you can get your files back from there!
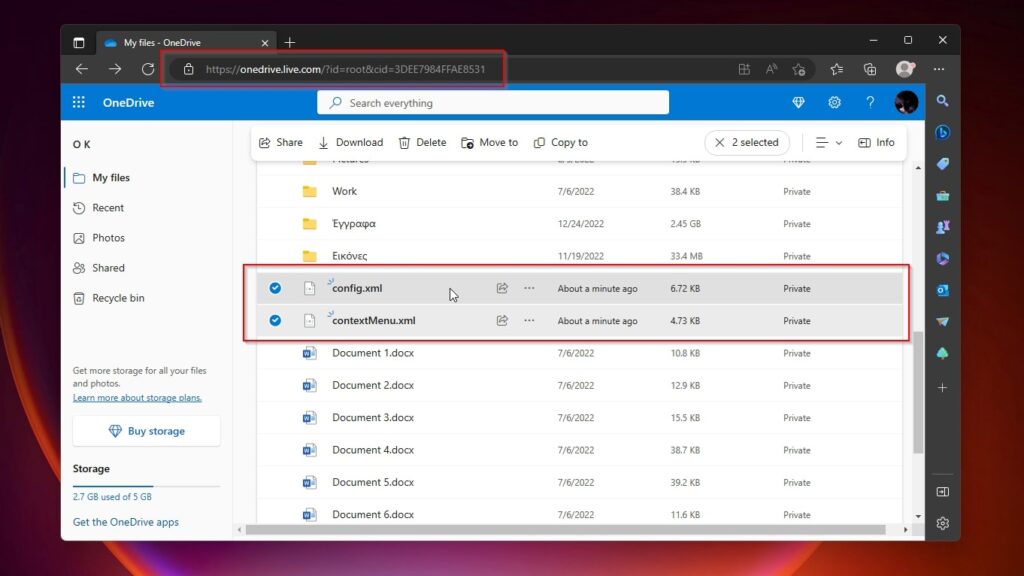
To restore the failed cut and paste files that disappeared “locally” on Windows 10/11 from their cloud-synced versions on OneDrive:
- Visit OneDrive’s site, and if you can’t find the files you want on its list, check inside its Recycle bin or use the search field at the top. When you locate them, place a checkmark on their left.
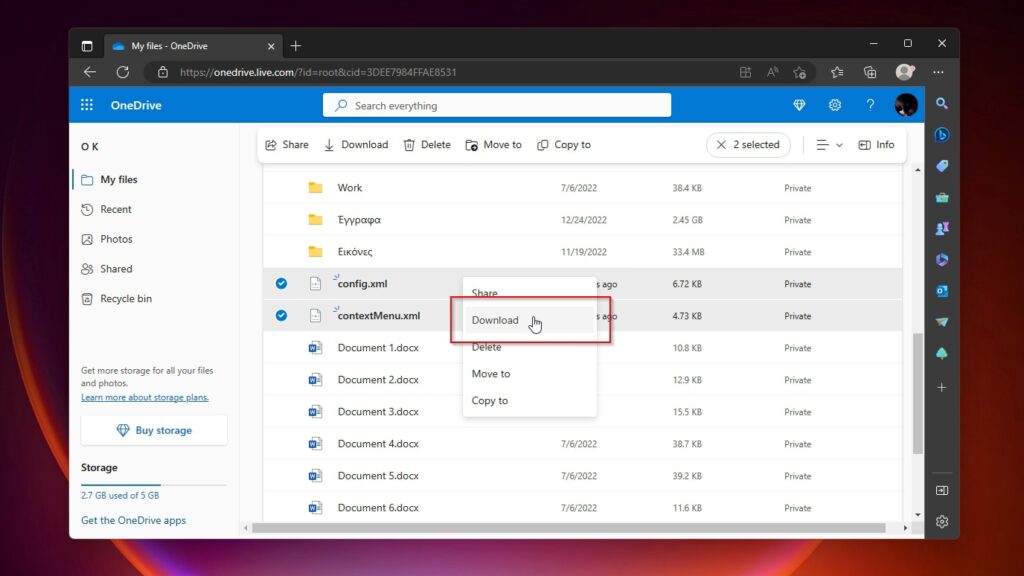
- Right-click on your selection, and choose Download to get your files back to your local storage.
Frequently Asked Questions
Can I recover cut and paste files?
There are various ways to recover files you lost during cut and paste. If your files aren’t in their original location, you can use a recovery tool like Disk Drill or Recuva to locate them. Alternatively, you can restore them from a Windows’ File History or Previous Versions backup or an online cloud storage service like OneDrive.
Where do cut files go in Windows 10?
Even after “cutting” them, your files remain in their original location. After you paste them, you can find them in their new location. The files “don’t go anywhere” in between but are directly moved from one folder to another right after the paste process.
How to recover files lost during cut and paste on Android?
If your files aren't where you cut or pasted them, check in your Android OS's Recycle Bin/Trashcan (if it comes with one).
If you can't find them there either, install an app like DiskDigger from the Google Play Store. Then, launch it, grant it access to your storage, and scan your device with it.
Note that there's a higher chance for recovery on rooted Android devices.
How to undo cut and paste in Windows 10?
Did you change your mind right after a successful cut and paste and decided to return your files to their original spot? Hit CTRL + Z on your keyboard to undo the cut and paste operation.
Note that you should only do this right after the cut and paste operation. Otherwise, it could undo another action.
How to recover cut folder from the desktop?
To return a folder you cut from your desktop and pasted elsewhere, press CTRL + Z right after the operation.
If you performed more actions afterward, or your cut and pasted folder has vanished, this shortcut won’t help. Instead, try finding your files with Windows Search.
If you still can’t locate them, use an app like Disk Drill to find and recover your lost folder. Alternatively, you can restore it from a backup.
How to recover cut files from USB?
Recovering cut and pasted files that disappeared on Windows 10 from one of your USB storage devices is the same as with any other storage device:
- Press CTRL + Z right after the cut and paste operation.
- If that doesn’t work, use a data recovery tool, or restore your files from a backup.
Getting Back Your Lost Files after a Cut and Paste
As we saw in this article, there are various ways you can restore the files you lost during a failed cut and paste procedure. In the best scenarios, the files may not be lost but merely misplaced.
Even if your files are gone, using the proper tools, like Disk Drill or Recuva, it’s possible to scan your storage to locate them – even if they’ve been deleted – and get them back.
Plus, solutions like the Windows built-in Previous Versions and File History and cloud storage solutions like OneDrive and Dropbox can be an extra protective layer over your files.
So, there’s no reason to worry when you can’t find the files you copied and pasted minutes ago. Choose one of the methods we saw in this guide, and soon you’ll have your data back.

Odysseas is a geek with over three decades of experience in tech who occasionally lost vast amounts of data. “Data” he managed to recover most of the time using various recovery solutions.
Eventually, he joined our team to write about such data loss and recovery scenarios and all related software and methods.
Despite having written thousands of articles and tutorials for various popular outlets, he considers his data-recovery adventures an ongoing learning experience.
- Frisco, Texas, United States
Yevgeniy Tolkunov is Hardware Engineer at ACE Data Recovery. Yevgeniy has a Master's Degree in Physics, Information Technology; 15+ years of experience.