
Perform MacBook Data Recovery for Free
Is it possible to recover data from a fully formatted or crashed MacBook Pro hard drive?
Yes, you can recover data from your MacBook, and the process is easier than you might think. The results will, however, depend on several factors, and one of them is your ability to get it right the first time. With each unsuccessful attempt at recovering data from your MacBook, you risk losing valuable information, which is why you should start with the instructions provided in this article and get it right on the first try.
Update Notice
Since we first published this article, we’ve received a lot of positive feedback but also many questions related to the topic of MacBook data recovery. Instead of answering them individually, we decided to update this article and make it even more comprehensive than it was before so that you can recover data from your MacBook hard drive or any other storage device with confidence.1. Common Causes of MacBook Data Loss
MacBook users lose important data for a variety of different reasons, but some causes of MacBook data loss are far more common than others. Here’s a quick overview of the most common causes of MacBook data loss and the danger they represent.
Accidental Deletion
⚠️ Danger level: 30%
📋 Symptoms: Important files are not present in their original location after storage device formatting or the deletion of different files.
🩺 Reason: Accidental deletion is almost always caused by human error. Typically, the user selects a bunch of files and deletes them, not noticing that they’ve also selected important files that definitely shouldn’t be deleted.
💡 Recovery options: The good news is that most accidentally deleted files can be recovered easily straight from the Trash folder. Even files that are no longer present in Trash can often be undeleted using third-party data recovery software.
Sudden Crashes
⚠️ Danger level: 50%
📋 Symptoms: Your MacBook suddenly restarts without giving you enough time to save your work.
🩺 Reason: Sudden crashes can be caused by faulty hardware components, software bugs, malware, and even overheating.
💡 Recovery options: Just because your Mac suddenly crashed doesn’t mean that data loss is inevitable, but there are many users who have lost many important files after a crash and were able to recover them only from previous backups or with the help of third-party data recovery software.
Physical Damage
⚠️ Danger level: 100%
📋 Symptoms: Physical damage may manifest itself by your MacBook refusing to boot or your hard drive making strange noises.
🩺 Reason: Unfortunately, even modern storage devices are not 100% reliable, and they may experience a critical malfunction without any prior warning, especially if they’ve been aging for a while. Of course, brand-new storage devices may become water damaged, crushed, or otherwise ruined.
💡 Recovery options: It’s usually not possible to recover data from physically damaged storage devices using DIY solutions, leaving professional data recovery services as the only option.
Data Corruption
⚠️ Danger level: 70%
📋 Symptoms: You may experience errors when transferring or opening files, and data corruption may even compromise the stability of your MacBook.
🩺 Reason: Data corruption may be caused by physical hardware issues, software bugs, interruptions in normal processes, and several other reasons. It’s a common cause of data loss, but it can also lead to complete hard drive failure, depending on the number of bad sectors.
💡 Recovery options: Even though data corruption is a scary problem to deal with, you do have quite a few recovery options, including previously created backups, special data repair software, and third-party data recovery applications.
Malware Infection
⚠️ Danger level: 90%
📋 Symptoms: Some malware is programmed to delete or encrypt as many files as possible, but there are also many strains of malware that are far less sinister and cause no serious symptoms.
🩺 Reason: Most malware infections, such as virus attacks, start with a user visiting a compromised website and downloading an infected file.
💡 Recovery options: First, you need to stop the malware infection using an antivirus solution, and then you can proceed to recover your data from backups.
2. MacBook Data Recovery Explained
MacBook data recovery is a complicated process, but the basics are pretty simple. When you delete a file on your Mac computer, the file doesn’t go anywhere. Instead, macOS simply makes the storage space the file occupies available for new data.
Until the deleted file becomes overwritten by new data, you can get it back using third-party data recovery software, which takes care of all the difficult parts associated with data recovery, allowing you to get back your files with a few clicks.
The only problem is that you can never know exactly when the deleted files will become overwritten, which is why you need to start the data recovery process as soon as possible.
2.1 How to Recover Files from a MacBook Pro Hard Drive?
Step 1: Download & Install Disk Drill for Mac
Disk Drill for Mac is an easy-to-use data recovery application intended, among other things, for people who desperately need to recover data from a MacBook hard drive or any storage device attached to it. You can download it directly from its website.
A disk image with Disk Drill for Mac should automatically download to your MacBook. Open it and drag the Disk Drill app to the Applications folder like you see on the screenshot below.
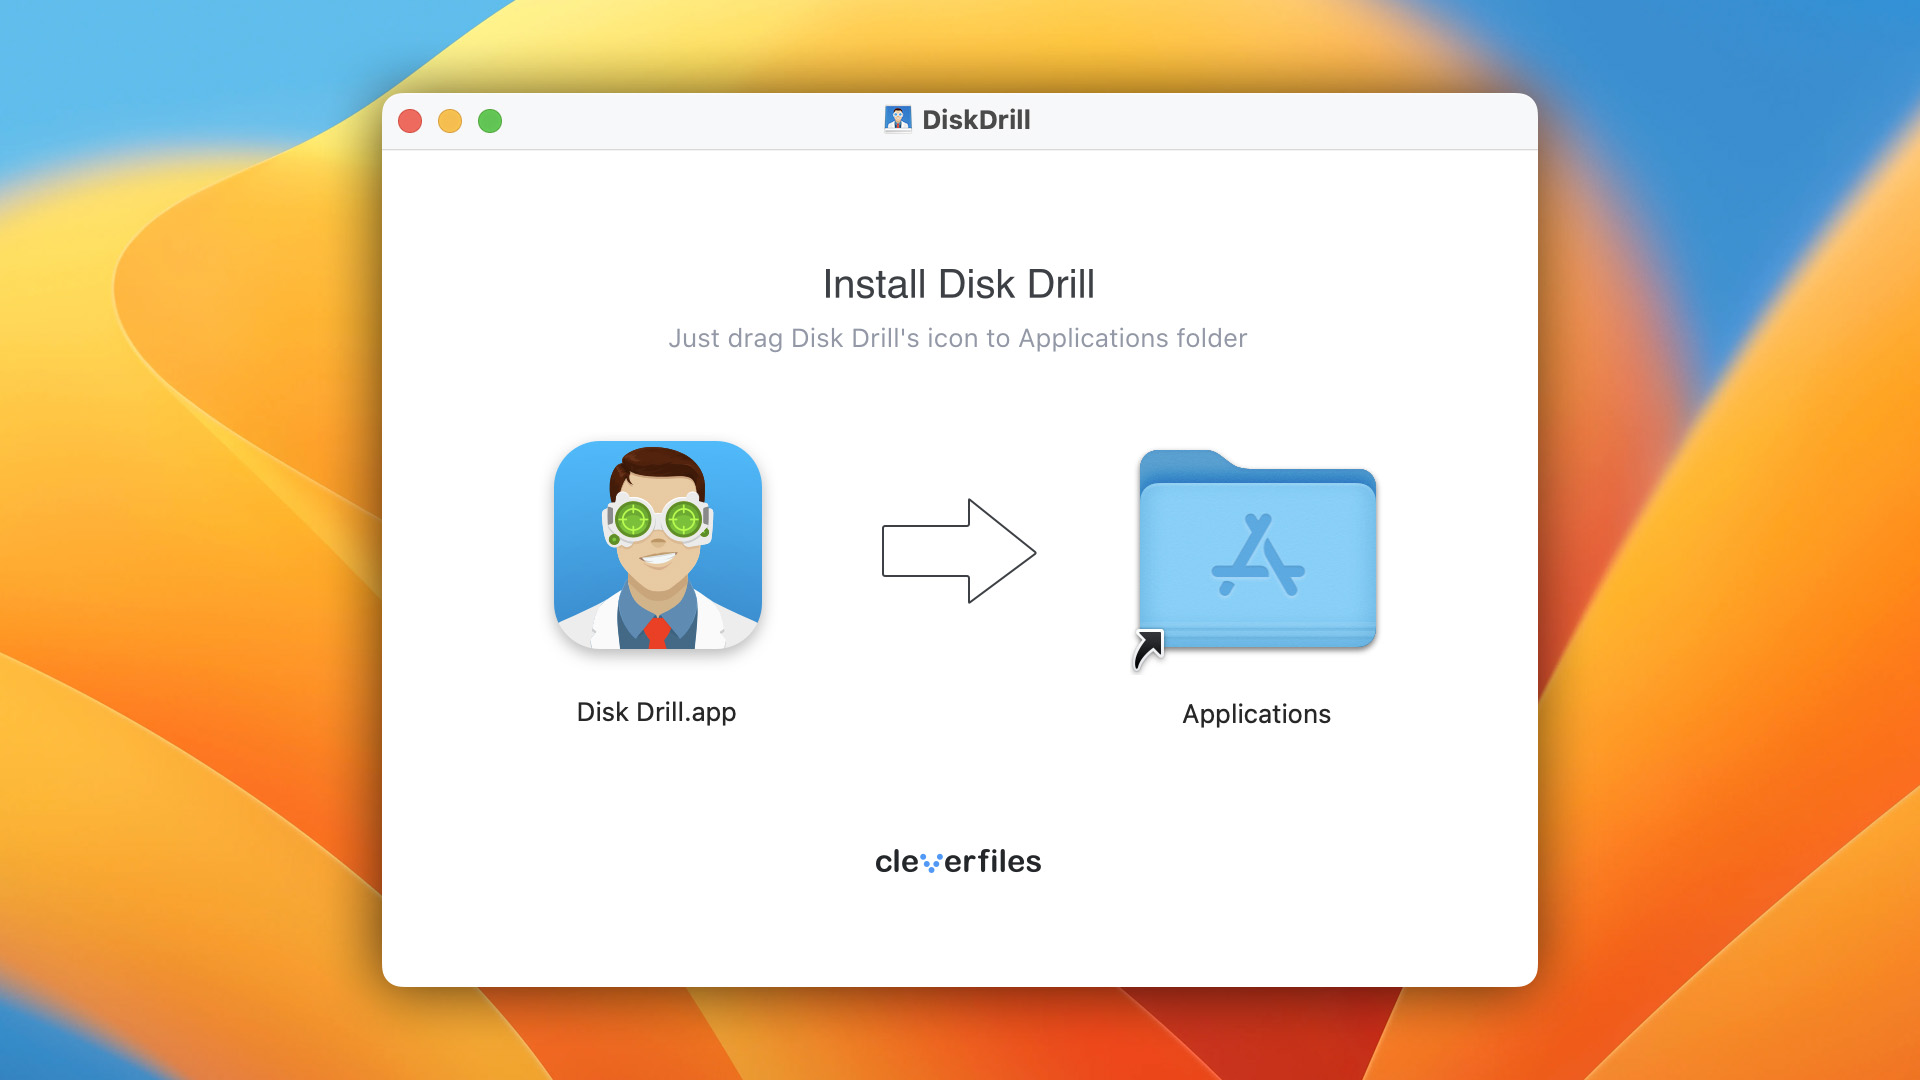
Wait for the Disk Drill app to copy. This shouldn’t take more than a couple of seconds.
Step 2: Run Disk Drill & Start Scanning for Deleted Files
You can now launch Disk Drill from the Applications folder in Finder or using Spotlight (Command + Space bar). You may be asked to confirm your decision to open Disk Drill. If so, click Open.
If the storage device from which you want to recover the deleted files is in a working condition, you will see it listed among hardware disks. Simply click the Search for lost data button next to it and wait for Disk Drill to find all deleted or lost files. This process tends to be relatively fast on modern SSDs, but it can take several hours on traditional spinning hard drives, especially larger ones, so be patient and don’t interrupt it.
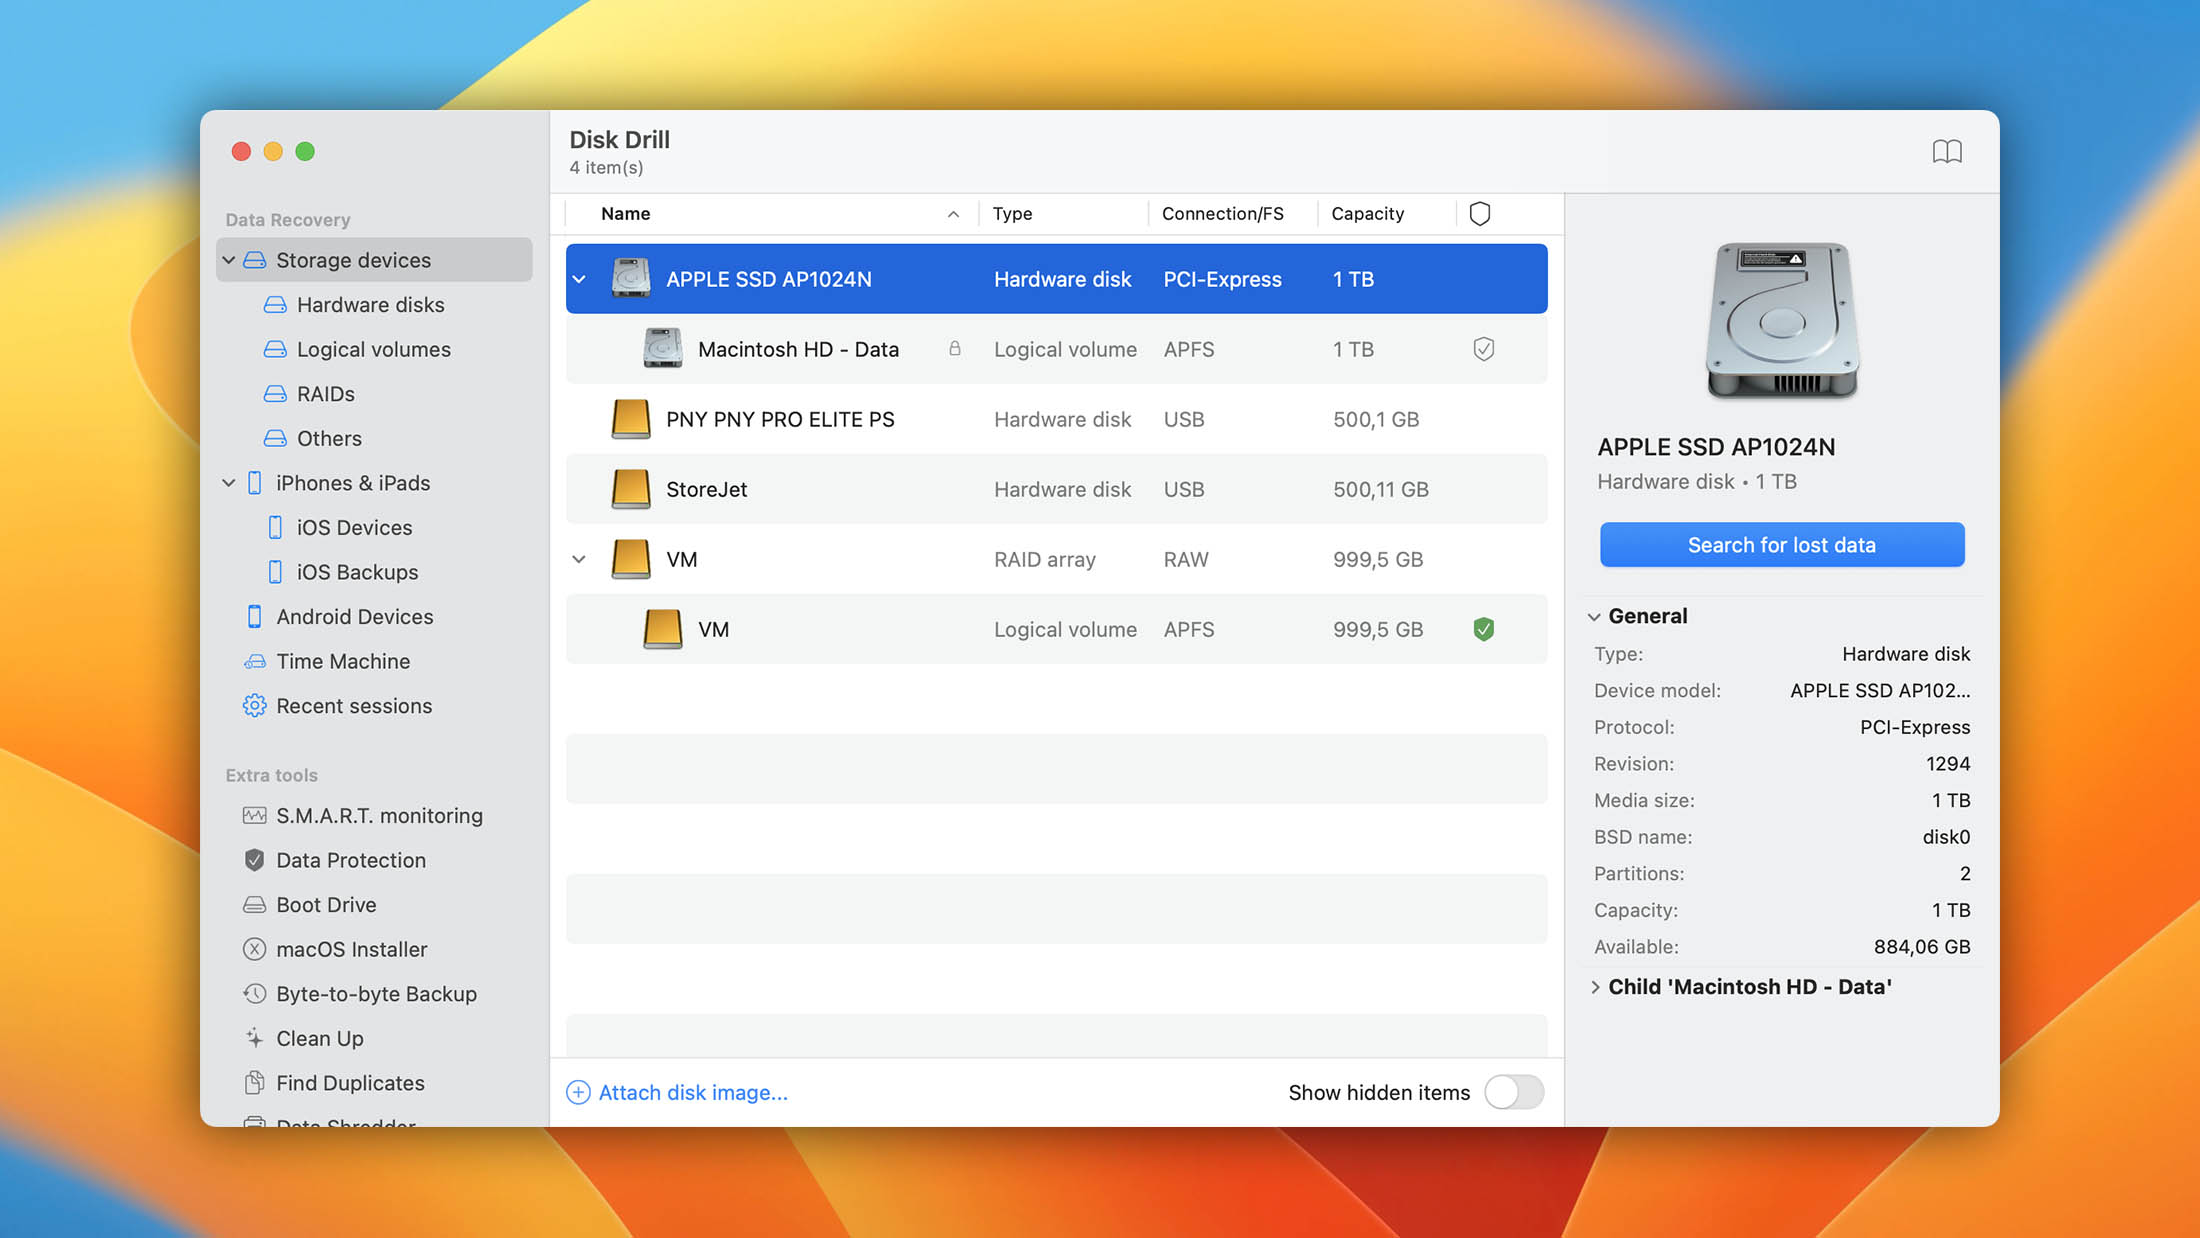
Because Disk Drill is designed to make data recovery as simple as possible, you don’t need to know how what happens under the hood. All you need to do is click the Recover button.
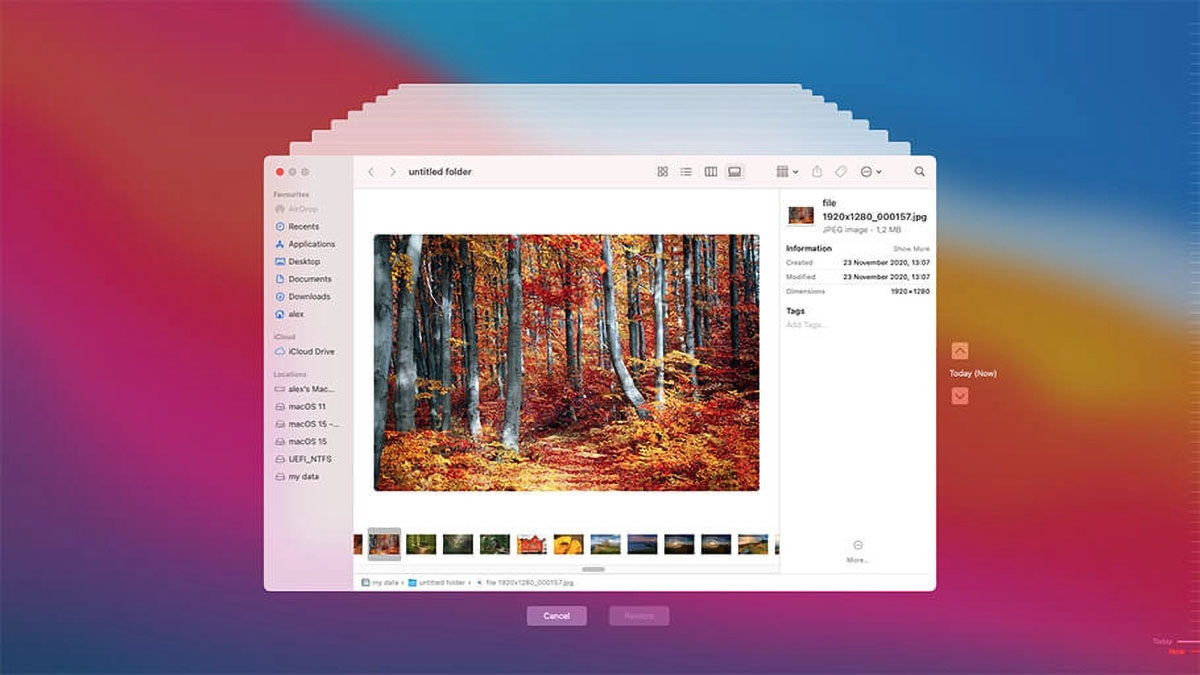
Step 3: Preview the Recoverable Data
Disk Drill for Mac has a handy preview feature that allows you to preview all the file formats your Mac natively supports, allowing you to recover only the files you actually need. To use this feature, click the View icon next to the file you want to preview.
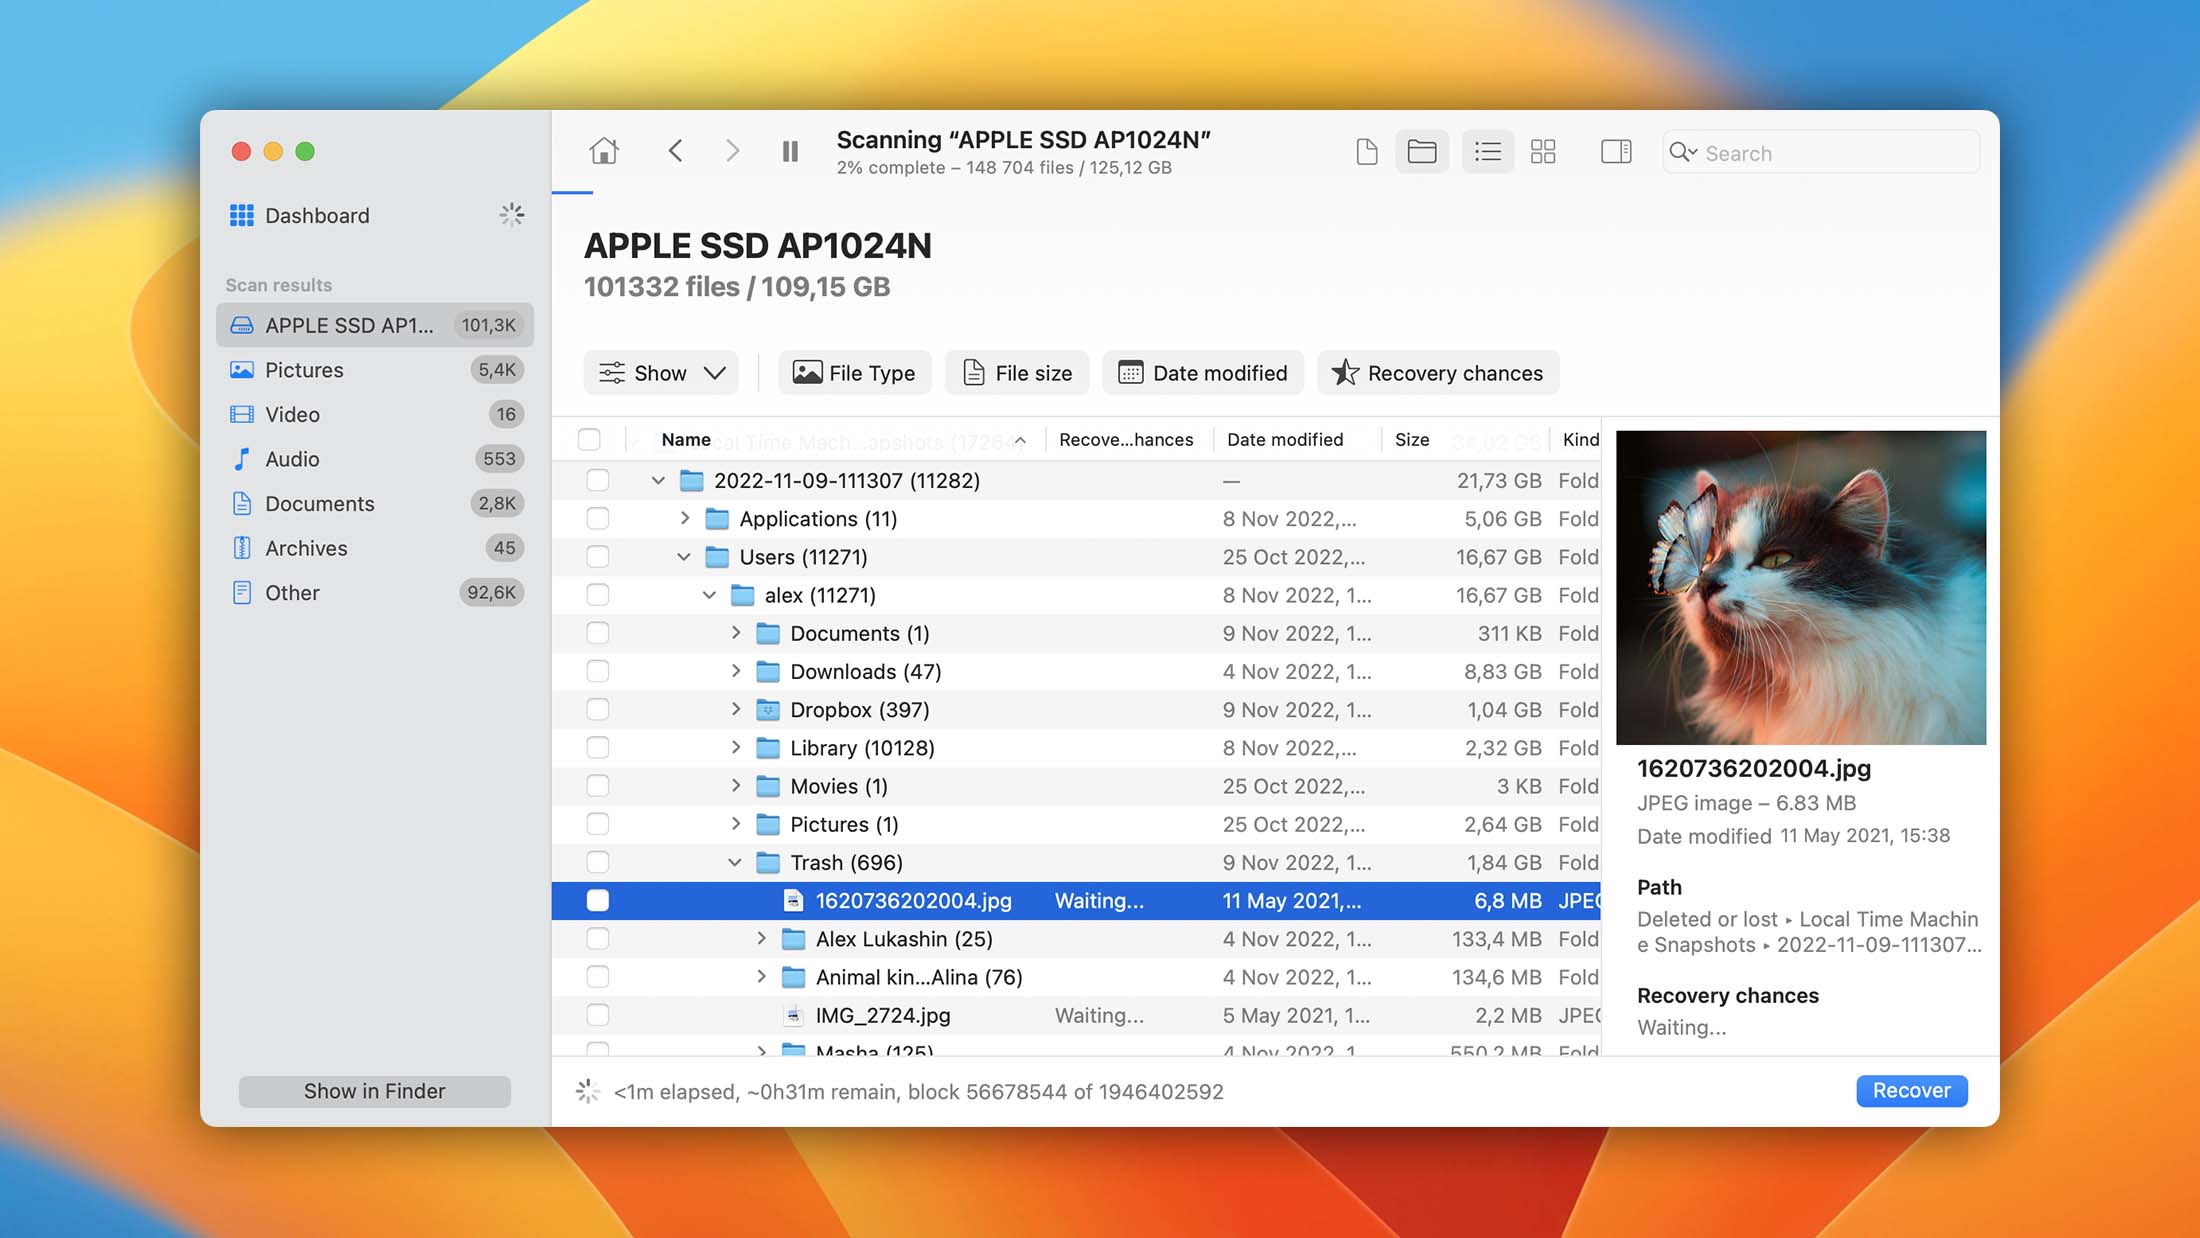
The macOS Quick Look window will appear, allowing you to open the file with the Preview app.
Step 4: Recover Your Data
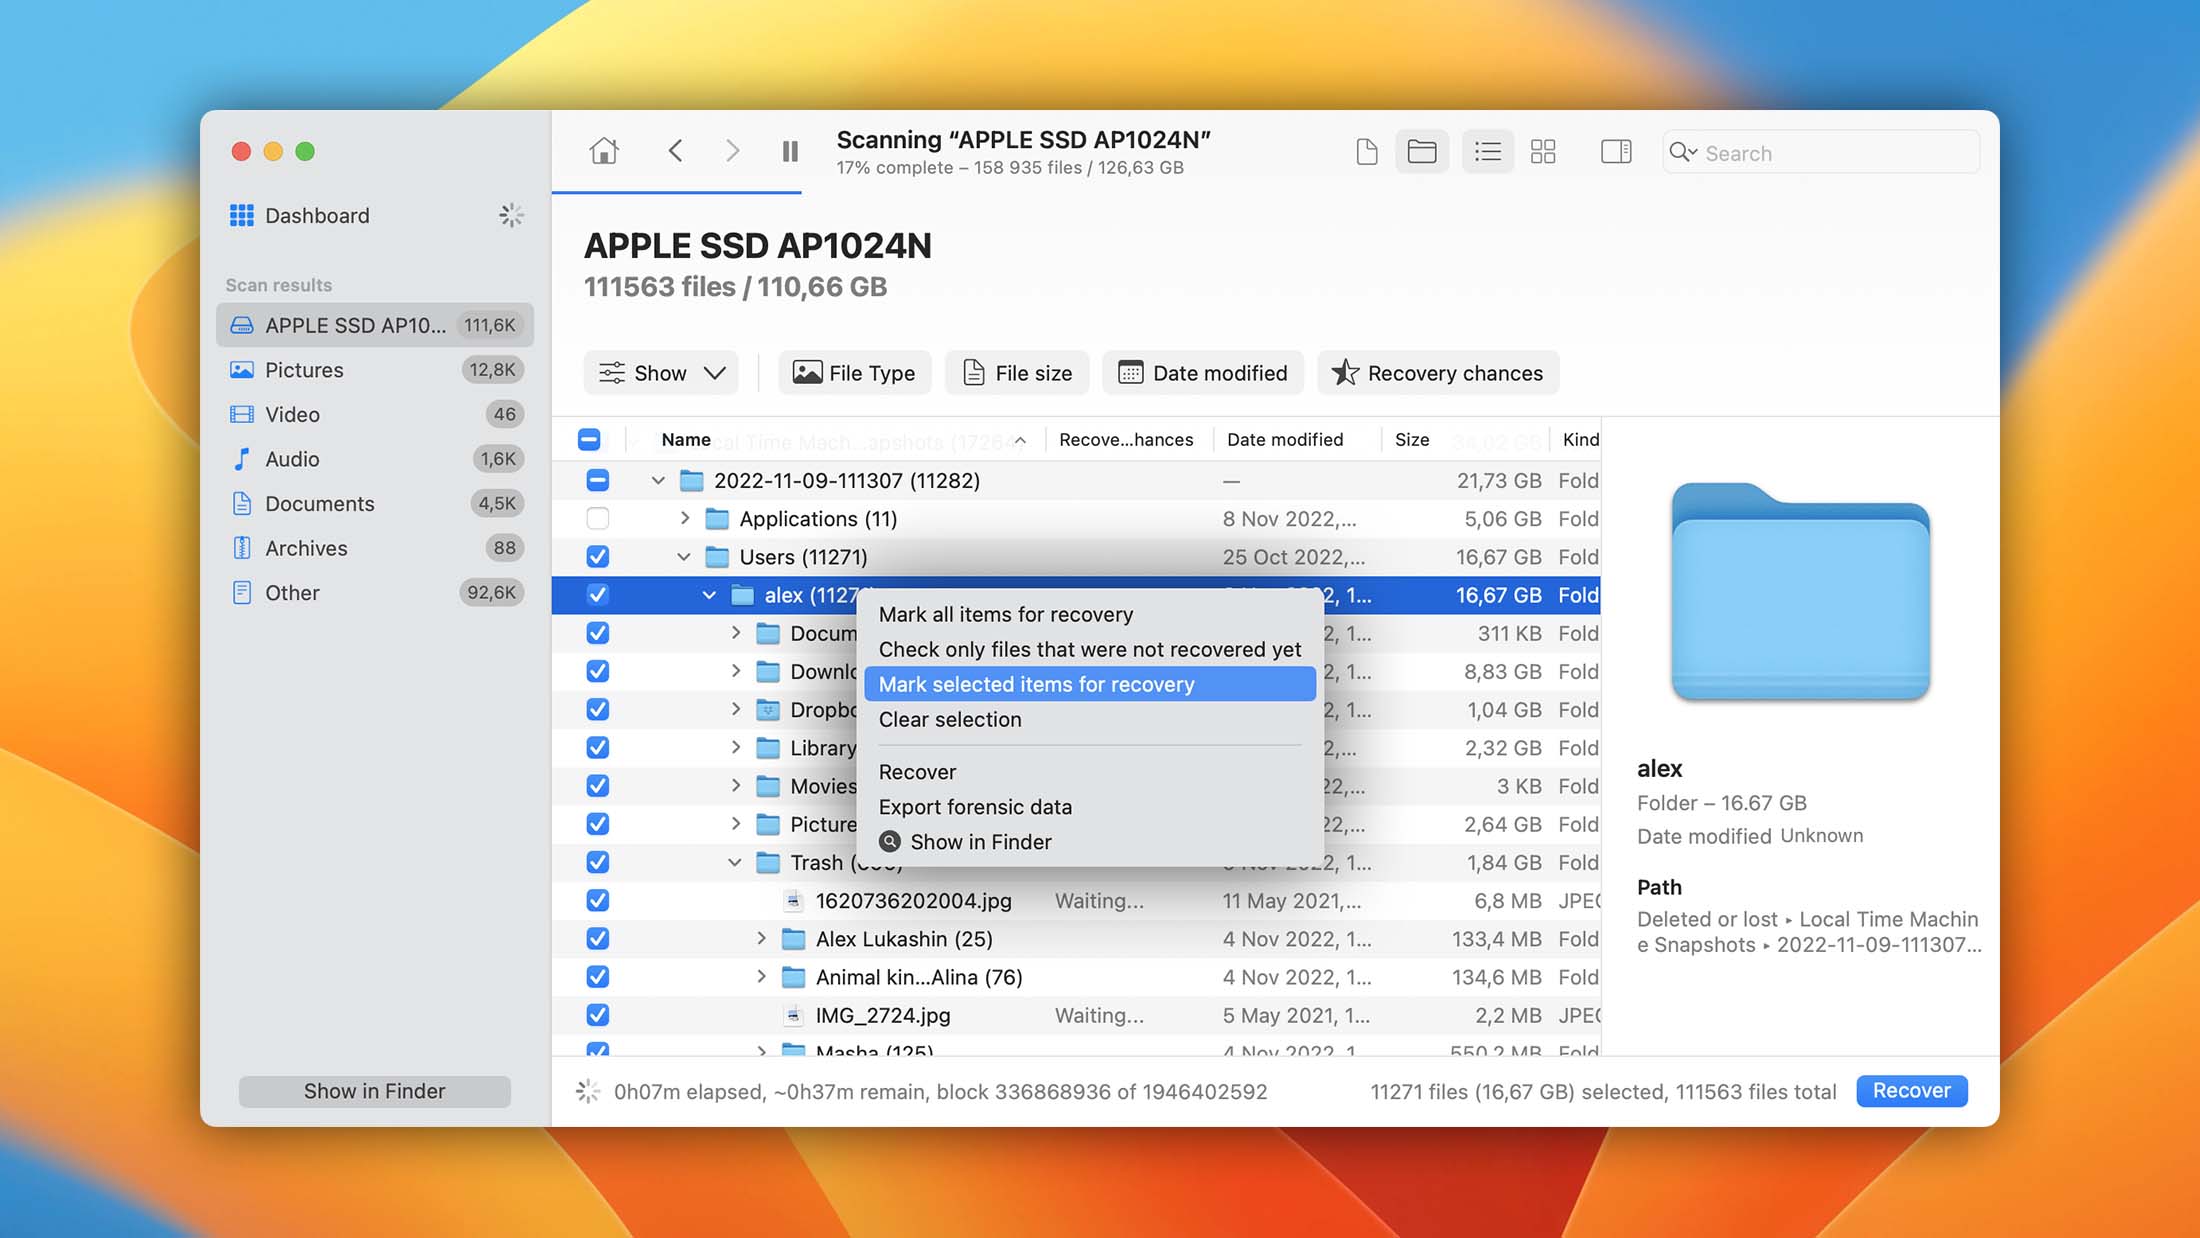
Once you’ve decided which files you want to recover from your MacBook, you need to click on the small checkbox next to each file.
Alternatively, you can highlight the files you want to recover, right-click on them, and choose the Mark selected items for recovery option from the context menu. If you want to recover all files, select Mark all items for recovery from the same menu.
The only thing left to do is click the Recover button in the lower-right corner of the Disk Drill window. Just like learning how to recover files from a MacBook, the actual recovery doesn’t take much time at all.
Wrapping Up
Disk Drill for Mac makes recovering data from a MacBook a matter of a few simple clicks. Without any expert knowledge, you can restore your data and save the day. Here’s a short version of the steps above:
How to retrieve files from a MacBook with Disk Drill:
- Download and install Disk Drill.
- Run Disk Drill and start scanning for deleted files.
- Preview the recoverable data.
- Select which files you want to recover.
- Click the Recover button to perform the recovery.
2.2 Why Perform MacBook Data Recovery with Disk Drill?
As part of my job, I have the opportunity to test different third-party data recovery software solutions capable of performing MacBook data recovery, including MacBook Pro hard drive recovery, and compare their real-world performance. Out of all the solutions I’ve tested Disk Drill manages to deliver the best data recovery results in the most accessible package.
Disk Drill for Mac at a Glance:
- Recovers all common file formats
- Supports Mac, Windows, and Linux file systems
- One-click approach to data recovery
- Includes extra free disk tools
- Runs on all Macs with Mac OS X 10.8.5+
| Value | Description |
| Supported Devices | MacBook, MacBook Pro, MacBook Air, iMac, iMac Pro, Mac mini, Mac Pro, iPad, iPhone, digital storage devices (SD, USB, HDD, and more) |
| Supported File Systems | NTFS, FAT, FAT32, exFAT, EXT3/EXT4, HFS, APFS |
| Support File Types | Video (AVI, MOV, MP4, WMV, …), audio (MP3, OGG, WMA, WAV, …), images (PNG, JPG, GIF, TIFF, …), documents (DOCX, TXT, PDF, …), and more |
| Supported Languages | English, Arabic, German, Spanish, French, Turkish, Italian, Japanese, Korean, Malay, Dutch, Polish, Brazilian Portuguese, European Portuguese, Russian, Swedish, Chinese, Hindi, Ukrainian |
2.3 Alternative Third-Party Data Recovery Software
Disk Drill isn’t the only third-party data recovery software that you can use to quickly and easily recover data from your MacBook. Although it’s beyond the scope of this article for us to provide step-by-step instructions for multiple solutions, there are some alternative Apple data recovery software applications that we want to mention anyway.
Mac Data Recovery Guru
Mac Data Recovery Guru is a straightforward third-party data recovery software that works on all Mac computers running Mac OS X 10.7.0 or later. It takes a content-based approach to file scanning and always accesses the scanned storage device in read-only mode to prevent overwriting. Unfortunately, Mac Data Recovery Guru hasn’t been updated in a while, and many users report underwhelming data recovery performance.
Ontrack Data Recovery
Ontrack Data Recovery is a capable Disk Drill alternative from a company that has managed to become a global leader in data recovery. You can use it to perform precise recoveries of files lost through deletion, reformatting, or corruption from internal and external storage devices alike. Ontrack Data Recovery can recover data even from RAID volumes, but it falls slightly behind when it comes to user interface design.
Softtote Data Recovery
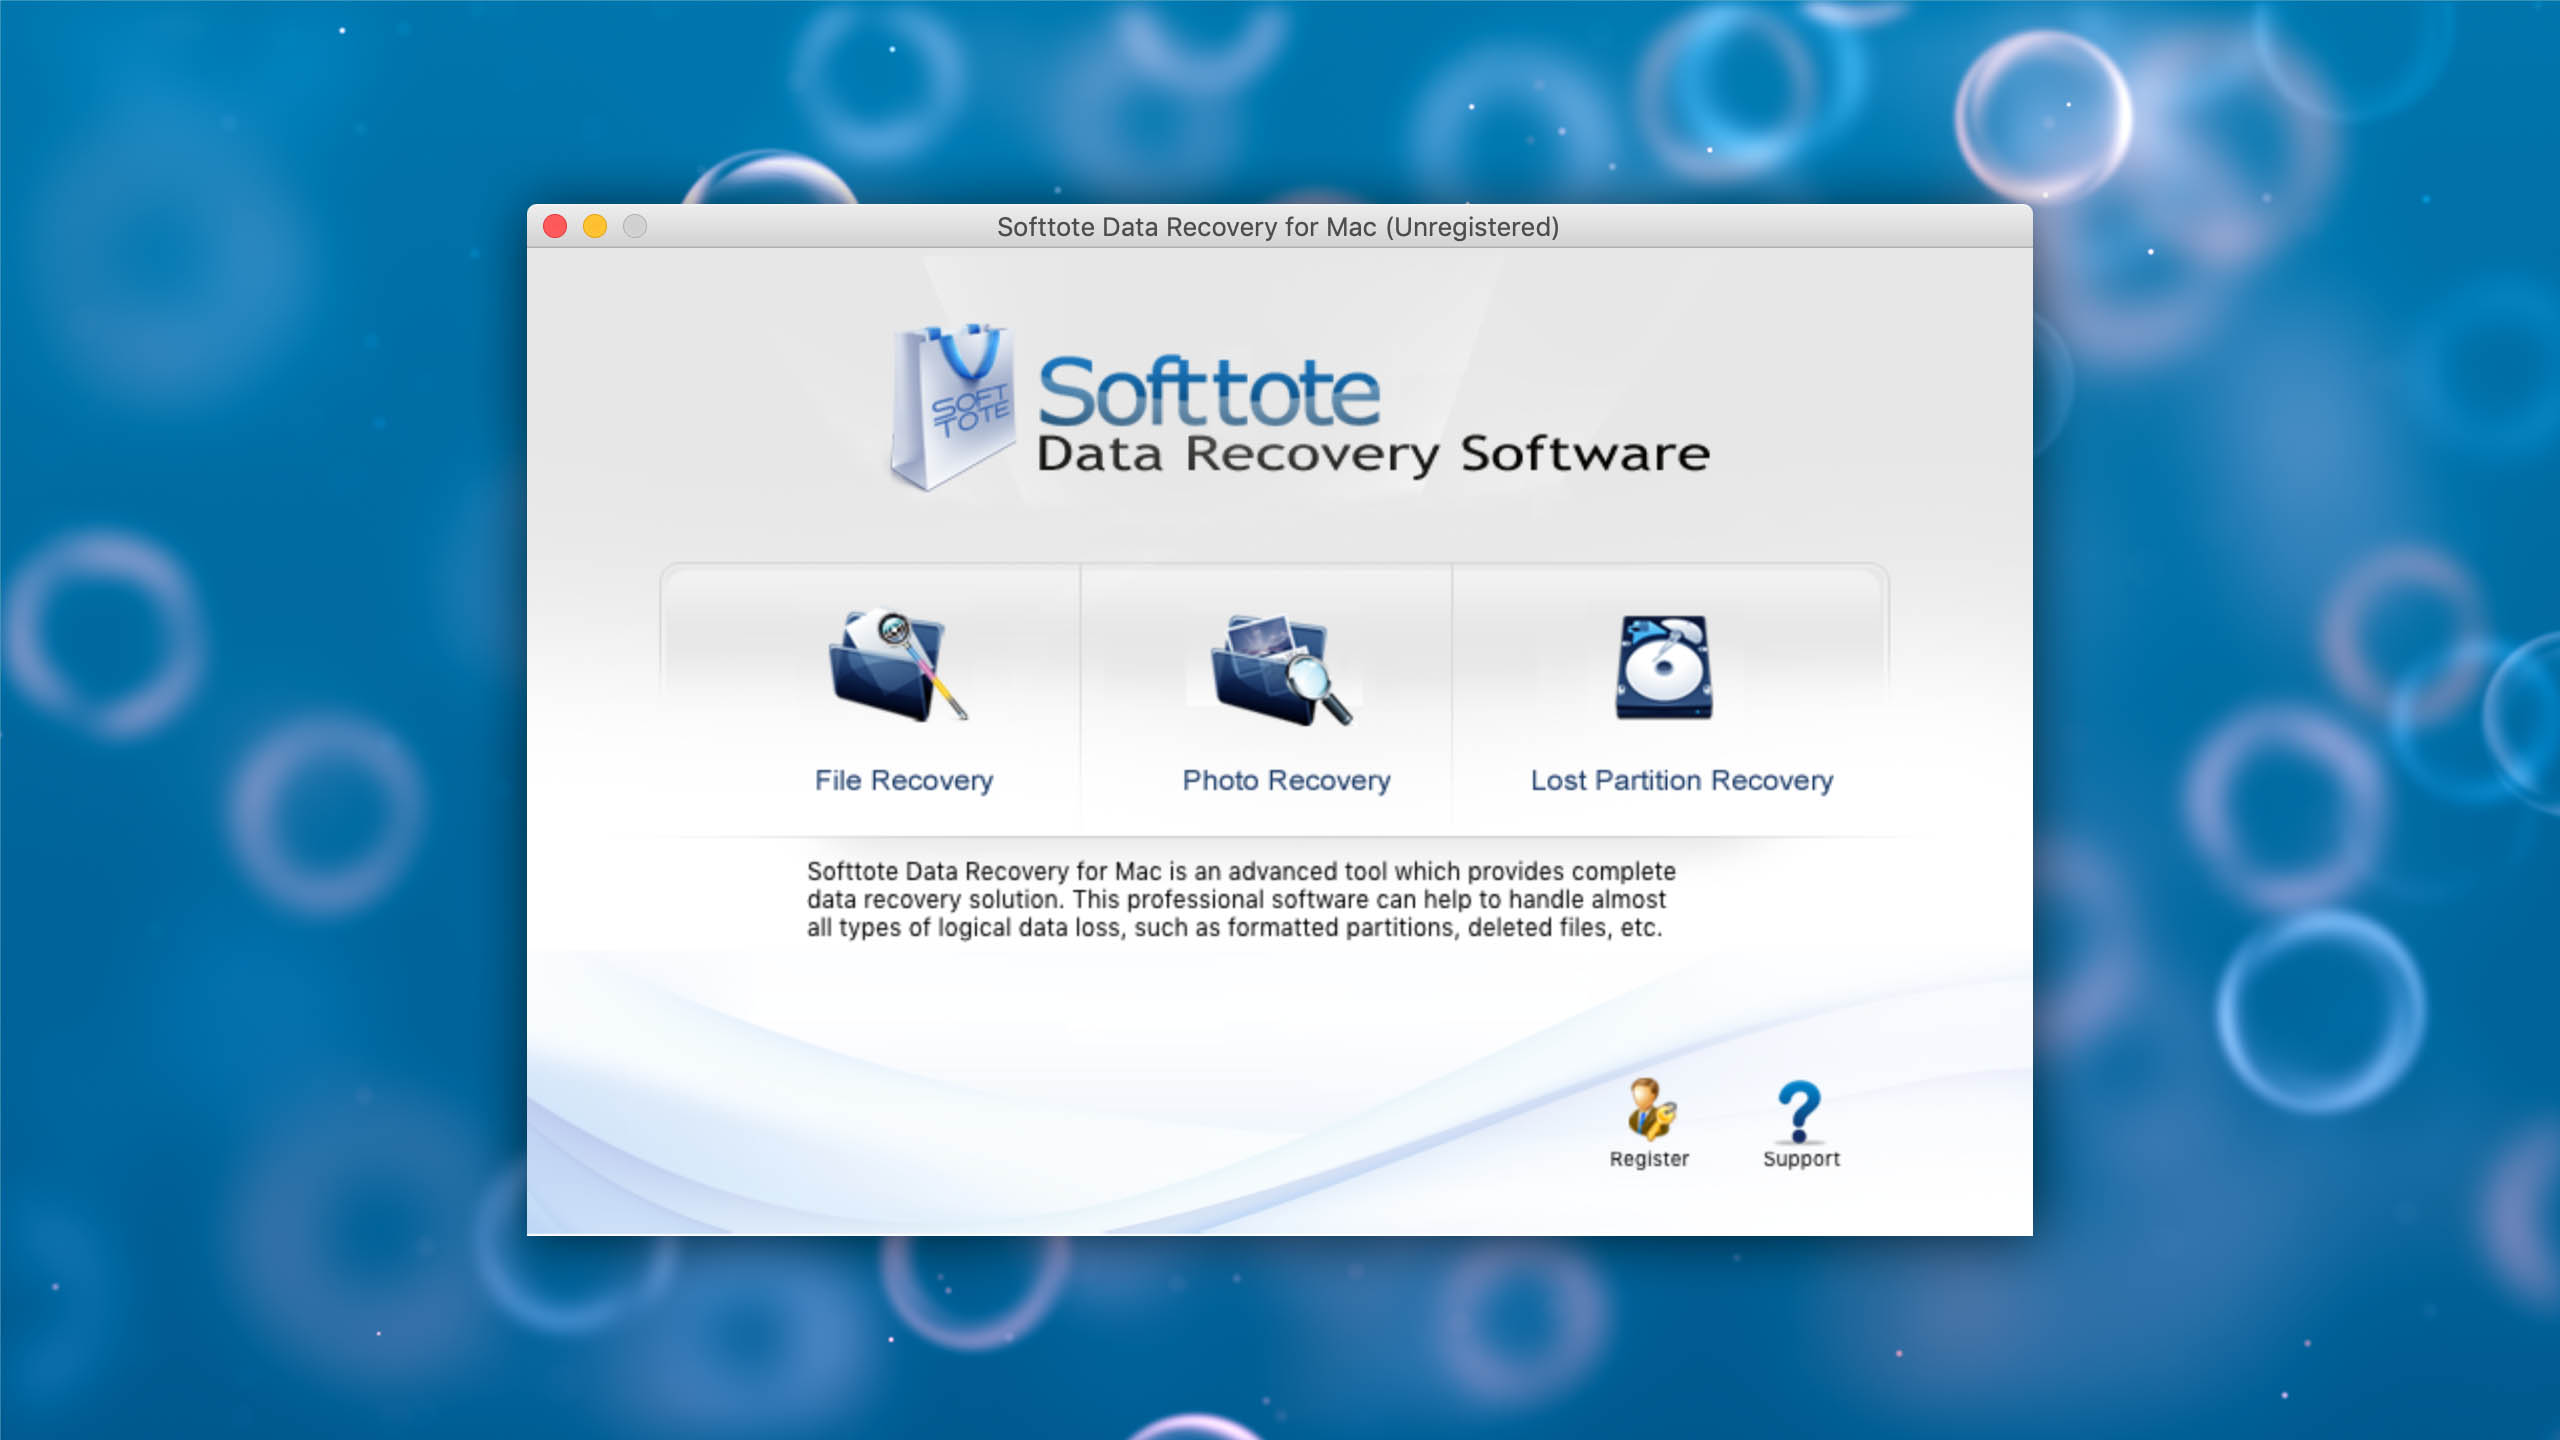
Even though Softtote Data Recovery doesn’t support nearly as many file systems as Disk Drill, it still deserves to be mentioned because it offers a free trial that lets you scan your device and discover all recoverable files. Just be ready for the scan to take some time because Softtote Data Recovery employs a very intensive data recovery algorithm.
EaseUS Data Recovery Wizard for Mac
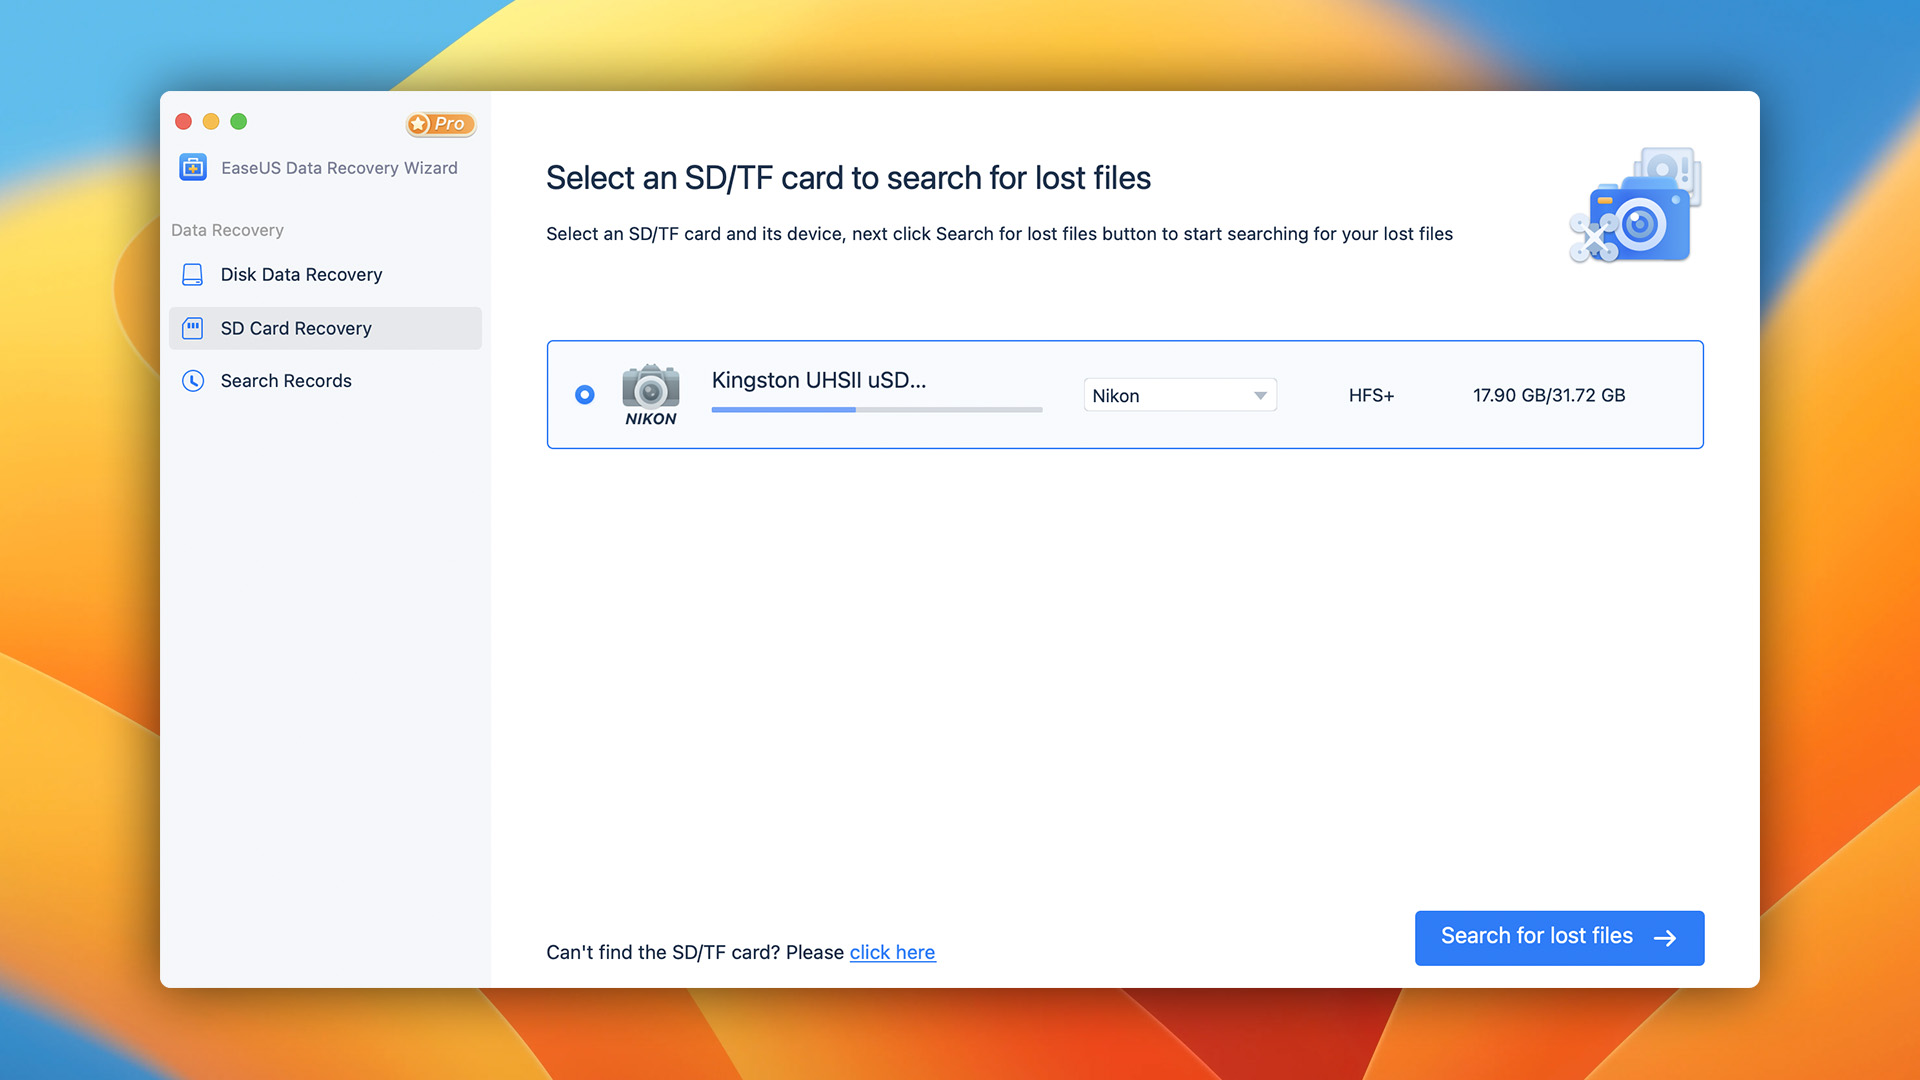
EaseUS is one of the most recognizable names in the data recovery category, and its Data Recovery Wizard for Mac is a great solution capable of recovering up to 2 GB of data for free. The application can solve many different data loss scenarios, but it sometimes gives its users false hope by listing unrecoverable files alongside recoverable files.
Stellar Phoenix Mac Data Recovery
Stellar Phoenix Mac Data Recovery boasts the ability to restore data from crashed or non-booting Macs by creating a recovery drive (Disk Drill also has this feature). The ability to create a recovery drive can be especially handy when attempting to recover data from a MacBook Pro hard drive containing a non-booting operating system without physically removing it from the laptop.
Lazesoft Mac Data Recovery
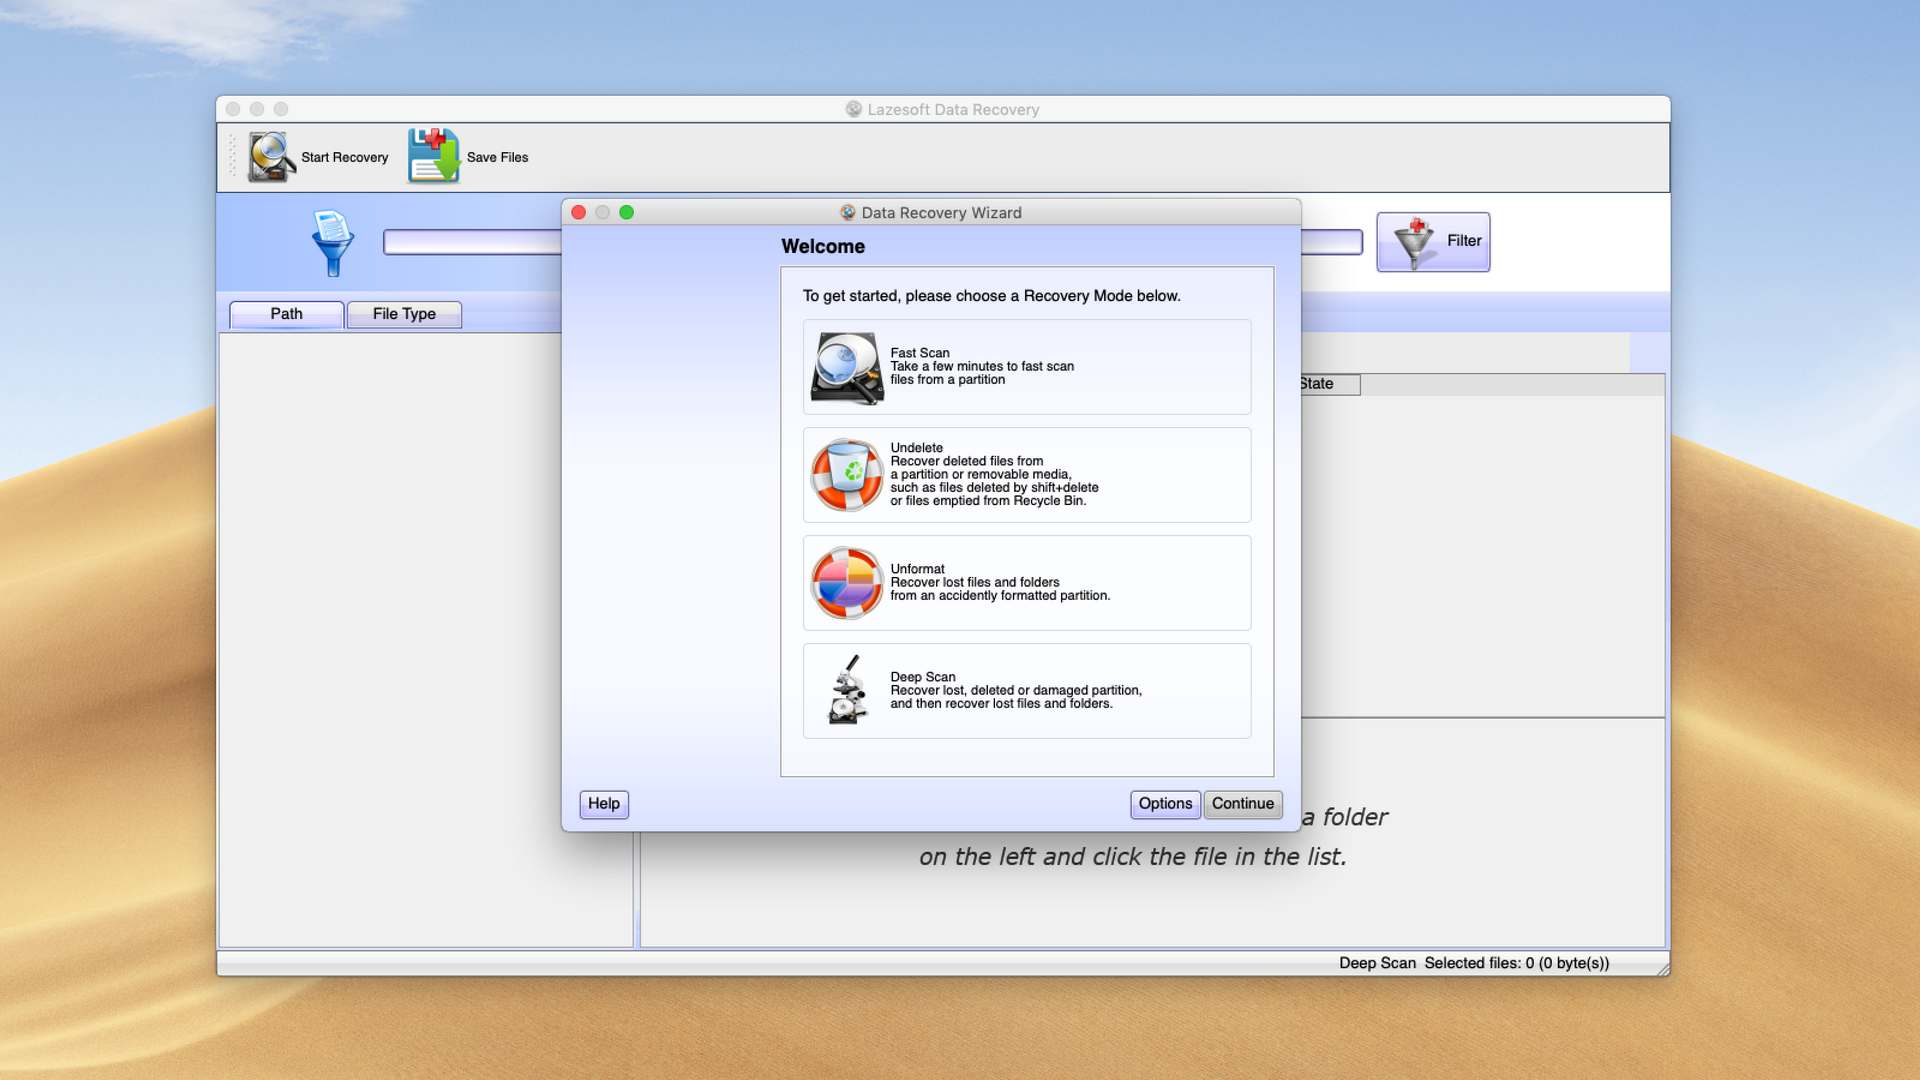
Lazesoft Mac Data Recovery stands out because it can recover an unlimited amount of data for free. Of course, you can’t expect a free data recovery application to match the performance of professional solutions like Disk Drill, but it’s still nice that there are free alternatives capable of performing MacBook hard drive recovery without charging any money for it.
2.4 How to Recover Data from a MacBook Without Software?
Many Mac users are understandably reluctant to install third-party data recovery software and give it access to all their files. While popular third-party data recovery solutions such as Disk Drill are 100% trustworthy and reliable, they are not always necessary. In this section, we describe three ways to recover data from a MacBook without software.
2.4.1 Retrieve Data from a Backup
If you regularly back up your data using Time Machine, now is the time when all the hard work has finally paid off because you can simply retrieve the deleted files from your Time Machine backup drive.
- Connect your Time Machine backup disk if it’s not already connected to your Mac.
- Open the folder that contained the deleted files. For example, if the files were in your Documents folder, open Finder and select Documents from the sidebar on the left.
- Click the Time Machine icon located in the Menu Bar and choose Enter Time Machine.
- Locate the files you want to recover using the timeline on the right edge of the screen.
- Click Restore to restore the selected file.
Of course, Time Machine isn’t the only backup solution for macOS, but we decided to describe it because it’s included for free with all recent versions of macOS.
2.4.2 Undelete Data from Trash
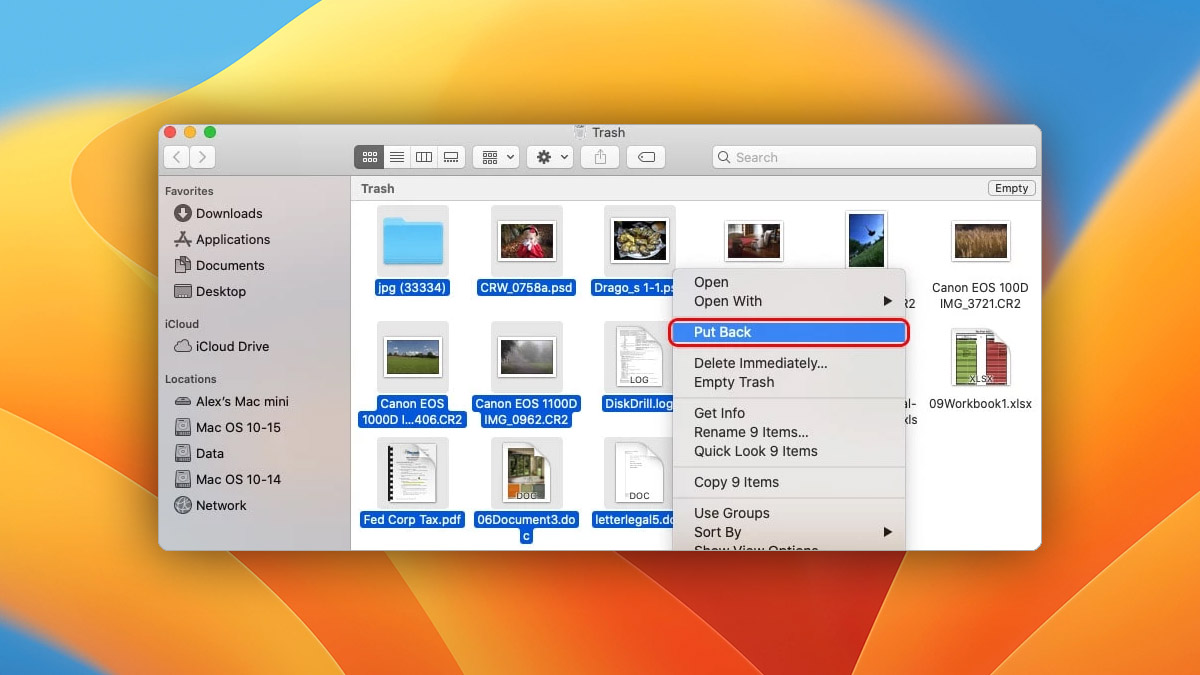
Are you sure that the deleted files are really gone? When you delete a file on macOS using Finder, the file is moved to the Trash folder, where it stays until the Trash folder is emptied. If you haven’t done so already, you should check the Trash folder to confirm that your files are permanently deleted.
- Open Trash by clicking on its icon, located on the right side or bottom of the Dock. If you don’t see the Trash icon, enter the following command in a Terminal window: open .trash
- Go through Trash and look for the files you want to undelete. When you find them, select them by either pressing and holding the command key and then clicking the files or by holding the left mouse click and dragging the cursor around them.
- Right-click on any of the selected files and choose the Put Back option. You can also drag the selected files to your Desktop or any other folder.
No luck with the Trash folder? Then you can skip the last method because it won’t work. Instead, download a third-party data recovery application capable of recovering permanently deleted files and scan your MacBook with it.
2.4.3 Get Back Lost Files Using Terminal Commands
You may not always be able to boot into macOS and undelete files from Trash using Finder. That’s why it’s good to know that you can get back lost files from the Trash folder using terminal commands.
- Launch the Terminal app from /Applications/Utilities.
- Enter cd .Trash to navigate to the Trash folder.
- Enter ls -al ~/.Trash to view the content of the Trash folder.
- Enter mv filename ../ to move a specific file to your home folder (replace filename with the name of the file you want to recover).
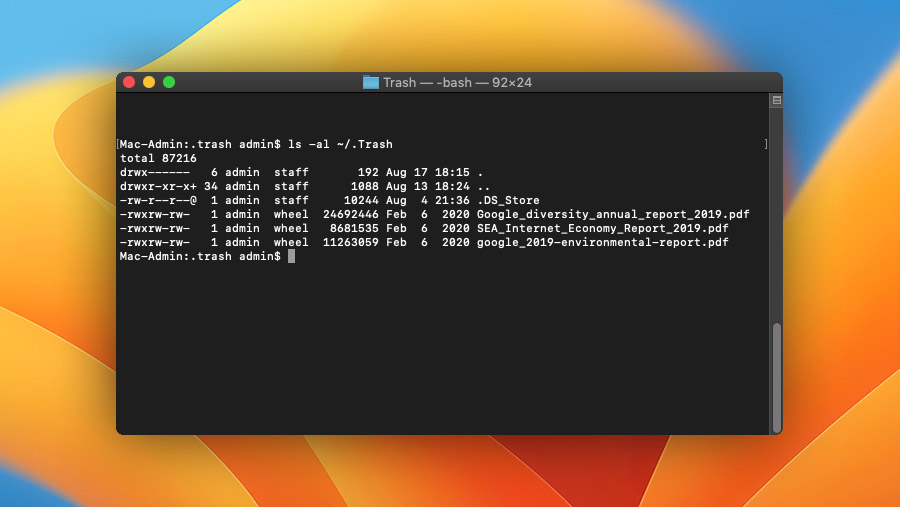
Again, these commands can recover only files that are present in the Trash folder, so there’s no reason to try them if you know that your files are not in Trash.
3. How to Transfer Data from a Mac Hard Drive to Another Computer
If you’re dealing with a dead MacBook Pro that won’t boot, you may want to transfer data from its hard drive to another computer and then perform data recovery on the new computer. Here are three ways how to do it plus common issues that you may run into.
3.1 How to Read a Mac Hard Drive on Windows
Mac hard drives typically use the HFS+ or the newer APFS file system. The Windows operating system can’t natively read any of these two file systems, but there are several third-party applications that can:
- HFSExplorer: As its name suggests, HFSExplorer lets you access HFS (Mac OS Standard), HFS+ (Mac OS Extended), and HFSX (Mac OS Extended with case sensitive file names) hard drives. It can also read most .dmg and .sparsebundle disk images created on a Mac. Unfortunately, it doesn’t support APFS hard drives, which is where the other two solutions come in.
- Paragon APFS for Windows: With this software solution from Paragon Software, you can read APFS volumes created in macOS 10.15 Catalina and newer on a Windows-based computer. Paragon APFS is efficient in terms of performance, and it includes multiple data integrity protection mechanisms to prevent accidental data corruption and possible loss.
- MacDrive: With this tried-and-tested application, you can read both HFS+ and APFS hard drives on any PC running Windows 10/8.1/8/7 and Server 2016/2012. MacDrive has a modern user interface that lets you easily manage all Mac disks through Windows Explorer. Best of all, you can try it for free for up to 5 days.
With one of these three applications installed on your Windows computer, you can simply connect your Mac-formatted hard drive and read it without any issues.
3.2 Transfer Files from a Broken Mac to New Mac
If you have a Mac that refuses to boot, there’s a good chance that you’ll be able to transfer files from it using the Target Disk Mode, which makes it possible to access the content of your Mac’s internal hard drive as if it were an external hard drive.
To transfer files from a broken Mac to a new Mac using Target Disk Mode, you need to:
- Connect the broken Mac to the new Mac using Thunderbolt 3, USB-C, Thunderbolt 2, or FireWire.
- Turn on the non-booting Mac and immediately press and hold the T key while it starts up.
- Access the non-booting Mac just like you would an external hard drive from the working Mac.
Once you’re done transferring your files, make sure to first properly eject the hard drive in Target Disk mode before you disconnect the non-booting Mac.
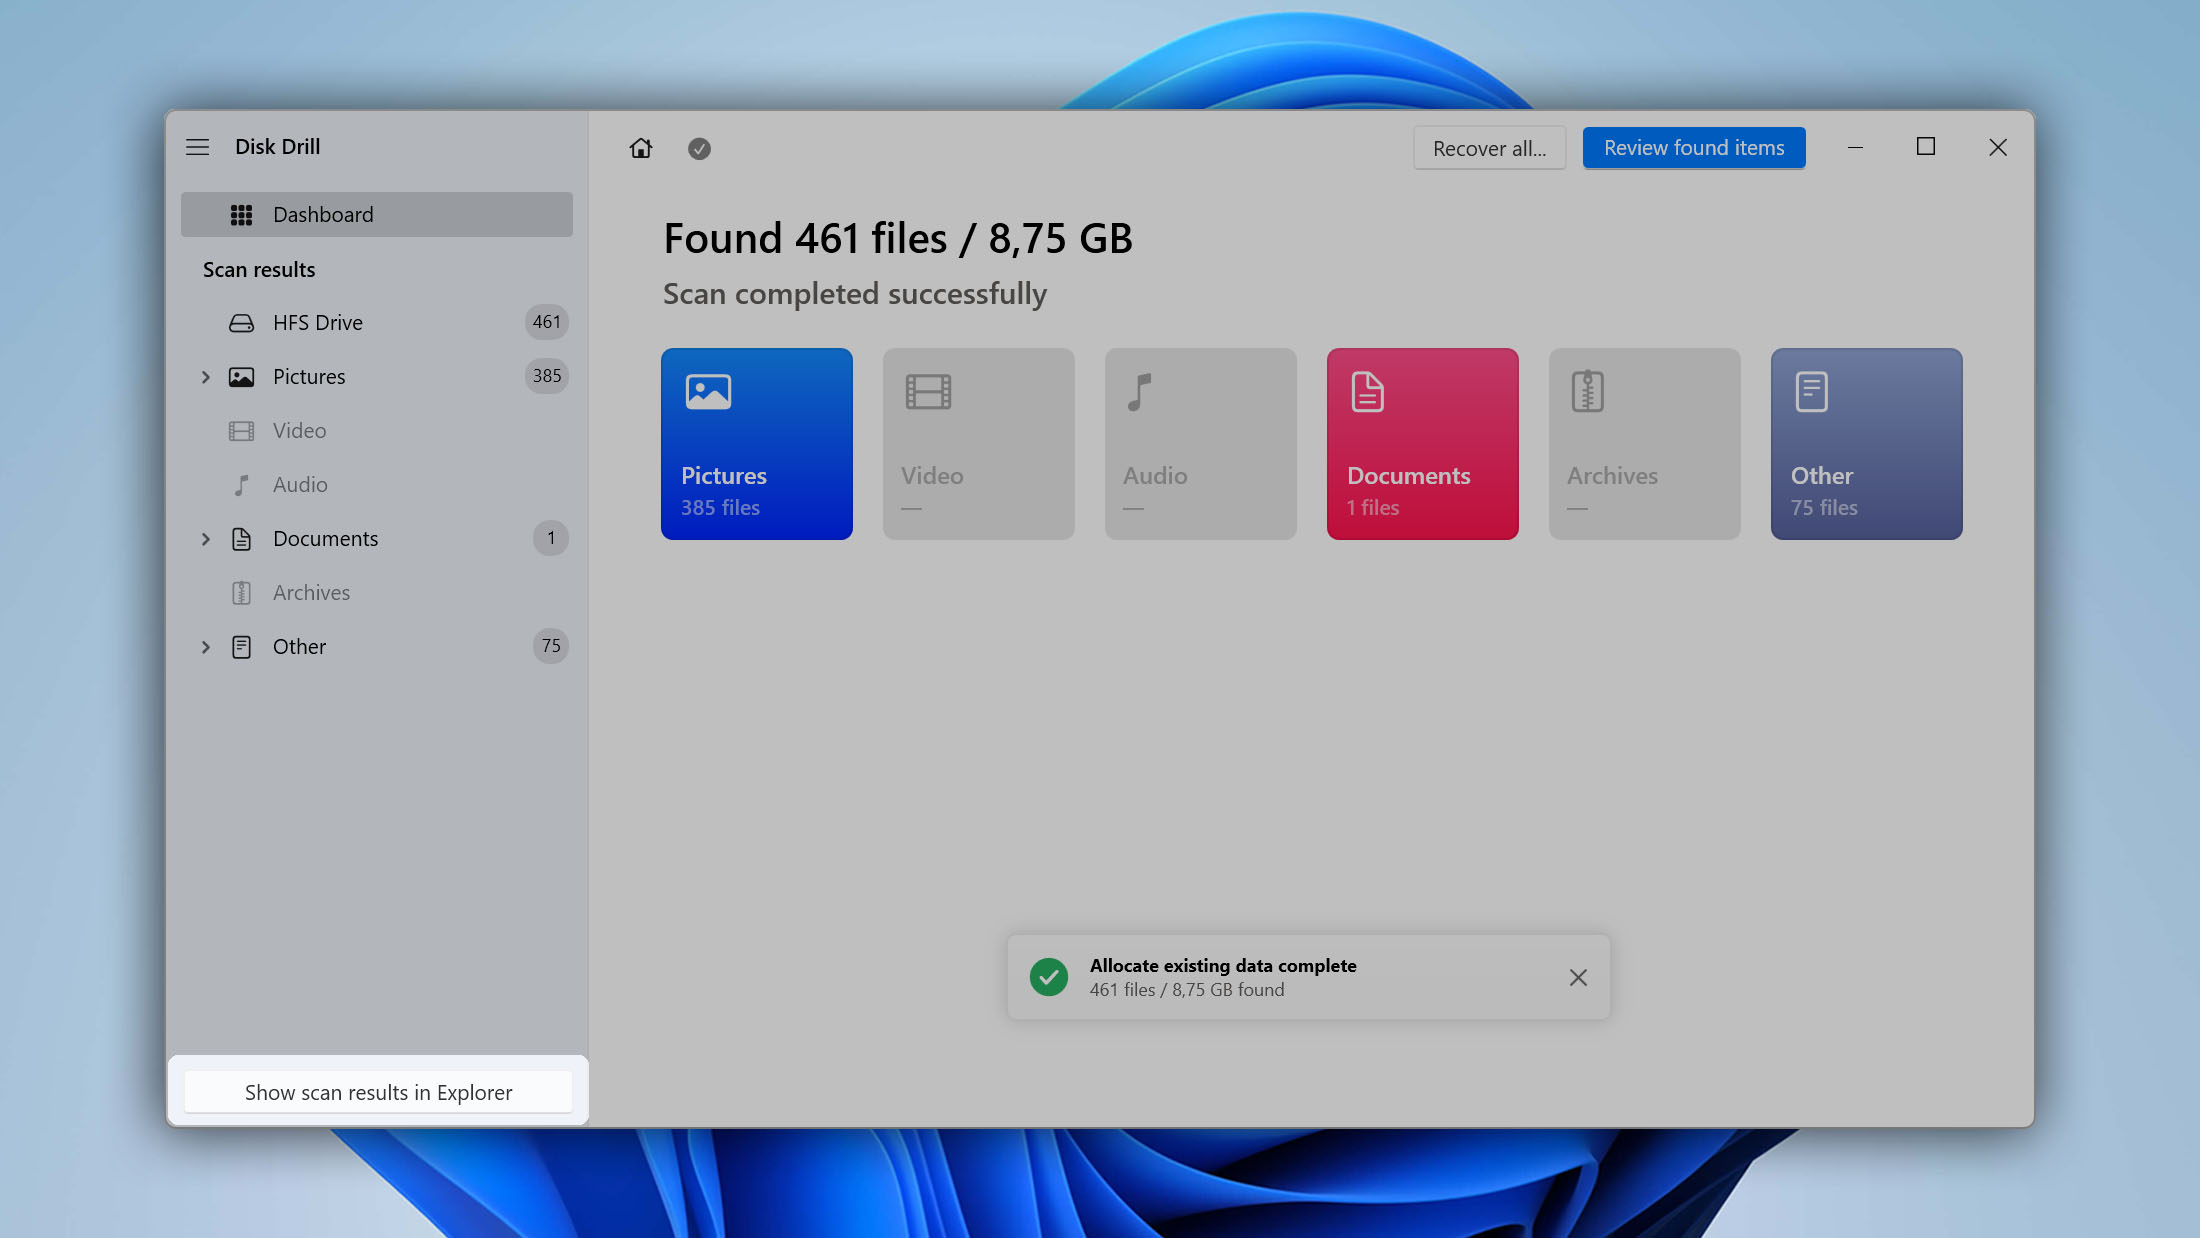
3.3. Recover Data from a Mac Hard Drive to Another Computer Using Disk Drill
Even though the Windows operating system doesn’t natively support Apple’s Hierarchical File System (HFS+), you can recover data from HFS+ volumes with the help of Disk Drill for Windows:
- Free Download and install Disk Drill for Windows.
- Launch Disk Drill and select the hard drive with the HFS volume.
- Use the “Allocate existing data” recovery method.
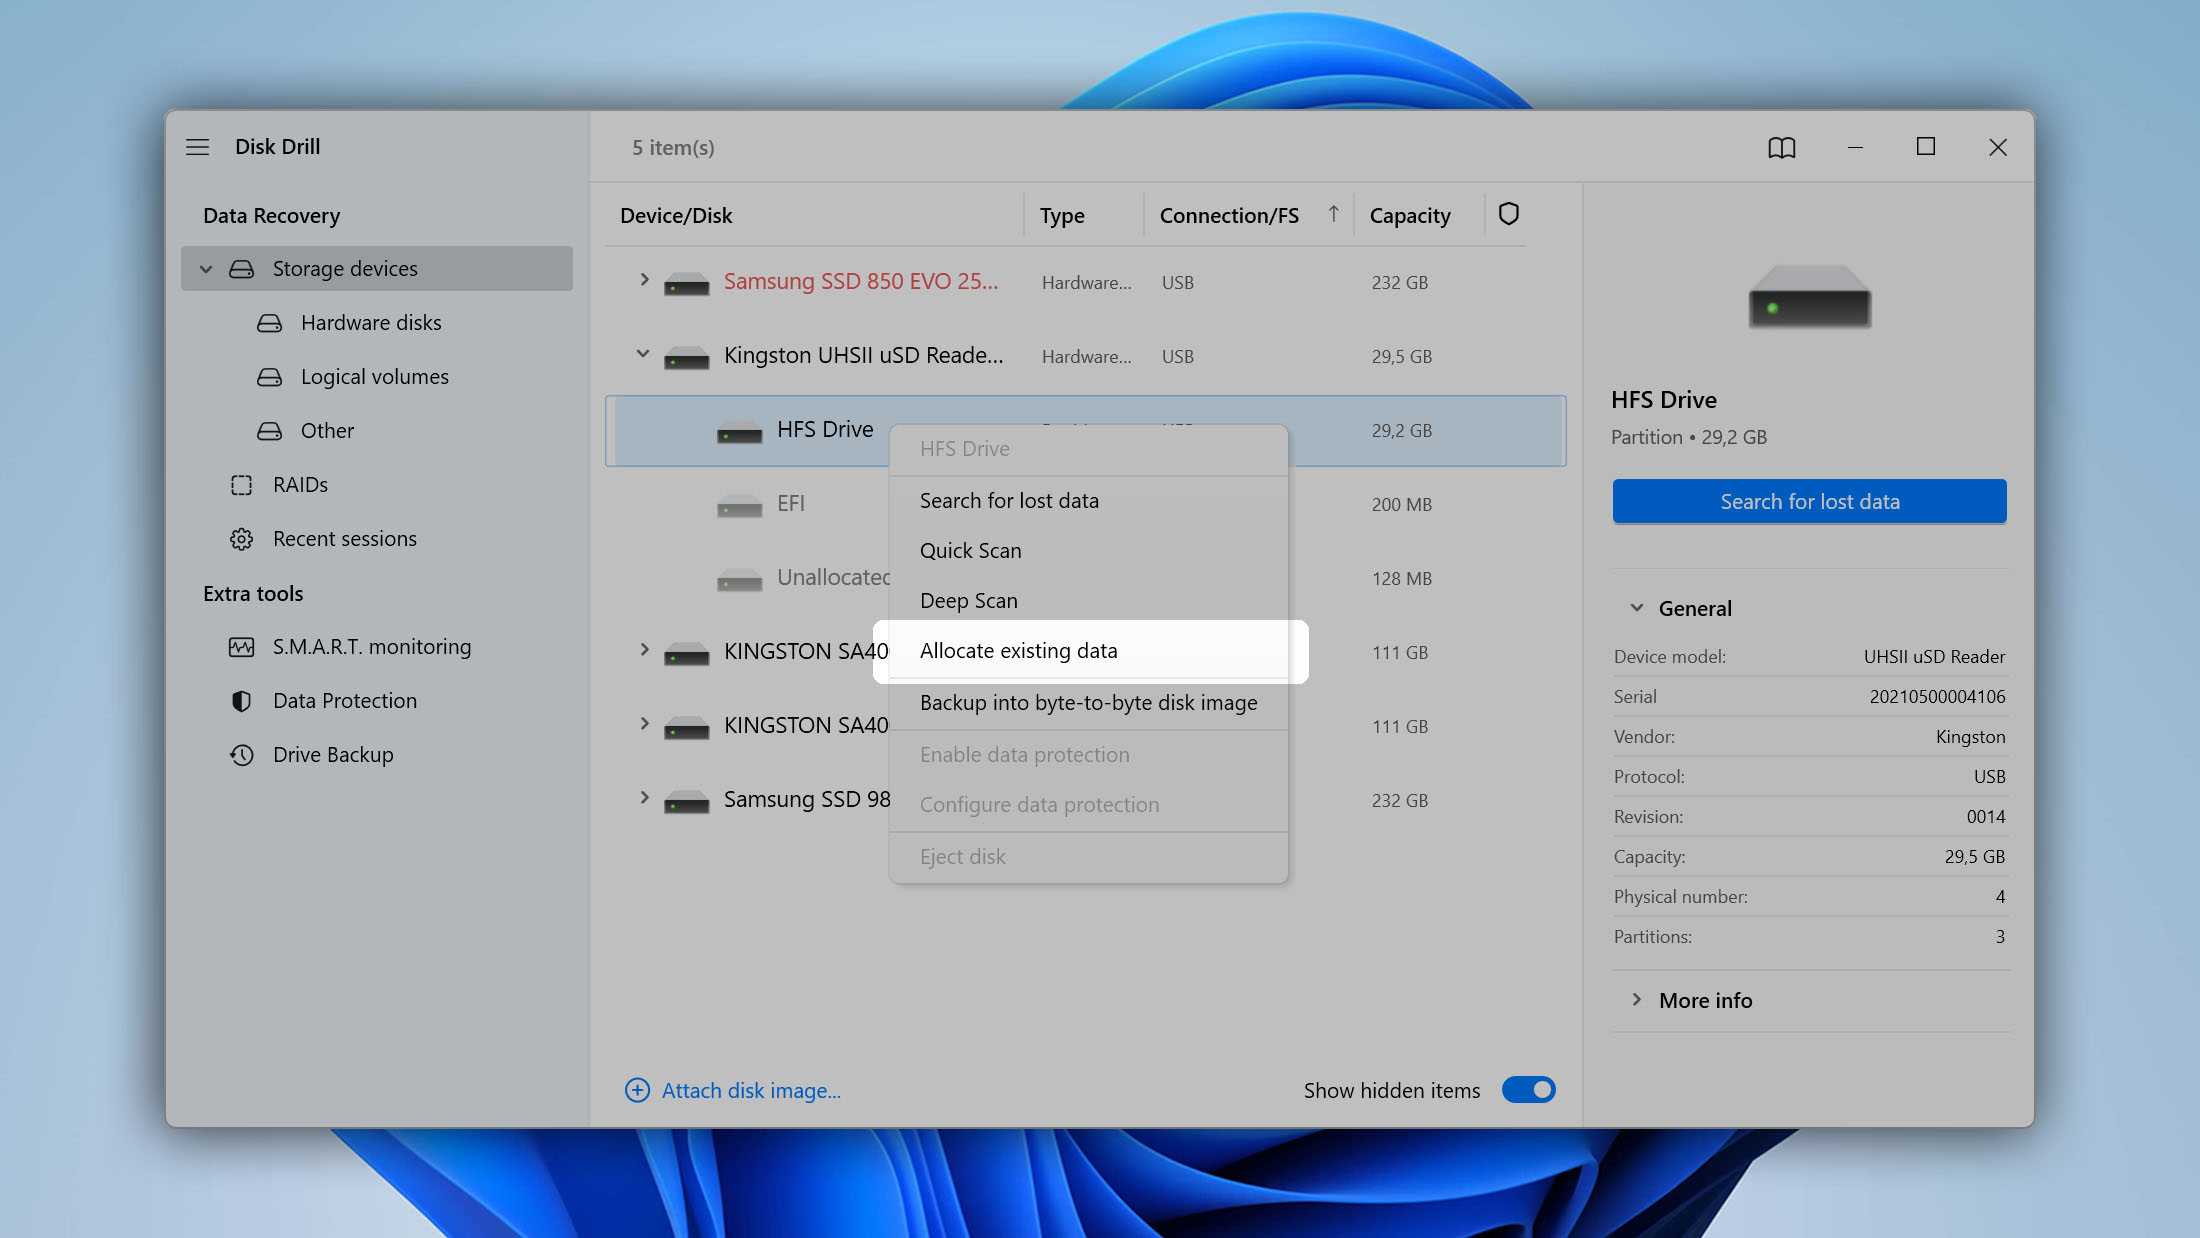
- Disk Drill will show you available data.
- Click Show scan results in Windows Explorer.
- The new drive will appear in Windows Explorer, and you can access it just like any other drive.
3.4 Possible Issues
Here are three common issues Mac users often experience when attempting to transfer data from a Mac hard drive to another computer:
| Issue | Solution |
| Mac external hard drive not showing up on PC. | Check if the hard drive is listed in the Disk Management utility. If it is, right-click on it and choose Change Drive Letter and Paths to assign any available drive letter to it, and it should show up. |
| MacBook won’t recognize a startup disk. | If your MacBook refuses to recognize a startup disk, we recommend you boot in Recovery Mode by holding down Command + R keys until you see the Apple logo. Then, select Disk Utility and run First Aid on the problematic disk. This should fix any issues with the startup disk not showing on your Mac. |
| External hard drive is not bootable on Mac. | Many problems with external hard drives refusing to boot are caused by the Apple T2, M1 or M2 Security Chip, which offers several features to help secure your Mac against unauthorized access. One of these features prevents booting from external hard drives, and you can disable it from the Startup Security Utility. To open this utility, boot in Recovery Mode and choose Utilities > Startup Security Utility from the menu bar. |
4. Data Recovery Services: How Much Do They Cost and Are They Worth the Money?
Don’t believe anyone who tells you that it costs $1 to recover 1 GB of data. That’s simply not the case. In the United States, the hourly rate for a data recovery professional is between $100 and $300 per hour, depending on the following factors:
- Location: As you would probably expect, data recovery professionals who are based in major cities charge substantially more for their services than rural data recovery professionals because their expenses are higher.
- Equipment: Anyone with a capable data recovery software application and an entrepreneurial mindset can call themselves a data recovery professional, but true professionals operate in facilities with dust-free rooms and state-of-the-art equipment.
- Experience: Naturally, someone who has successfully complete countless data recoveries can charge more money than someone who’s just starting out.
In addition to the hourly rate of data recovery professionals, there are other things that greatly influence the cost of professional data recovery, including:
- Cause of data loss: As we’ve explained in the beginning of this article, certain causes of data loss, such as physical damage, are much more difficult to recover from than others.
- The amount of lost data: While it’s not common for data recovery services to charged based on the amount of recovered data, it’s usually considerably faster (and thus less expensive) to recover a single file than a thousand.
- Replacement parts: When recovering data from physically damaged storage devices, it’s usually necessary to provide replacement parts, and their cost understandably influences the total cost of recovery.
With all these factors in mind, you can expect the overall cost of professional data recovery services to be between $500 and $3,000, but it can also be much higher or much lower.
Considering how much professional data recovery costs, most people are better off first attempting to recover lost data on their own using DIY data recovery software. The only exception to this is the recovery of data from physically damaged storage devices, which is seldom possible at home. That said, professional data recovery is a no-brainer for companies that need to recover critically important data but don’t employ anyone with the necessary skills and experience.
If you decide to take advantage of professional data recovery services, we highly recommend you choose a reputable company, such as:
As long as you’re not in a hurry, it’s a good idea to contact several data recovery services and compare their prices before you ship off your storage device to one of them.
Frequently Asked Questions
How to access files on a Mac hard drive?
To access files on a Mac hard drive:
- Open Finder.
- Select your Mac from the list of locations in the left pane.
- Open your Mac hard drive.
You should see the following folders: Applications, Library, System, and Users. The Users folder is where you can find your personal data, including documents, movies, and music.
Is there any completely free data recovery software for Mac?
Yes, there are several completely free data recovery software solutions for Mac, including:
- Lazesoft Mac Data Recovery
- PhotoRec
- TestDisk
Each of these solutions has its own strengths and weaknesses, but they all leave something to be desired when compared with professional data recovery software.
Can I put a Mac hard drive in a PC?
It’s possible to physically connect a Mac hard drive to a PC, but the Windows operating system can’t natively read Mac file systems, including HFS, HFS+, and APFS. There are, however, third-party applications that make it possible to read a Mac-formatted hard drive on a Windows PC, including HFSExplorer.
How to back up a Mac that won’t turn on?
If you want to transfer files from a broken Mac to a new Mac, we recommend you connect the two Macs together using Thunderbolt 3, USB-C (on the MacBook), Thunderbolt 2, or FireWire and boot the Mac that won’t turn on into Target Disk Mode by holding down the T key until you see the Target Disk Mode screen with a bouncing Thunderbolt logo.
MacBook Pro SSD Data Recovery: Is It Possible?
All modern MacBook Pros have SSDs soldered onto the motherboard, which makes it impossible to perform MacBook Pro data recovery by removing the SSD with lost data from a MacBook Pro that won’t turn on and connecting it to a different computer. If that’s the problem you’re dealing with, we recommend you contact data recovery professionals.
David Morelo is a professional content writer with a specialization in data recovery. He spends his days helping users from around the world recover from data loss and address the numerous issues associated with it.
When not writing about data recovery techniques and solutions, he enjoys tinkering with new technology, working on personal projects, exploring the world on his bike, and, above all else, spending time with his family.
- Klennet Recovery Review (Formerly Zero Assumption Recovery)
- iBeesoft Data Recovery Review – A Likable Clone With Limited Features
- DMDE Review – A Data Recovery Powerhouse or a Usability Nightmare?
- Cisdem Data Recovery for Mac Review – A Clone in Disguise
- Tenorshare 4DDiG Review – All That Glitters Is Not Gold
- Frisco, Texas, United States
Yevgeniy Tolkunov is Hardware Engineer at ACE Data Recovery. Yevgeniy has a Master's Degree in Physics, Information Technology; 15+ years of experience.