How to Access the Recycle Bin on an External Hard Drive
The Recycle Bin feature on your HDD can be a lifesaver if you accidentally delete important files from the drive. But accessing it is not as simple as accessing Windows’ native Recycle Bin. Use this guide to learn how you can access your external hard drive’s Recycle Bin as well as recover your data, even if it’s not available in the Recycle Bin.
How to View the Recycle Bin on an External Hard Drive
An external hard drive’s Recycle Bin is classified as a system folder and is hidden. It’s typically named “$RECYCLE.BIN” and located in the root directory of the external hard drive. The folder itself works in the same way as Windows’ native Recycle Bin.
To view the Recycle Bin on an external hard drive, follow these steps:
- Type “folder options” in Windows Search (Windows Key + S). Click on File Explorer Options or Folder Options depending on your Windows version.
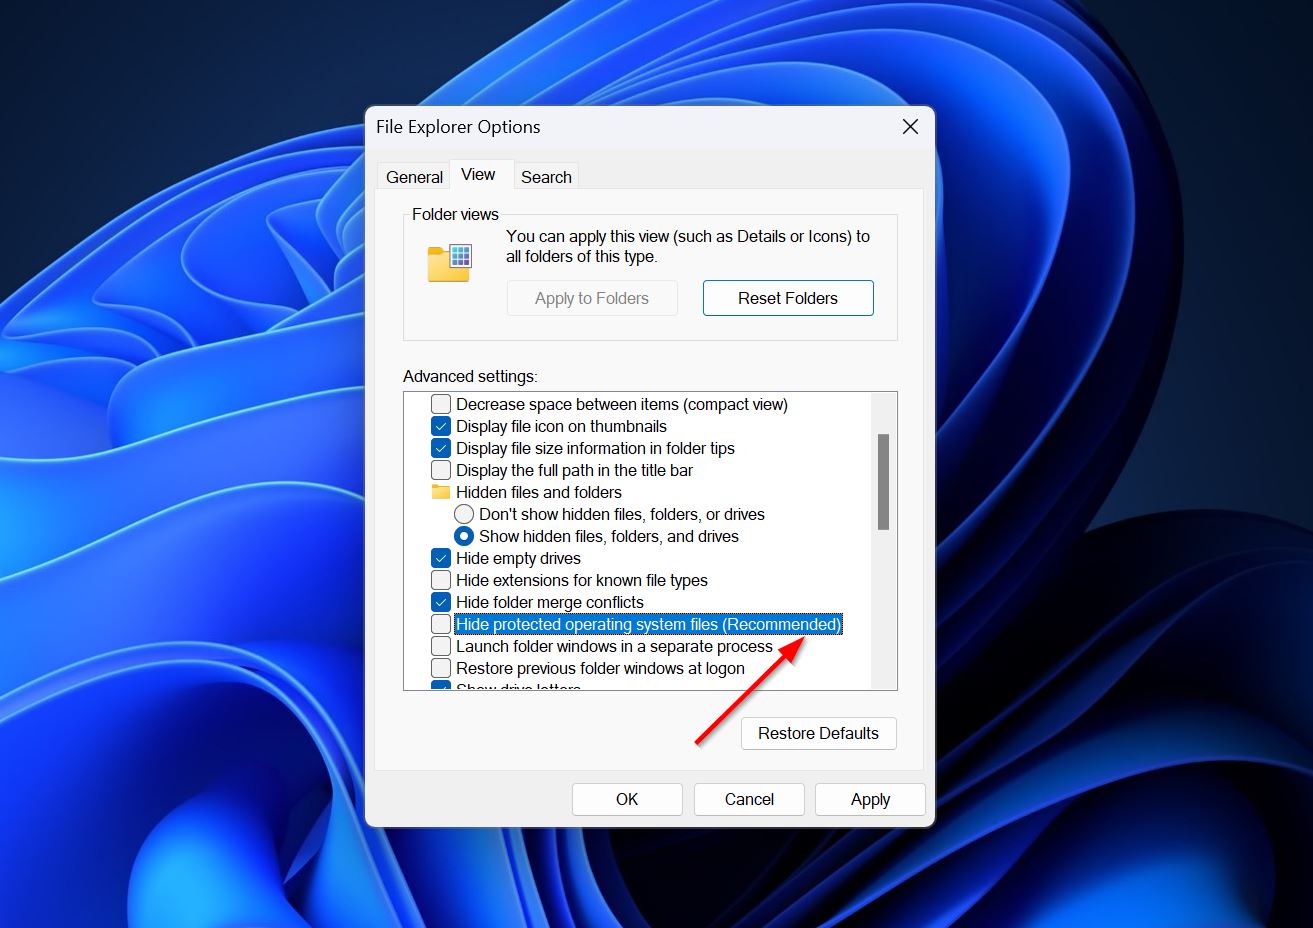
- Go to View and then uncheck the Hide protected operating system files option. Click on OK.
- Connect the external HDD to your PC and launch File Explorer (Windows Key + E).
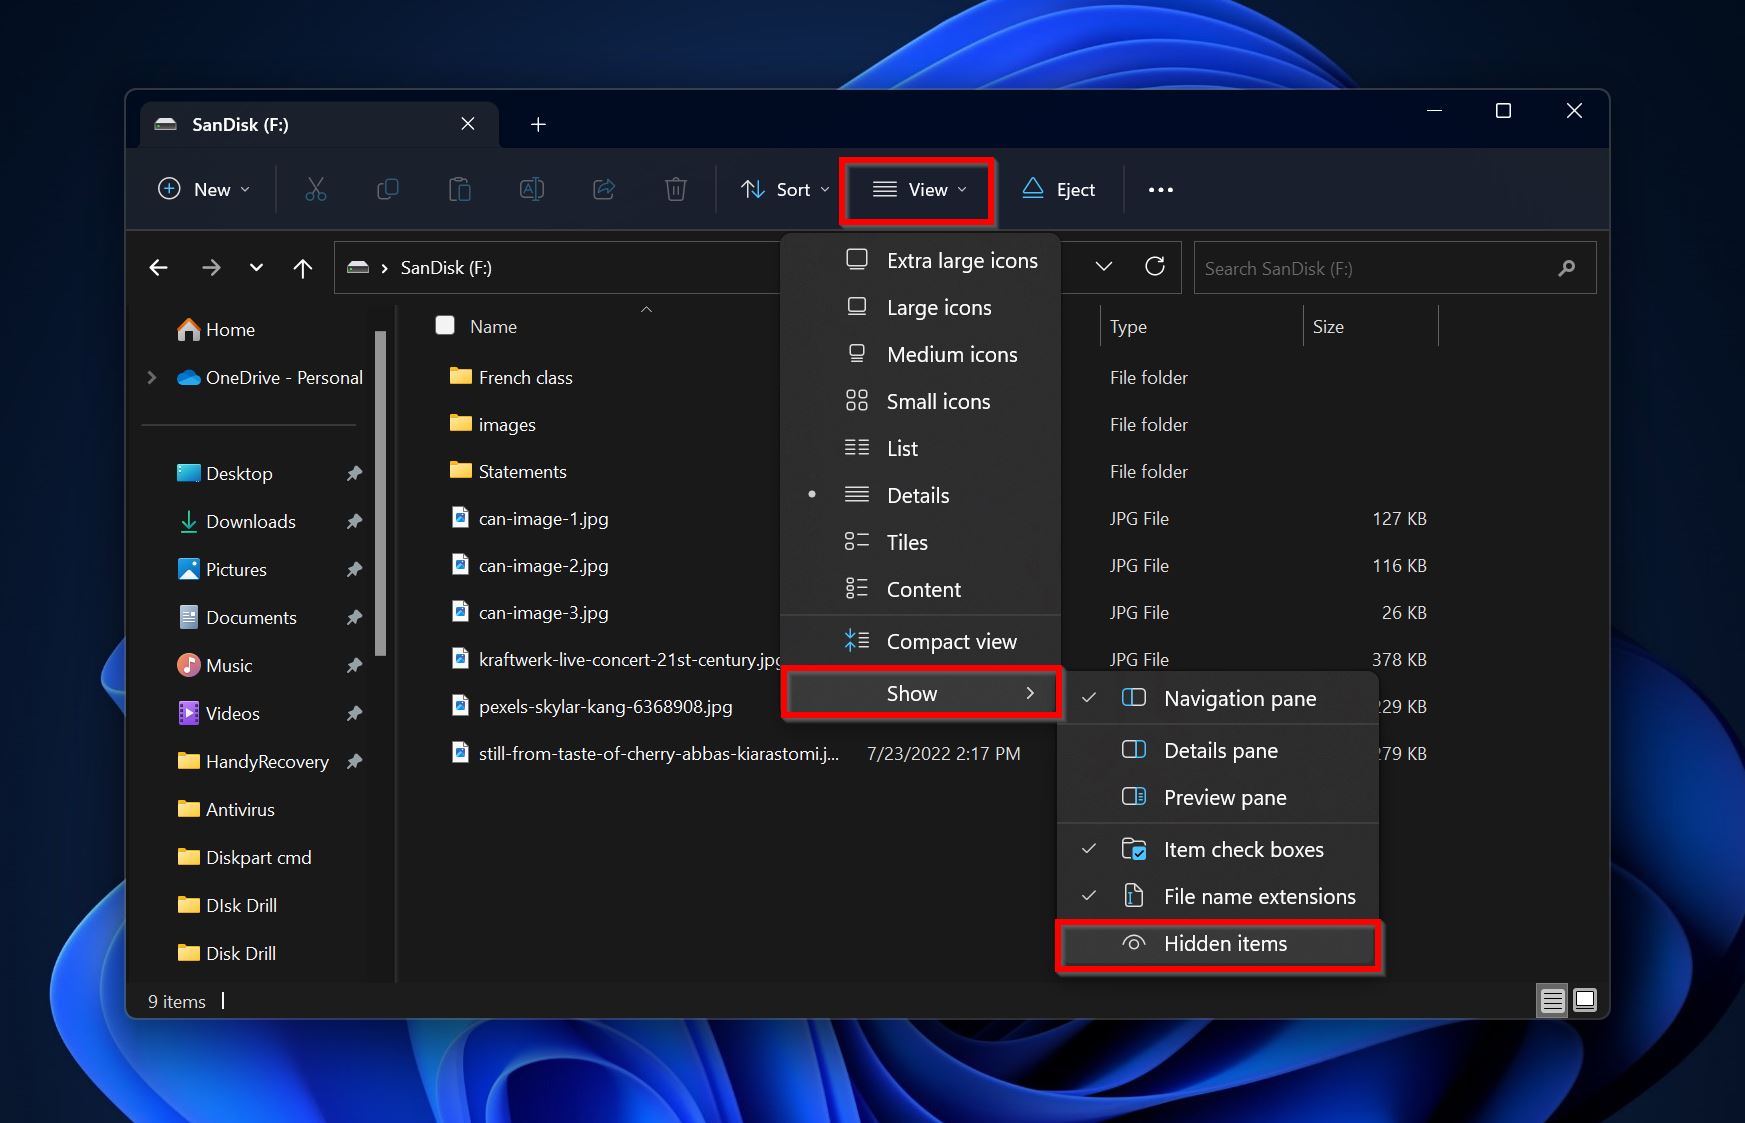
- Click on View > Show. Check the Hidden items option.
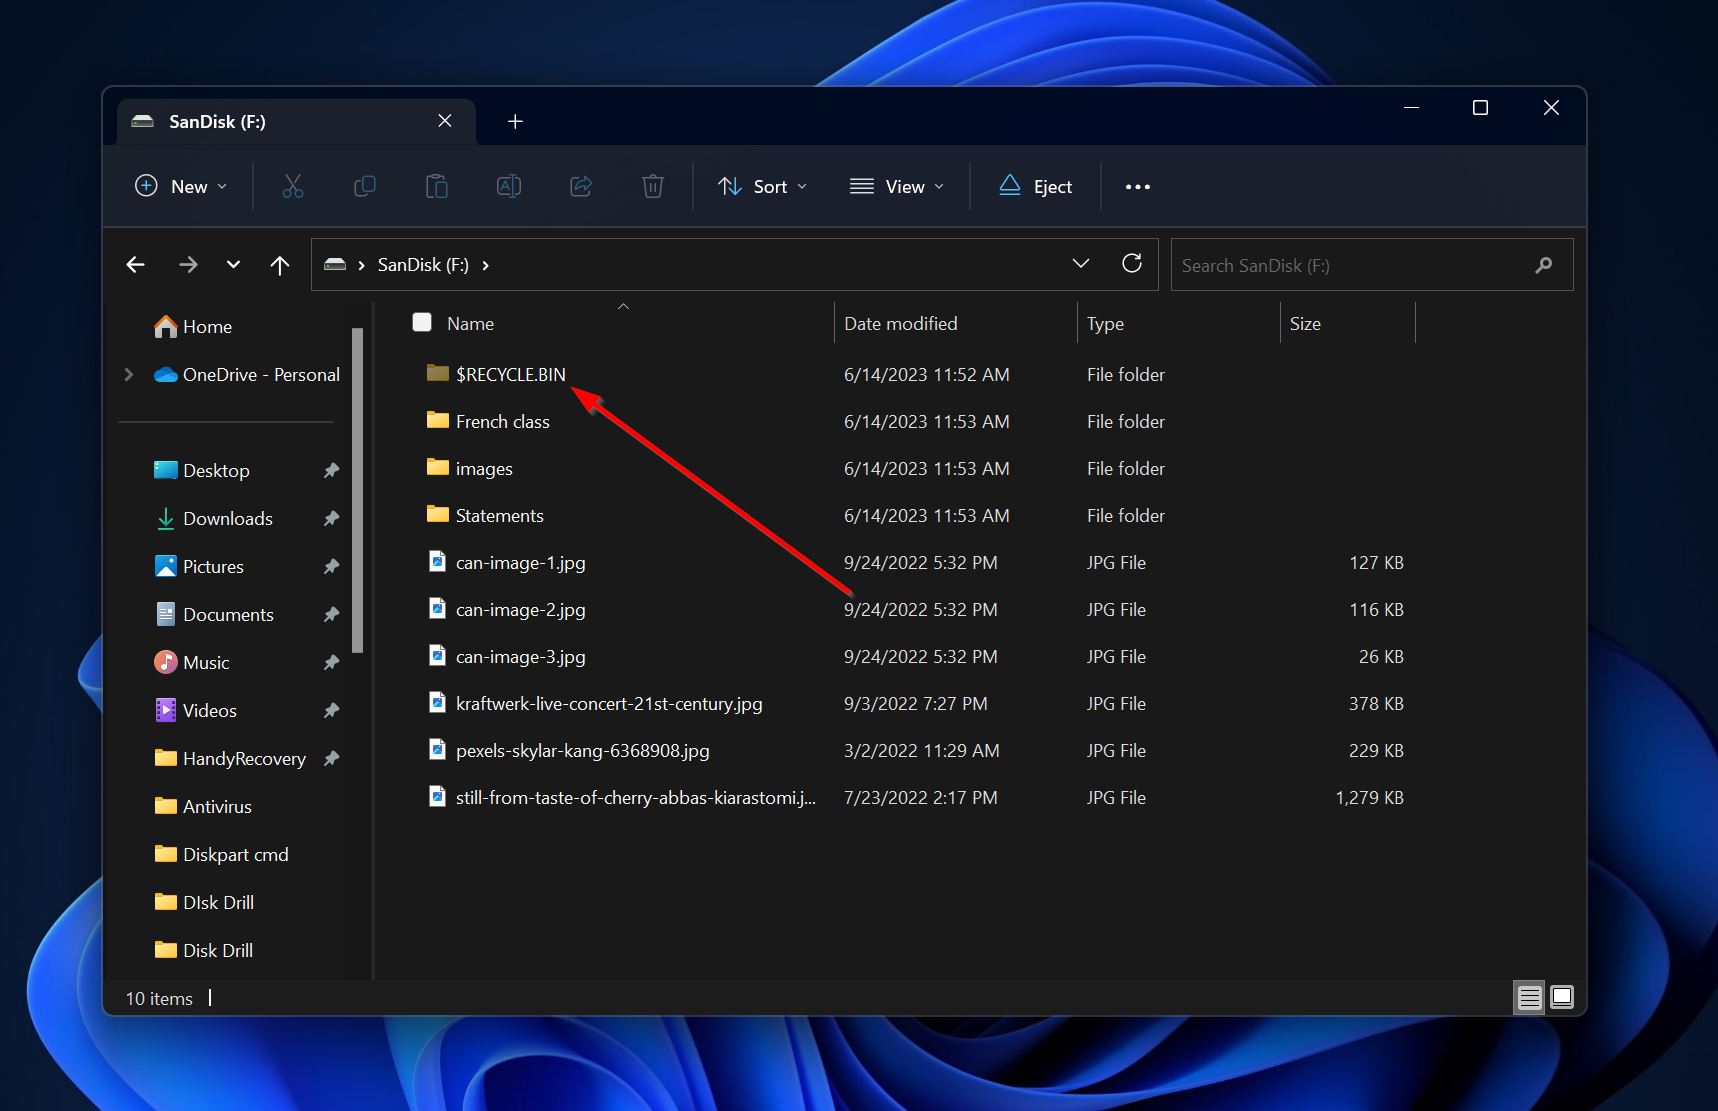
- The external HDD’s Recycle Bin folder will be visible.
How to Access the Recycle Bin on an External Hard Drive
On PCs running Windows 11, you may be unable to see your external hard drive’s Recycle Bin even after enabling hidden items in Windows Explorer. That’s because Microsoft recently disabled the Recycle Bin folder on external hard drives. Luckily, you can bring the folder back with a quick trip to Windows Registry Settings.
Here’s what the process looks like:
- Press Windows Key + R to open the Run app. Type regedit in the textbox and press Enter.
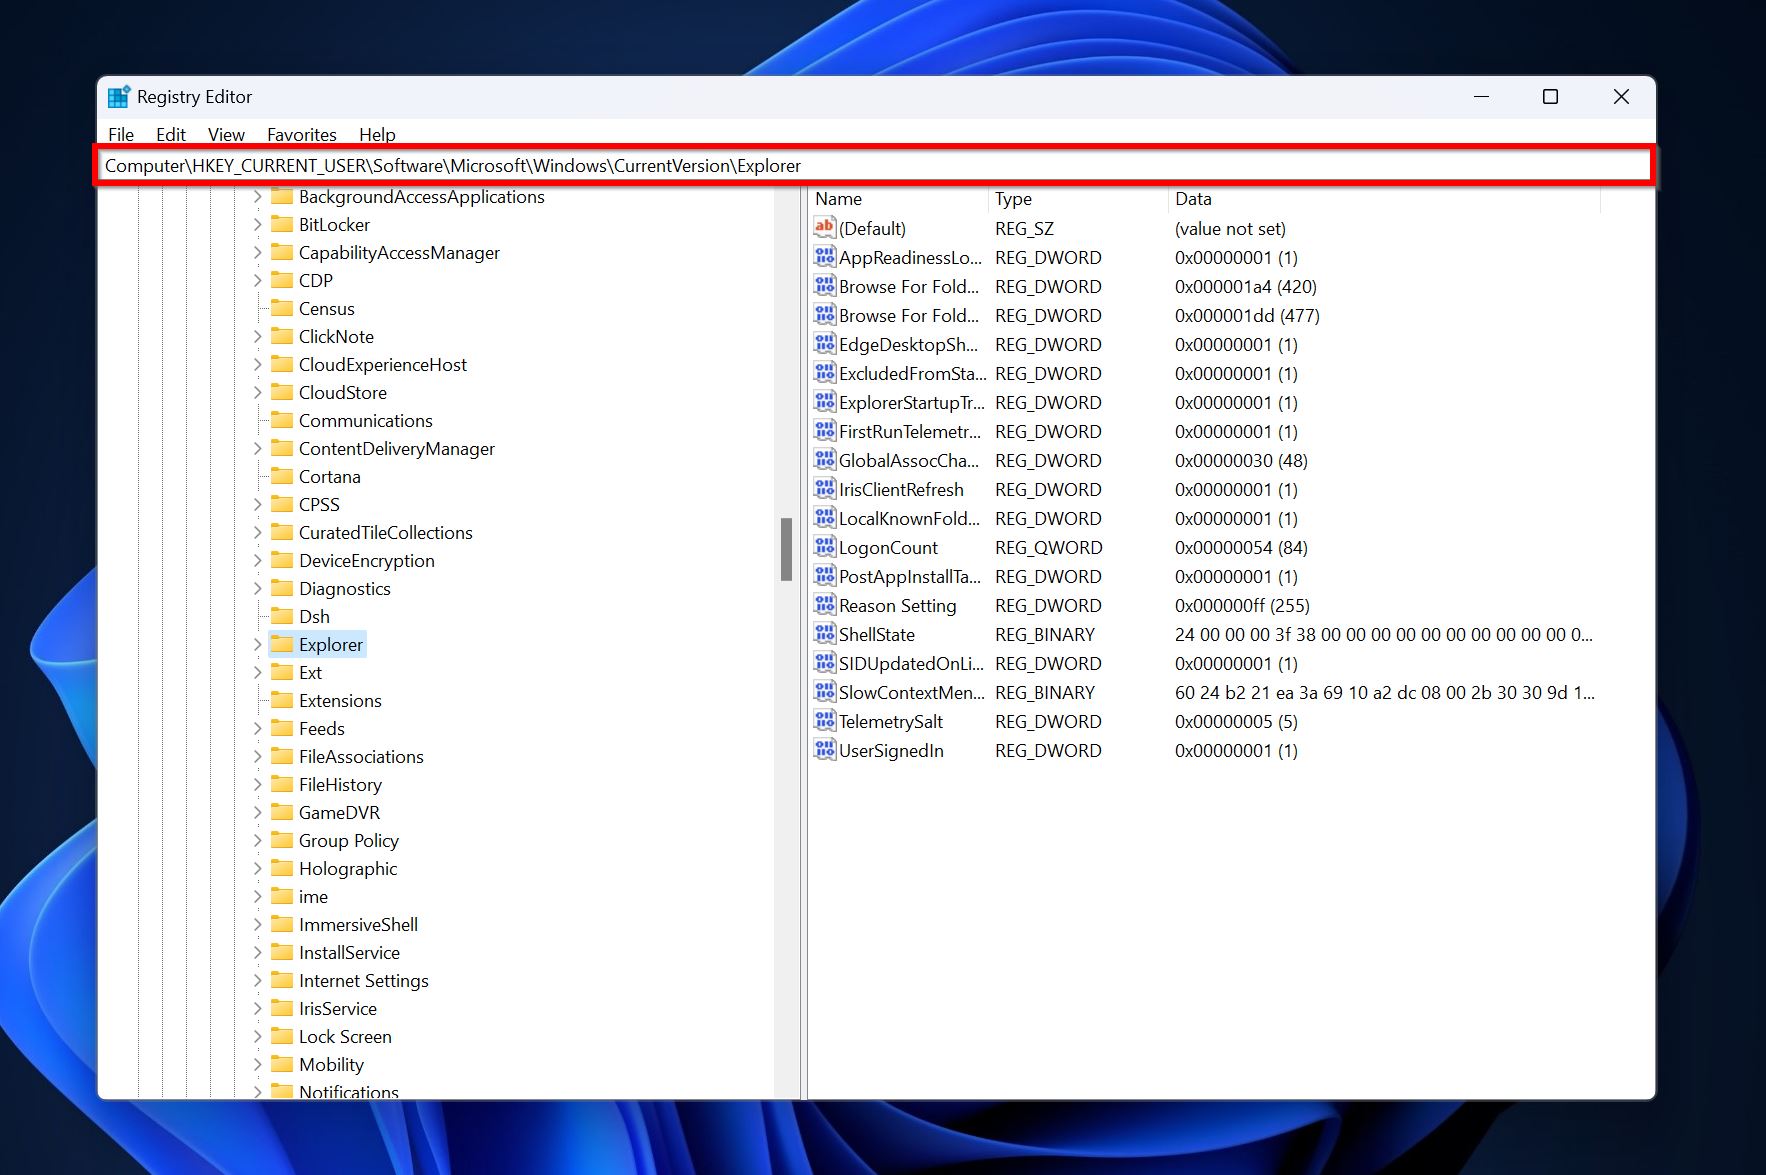
- Navigate to this location in the Registry Editor –
HKEY_CURRENT_USER\SOFTWARE\Microsoft\Windows\CurrentVersion\Policies\Explorer
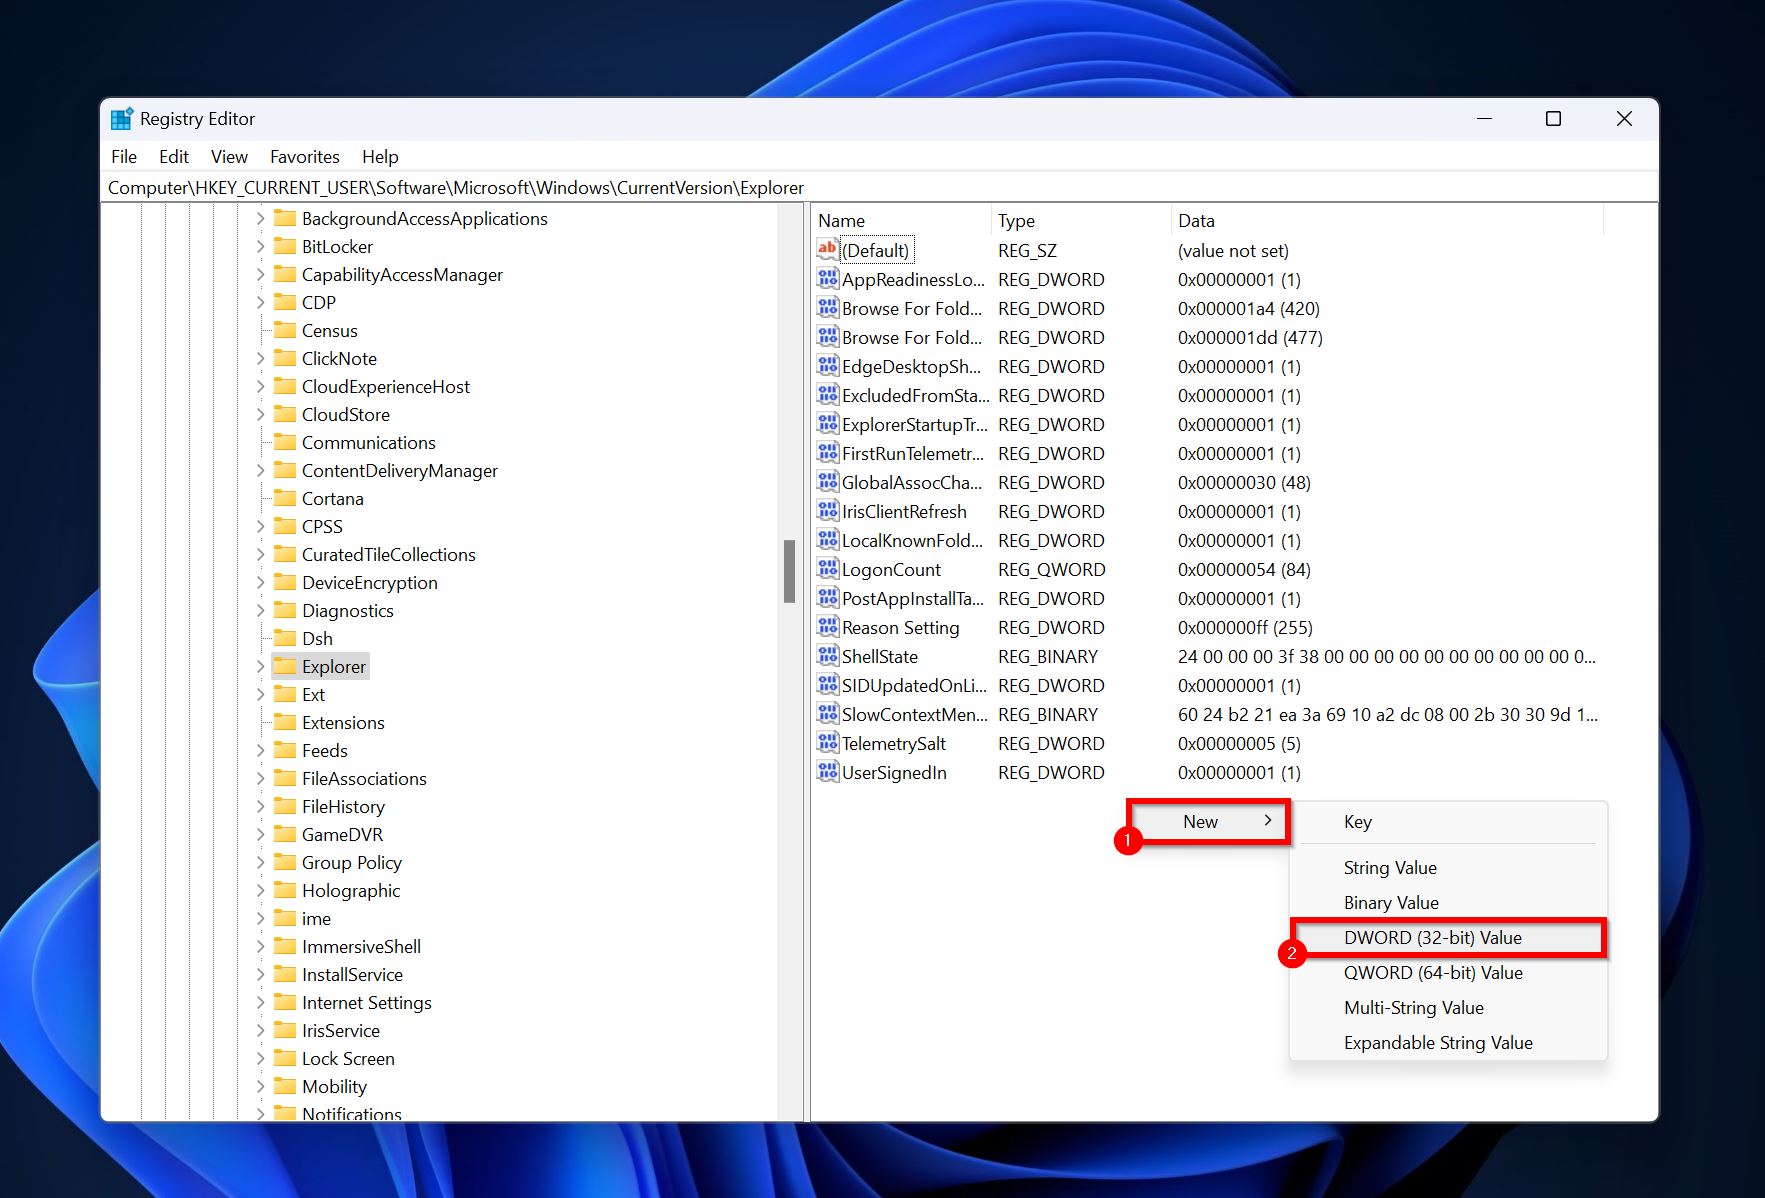
- Right-click on the white space in the right pane and click on New > DWORD (32-bit) Value.
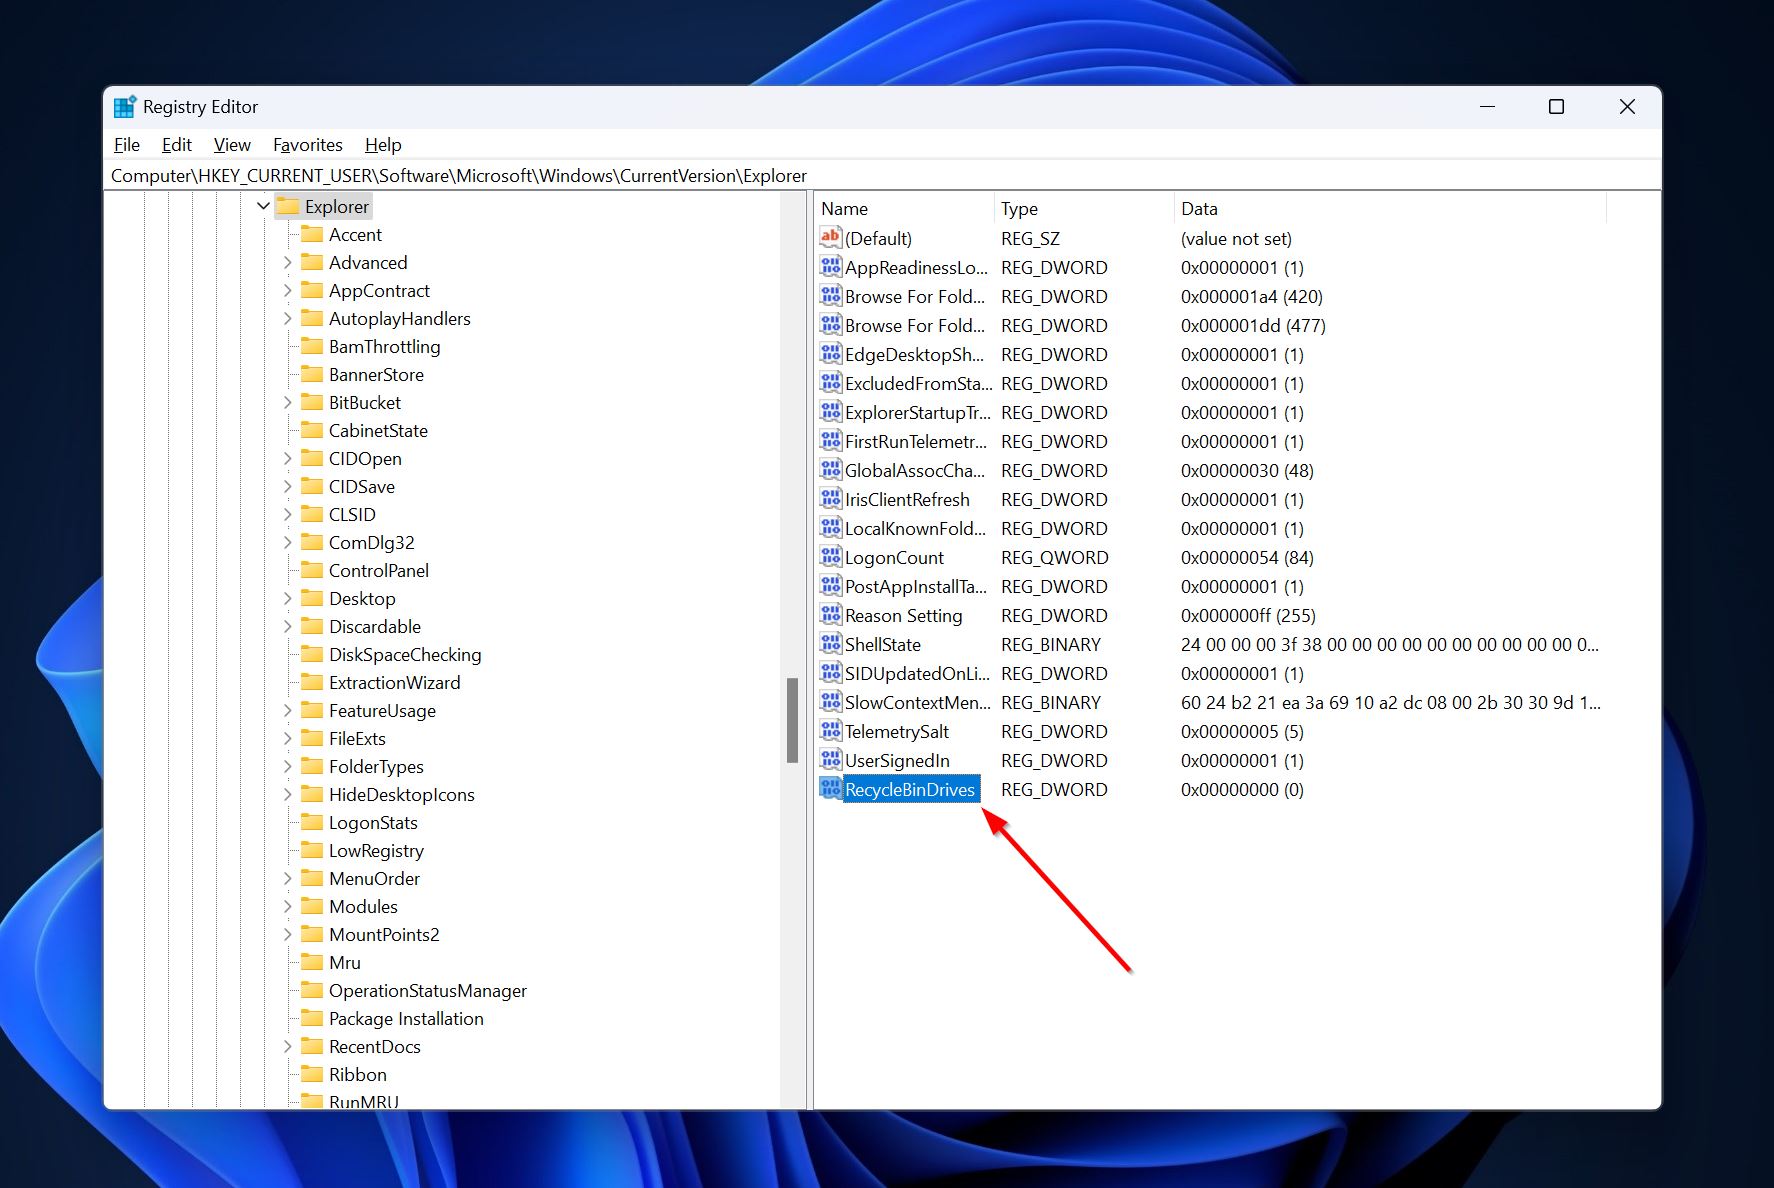
- Name the newly created entry as RecycleBinDrives.
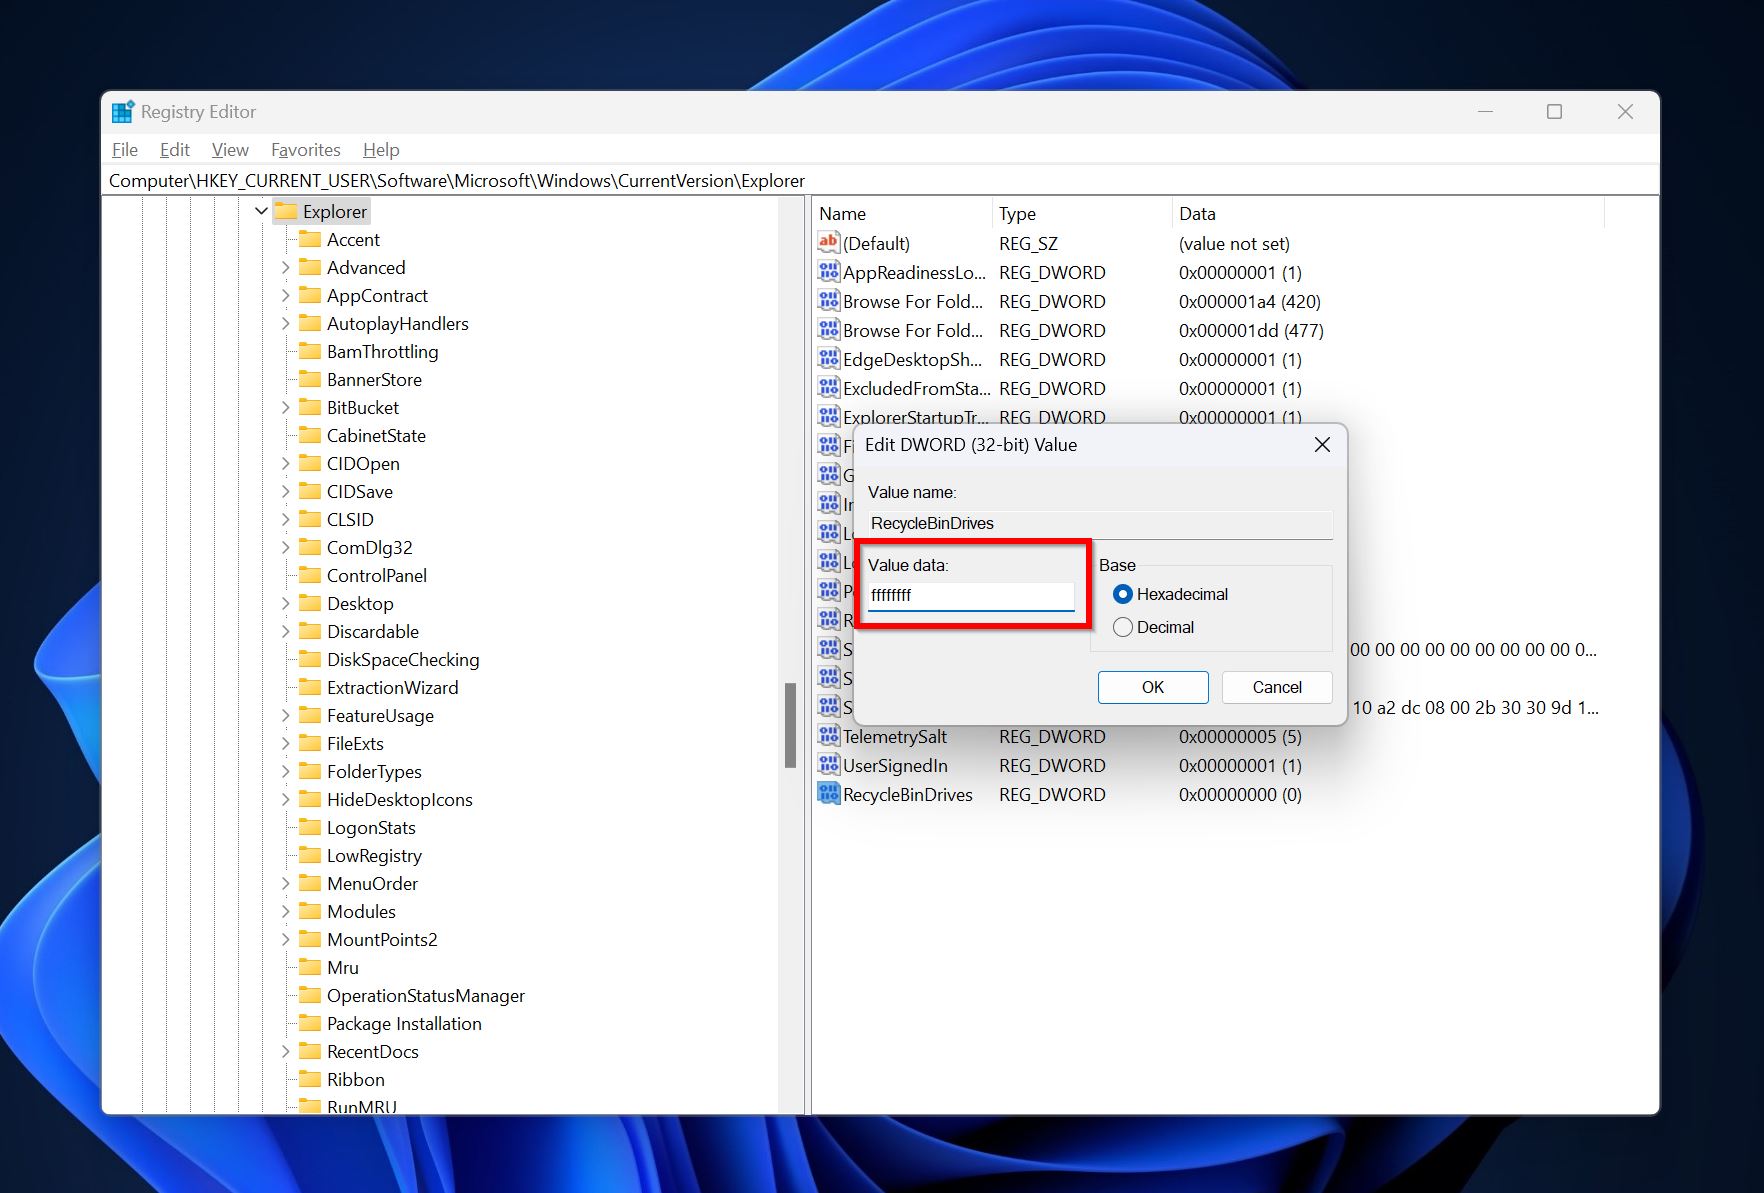
- Double-click on RecycleBinDrives entry and type ffffffff in the Value data field. Click OK.
- Exit the Registry Editor and restart your PC. The $RECYCLE.BIN folder will be visible in the external drive’s root directory.
How to Recover Files Lost from the Recycle Bin on an External Hard Drive
In scenarios where you’re unable to view the Recycle Bin, or the folder is empty, you can use data recovery programs to get back the files. The only problem is that there are innumerable data recovery apps that all claim to be the best at everything, which makes choosing the adequate one for Recycle Bin recovery, difficult.
When it comes to external hard drive data recovery, Disk Drill is an excellent choice:
- Wide compatibility: The program recognizes and supports data recovery from all external hard drives under the sun, including major manufacturers like WD, Seagate, Toshiba, SanDisk, and more.
- User-friendly: Its easy-to-use, clean UI ensures your data recovery experience is as smooth and user-friendly as possible.
- Support for numerous file formats: Disk Drill recognizes over 300 file formats and comes with an in-built preview feature. This is of immense help because many of us store photos, videos, and other important files on our external hard drives that can be difficult to identify with just the filename alone.
Let’s see what the external hard drive Recycle Bin data recovery process looks like in Disk Drill:
- Download Disk Drill and install it.
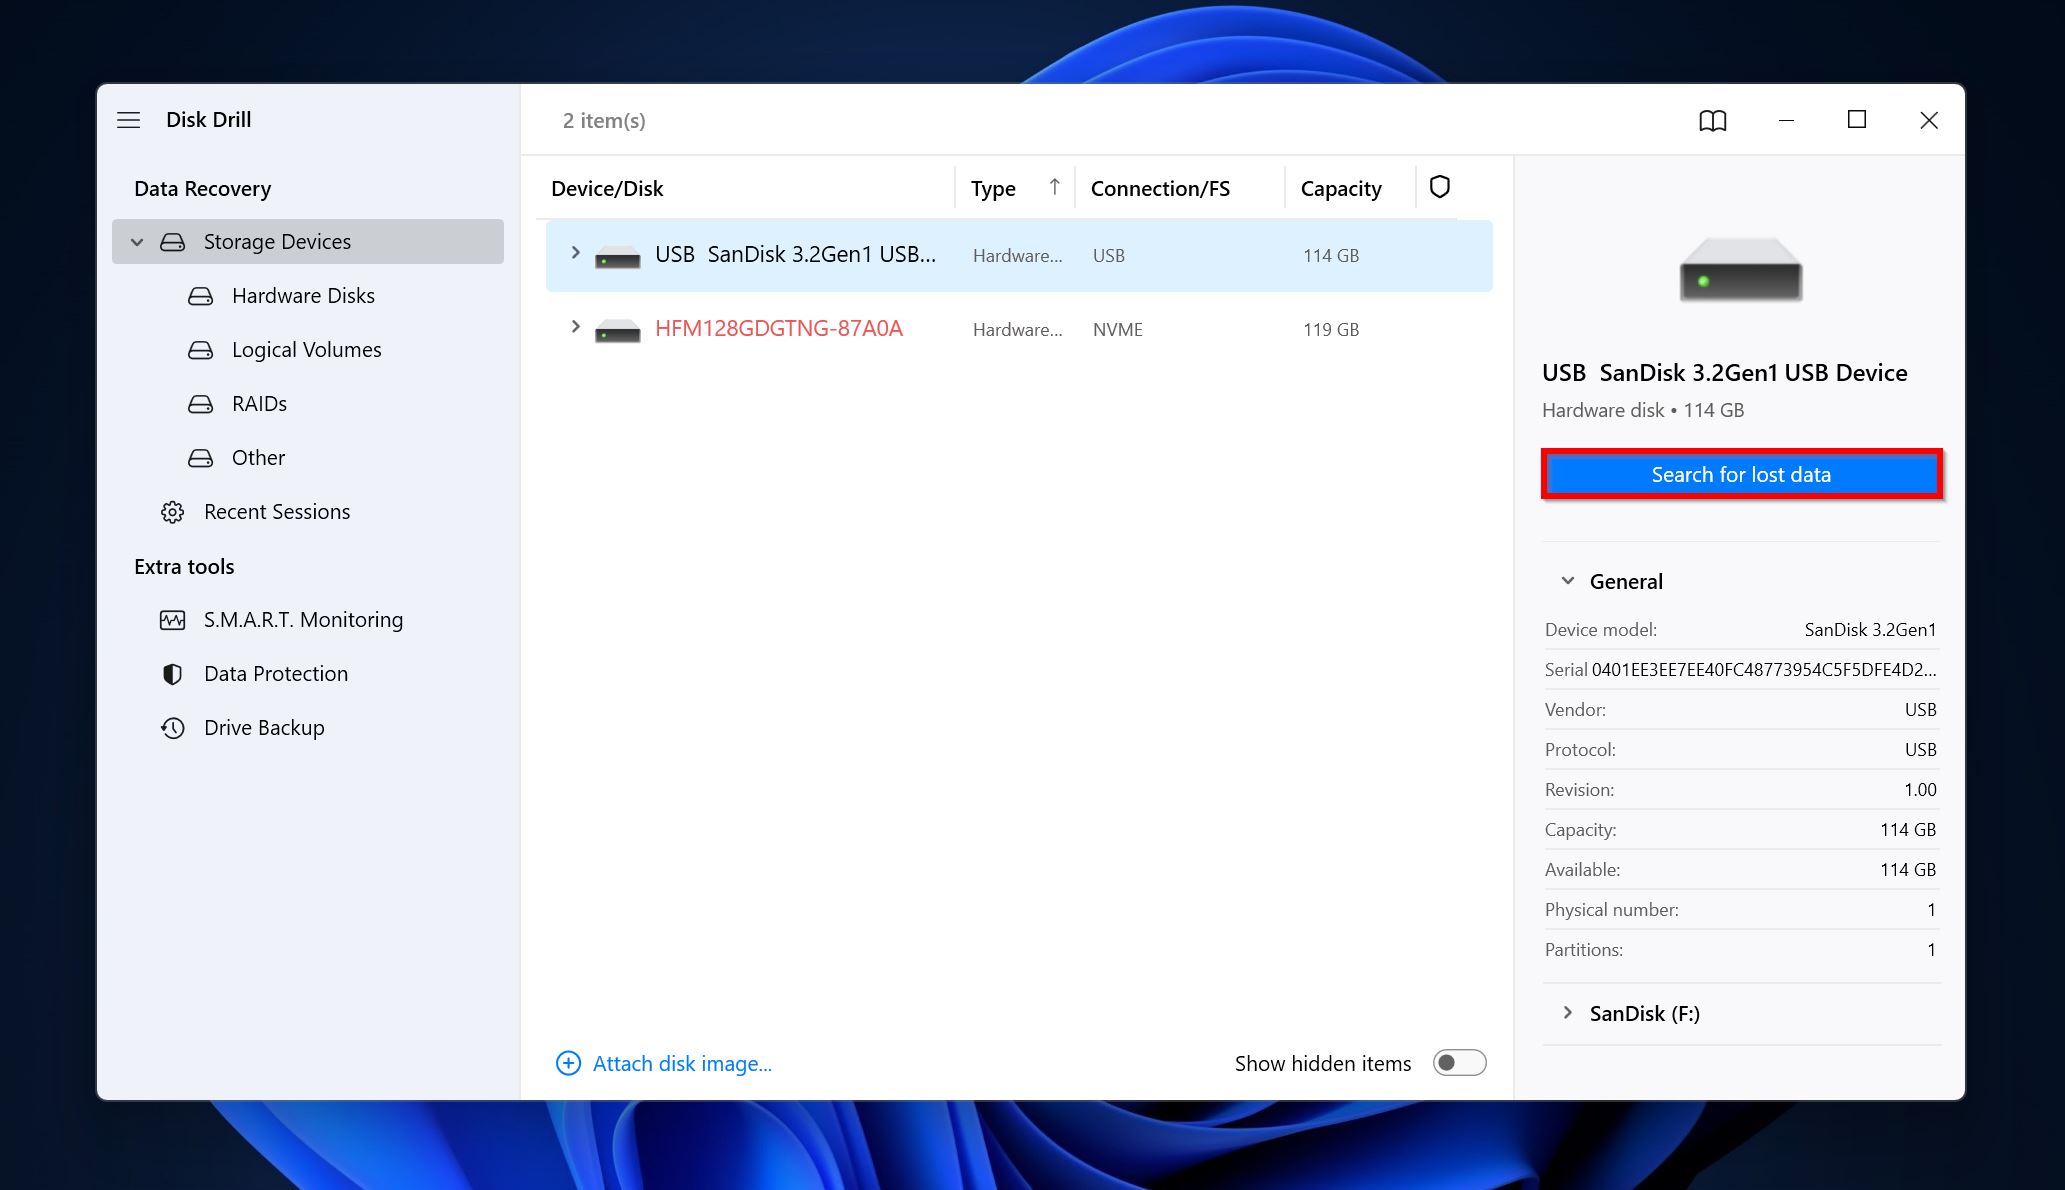
- Connect the external drive to your PC, and then launch Disk Drill.
- Select the external hard drive, and click on Search for lost data.
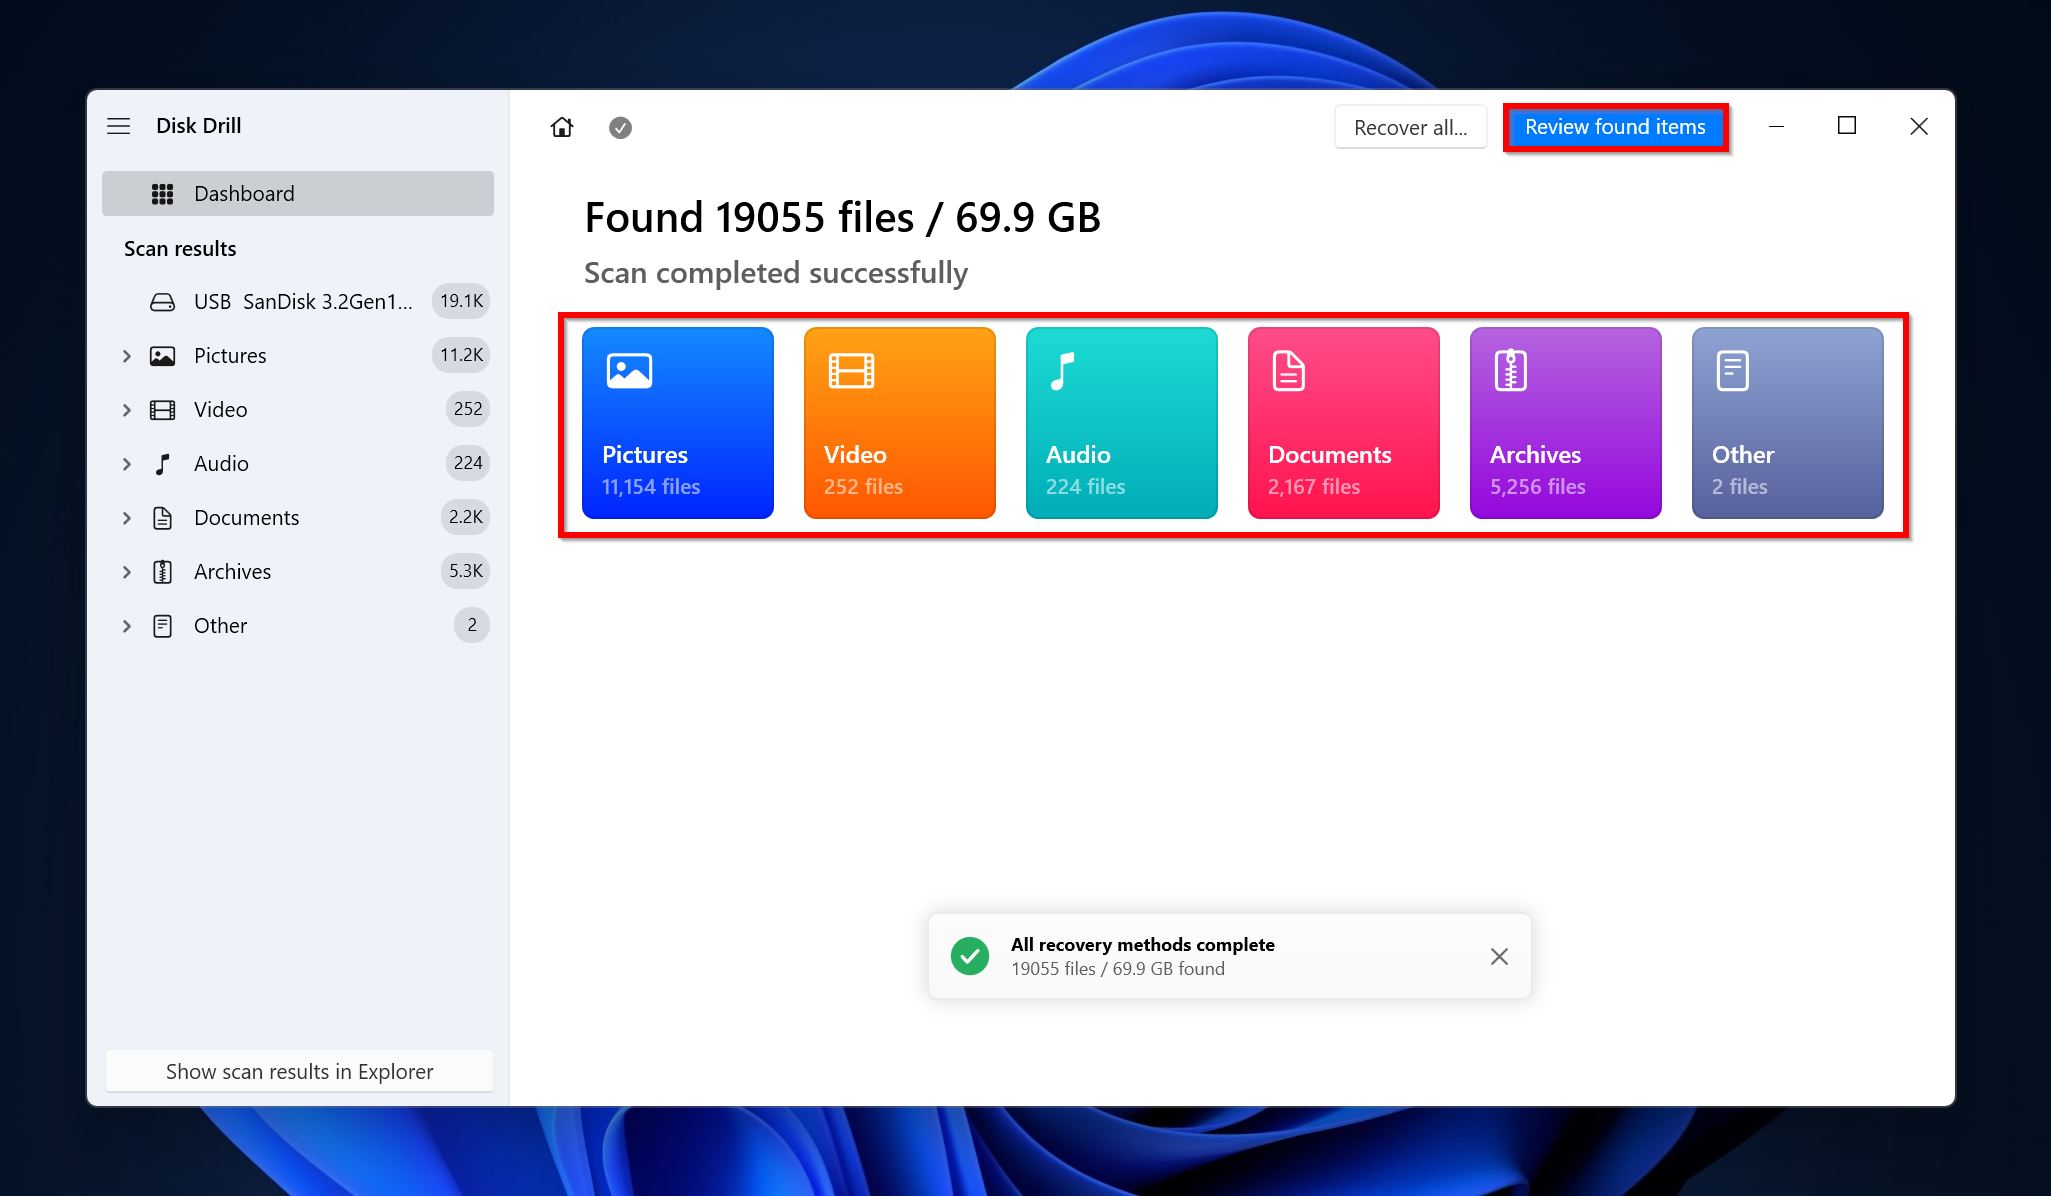
- Click on Review found items to view all the recoverable files that Disk Drill has discovered. To filter out the results right away, click on the relevant file type instead (Pictures, Video, Audio, Documents, Archives, and Other).
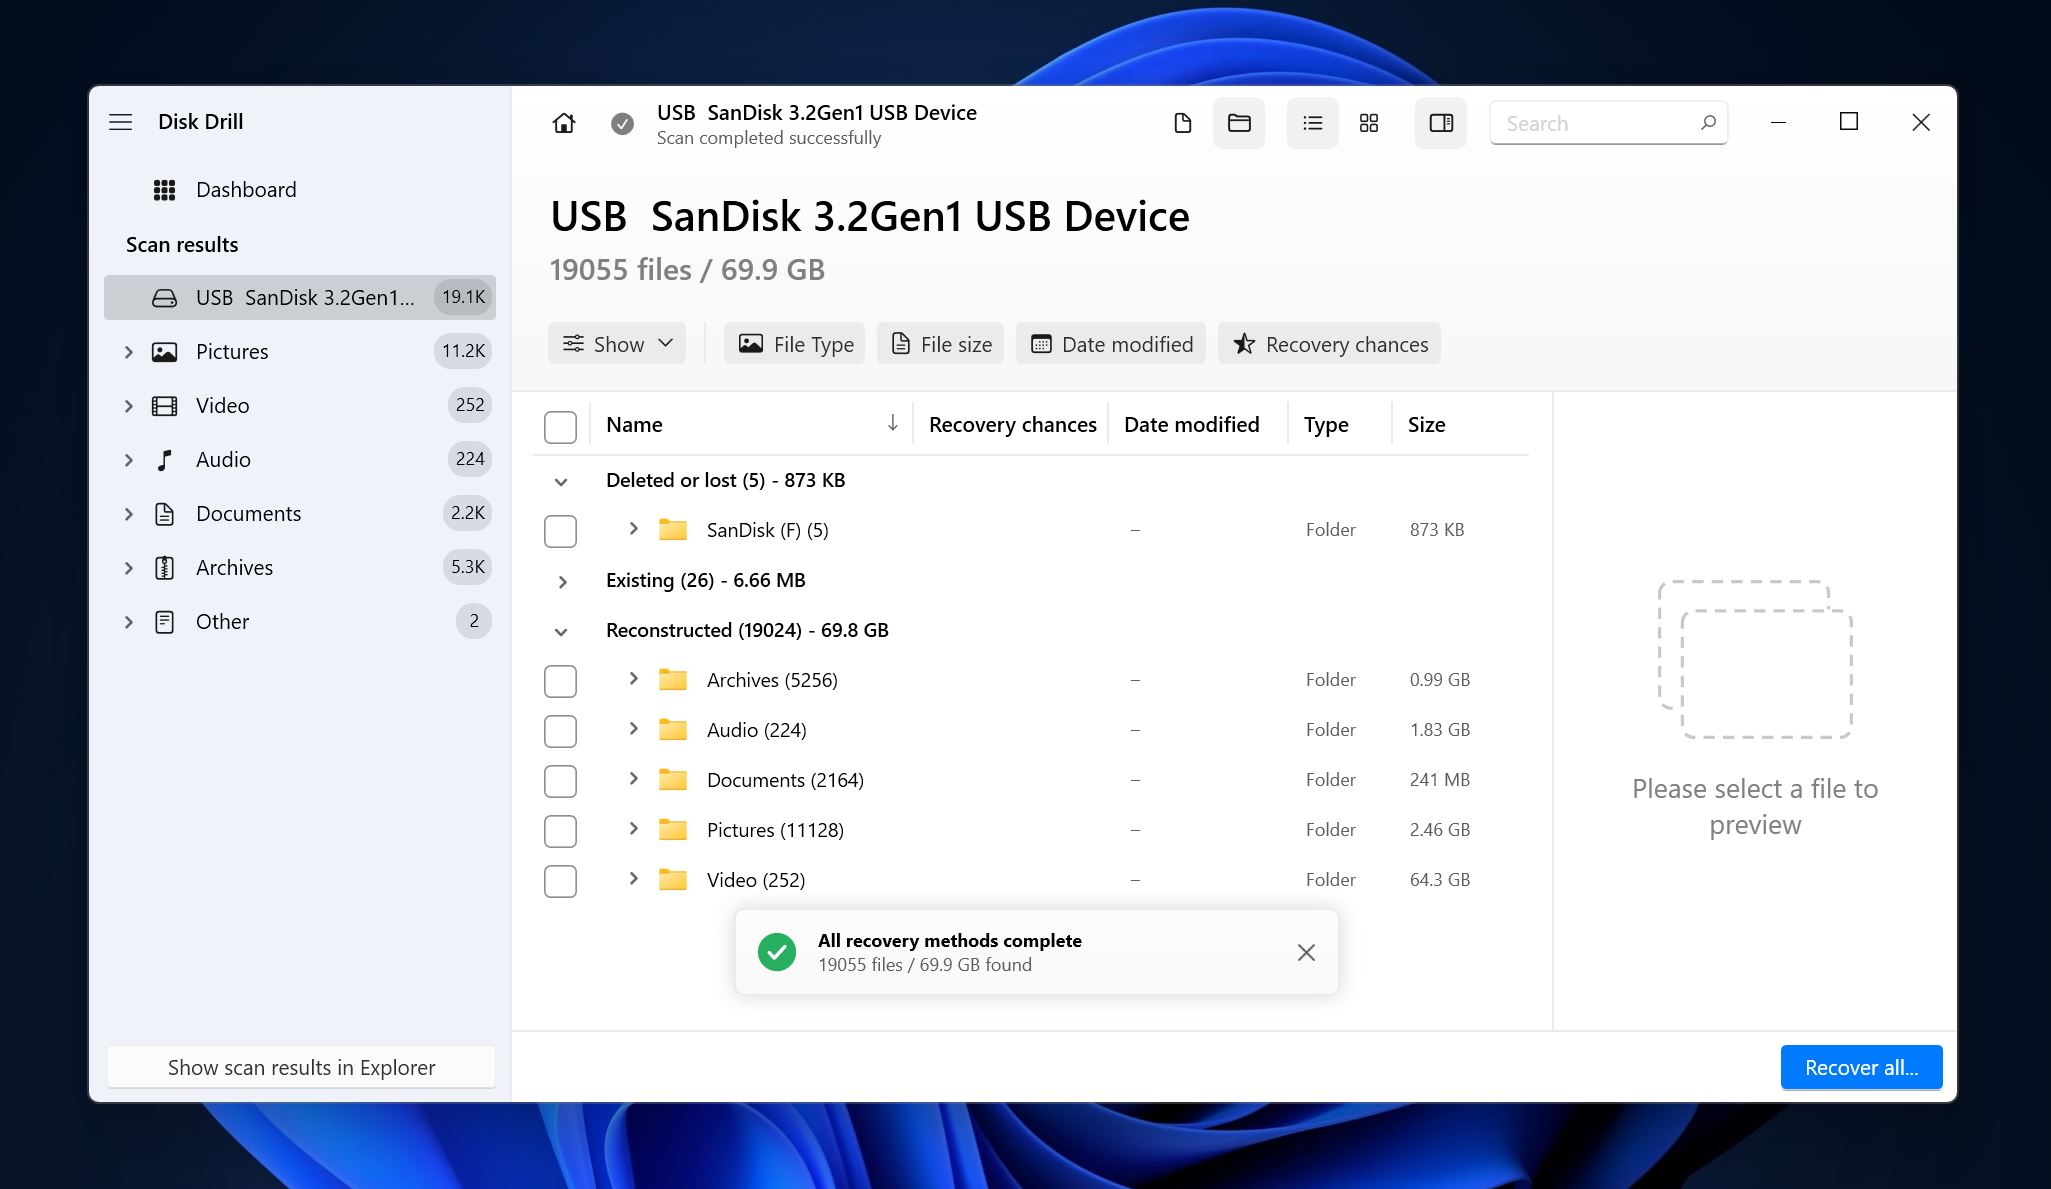
- Expand the Deleted or lost and Reconstructed sections to view deleted, recoverable files.
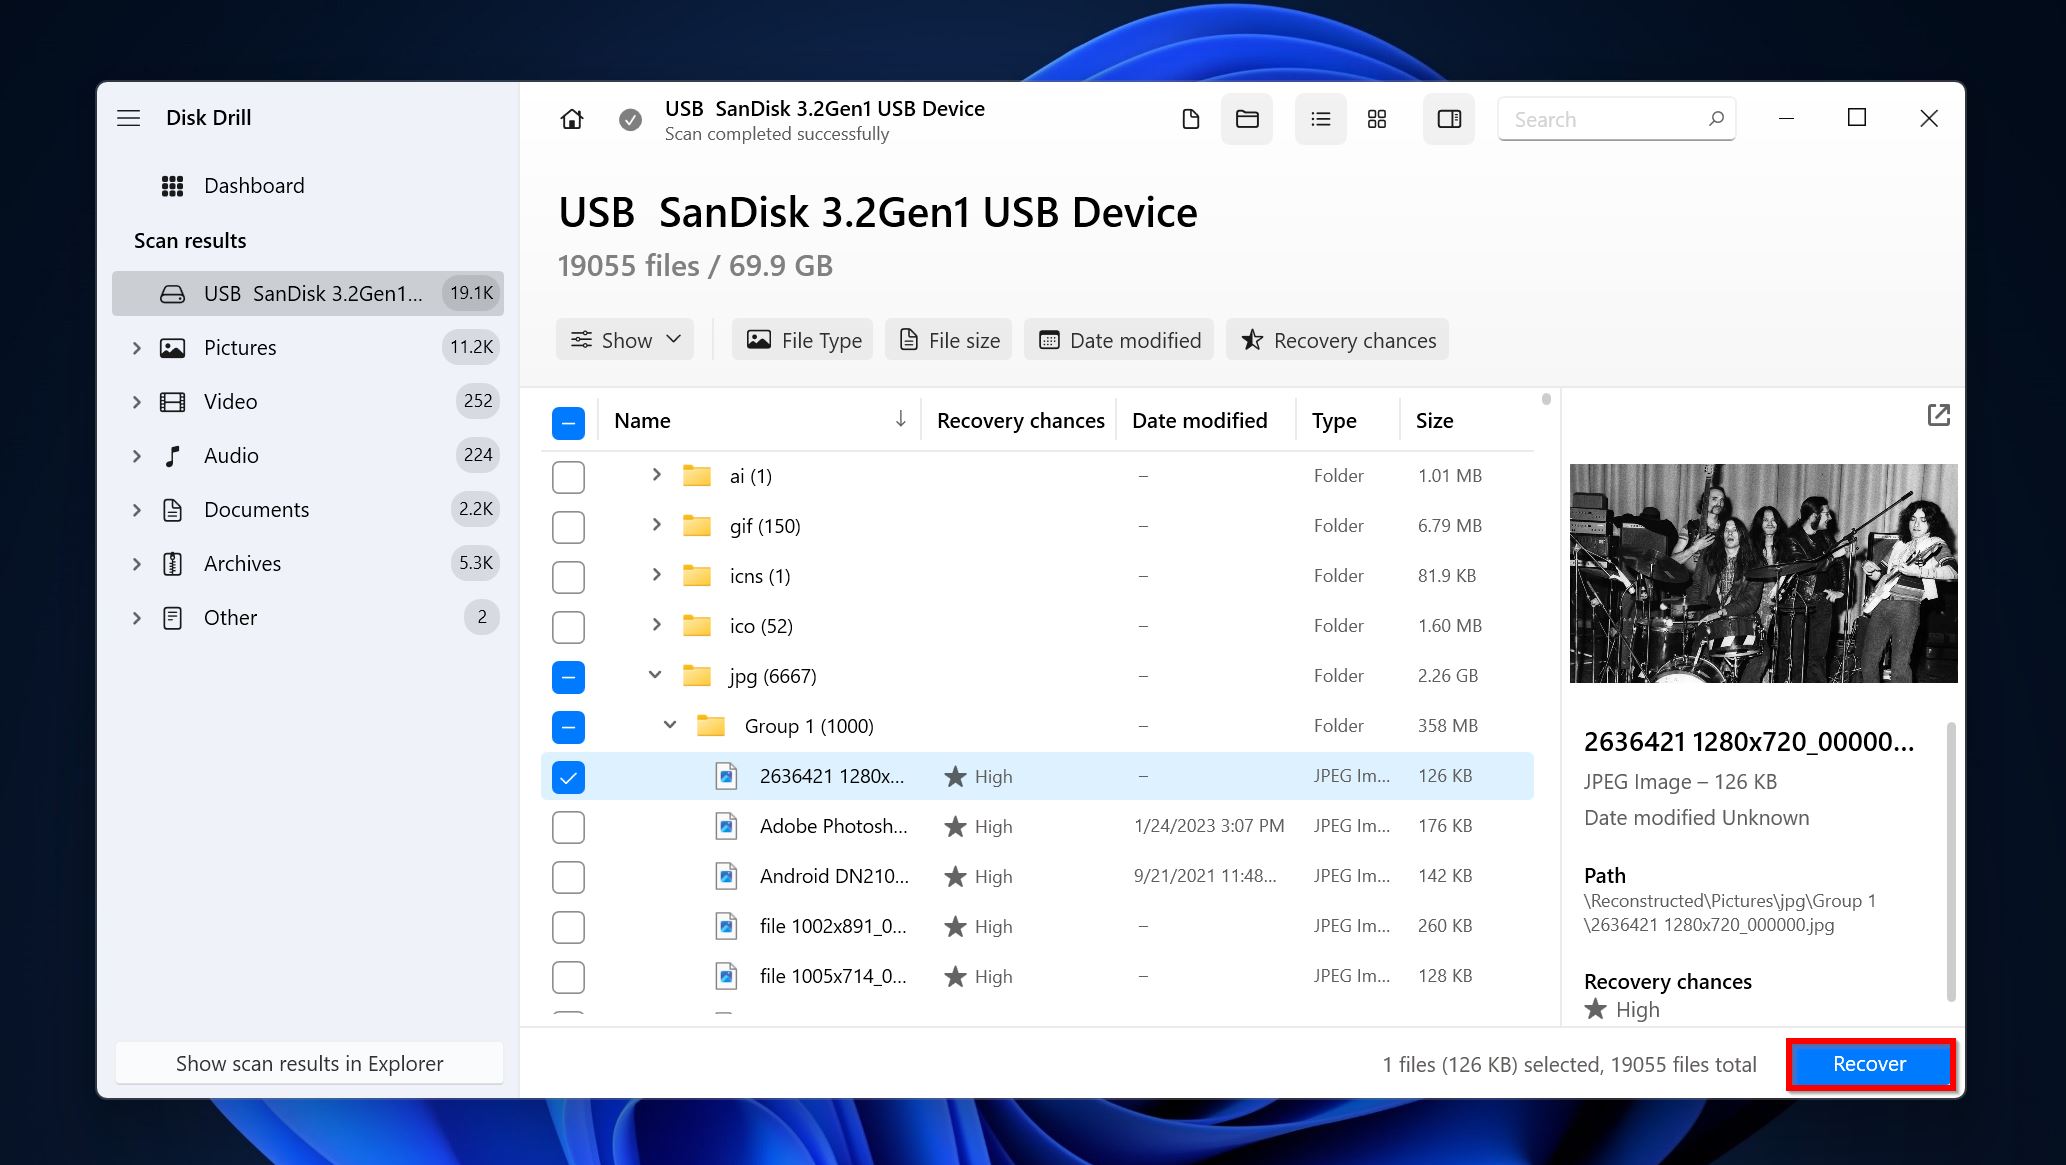
- Select the files using the checkbox next to each of them. Disk Drill will display a preview of the currently selected file. Click on Recover once you’re sure of your selection.
- Pick a recovery destination and click Next. It’s recommended that you recover the files to a location apart from the external HDD itself.
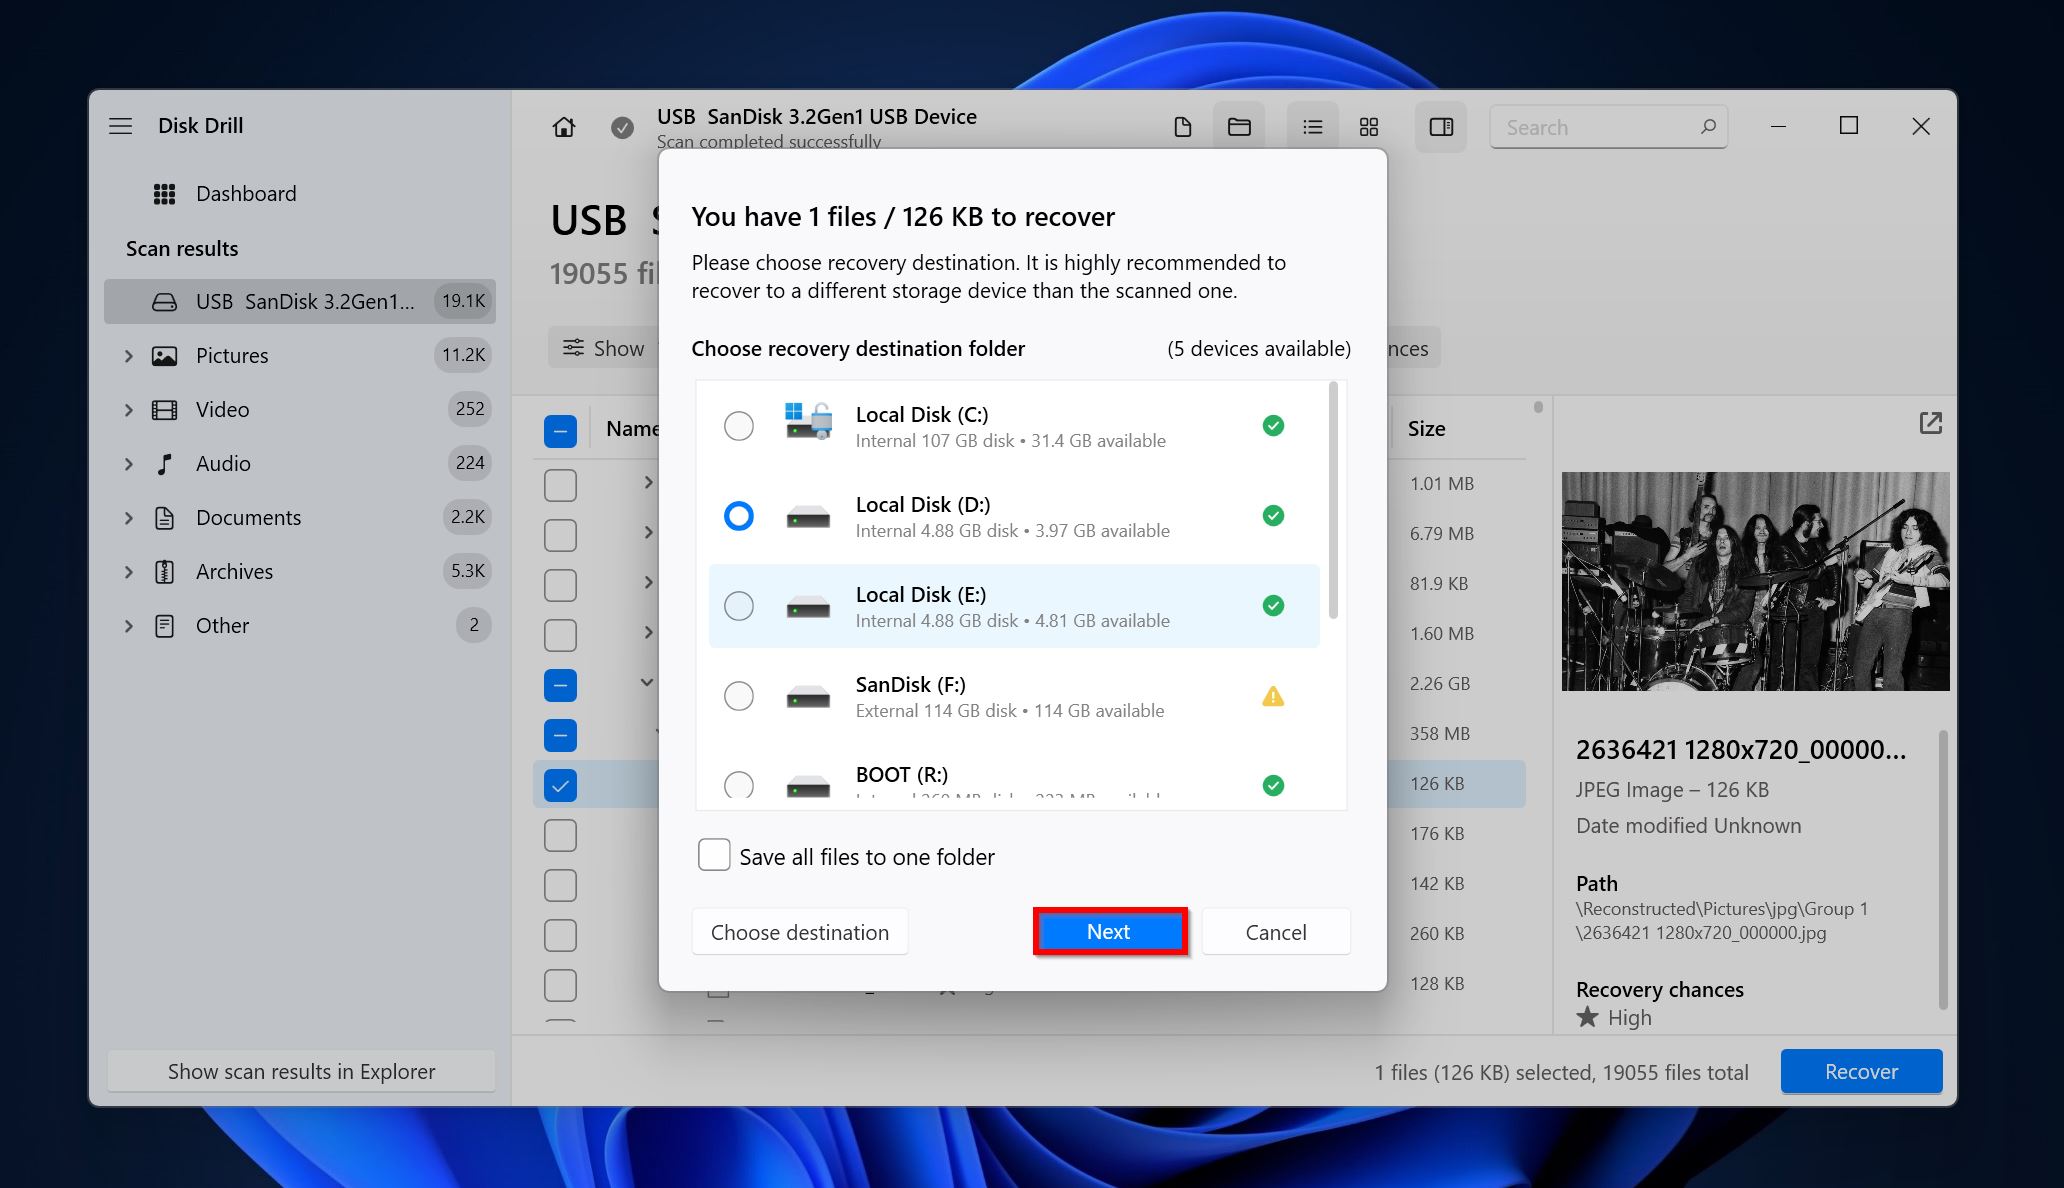
- Disk Drill will retrieve your deleted files.
How to Fix a Corrupted Recycle Bin on an External Hard Drive
Errors like, “Access denied” and problems getting the external hard drive’s Recycle Bin to show up, could be indicators of a corrupt Recycle Bin. You can address this issue by using the Error Checking Tool, or the Command Prompt.
Using the Error Checking Tool
The Error Checking Tool scans your entire HDD for bad sectors and other file system issues, then attempts to fix them.
Here’s how to use the tool:
- Open Windows Explorer (Windows Key + E).
- Right-click on the external hard drive and choose Properties.
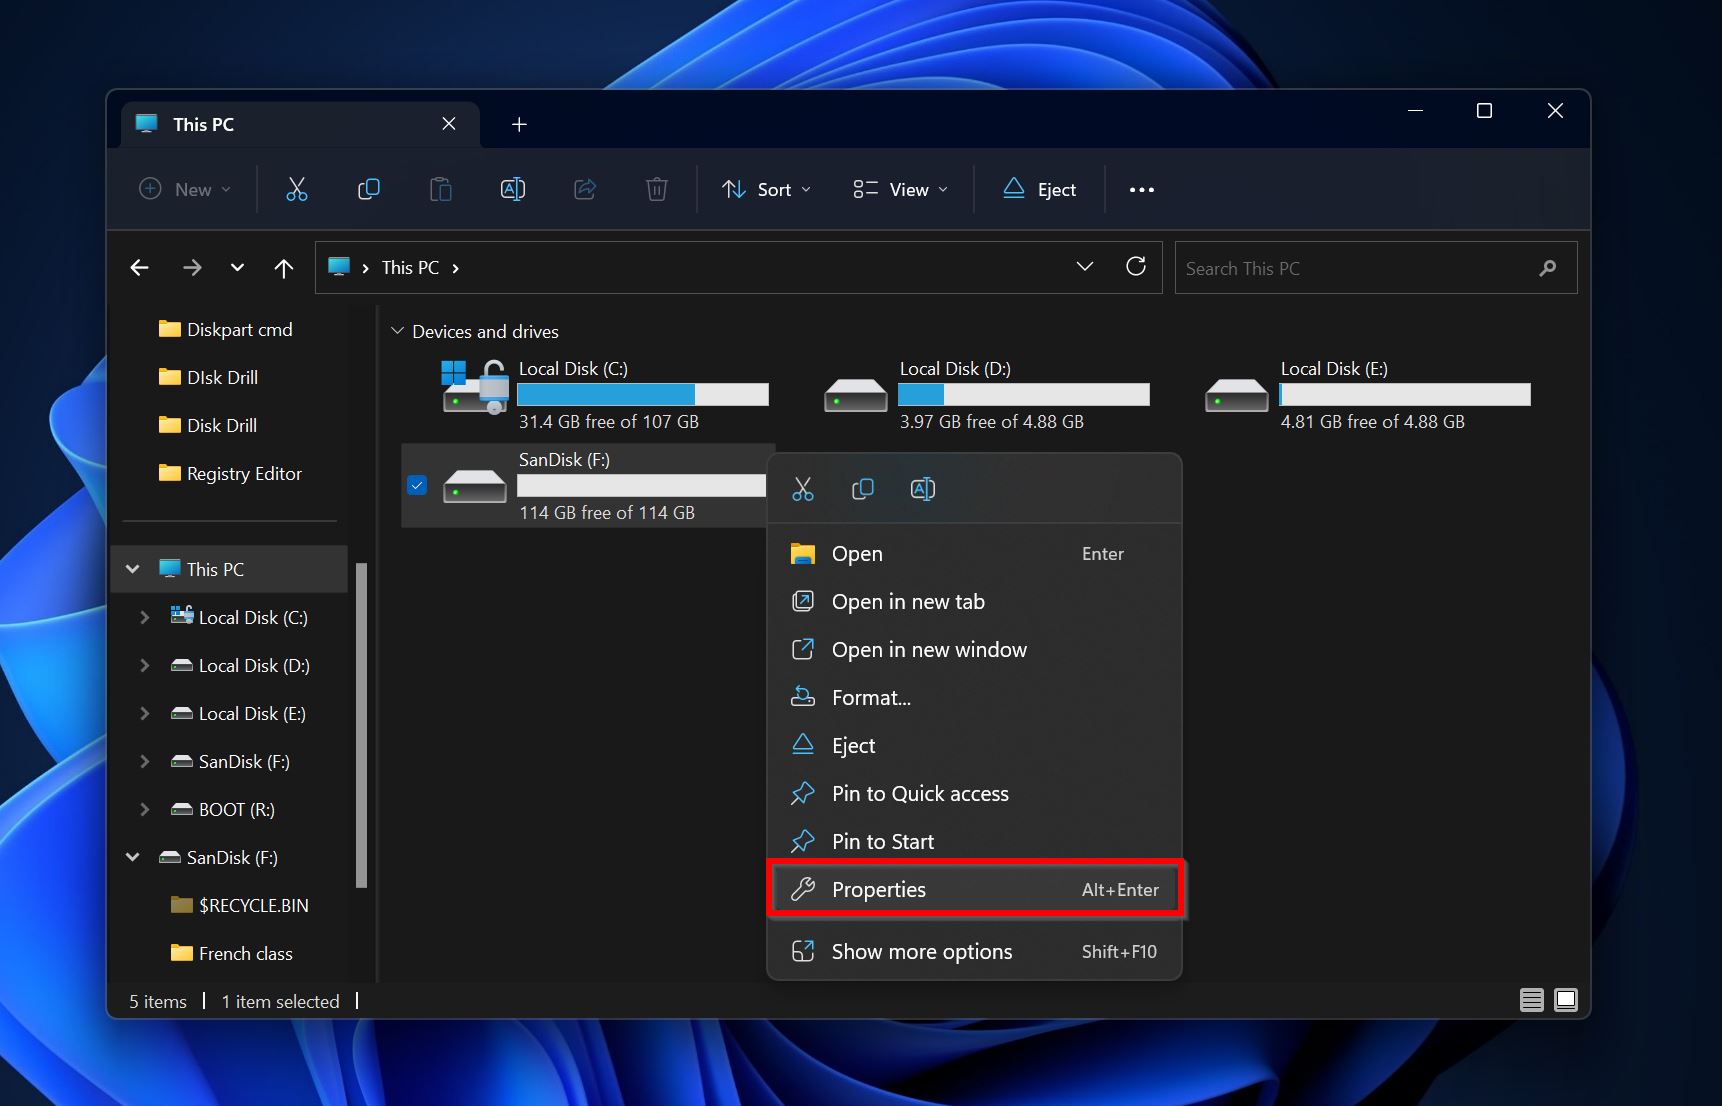
- Go to the Tools tab and under Error checking, click on Check. You will need administrative privileges to do so.
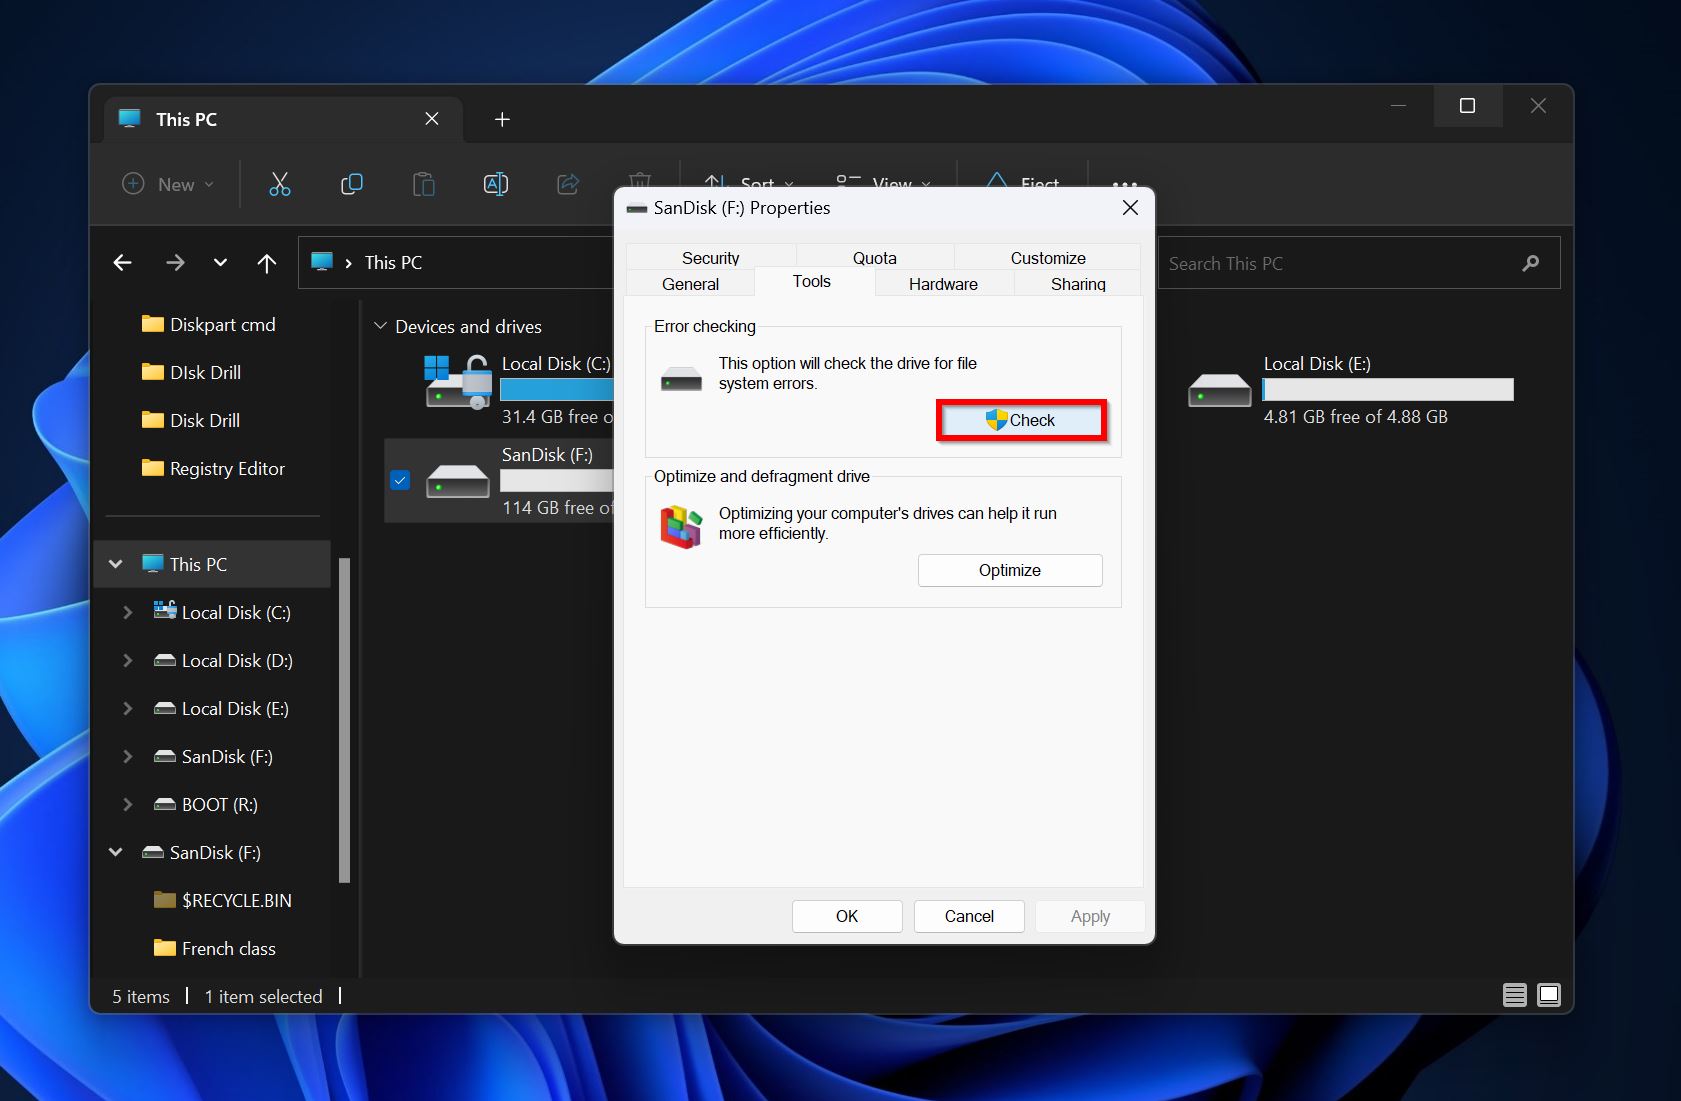
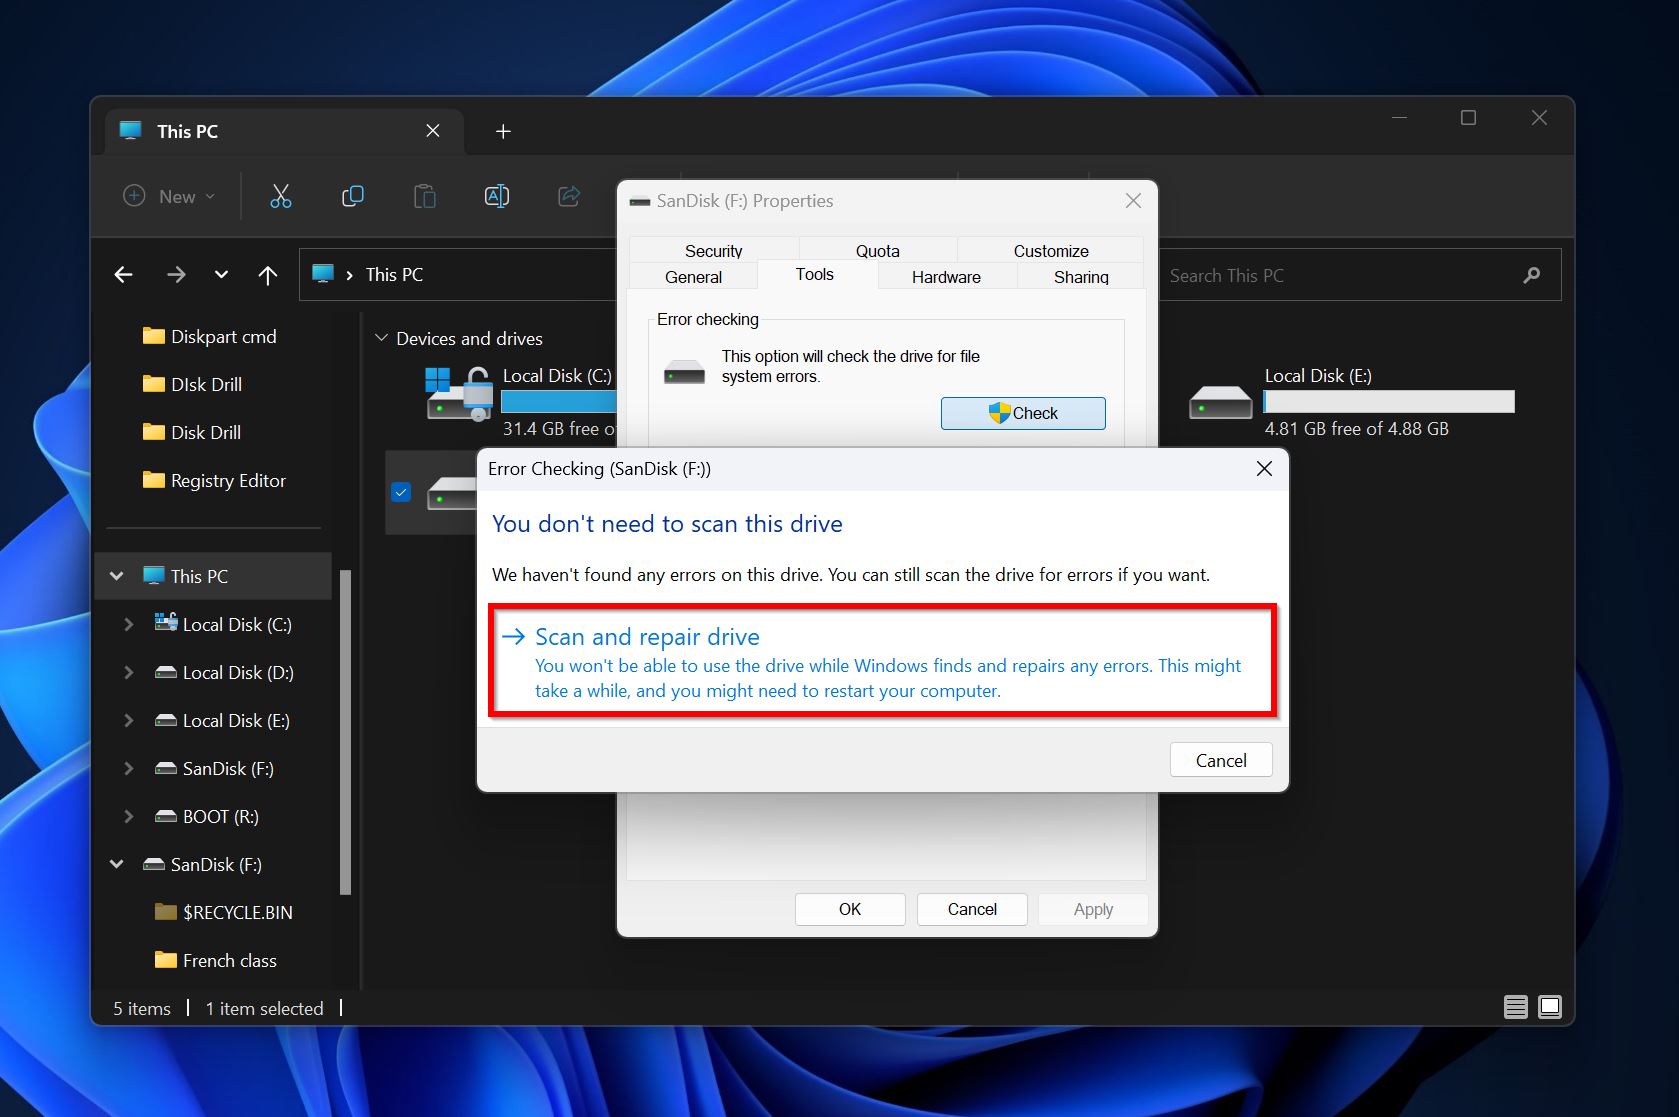
- Click on Scan and repair drive.
Using CMD
You can use the Command Prompt to force Windows to delete the Recycle Bin folder on the external hard drive or USB and create a new one. You essentially get a clean slate.
Here’s what you need to do to fix the external drive’s Recycle Bin, using CMD:
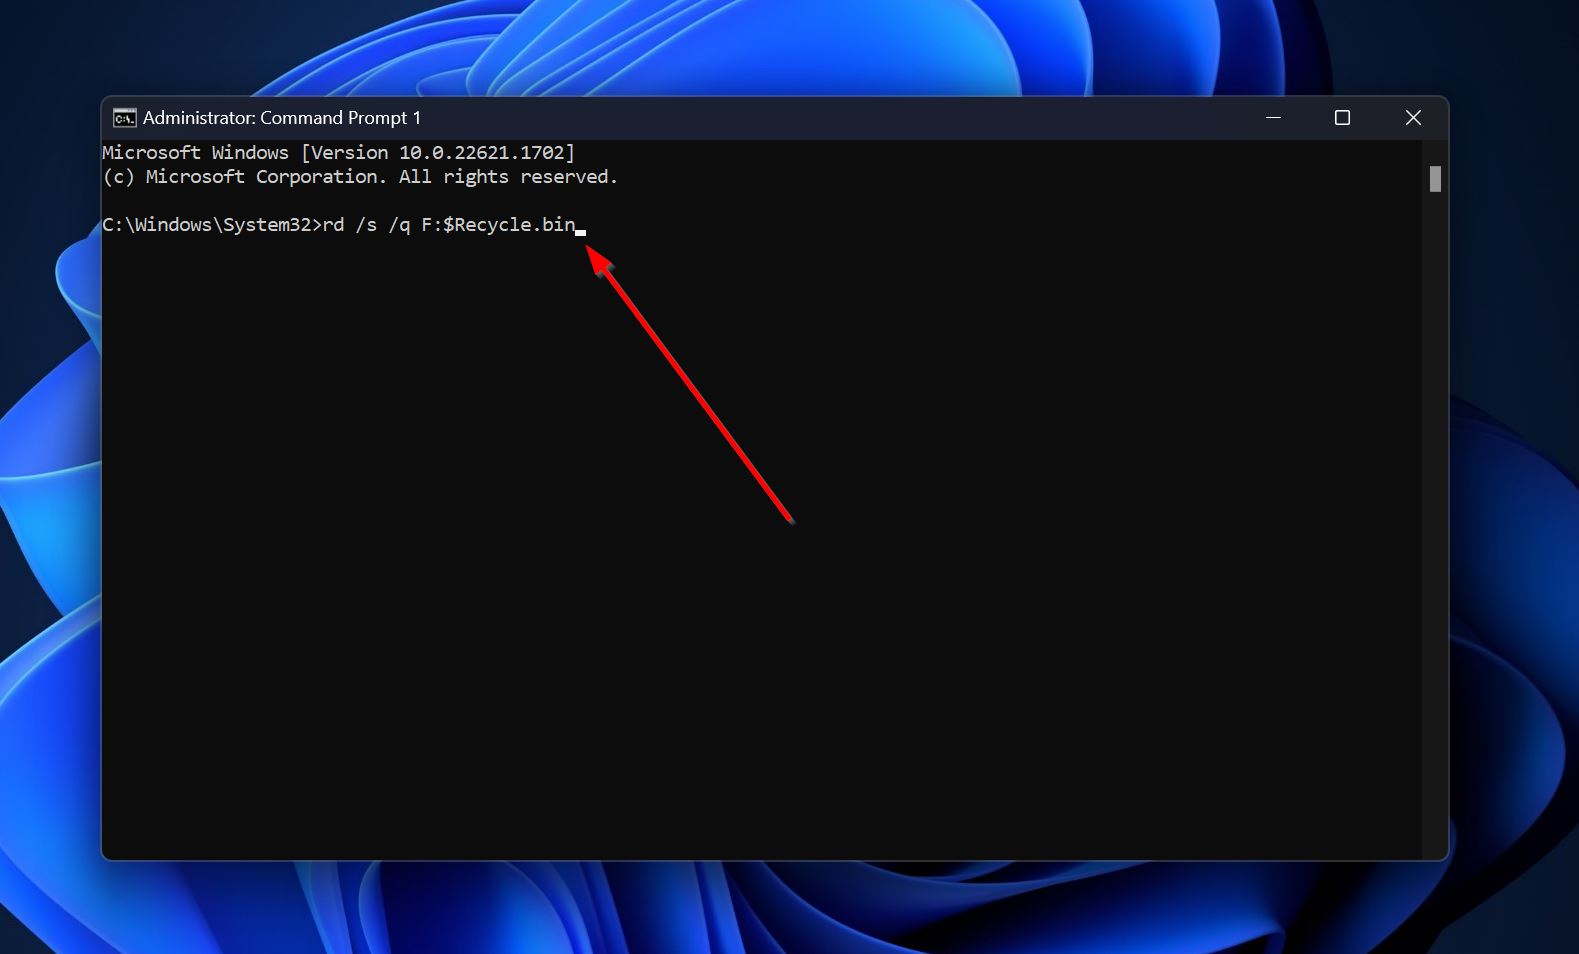
- Search for “cmd” in Windows Search (Windows Key + S). Right-click on the Command Prompt > Run as administrator.
- Type rd /s /q X:$Recycle.bin in the console and press Enter. Replace “X” with the drive letter of your external drive.
Frequently Asked Questions
How to find the Recycle Bin on an external hard drive?
An external hard drive’s Recycle Bin is located in its root directory but is hidden. To find it, you need to enable hidden items in Windows Explorer by going to View > Show > Hidden items. Remember to ensure that the Hide protected operating system files option is unchecked in Folder Options > View.
How to empty the Recycle Bin on an external hard drive?
First, enable hidden items in Windows Explorer using View > Show > Hidden items. Now, open the $RECYCLE.BIN folder on your external HDD and delete all its contents. You can also execute the rd /s /q X:$Recycle.bin (replace “X” with the external drive’s drive letter) in the Command Prompt. This deletes the previous Recycle Bin folder and creates a new one.
How to access the Recycle Bin on an external hard drive on Mac?
To view the external hard drive’s Recycle Bin on macOS, you’ll need to use third-party apps.
However, you can also attempt to view the .Trashes folder on an external drive, using the steps below:
- Open the external hard drive’s directory using Finder.
- Press Command + Shift + .(dot).
- You’ll be able to access the .Trashes folder.
How to delete the $Recycle.Bin folder from an external hard disk?
You can run the rd /s /q X:$Recycle.bin (replace “X” with the external drive’s drive letter) command in CMD to remove the Recycle Bin folder from the external hard drive. However, the folder will reappear if you delete any files from the drive subsequently.
If you want to disable the external drive Recycle Bin feature entirely, follow these steps:
- Search for “folder options” in Windows Search (Windows Key + S). Click on File Explorer Options (Windows 11), or Folder Options (Windows 10) from the search results.
- Go to the View tab.
- Ensure that the Show hidden items option is checked and the Hide protected operating system files option is unchecked.
- Right-click on the Recycle Bin folder in the external hard drive and choose Properties > Don’t move files to the Recycle Bin.
- Click on OK and then delete the folder.
Conclusion
Usually, your files are permanently deleted from an external storage drive, which makes it essential that you keep multiple backups of all your important data. Ideally, store your data on two local storage drives and one cloud service. If a data recovery scan doesn’t yield any results, but you need the files back at any cost, using professional data recovery services is the only course of action available.

- 4 publishings
Manuviraj Godara is a professional content writer with over four years of experience, specializing in technology and data recovery topics. His passion for technology began when he got his first computer, sparking a fascination that has never ceased to amaze him. He is also an avid gamer who enjoys spending his free time exploring his favorite music albums and reading. Apart from writing, Manuviraj has a penchant for gaming, motorcycling, and listening to Steely Dan. With his ever-growing expertise in technology, Manuviraj consistently delivers engaging content, helping readers make the most out of their devices and computers.
- Frisco, Texas, United States
Yevgeniy Tolkunov is Hardware Engineer at ACE Data Recovery. Yevgeniy has a Master's Degree in Physics, Information Technology; 15+ years of experience.