Recycle Bin Recovery: How to Recover Files Deleted From Recycle Bin
The Windows Recycle Bin is a special folder that stores files deleted from your computer. Files are stored in the Recycle Bin for a predefined time or until they are manually deleted. After a file is deleted from the Recycle Bin, it is considered to be permanently deleted.
Fortunately, several methods allow you to recover permanently deleted files when they are no longer in the Recycle Bin. We are going to show you how to get your data back using third-party Recycle Bin recovery software, a backup, and native Windows functionality.
How to Recover Deleted Files From an Empty Recycle Bin
After files are deleted from the Recycle Bin, they are still physically present on your hard drive until they are overwritten by new data. Windows simply deletes the logical links that make the deleted files and folders available to the operating system or applications. You can recover deleted files from an emptied Recycle Bin by using data recovery software, which repairs the broken links associated with these files.
The following procedure illustrates how to use Disk Drill to recover files deleted from the Recycle Bin.
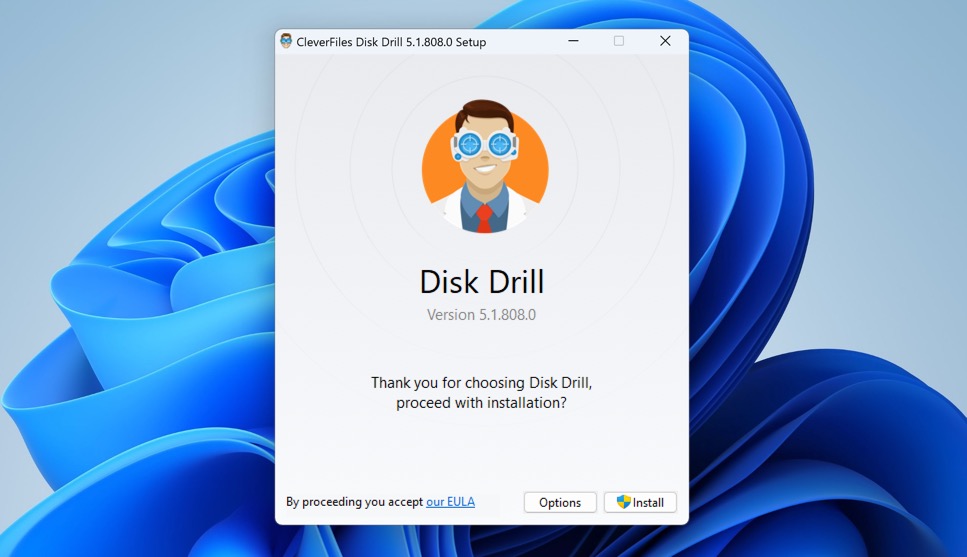
- Download and install Disk Drill for Windows on a different device from the one you will use to recover files. Disk Drill provides users with more than an excellent recovery solution. The software includes free tools designed to help you manage and protect your valuable data. These free features include the ability to create a byte-level backup suitable for recovering deleted data from failing drives and SMART monitoring.
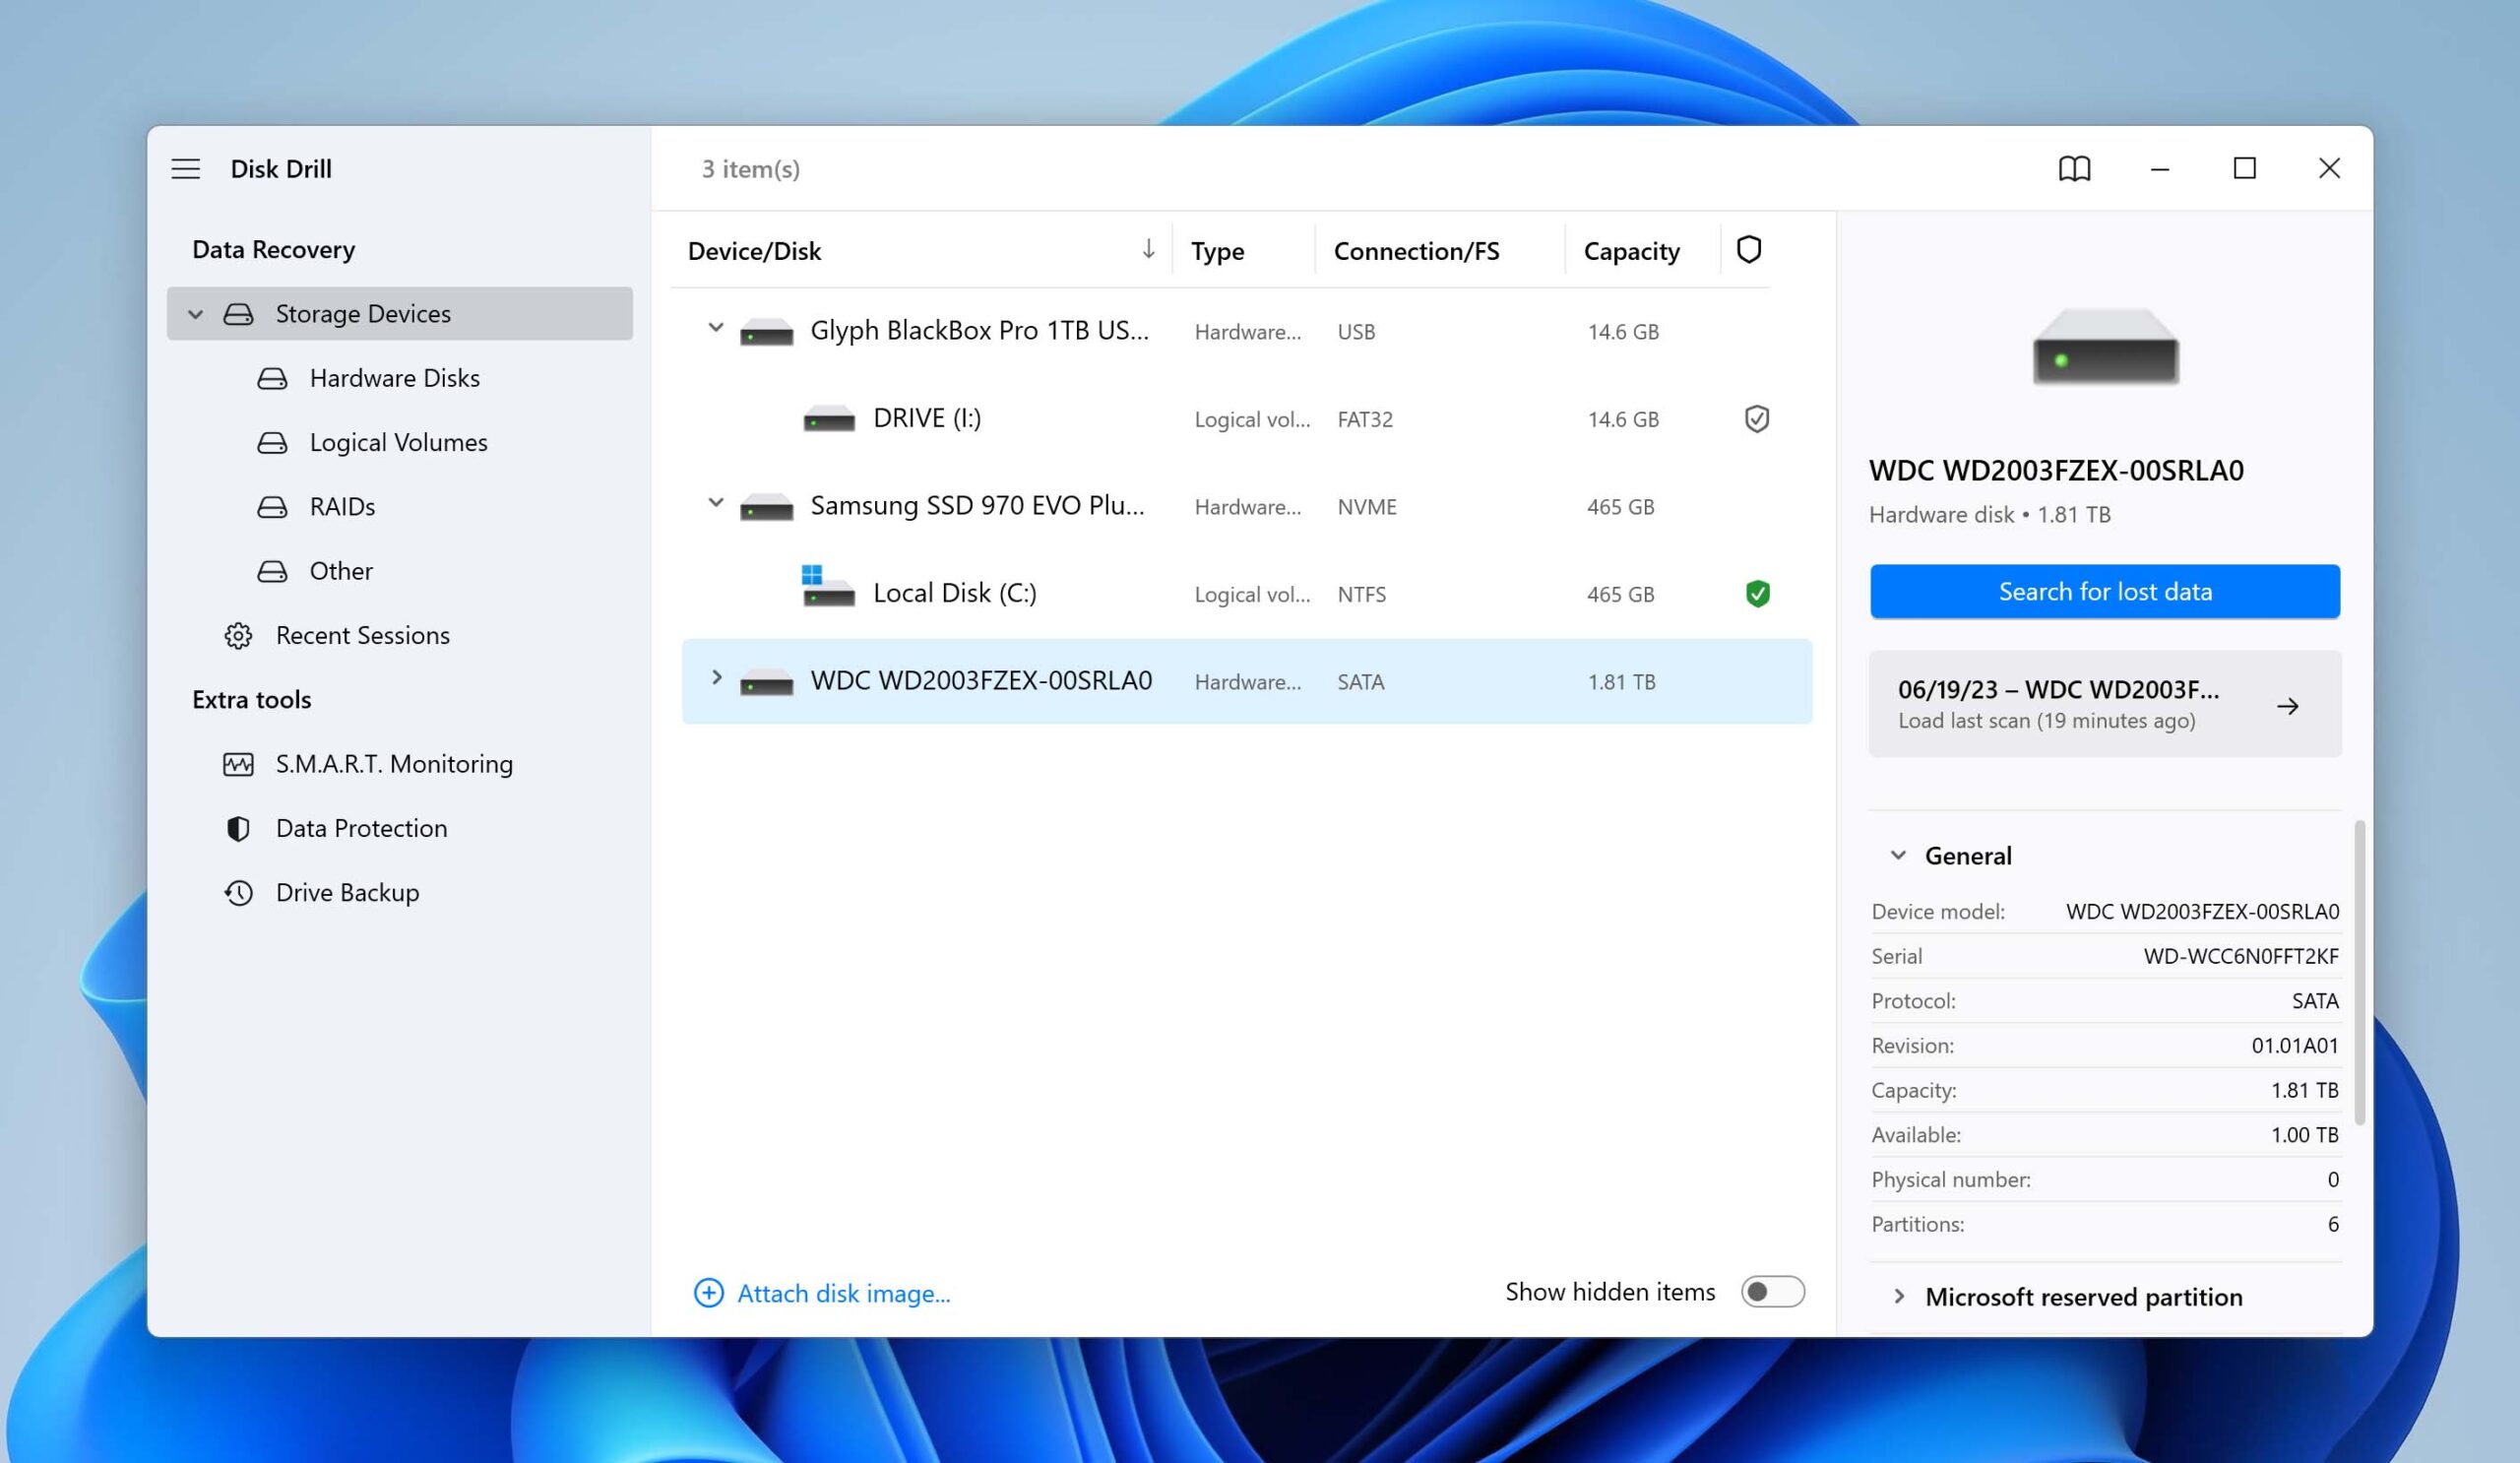
- Launch Disk Drill and select the disk you will use for recovery. If you use this disk for other purposes, it is possible that the files you need will be overwritten before you can restore them. For this reason, we strongly recommend that you do not use this disk to download and install Disk Drill. We suggest you use a separate partition, a flash drive, or another removable storage device for downloading and running the data recovery software.
- Click the Search for lost data button to start the scanning process.
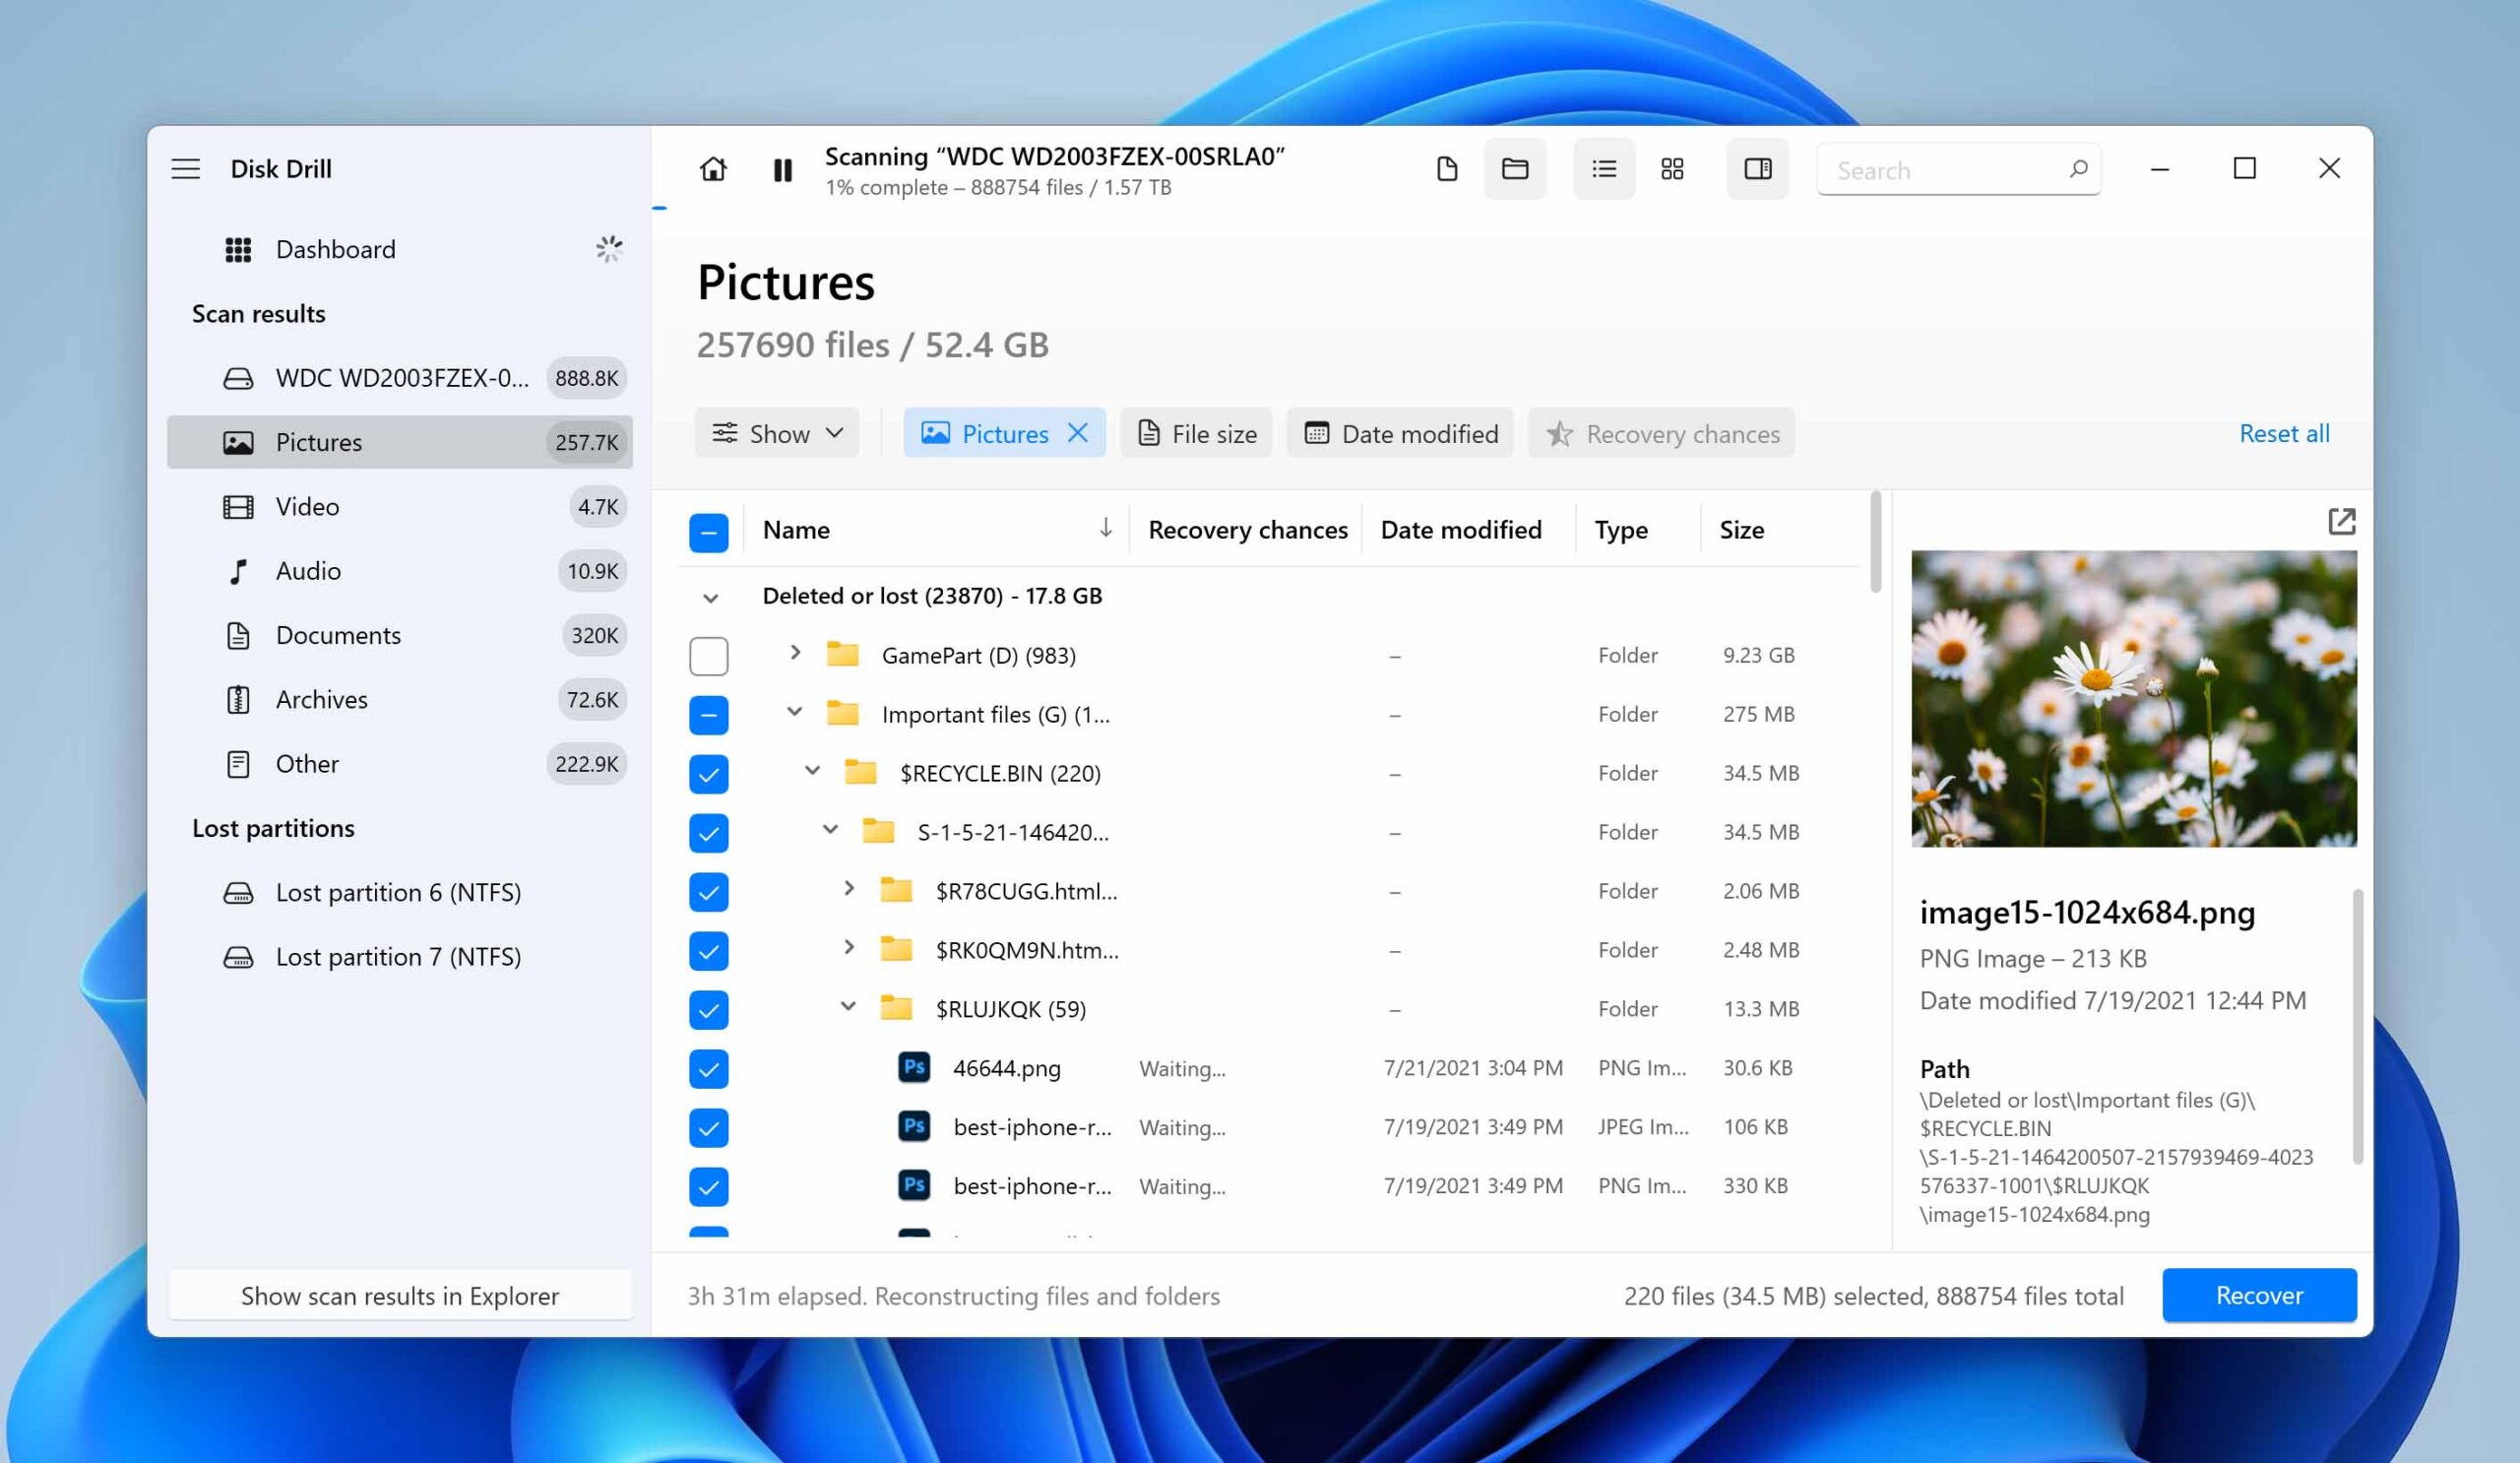
- Review the scan results and select the files you want to restore. During the scanning process, the links to recoverable files are categorized for easy identification. Files are classified and stored in folders according to their type.
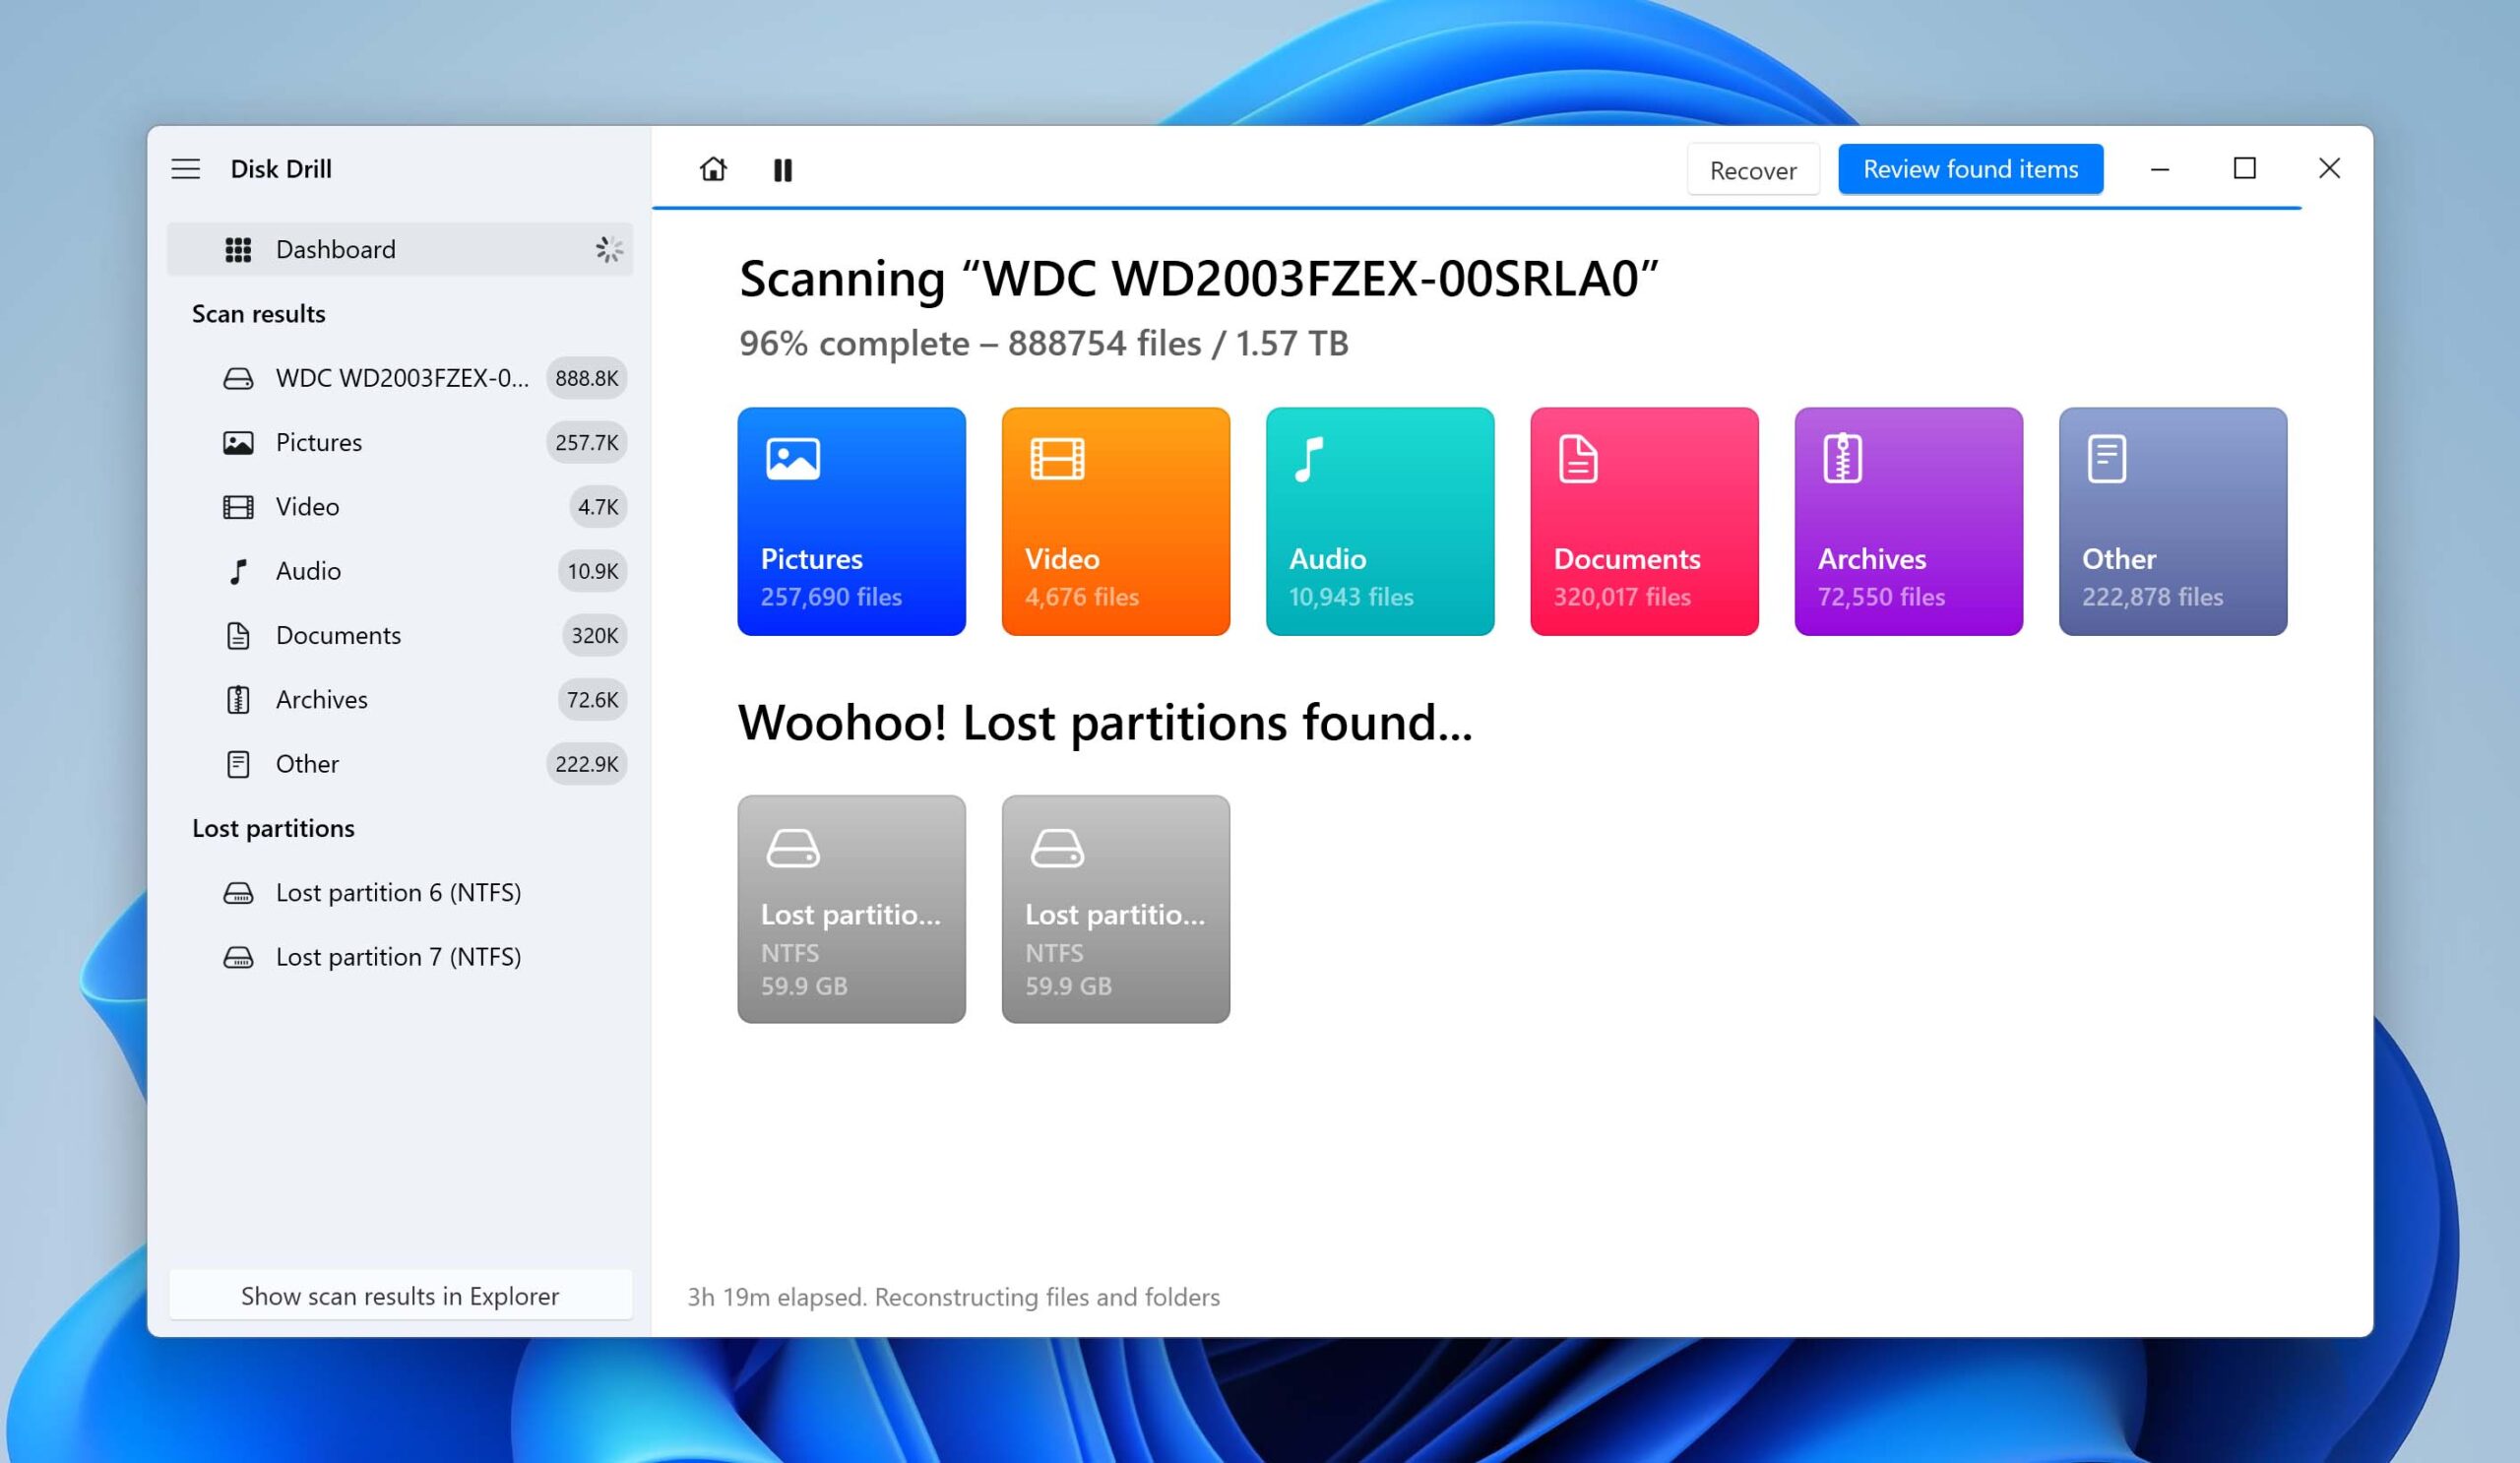
- Select the files you want to recover. You can look in the Pictures, Video, Audio, Documents, Archives, or Other folder to search for files that can be recovered. Opening a folder lets you sort the recoverable files in various ways or search for a specific file. This interface simplifies the recovery process.
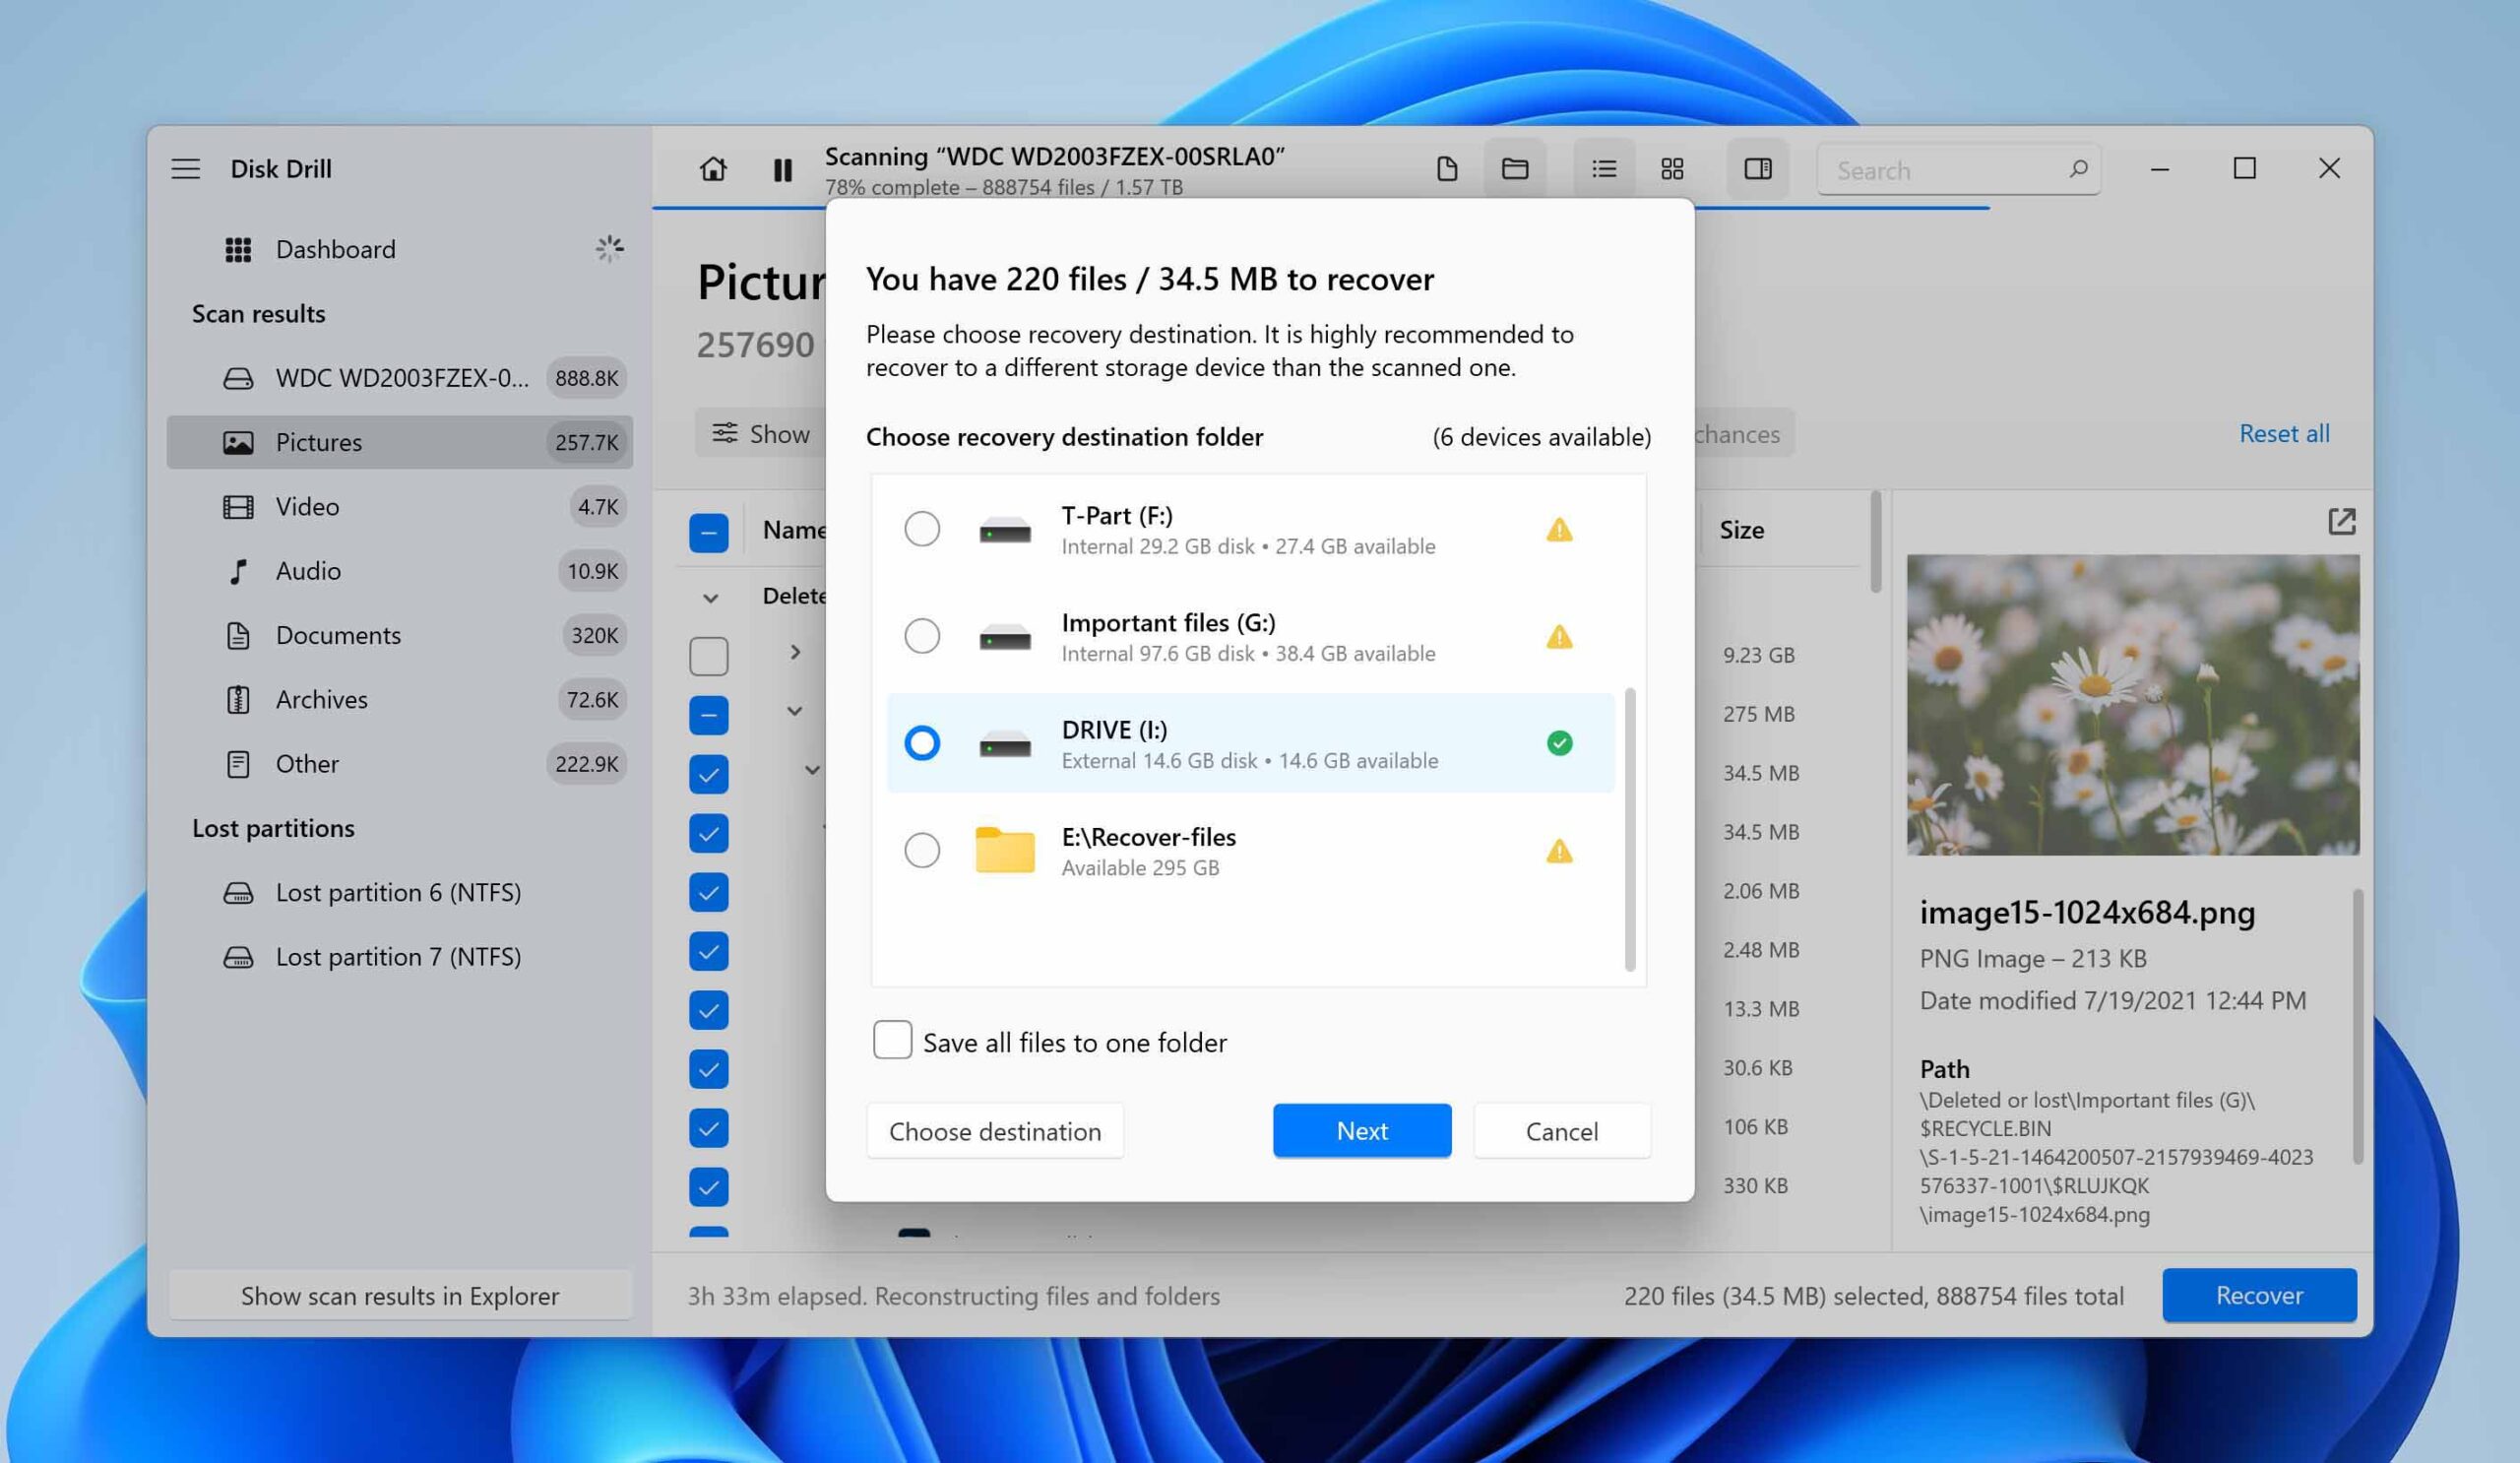
- Click the Recover button and select a safe storage location. You will be warned not to use the device you are recovering from to avoid overwriting recoverable data. Do not attempt to save them to their original location or folder. Corruption could occur while you are trying to unerase the files. After recovery is complete you can move the files to any location you like.
Disk Drill is comprehensive data recovery software that can get back lost and deleted files that are no longer in the Recycle Bin or help you recover from any other type of data loss scenario. It’s one of our go-to data recovery tools due to its simple, intuitive interface and its impressive data recovery capabilities.
Disk Drill employs advanced scanning algorithms capable of recovering deleted files in hundreds of file formats. The tool is compatible with virtually any type of disk-based storage device. This includes internal and external hard drives, USB drives, and memory cards.
Why is My Recycle Bin Empty?
Your Recycle Bin may be empty for a variety of reasons.
| Reason | Description |
| 👆 The Recycle Bin has been manually emptied. | You may have accidentally emptied the Recycle Bin without checking its contents. Recovery software may be able to recover the files. |
| 🗜️ The deleted files were too large for the Recycle Bin. | If the file size exceeds the Recycle Bin’s capacity, the file is permanently deleted. Recovery software may be able to recover the files. |
| ⌨️ The files were deleted with the Shift+Delete keystroke combination. | Using Shift + Delete bypasses the Recycle Bin and permanently deletes the file. Recovery software may be able to recover the files if you act quickly. |
| ⚠️ The Recycle Bin is corrupted. | You may have had a malware infection that has corrupted your Recycle Bin. Recovery software may be able to recover the files depending on the level of corruption. |
It really doesn’t matter what caused the data loss. The fact is that you have lost what in some cases can be extremely important or irreplaceable photos, Word documents, or PDF files. This can initially cause panic as you realize the scope of the lost data.
How to Recover Files Deleted From Recycle Bin Without Software
There are several other options besides data recovery software that you can use to try and recover files deleted from the Recycle Bin.
Method 1: Retrieve Files from Cloud Backup
If you use Microsoft OneDrive to backup your data to the cloud, you can use the following procedure to recover deleted files no longer in your computer’s Recycle Bin.
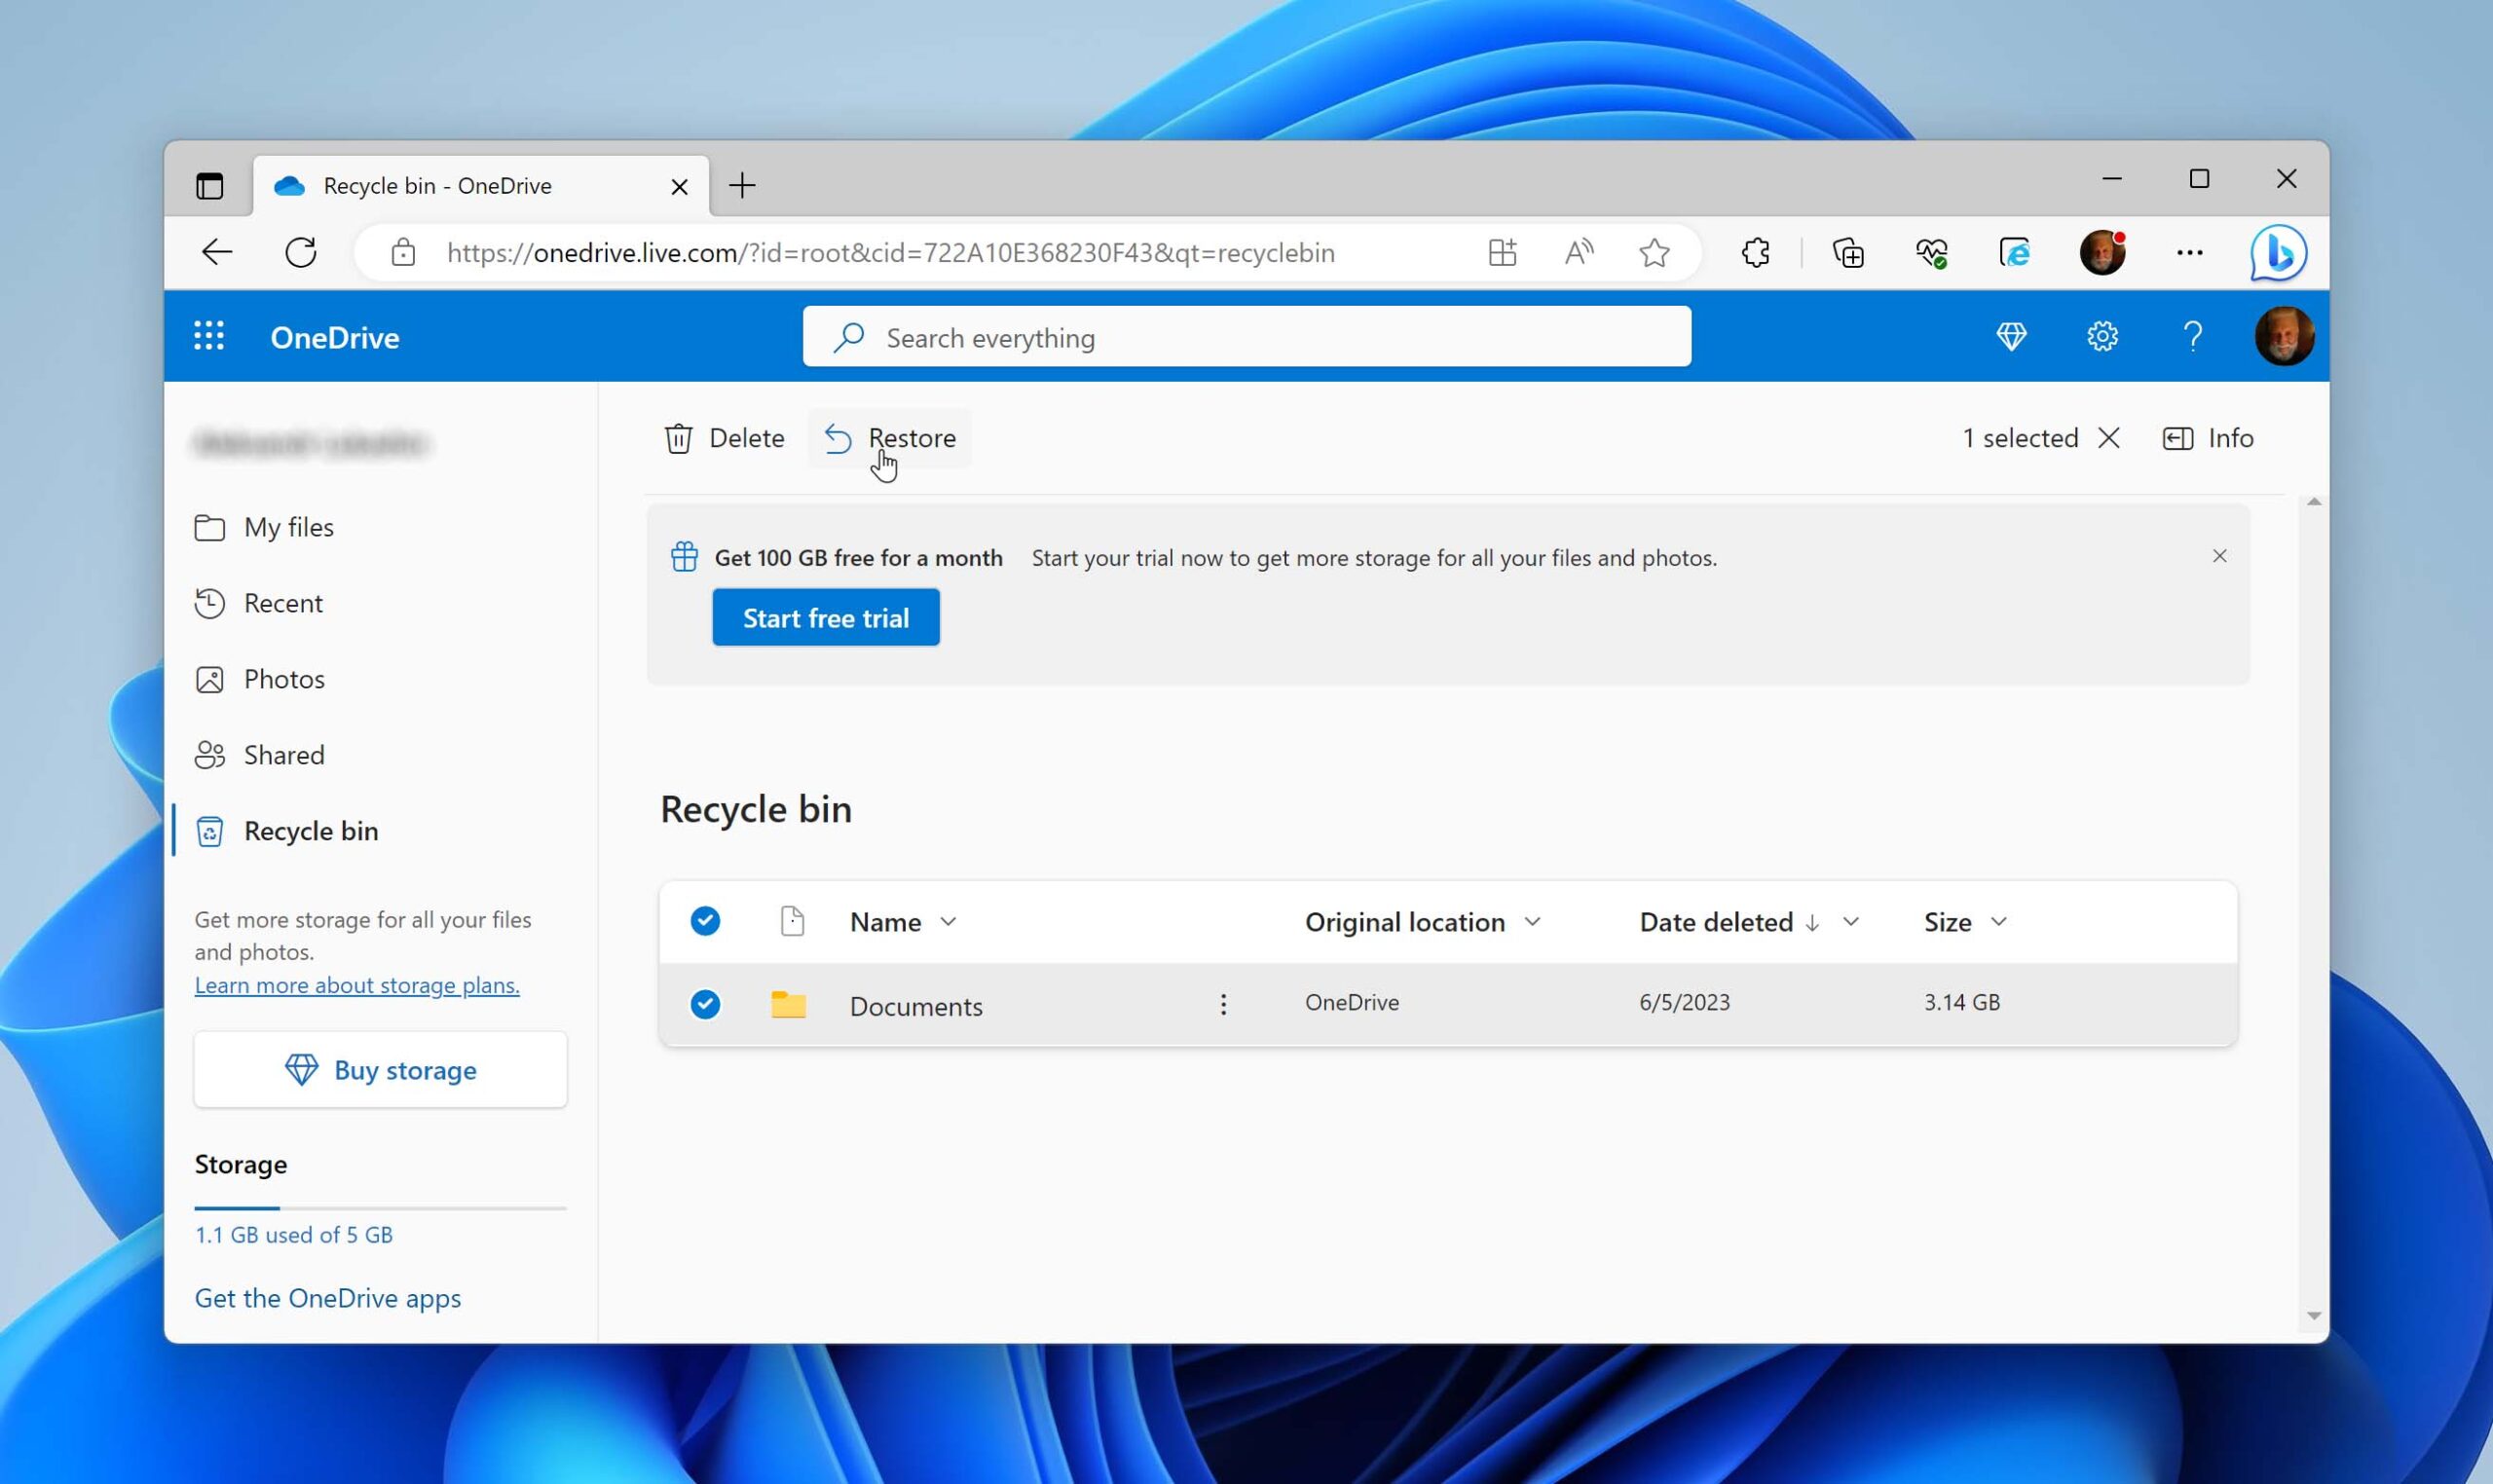
- Go to the OneDrive Website and log in with your Microsoft account.
- In the navigation pane, select Recycle Bin.
- Locate the files or folders you want to recover and click Restore.
Method 2: Restore Data from File History
You can use Windows File History to recover a deleted file with the following steps. To use this method, you must have backed up your files with File History so they are available for the restore. File History is turned off by default in both Windows 10 and Windows 11.
File History creates snapshots of files users store in their user account’s primary folders and directories, including files in OneDrive. Using this Windows feature is a great way to protect your important files and folders.
The Windows 10 and Windows 11 operating systems present different ways to configure and run File History.
File History Backup and Restore in Windows 10
First, let’s look at how to back up your files with File History in Windows 10. Use the following procedure to configure File History.
- Go to Settings > Update & Security > Backup.
- Connect the drive or storage device you will use to store the backups.
- Click the Add a drive button and select the drive you will use. This turns on File History.
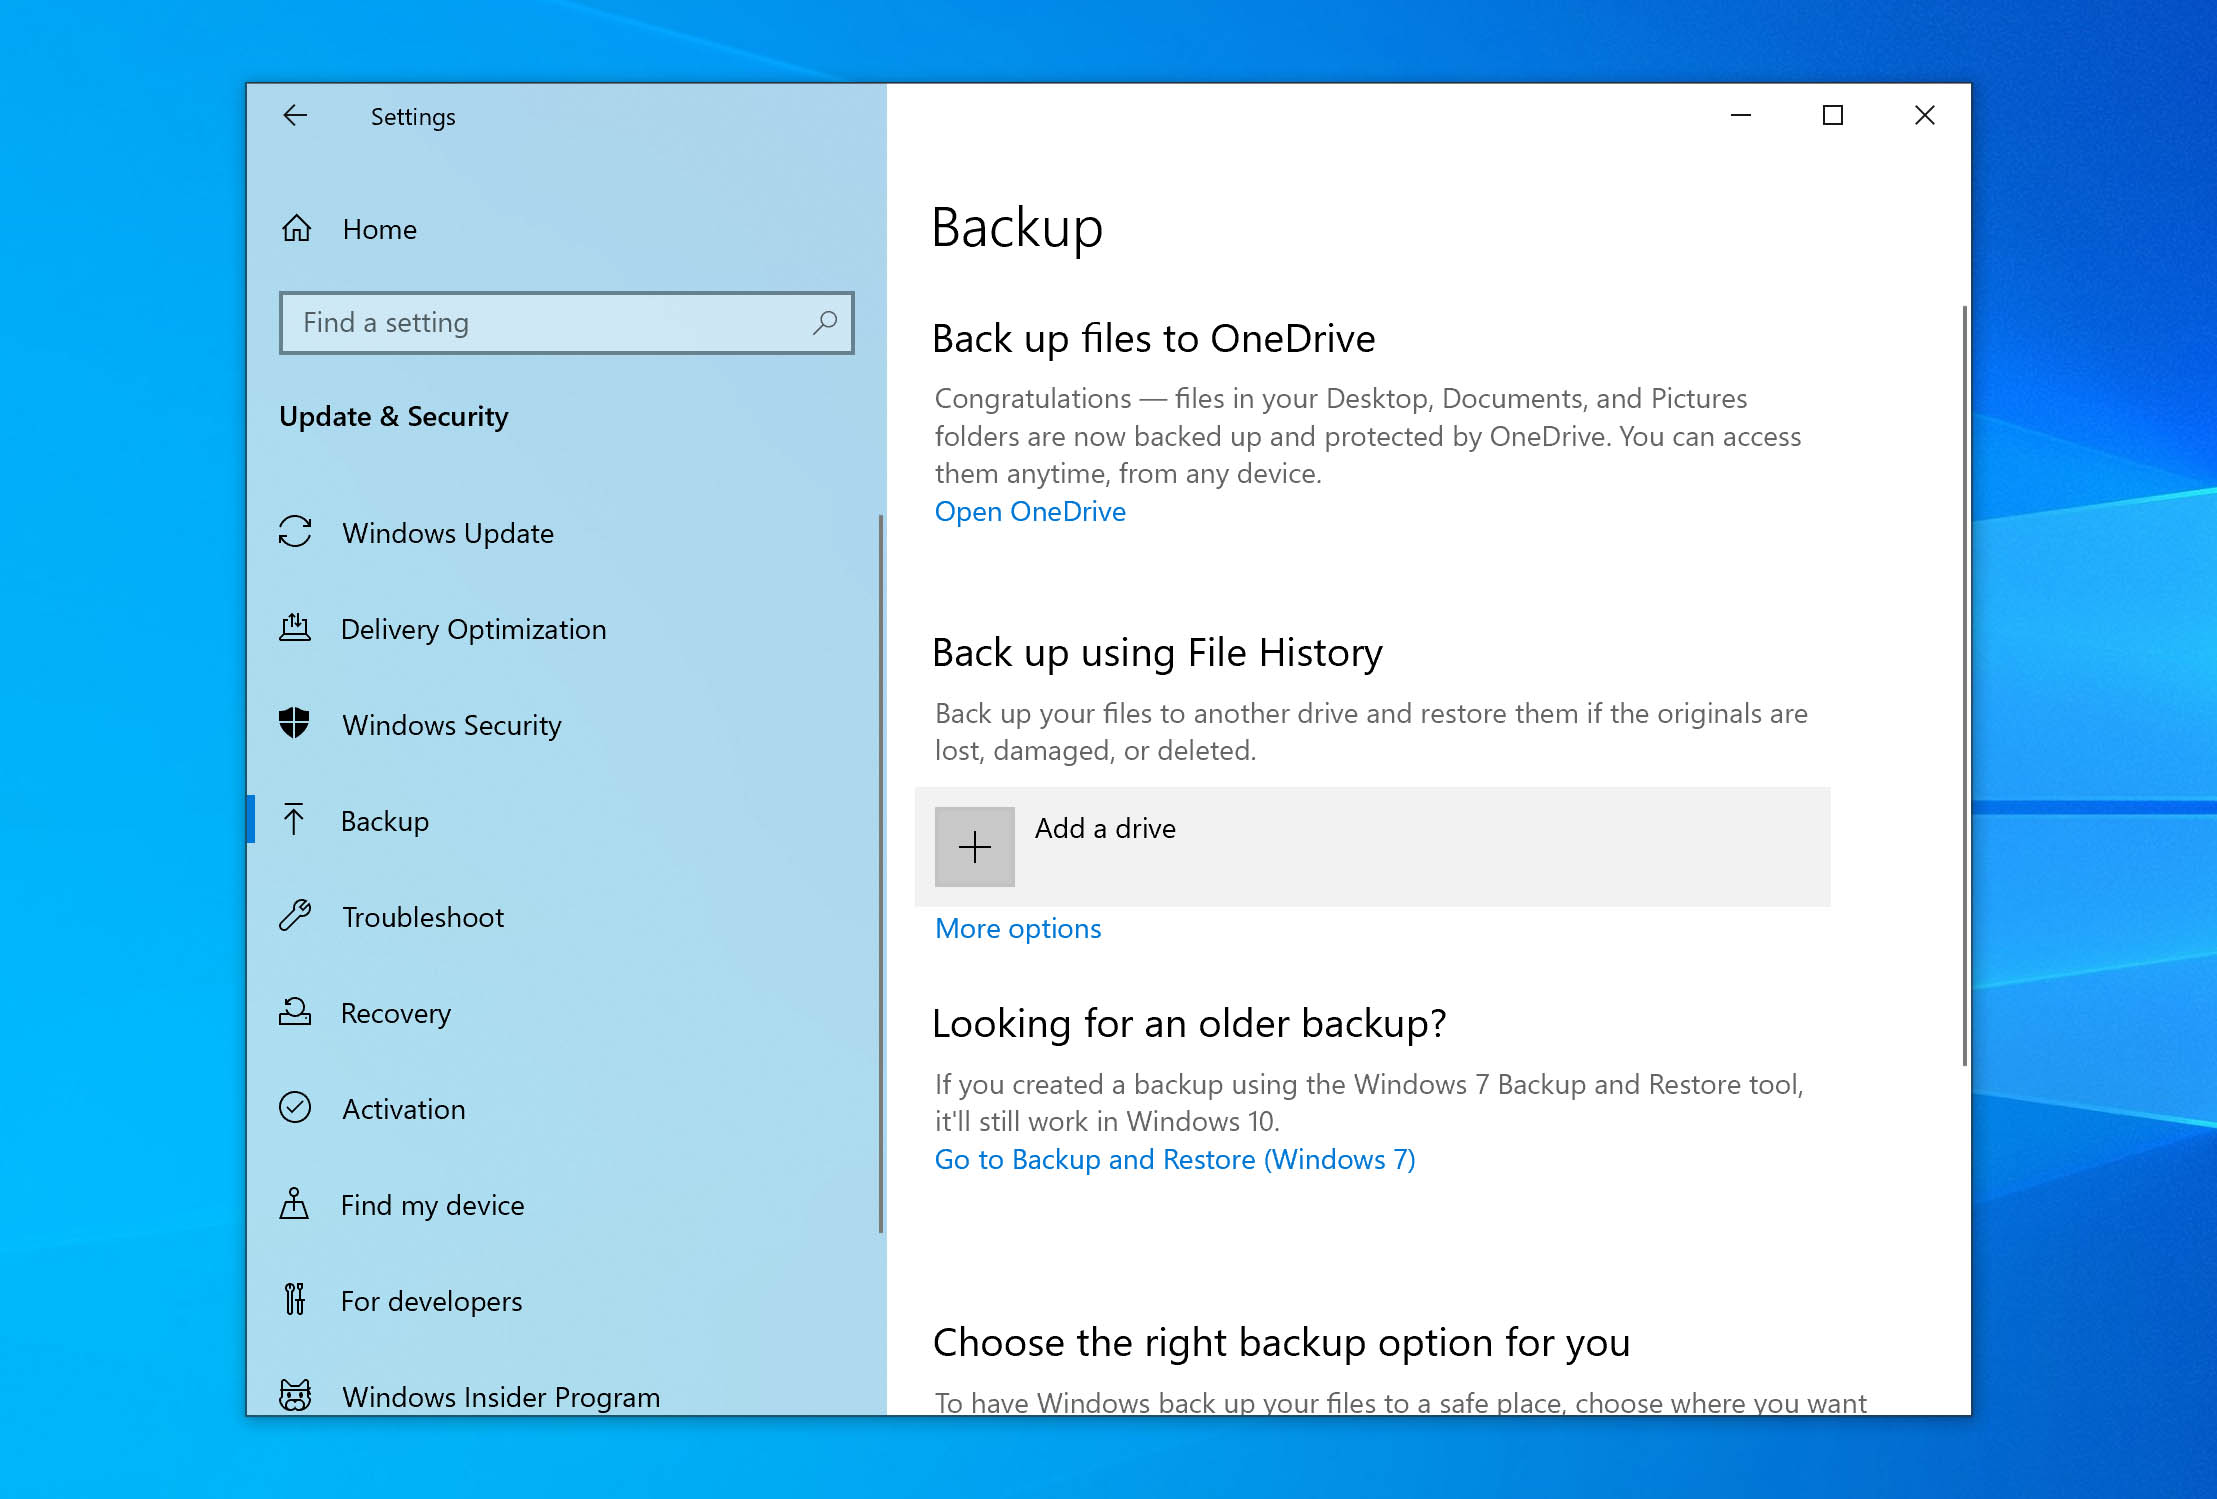
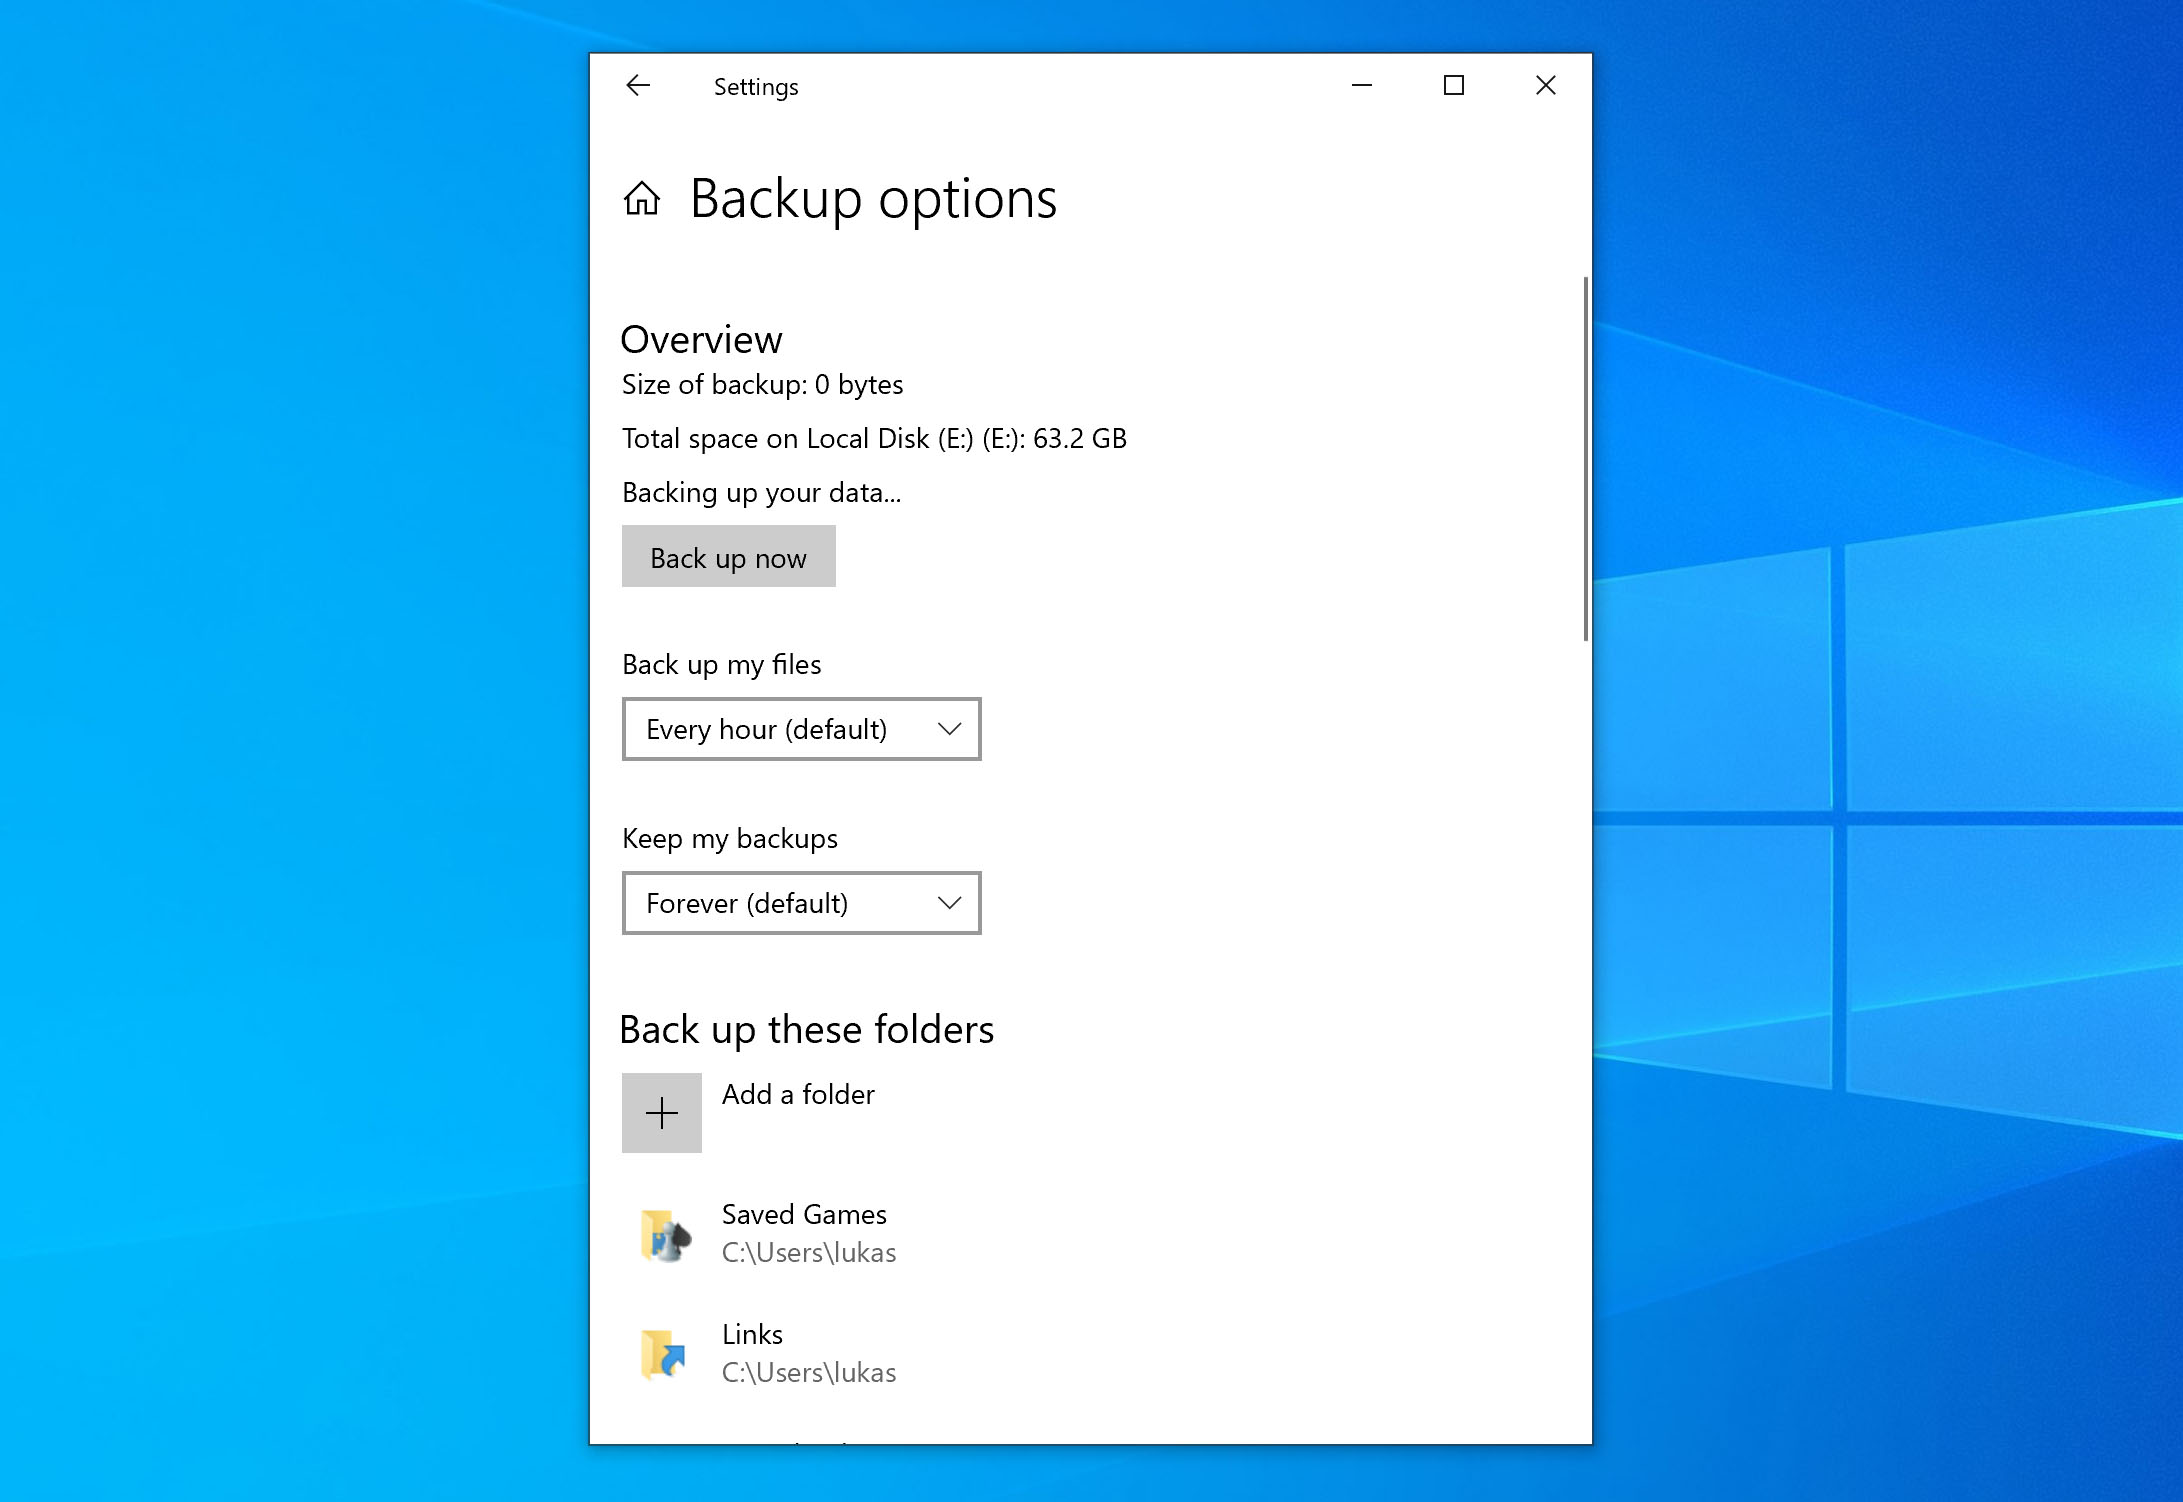
- Click the link for More options and select the Backup options screen.
- Click the dropdown menu for Back up my files and set the desired backup interval.
- Click the Keep my backups menu and select how long you want to retain your backups.
- Select the files and folder you want to include and exclude from the backups.
- Click the Back up now button to start backing up or wait until the interval you have defined for the backup to start automatically.
To restore files from File History in Windows 10 use the following steps.
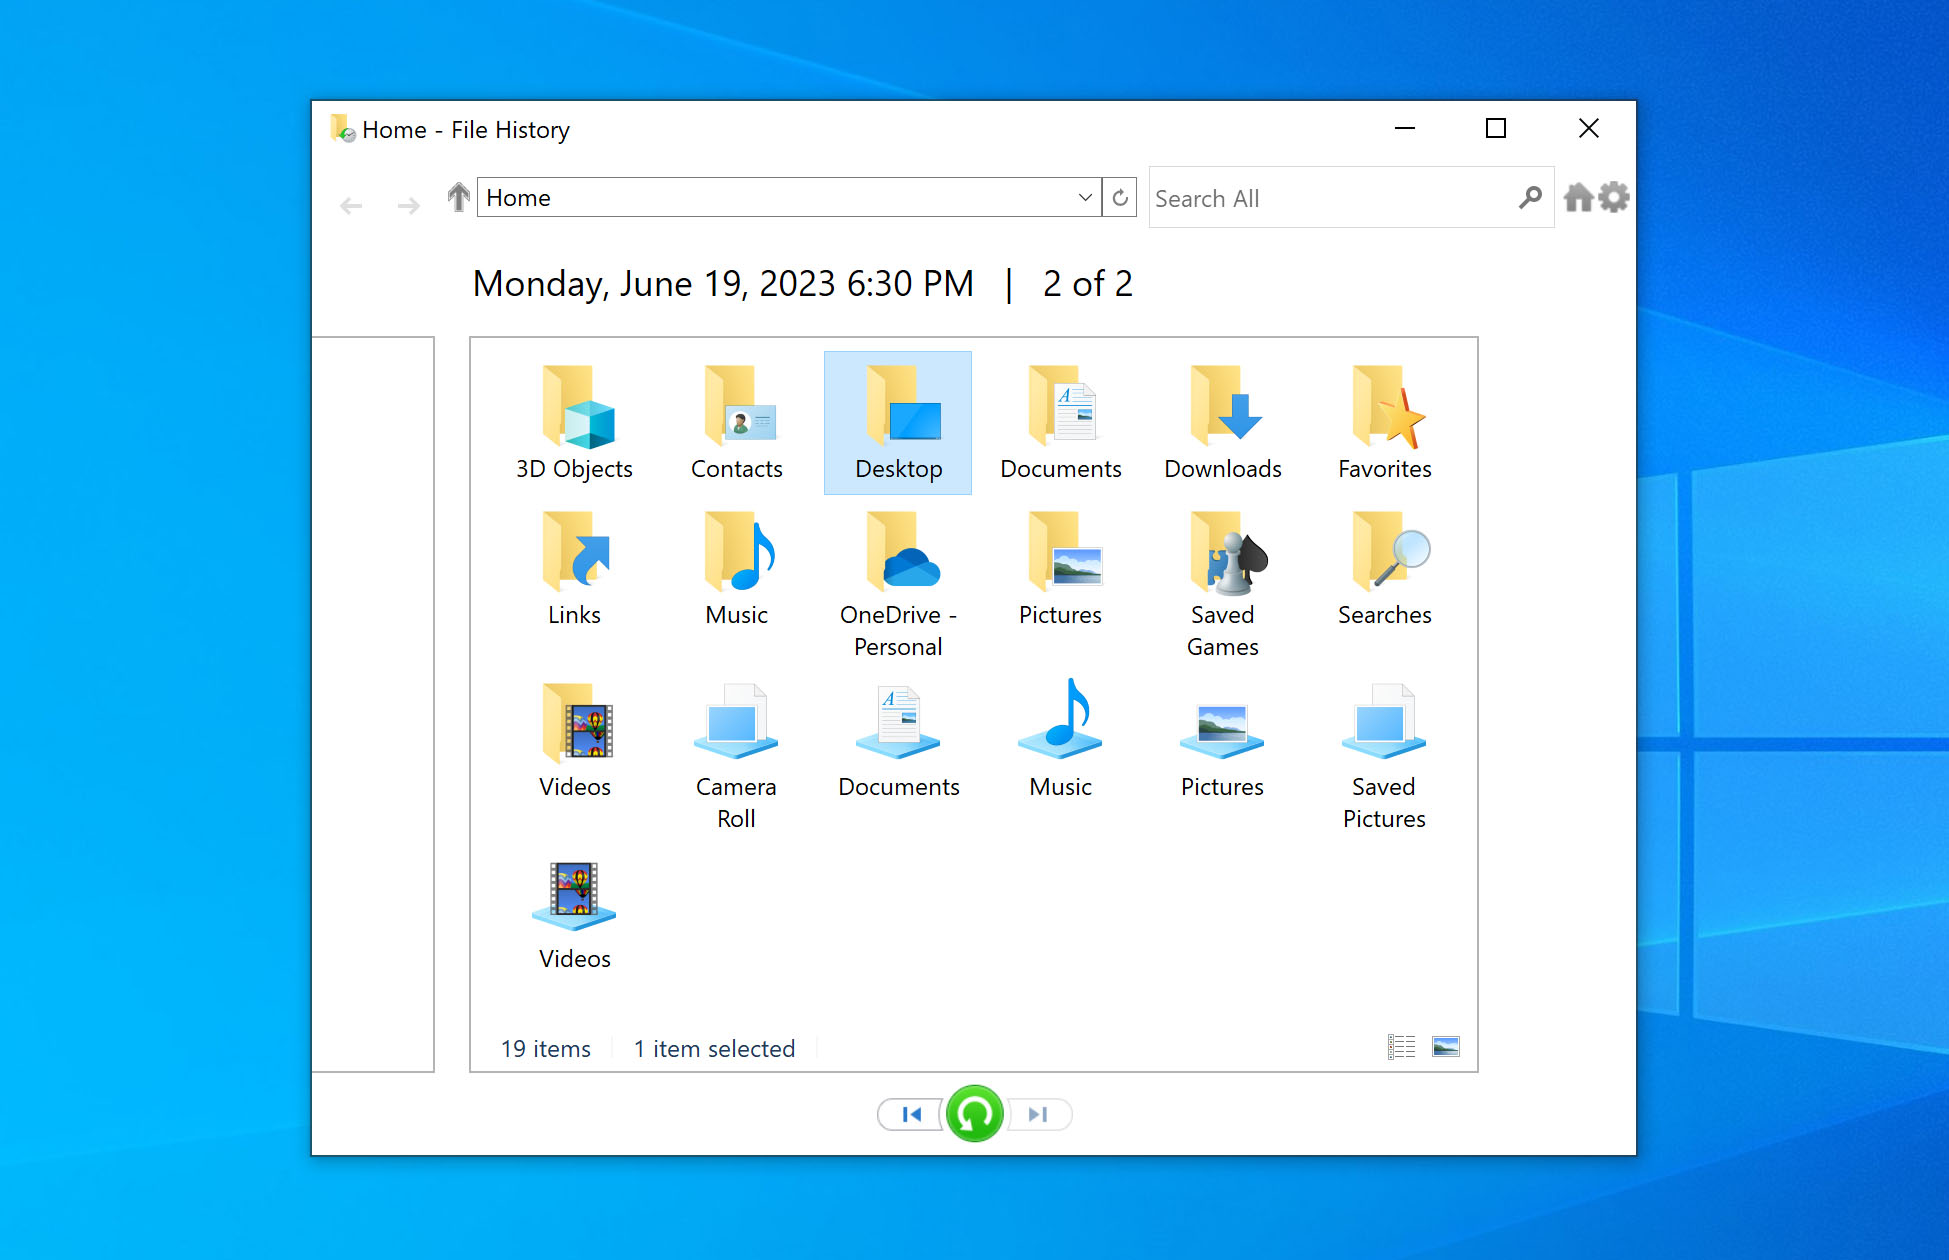
- Open Settings > File History and click the link to Restore files from a current backup.
- A File History window will be displayed that shows the last backup. You can navigate to previous backups with the left arrow icon at the bottom of the screen.
- When you get to the backup you want, open the folder that contains the items you want to restore.
- Select the files for recovery and click the Restore button. The items are recovered to their original locations.
File History Backup and Restore in Windows 11
Use the following procedure to use File History to back up your files in Windows 11.
- Ensure you have connected the drive you will use to store the backups.
- Open Control Panel and select the File History icon. The File History window should point to the backup destination under Copy files to. You can select the destination drive if more than one device is connected to your computer.
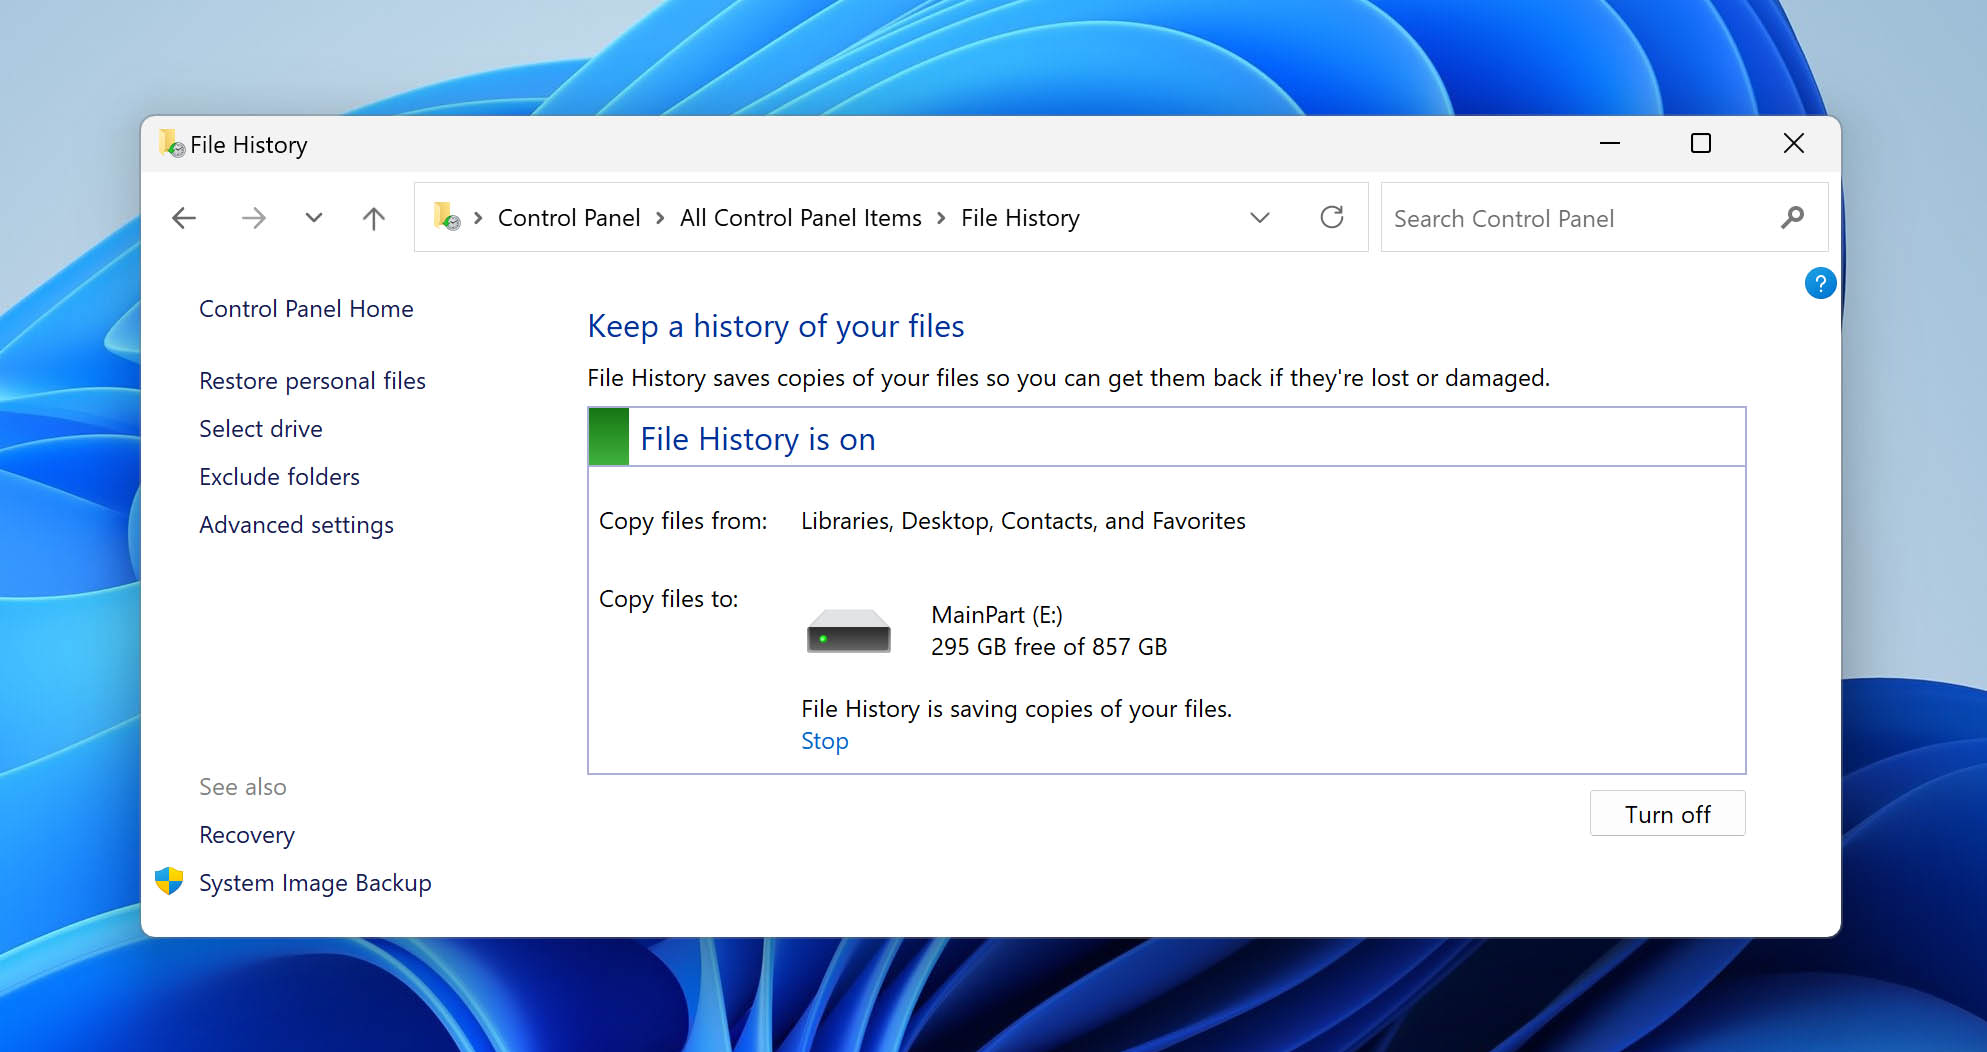
- Click OK after selecting the drive.
- Open File Explorer and right-click on the folder you want to include in the backups.
- Select include in library to add the folder to the File History default folders.
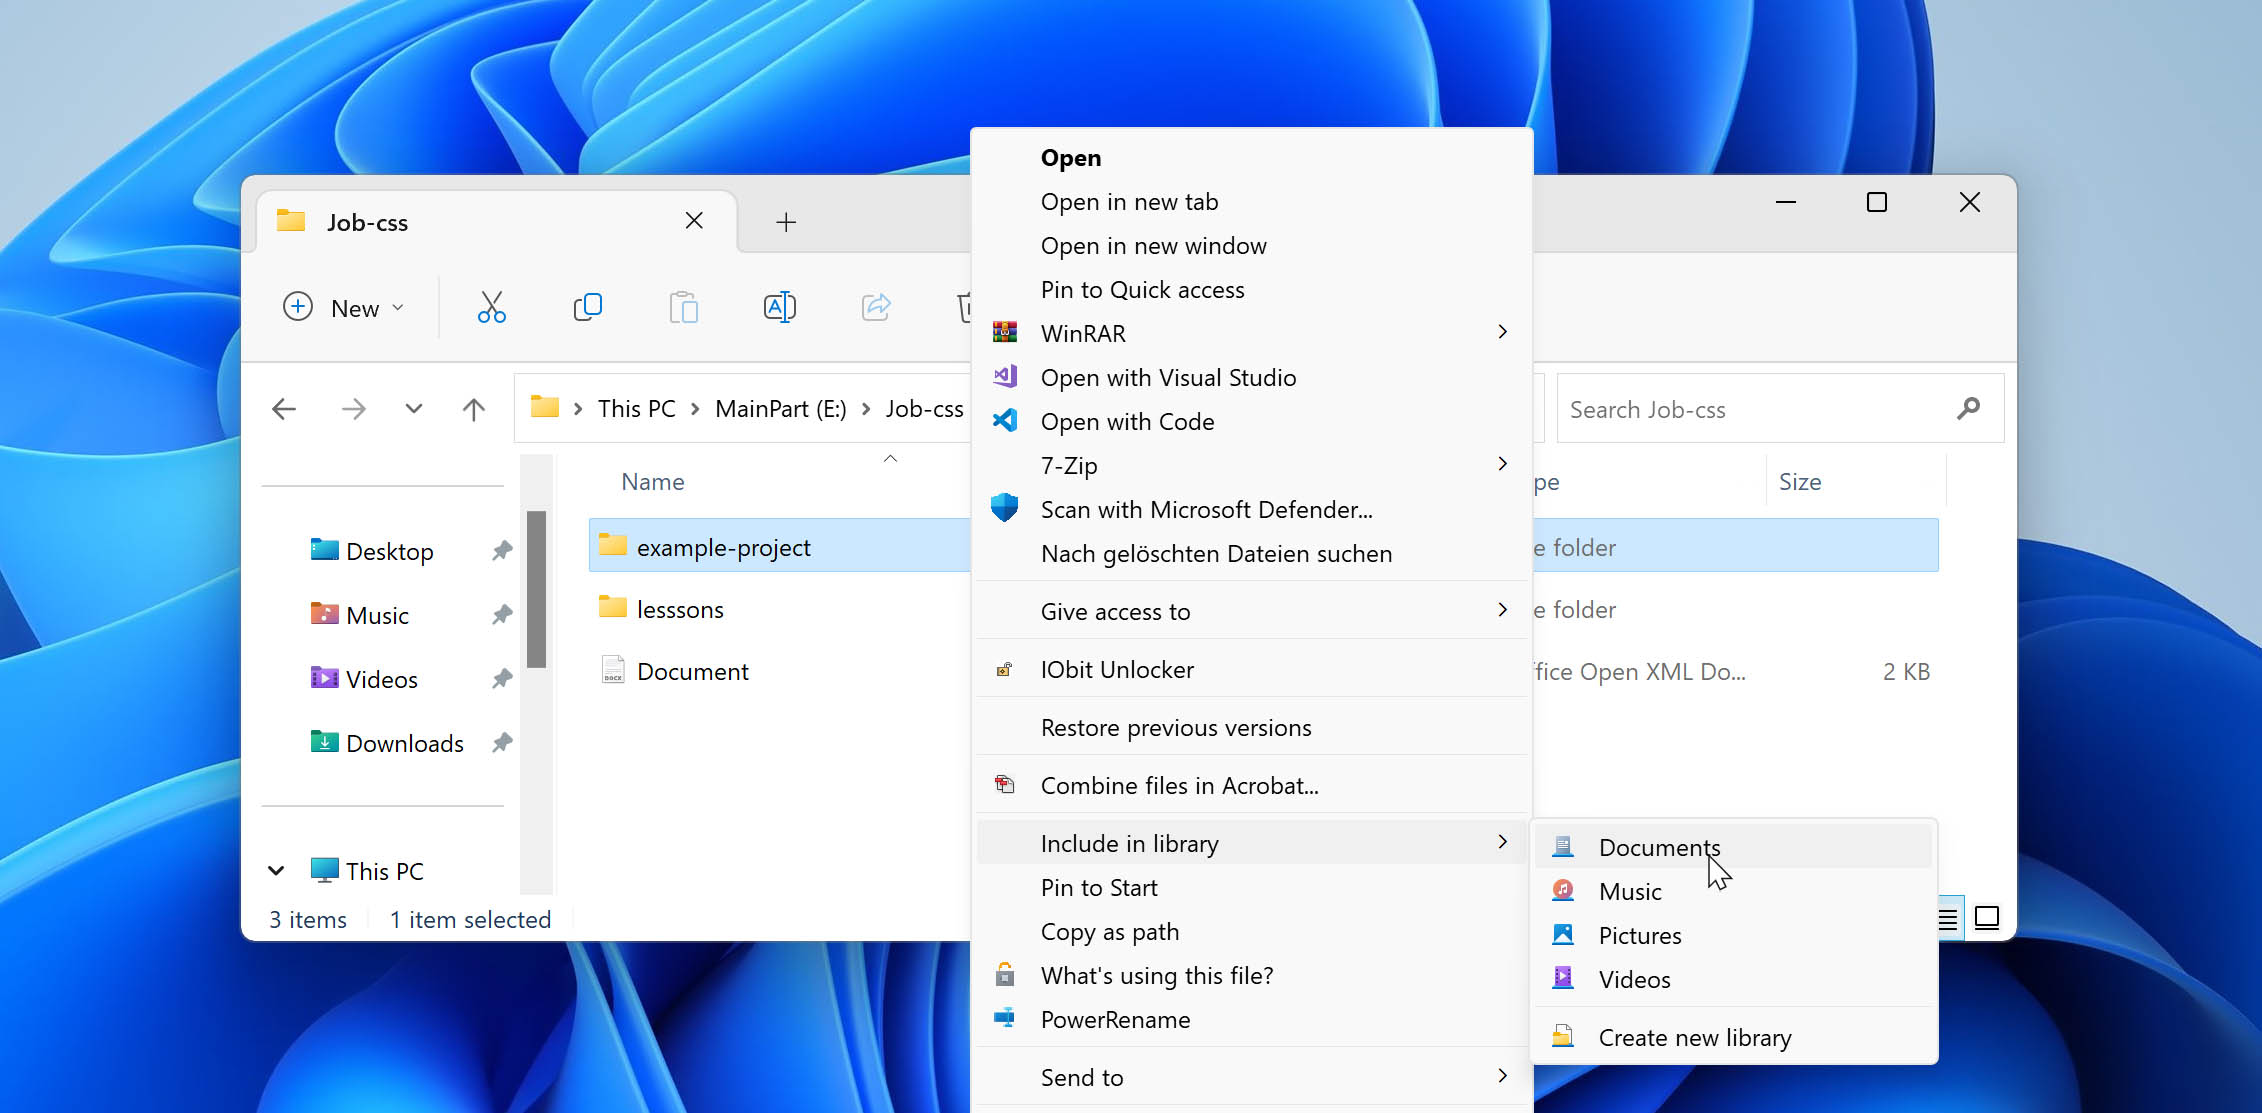
- Repeat the process and click on Exclude folders to exclude items from the backup.
- Go back to the main File History Control Panel and click Advanced settings.
- Set the backup interval and the length of time you wish to retain backups.
Click Save changes.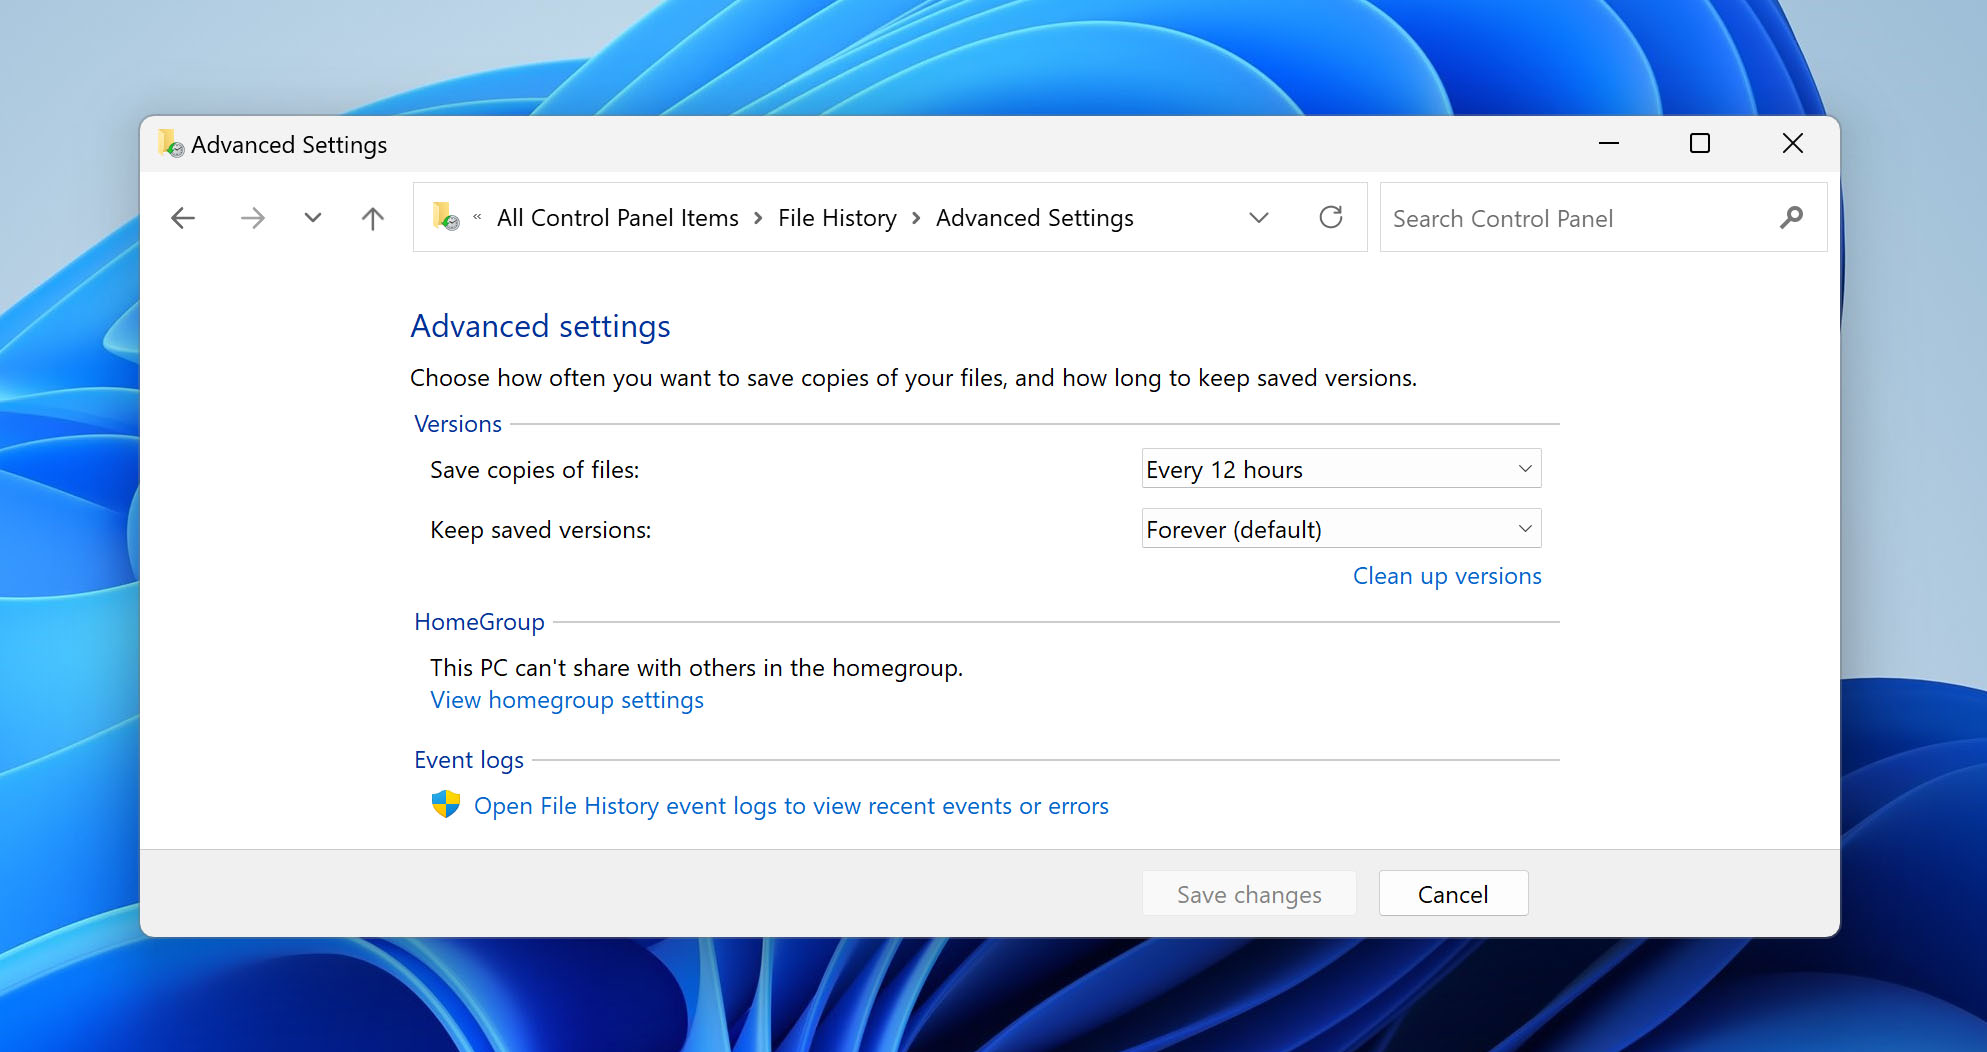
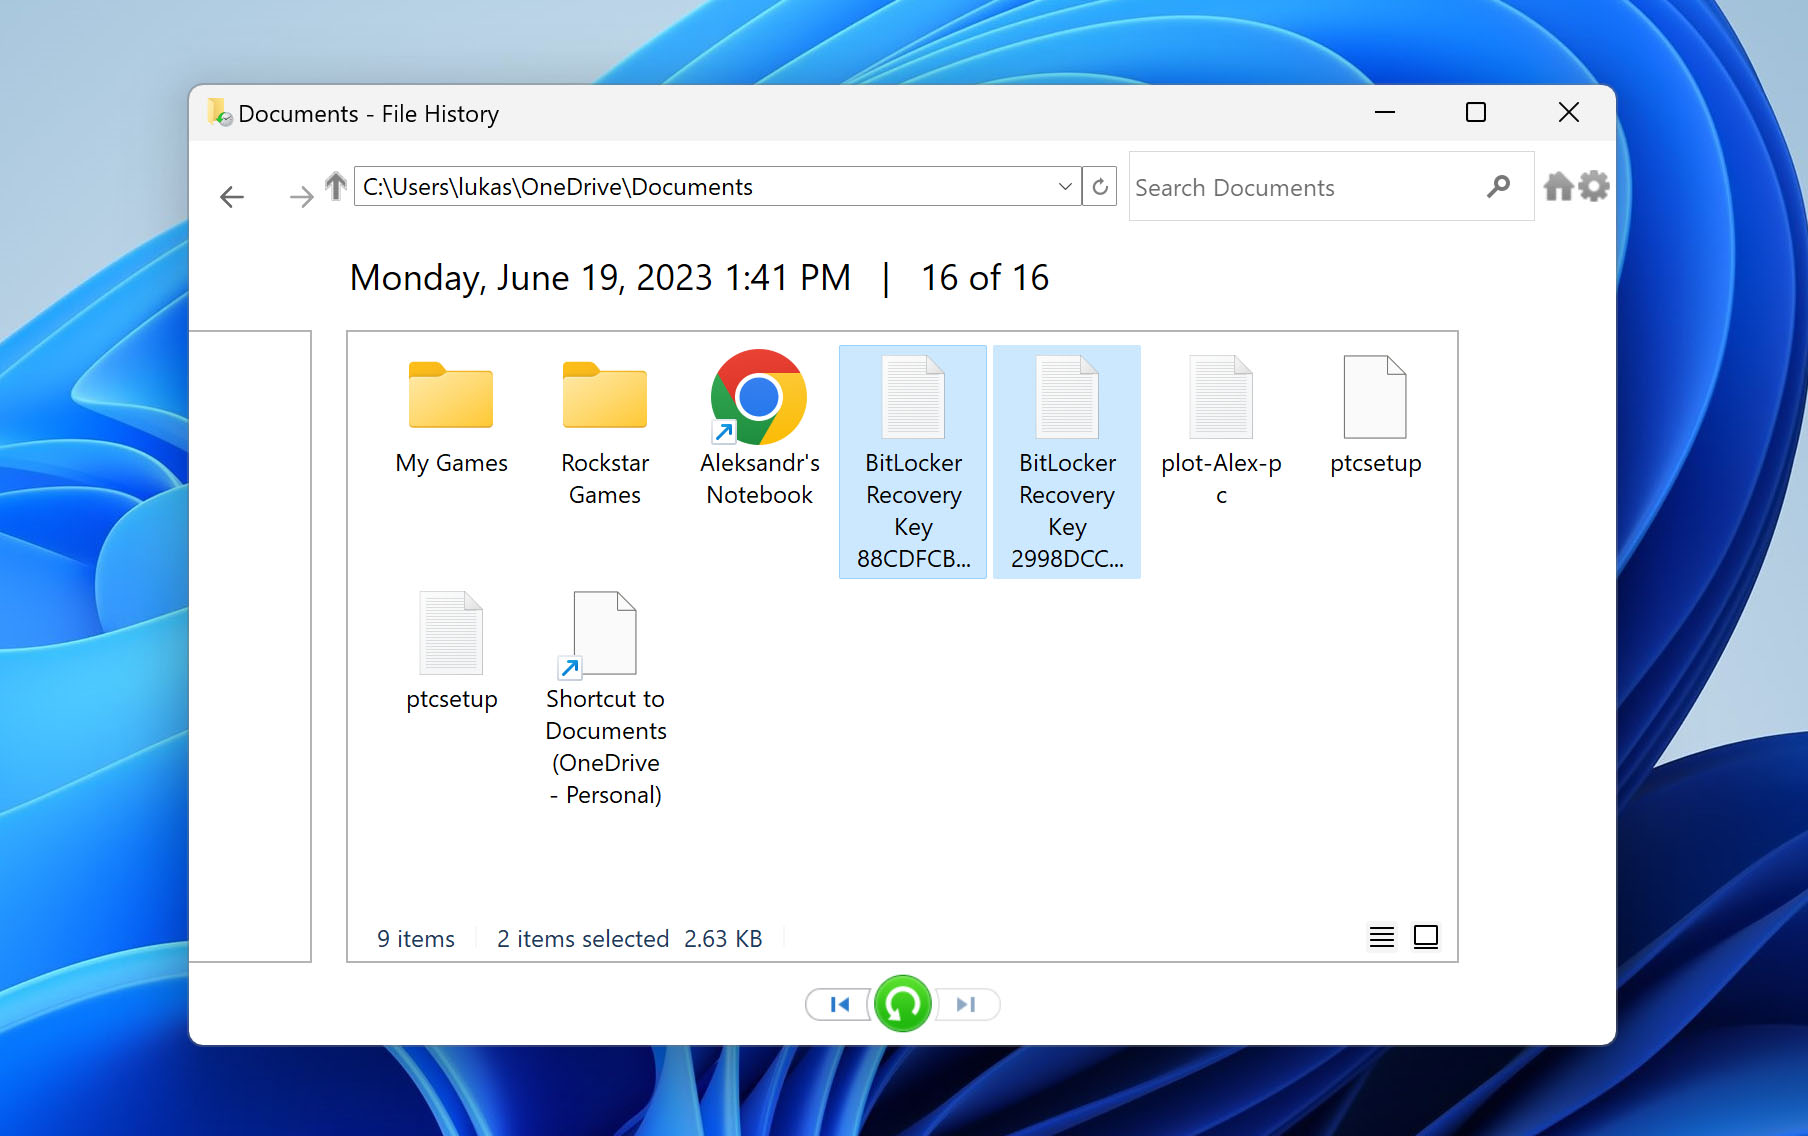
To restore files from File History in Windows 11 use the following steps.
- Open File History in Control Panel.
- Click Restore personal files.
- Search the backups and locate the folder that contains the desired file.
- Select the file and click the button to Restore to original location.
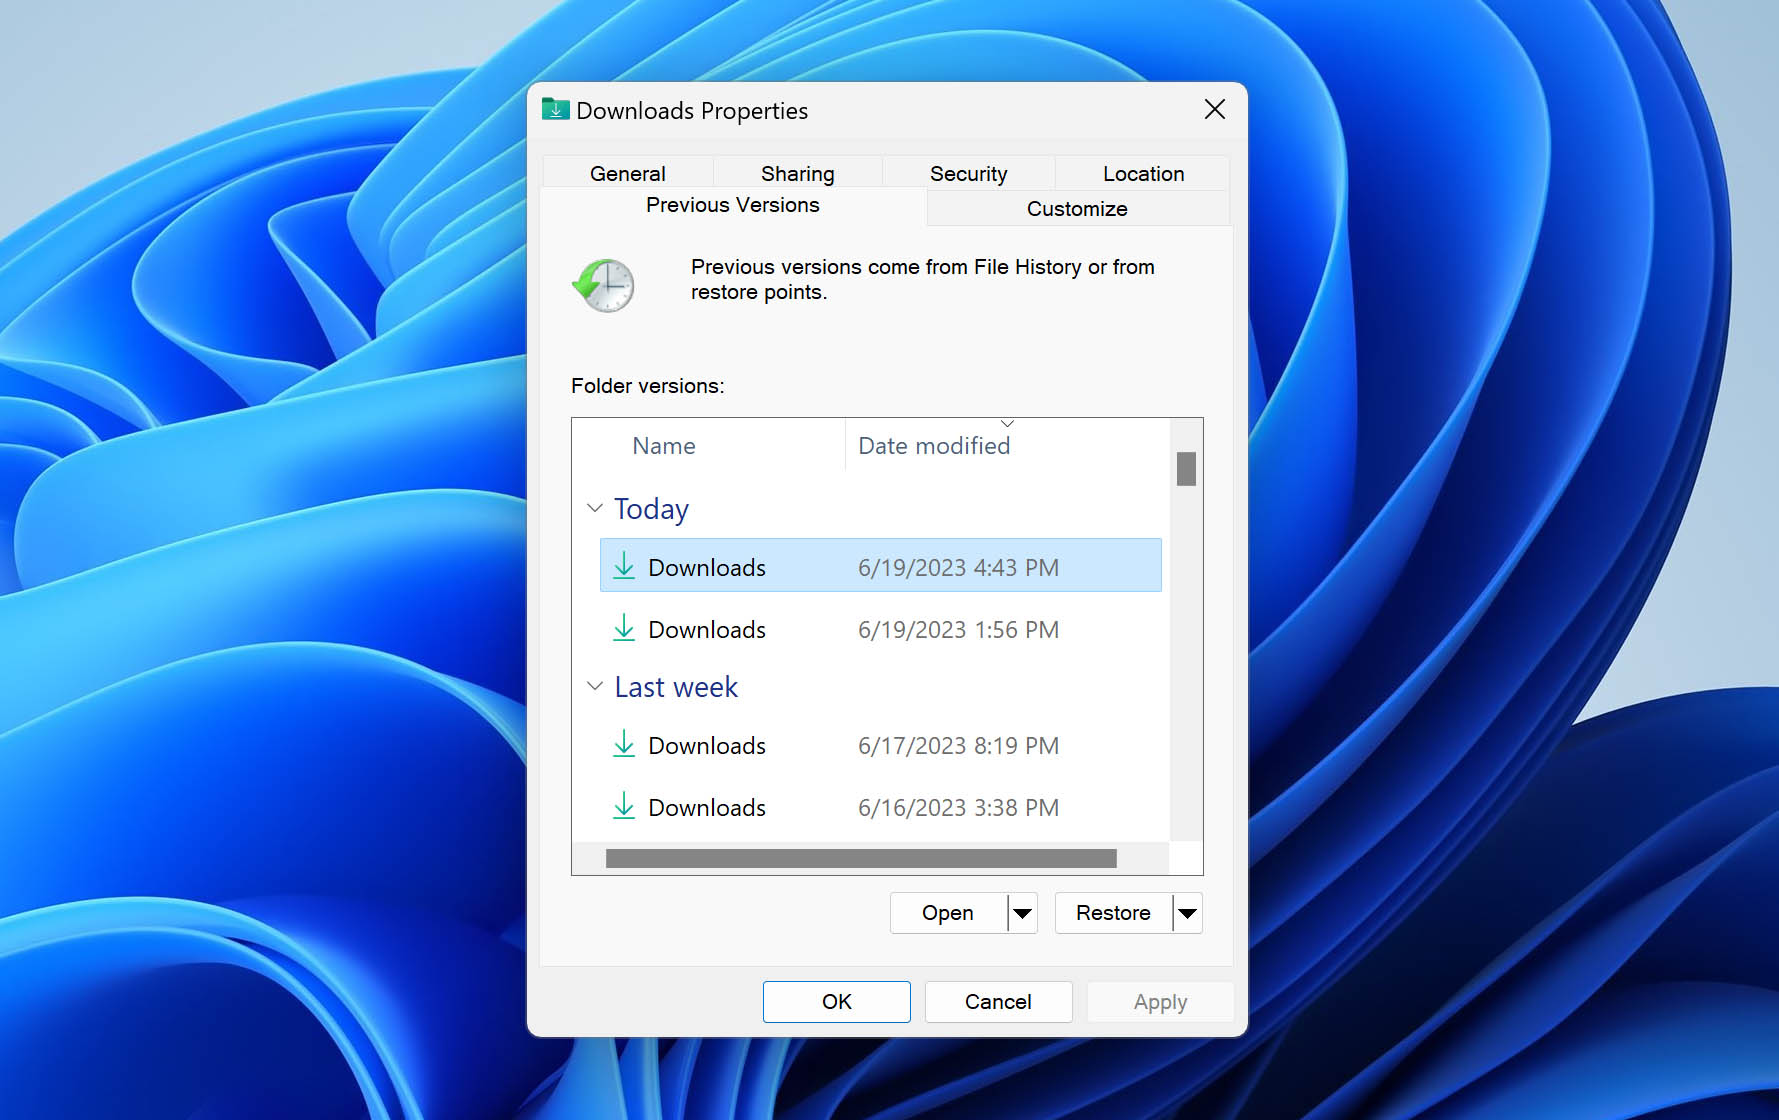
Method 3: Get Back the Previous Version of the File
Use the following method to get back a previous version of the file.
- Select Start and then Computer.
- Navigate to the folder that contained the file or folder and right-click on it and select Restore previous versions tab.
- You will see a list of available previous versions of folder that can be recovered.
- Select the version you want to restore, then click Restore button.
Is There Any Way to Prevent Important Files From Being Moved to the Recycle Bin?
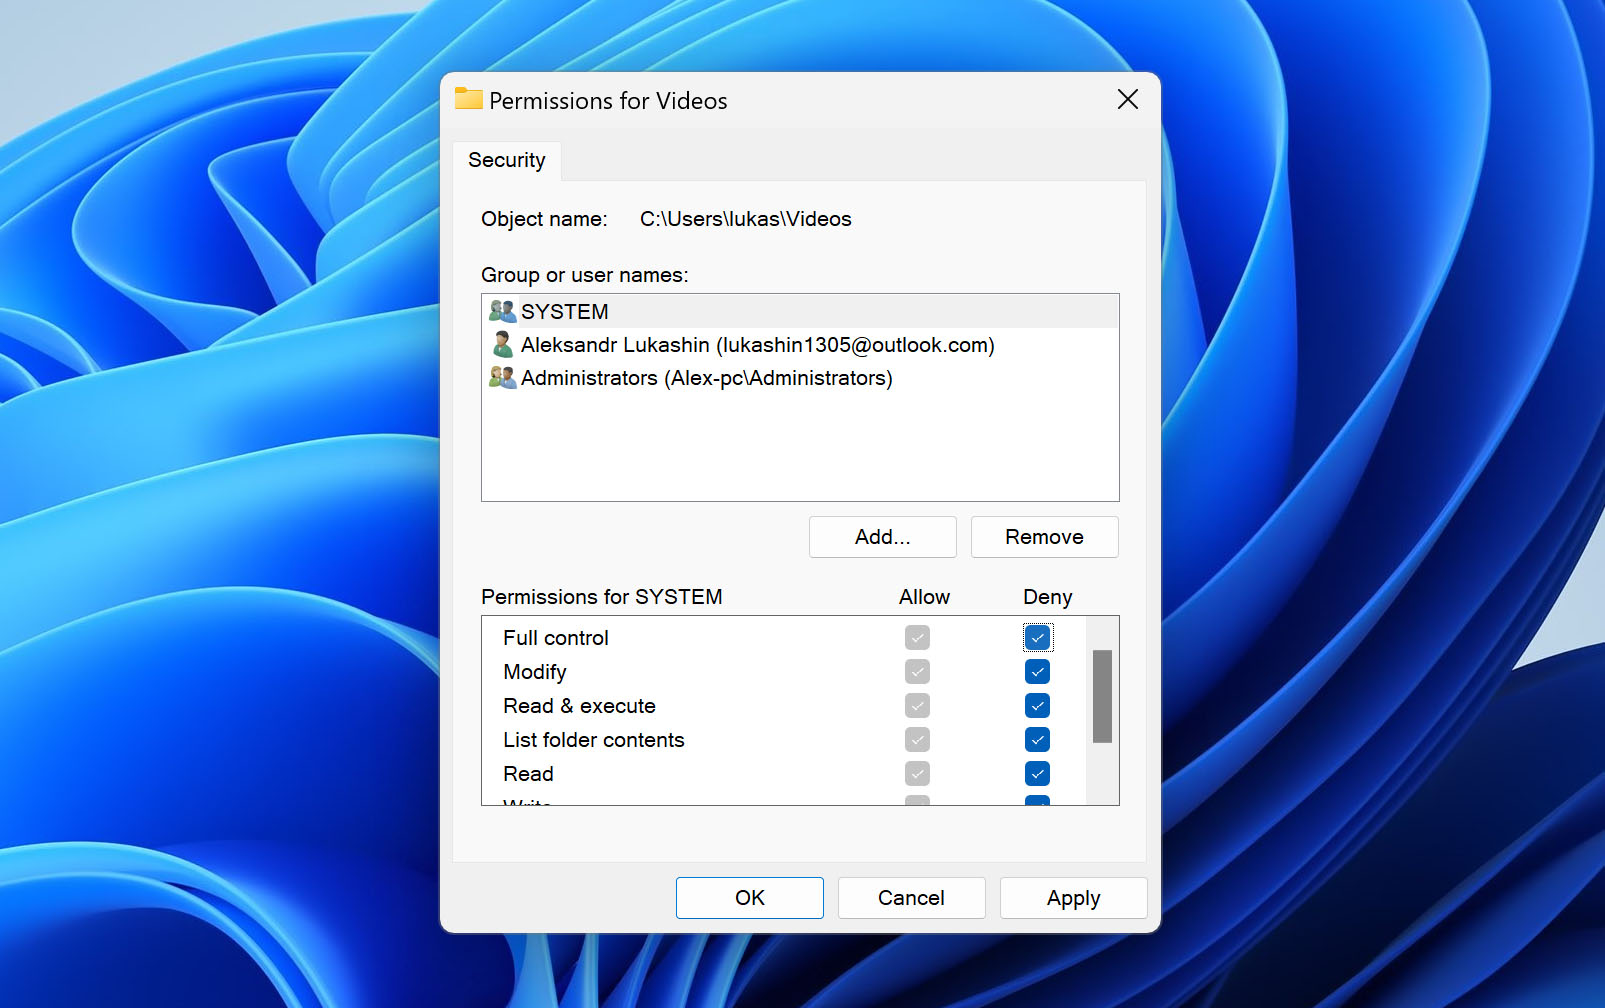
You can prevent important files from being deleted and therefore not going to the Recycle Bin. You can also configure Windows to bypass the Recycle Bin and immediately permanently delete an item, but that’s probably not what you want with important files. To prevent important files or folders from being deleted, use the following procedure to change permissions on the items.
- Right-click on the file or folder you want to protect and select Properties.
- Choose the Security tab and click Edit.
- Select all groups that are available in the list and choose Deny Full Control for every group.
- Click Apply and then OK. The items cannot be deleted unless you change the permissions to allow deletion.
Frequently Asked Questions
How do I recover deleted files from Recycle Bin after it is emptied without software?
You can use a backup to recover deleted files from an emptied Recycle Bin without software. This fact highlights the importance of regularly backing up your computer to guard against data loss.
Can you recover deleted files after emptying the Recycle Bin?
Yes, you can recover files after emptying the Recycle Bin. The most efficient method is with data recovery software, but you can also use a backup or Windows features to recover a deleted item.
How do you restore files permanently deleted from the Recycle Bin?
Use this procedure to restore files permanently deleted from the Recycle Bin.
- Download and install Disk Drill for Windows.
- Launch the app and select the disk with the Recycle Bin.
- Click Search for lost data to scan the disk.
- Evaluate the results and select items for recovery.
- Click the Recover button and choose a safe storage location.
How long does the Recycle Bin keep files?
The Recycle Bin retains files indefinitely by default. Older files will be permanently deleted from the Recycle Bin when it runs out of storage to make room for newly deleted files. The Storage Sense feature lets you configure the Recycle Bin to automatically empty itself every 1, 14, 30, or 60 days. You can also configure the Recycle Bin to hold deleted files for a defined number of days and then permanently delete them.
Is there a way to check the Recycle Bin history?
There is no method of checking the history of files deleted from the Recycle Bin. You can use Disk Drill data recovery software to scan your hard drive and obtain a list of deleted files that can be recovered.

- 33 publishings
- Atlanta, GA
Jeff Cochin is a data management and recovery professional, who has been with Pandorarecovery for nine years and has always been an essential part of the team. Jeff also works as a technical writer at Macgasm, being a first hand in testing, trying and writing about big and small tech software.
- Houston, Texas, United States
Nikolay Lankevich has over 15 years of strong experience in various fields and platform includes Disaster Recovery, Windows XP/7. System analysis, design, application (Inter/Intranet) development, and testing. Provided technical supports on desktop and laptops on Win-XP and Macintosh for about 2000 employees.