Recovering Deleted Files: A Practical Approach
Are you tired of outdated tutorials and malware-infected utilities? So are we, which is why we’ve put together this comprehensive guide, listing multiple tried and tested data recovery methods to help you recover your data from any device for free.
Recovering Deleted Files on Windows
We have compiled a list of the most commonly used methods for recovering deleted or lost files from your PC or laptop. Without further ado, let us begin.Method 1: Check if the Files Are Really Deleted
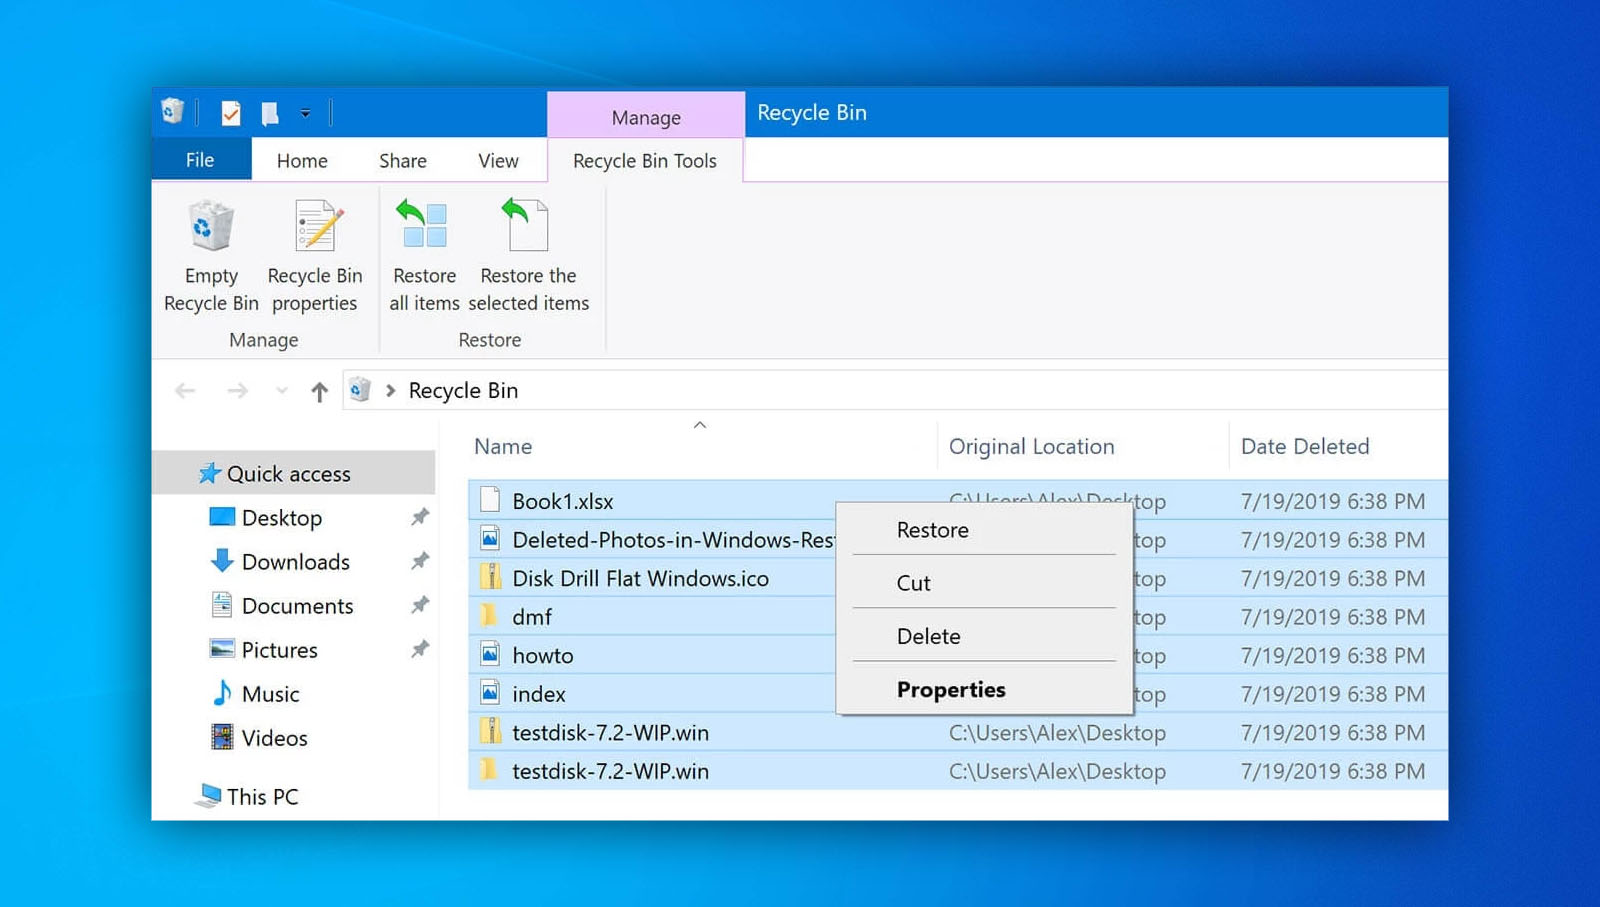
There’s a a difference between deleted files and permanently deleted files. Before you move any further, you should verify that the missing files are really deleted and have not just been moved to the Recycle Bin from which files and folders can easily be restored to their original location.
To find deleted files in the Recycle Bin:- Double-click the Recycle Bin icon on the desktop.
- Right-click on an empty space inside the Recycle Bin window and select Sort by → Date modified.
- Look for the missing files. If you remember how the files you’re trying to recover were called, you can use the Search bar in the top-right corner to locate them.
- Select your files.
- Drag the files from the Recycle Bin to your desktop or other desired location.
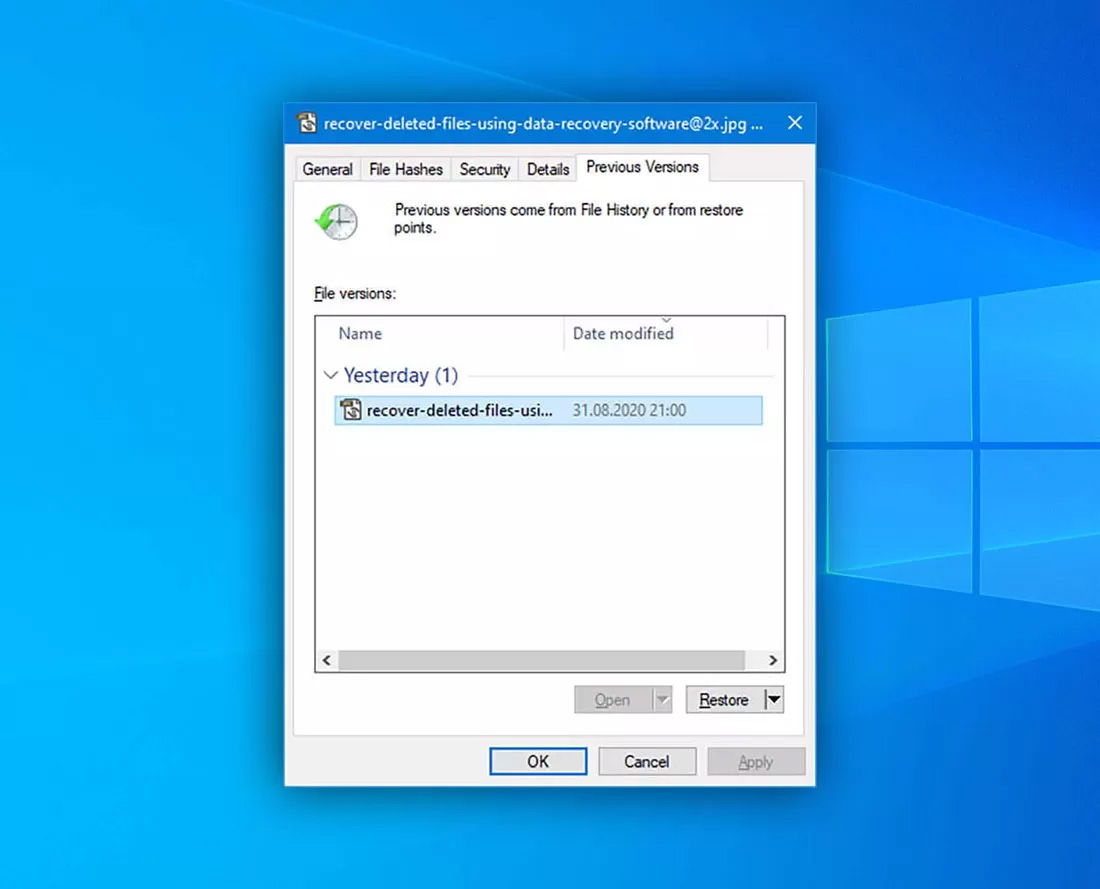
Method 2: Restore Previous Versions from a File History Backup
If you’re a Windows user and have configured File History to continuously protect your personal files, you’re in luck because you can easily recover them back.
To restore a previous version of a file using File History:- Open Windows Explorer and right-click on the folder where the deleted file was located.
- Select Restore previous versions.
- Select the most relevant File History backup and click Open to preview its content.
- Select the file you want to recover.
- Click the green Recover button at the bottom of the preview window to recover it.
Method 3: Use 3rd Party Software
Third-party data recovery software applications can recover even permanently deleted files. They analyze the content of a storage device, looking for recoverable data, and putting it back together in a salvageable format.
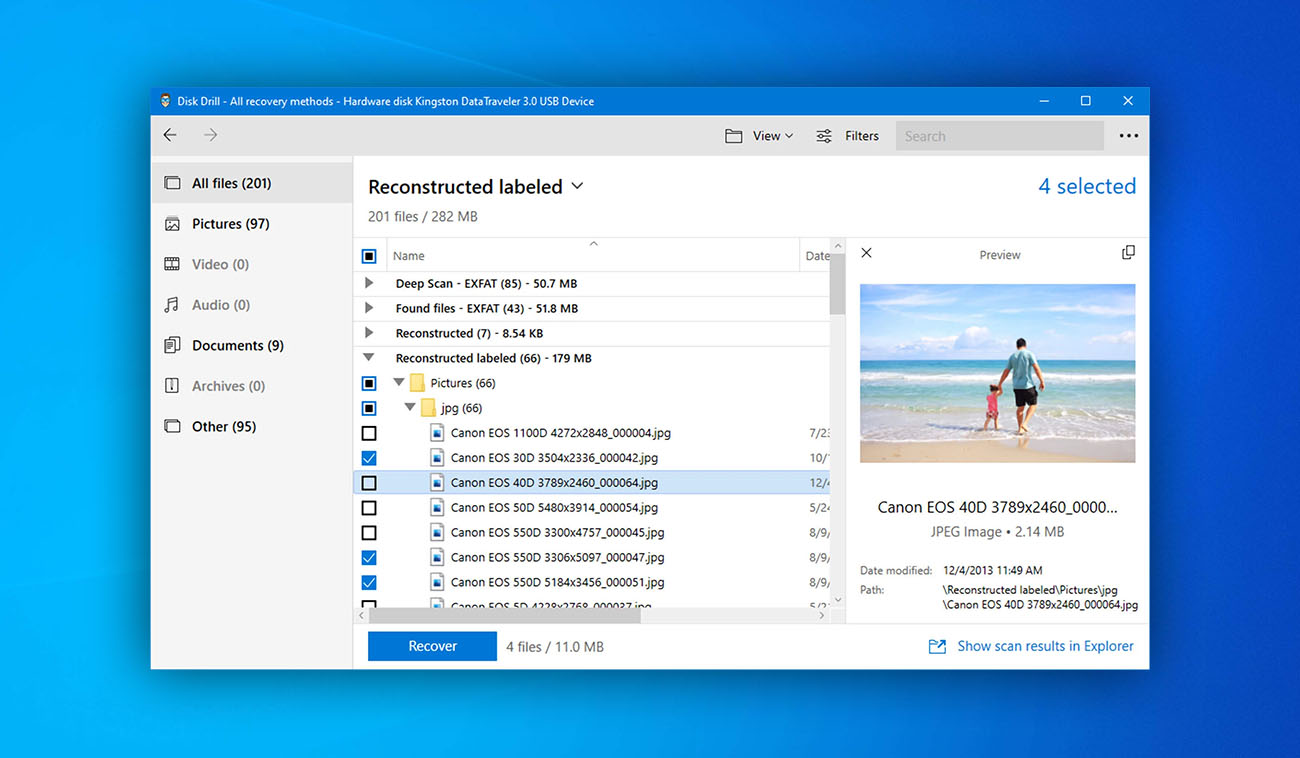
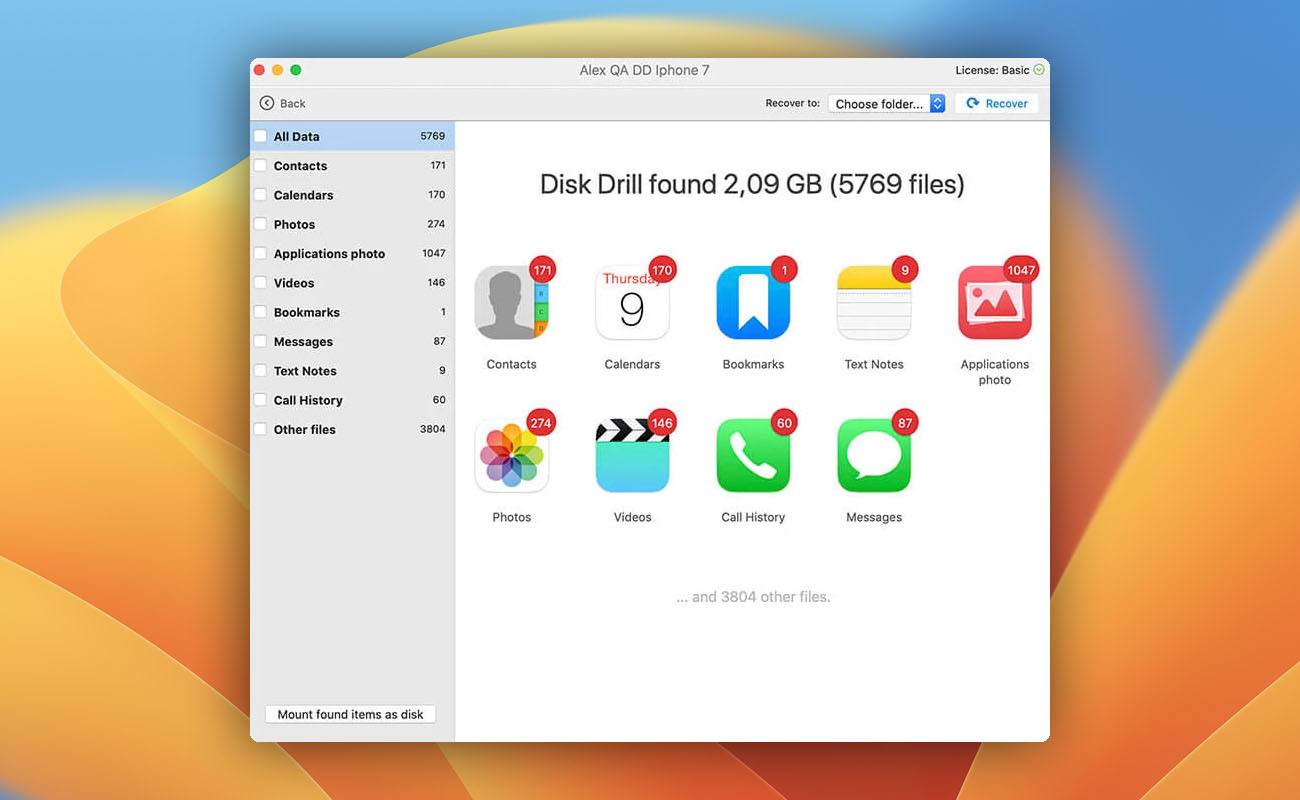
Disk Drill is a great example of a third-party data recovery software application suitable for regular home users and professionals alike. Its free version can recover up to 500 MB of data using state-of-the-art data recovery algorithms capable of recognizing hundreds of file formats.
To recover files on Windows with Disk Drill:- Download and launch Disk Drill for Windows.
- Select the storage device on which the deleted files were stored and click Search for lost data.
- Use the file format filters on the left to narrow down the scan results until you find the file you’re looking for. Select it to see its preview on the right.
- Click the checkbox next to the file and click the blue Recover button at the bottom.
- Specify the recovery folder and click OK.
Recovering Deleted Files on Mac
Apple created several safety nets to help Mac users easily restore accidentally deleted files, and you should give them a try before you spend money on a data recovery software application.
We’ve already described most of them on the corresponding page, so here’s just a quick summary:
- Trash folder. Click the Trash icon in the Dock and check if it contains the deleted files. For more information on how to recover files from the Trash, please refer to this page.
- Undo recent change. MacOS lets you easily undo your last action by simply pressing Command + Z on your keyboard.
- Time Machine. If you have activated Time Machine, you should be able to use it to recover the deleted files with just a few clicks.
- Terminal. There are several terminal commands that you can try to recover deleted files.
- iCloud backup. With iCloud, you can recover deleted files from any device.
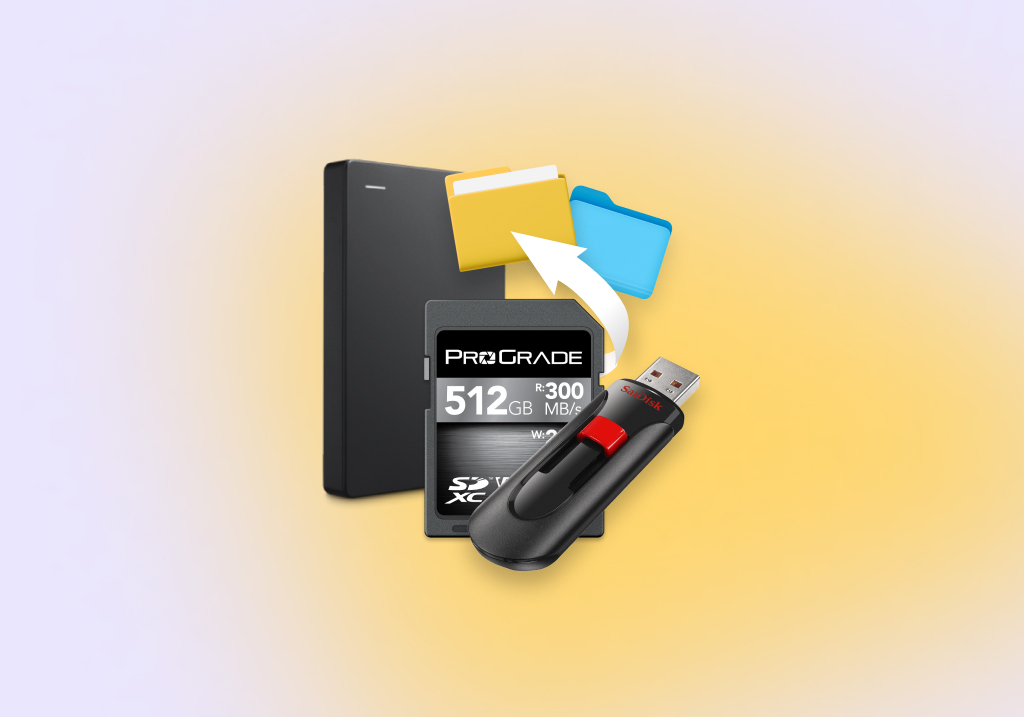
Recovering Deleted Files from Memory Card
Used in digital cameras, smartphones, and many other electronic devices, SD cards are among the most readily used storage media in the world, which explains why they’re involved in so many cases of data loss.
To recover deleted files from an SD card:- Connect the SD card to your computer using an internal or external SD card reader.
- Wait for your computer to recognize the SD card.
- Open your SD data recovery software application of choice.
- Use it to recover deleted files from the SD card to your computer.
- Copy the recovered files back to the SD card if desired.
Recovering Deleted Files from USB Drive
USB drives are handy for transferring files between computers and sharing them with other people. Unfortunately, the market is flooded with cheap, unreliable USB drives that use cheap flash memory modules that may cause them to fail unexpectedly. In many instances, it is feasible to retrieve lost data from a USB drive.
To recover deleted files from a USB drive:- Connect the USB drive to your computer.
- Download and install a USB data recovery application.
- Scan the USB drive.
- Select the files you want to recover.
- Begin the recovery process.
Recovering Deleted Files from External Hard Drive
External hard drive recovery isn’t any more complicated than USB drive or SD card recovery. As long as you use a reliable data recovery application, you should be able to easily recover lost files from any external hard drive, regardless of its size or brand.
To recover deleted files from an external hard drive:- Connect your external hard drive to your computer.
- Use the same data recovery application you would use to recover files from any other storage device.
- Scan the external hard drive. Be patient because it may take a while.
- Select the files you want to recover.
- Recover the selected files to your computer or a different external hard drive.
Recovering Deleted Files from Mobile Devices
We have become dependent on mobile phones, using them for much more than just communication. It shouldn’t then be a surprise that more data than ever before is lost on mobile devices. The good news is that there are several ways how you can get it back, and it doesn’t matter if you’re using Android or iOS.
Method 1: Recover from a Backup
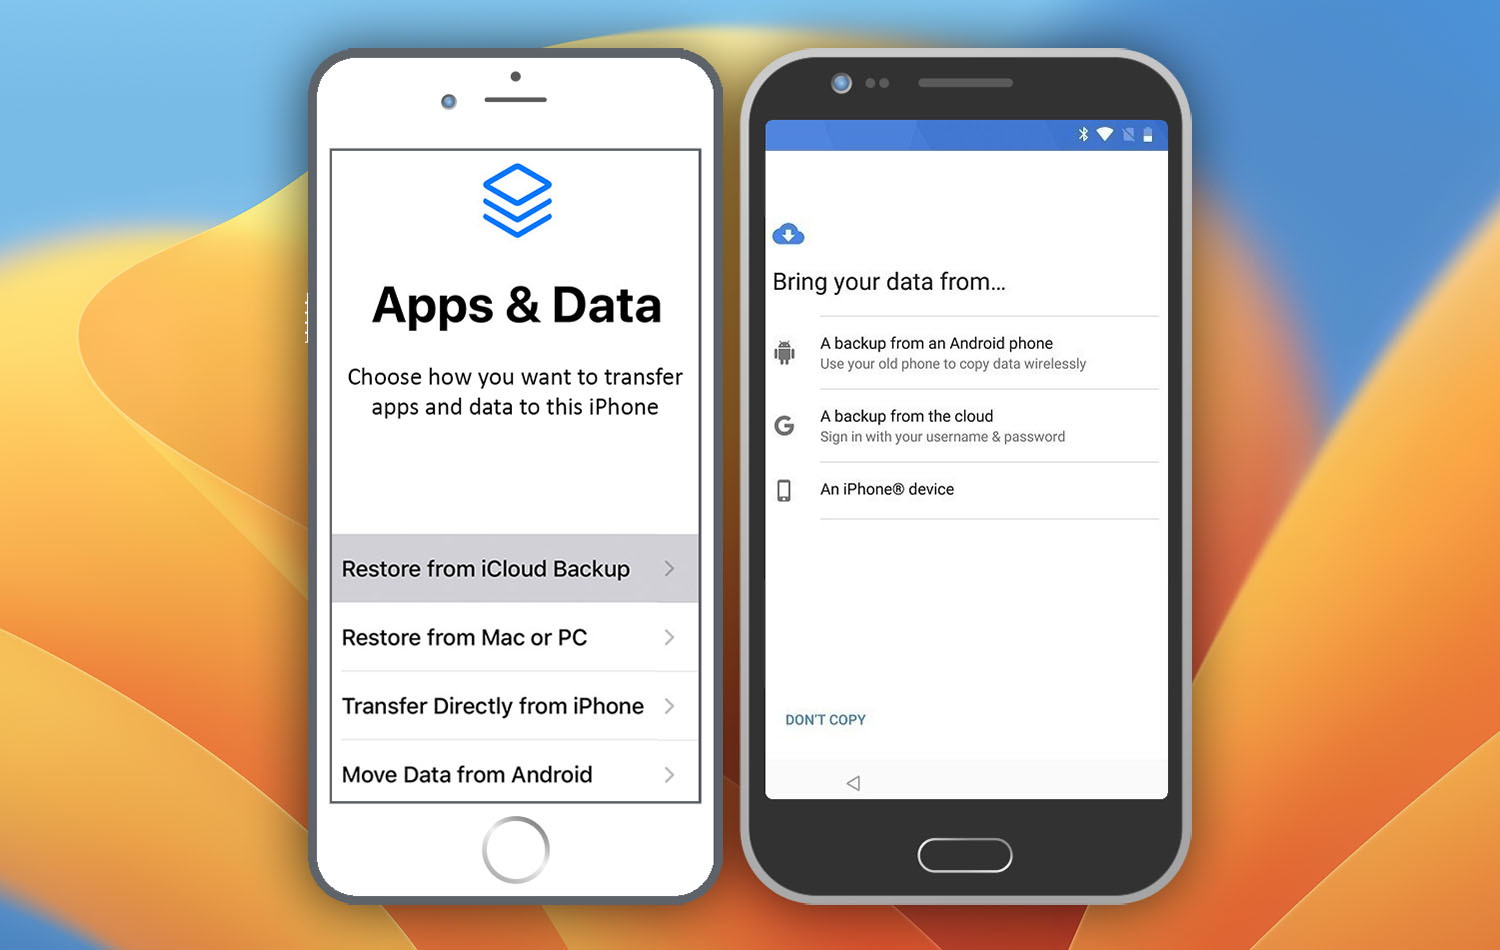
Both Android and iOS devices can back up content, data, and settings from your phone to cloud storage and restore everything from the cloud backup with a few simple taps.
- 🤖 If you’re an Android user, go to this Android help page to learn how to restore backed-up data and settings.
- 🍏 Are you using iOS? Then, this official tutorial has you covered.
Method 2: Use a Data Recovery App (Android Only)
The Android operating system allows users to access the entire file system and recover deleted files using third-party data recovery apps like DiskDigger by Defiant Technologies.
To recover deleted files with DiskDigger:- Download DiskDigger from the Play Store.
- Launch DiskDigger and tap Start basic photo scan.
- Give DiskDigger permission to access your device’s storage.
- Select the files you want to recover.
- Tap the Recover button.

Method 3: Connect Your Mobile Device to a Computer
If you don’t have a backup of the lost files and found no luck with data recovery apps (or use iOS, in which case you can’t use data recovery apps due to restrictions imposed by Apple), there’s still one solution that you can try: connect your mobile device to a computer and use a data recovery software application for Windows or Mac.
Can I Recover Deleted Files Using CMD?
Yes, it’s possible to recover deleted files using Command Prompt (CMD), but the process is far less predictable than you might think. Whereas data recovery software applications like Disk Drill allow you to recover specific files (and even preview them before recovery), CMD data recovery commands present in Windows don’t give you nearly as much control.
Additionally, it’s worth noting that command-line data recovery techniques are typically intended to recover data that has become inaccessible due to a variety of factors, rather than to explicitly retrieve deleted data.
CHKDSK
CHKDSK is a system tool that scans through your entire hard drive to discover and fix file system errors. If errors are found, the problematic files will be moved to the found.000 folder and names file01.chk, file02.chk, and so on. Then, the user has to figure out which file was recovered and what its file extension is supposed to be. This is a huge disadvantage of CHKDSK.
To recover files using CHKDSK:- Type cmd in the search box on the taskbar and select Run as administrator.
- Enter the following command (make sure to replace X with the letter assigned to the hard drive you want to fix) and press Enter: chkdsk X: /f
- Wait for CHKDSK to finish. The process may take several hours depending on the size of your hard drive.
- If there are errors, the CHKDSK will ask the question “Convert lost chains to files,” and you must answer Y. However, this request doesn’t always come up. Usually, CHKDSK fixes everything automatically.

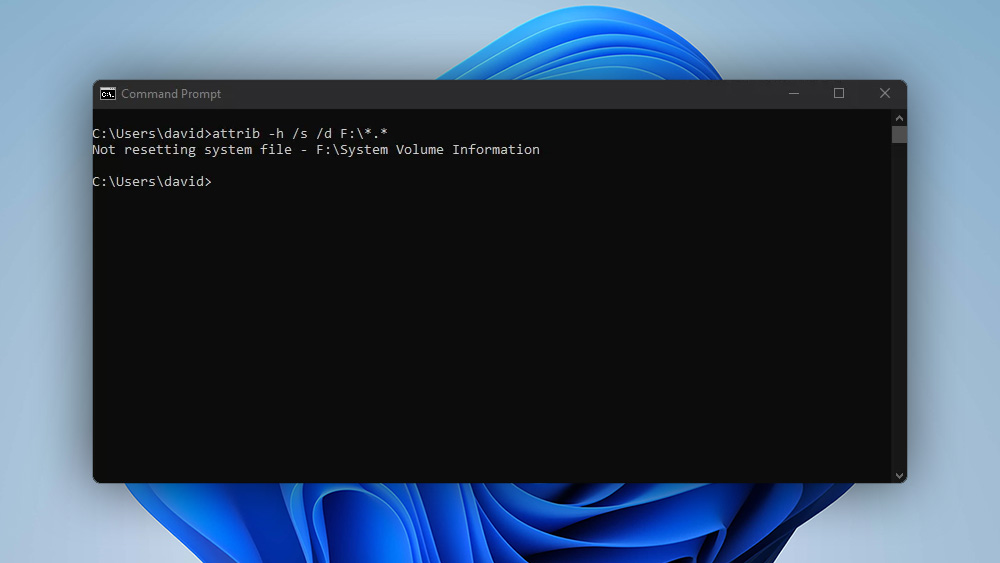
ATTRIB
ATTRIB is a useful command that makes it possible for the user to change various file and directory attributes. Often, users accidentally set the Hidden file attribute, causing their files to become invisible. Because files with the Hidden attribute have never been deleted, attempts to recover them using data recovery software applications are guaranteed to fail. Instead, it’s necessary to remove the Hidden attribute, and that’s where the ATTRIB command comes in.
To remove the Hidden attribute using the ATTRIB command:- Type “cmd” in the search box on the taskbar and select Run as administrator.
- Enter the following command (make sure to replace X with the letter assigned to the hard drive you want to fix) and press Enter: ATTRIB -H -R -S /S /D X:*.*
Frequently Asked Questions
Can deleted files be recovered?
Deleted files can be recovered in a number of ways. In some cases, you can use native Windows tools or system backups to get back your data. Data recovery software can also be used to search for deleted information and can locate files that cannot be retrieved through the use of basic Windows facilities.
How can I recover deleted files for free?
Backups are always the most reliable way to recover deleted files for free. You can also look for the deleted files in the Recycle Bin or use a free data recovery software application to scan your drive in an attempt to undelete them.
How to recover deleted files in Windows 10?
To recover deleted files in Windows 10:
- Open the Recycle Bin.
- Select the files you want to recover.
- Right-click any of the selected files and select Restore.
If you can’t find your files in the Recycle Bin, you can attempt to recover them using data recovery software for Windows 10.
Where do files go when they are deleted?
When Windows deletes a file it usually goes to the Recycle Bin. Once it is removed from the Bin or permanently deleted, logical references to the file are deleted but the data remains physically on the storage media. This fact enables data recovery software to recover permanently deleted files.
How do I recover permanently deleted files from my PC?
There are several ways to recover permanently deleted files from your PC, such as those described in this article, and you should choose the one that can deliver the best results with the least amount of effort.
In the vast majority of cases, data recovery software for PC like Disk Drill is the best choice because it combines the ability to recover permanently deleted files with a simple user interface that anyone can instantly figure out.
How do I recover a permanently deleted Excel file?
That depends on whether you’ve activated the AutoSave feature, which is available only to Microsoft 365 subscribers. If you have, you should be able to recover the deleted Excel file from OneDrive. If you haven’t, then you need to scan your drive using data recovery software.
How do I recover permanently deleted files from OneDrive?
OneDrive has its own Recycle Bin to help you recover deleted files. Here’s how to use it:
- Go to the OneDrive website.
- Log in with your username and password.
- Select Recycle Bin in the navigation pane.
- Select the files you want to recover.
- Click Restore.
How do I recover permanently deleted files from Google Drive?
- Log in to the Google Admin Console.
- Click on the Users icon in the Admin Console.
- Hover over the name of the user whose data will be restored and click the ellipsis icon.
- Select RESTORE DATA from the pop-up menu. Specify the date range and click Restore.

Jeff Cochin
- 33 publishings
- Atlanta, GA
Jeff Cochin is a data management and recovery professional, who has been with Pandorarecovery for nine years and has always been an essential part of the team. Jeff also works as a technical writer at Macgasm, being a first hand in testing, trying and writing about big and small tech software.
Nikolay Lankevich
- Houston, Texas, United States
Nikolay Lankevich has over 15 years of strong experience in various fields and platform includes Disaster Recovery, Windows XP/7. System analysis, design, application (Inter/Intranet) development, and testing. Provided technical supports on desktop and laptops on Win-XP and Macintosh for about 2000 employees.